Home » DIY Tutorials » DIY Crafting » Crafting: Miscellaneous » Vinyl Projects….a whole bunch of them.
Vinyl Projects….a whole bunch of them.
June 18, 2010 - By Ashley Johnston 67 Comments
I just have to show you some of the things I’ve been doing with
the Silhouette over the last few days.
It may be a sickness……but I can’t get enough of this little machine.
She has made my life a whole lot easier. (Can it be a she?)
And detailed.
..
But let me show you some of the ideas that I came up with.
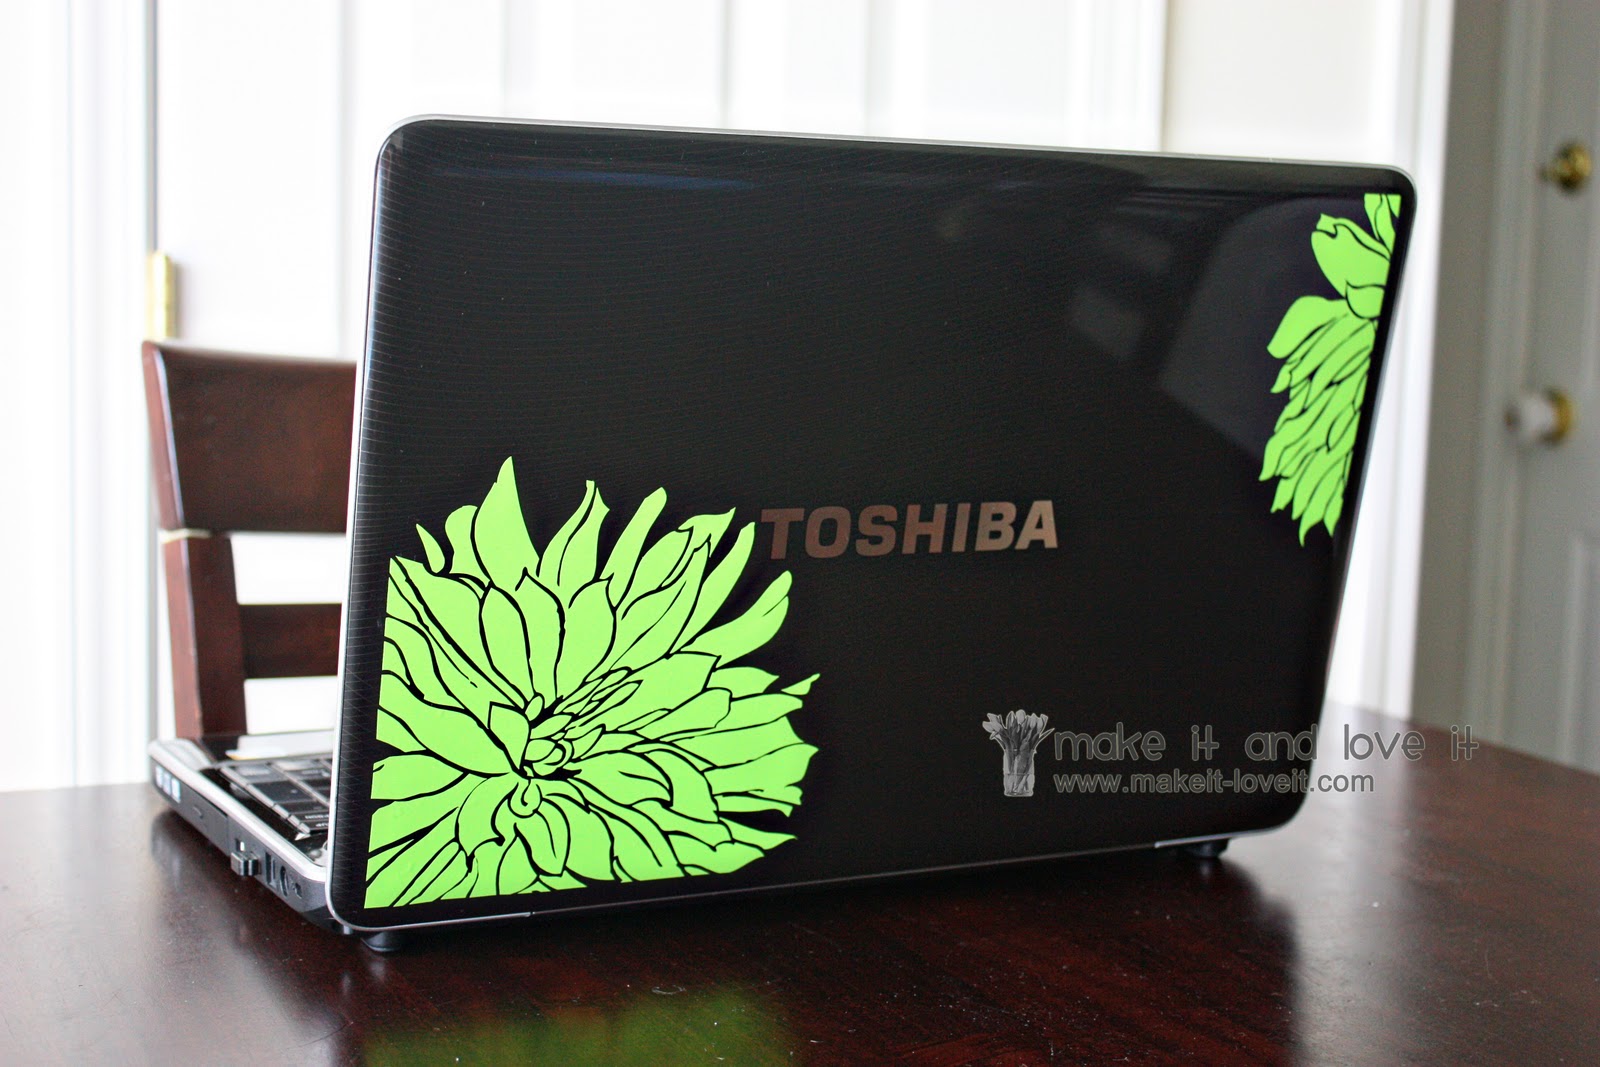
Starting with slapping a little fancy on this laptop.
(And okay, this is my husband’s laptop and he is on a week break from school. He said it must be removed before he returns to school. Fine. You win. But I love how it looks in the meantime. I’ll just use it exclusively while he’s home. Ha!)
But laptops are such a personal space. Your own little area…..dedicated to you, your work, your inspiration, etc. So make it your own.
The flower is from Silhouette and is code: flower_C00593_2581 05/10/2010
I even put some little tea cups on the inside. Right next to the mouse pad area.
It was empty. And needed love.
(The photo is washed out, but the teacups are just as vibrant as the green flowers on the front.)
The teacups code is: 4_flourished_tea_cup_set_C00656_19210 04/20/2010
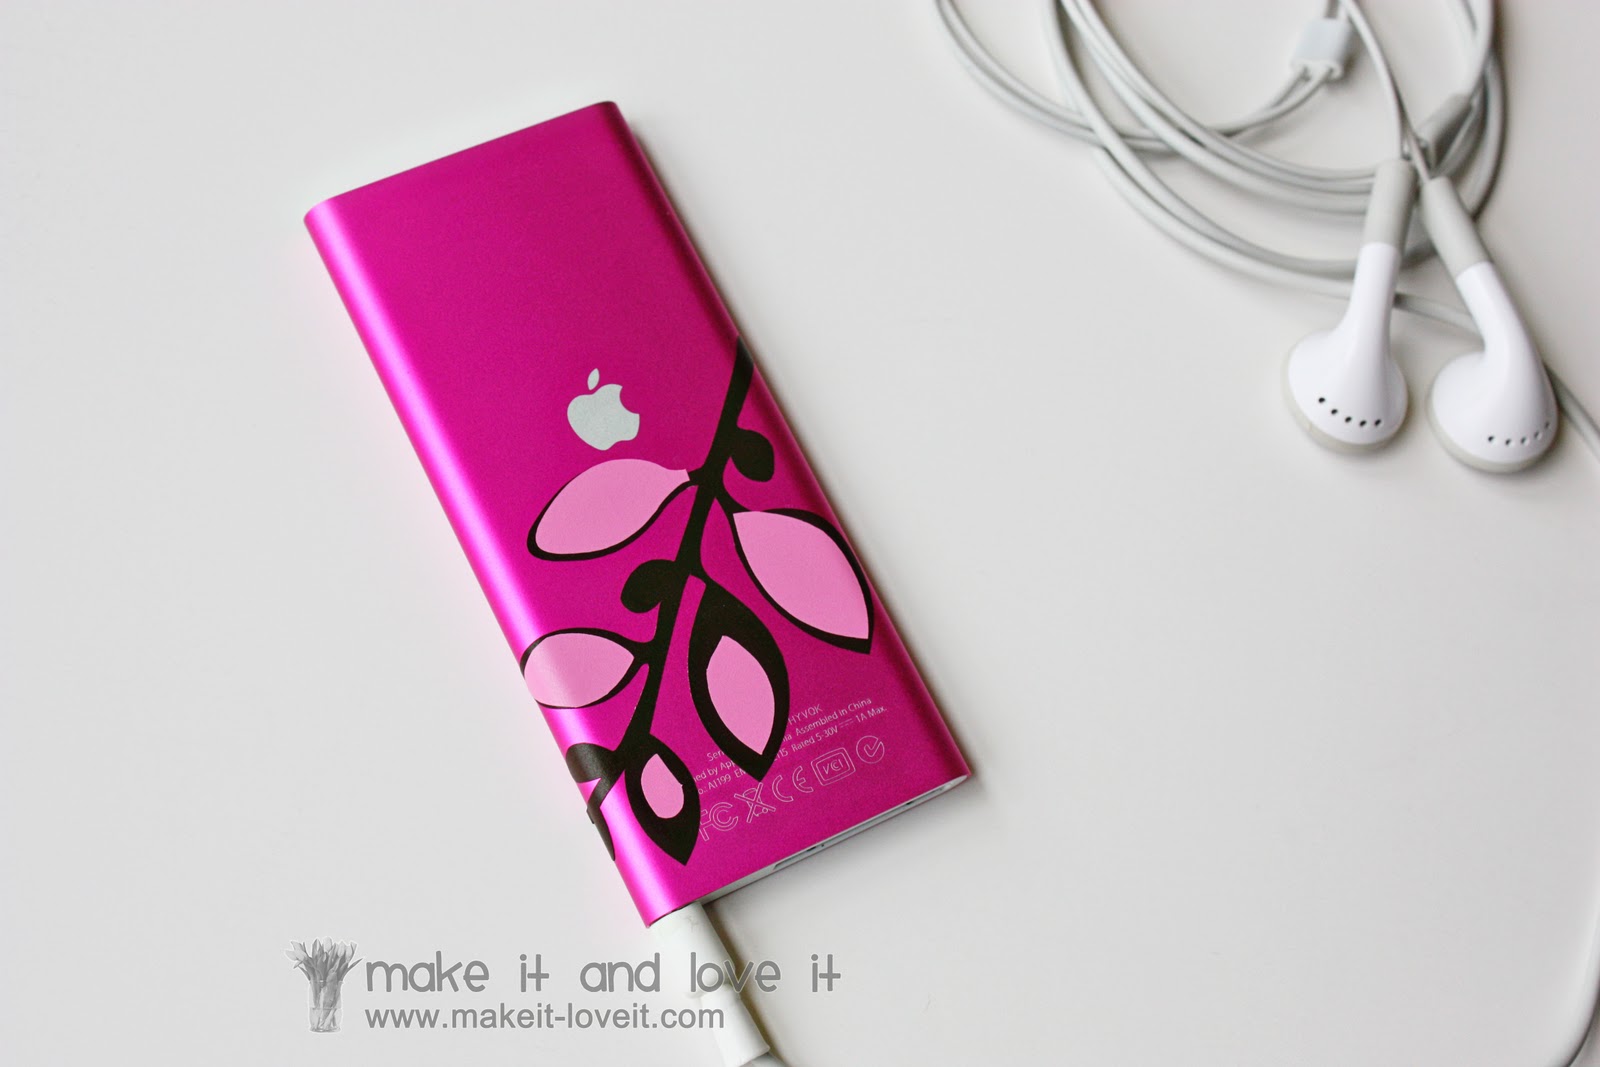
Along the electronics theme, I had to show the same love to my ipod. This little lady has served me well for over 4 years……and has given me no reason to upgrade.
(Other than than thousands of new features that apple has come out with since then.)
But this blazin’ pink ipod goes everywhere with me. And even keeps me company while I’m humming along on the sewing machine.
So I attached a leafy vine along the back……
…..and wrapped the tip around to the front.
It charmed her up just a bit.
The vine code is: leaf_1033
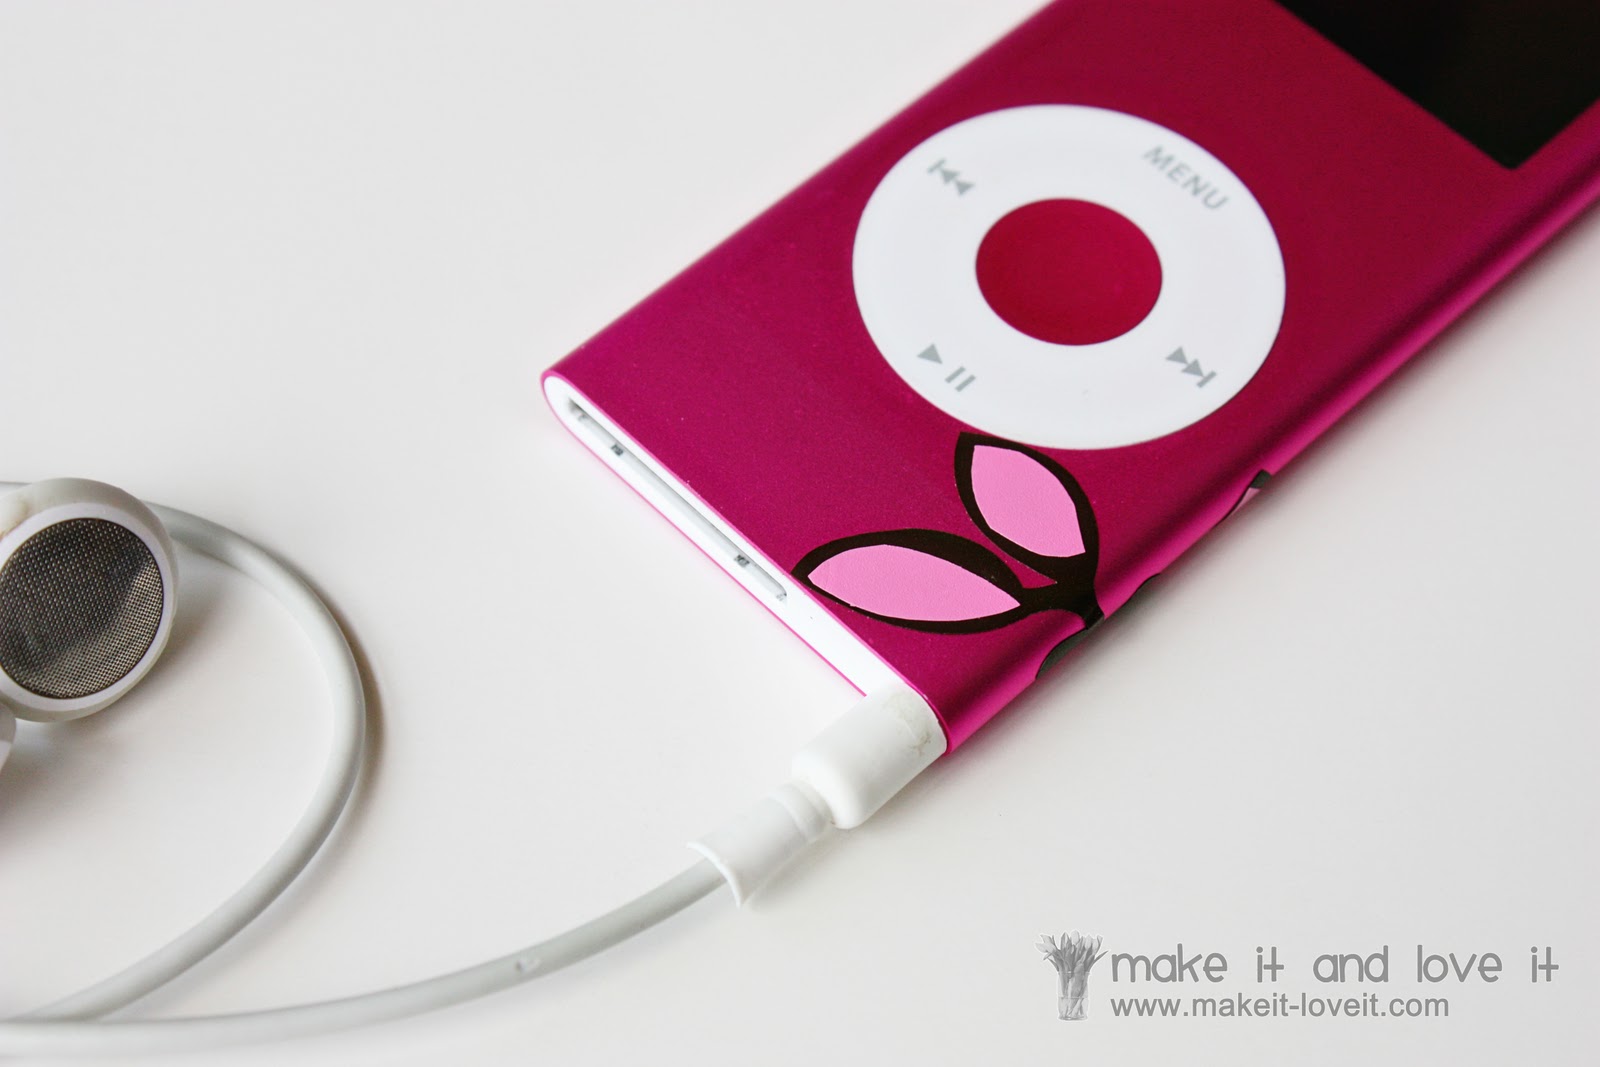
Now, off to the bathroom…
Remember when I worked on this bathroom
here and
here?
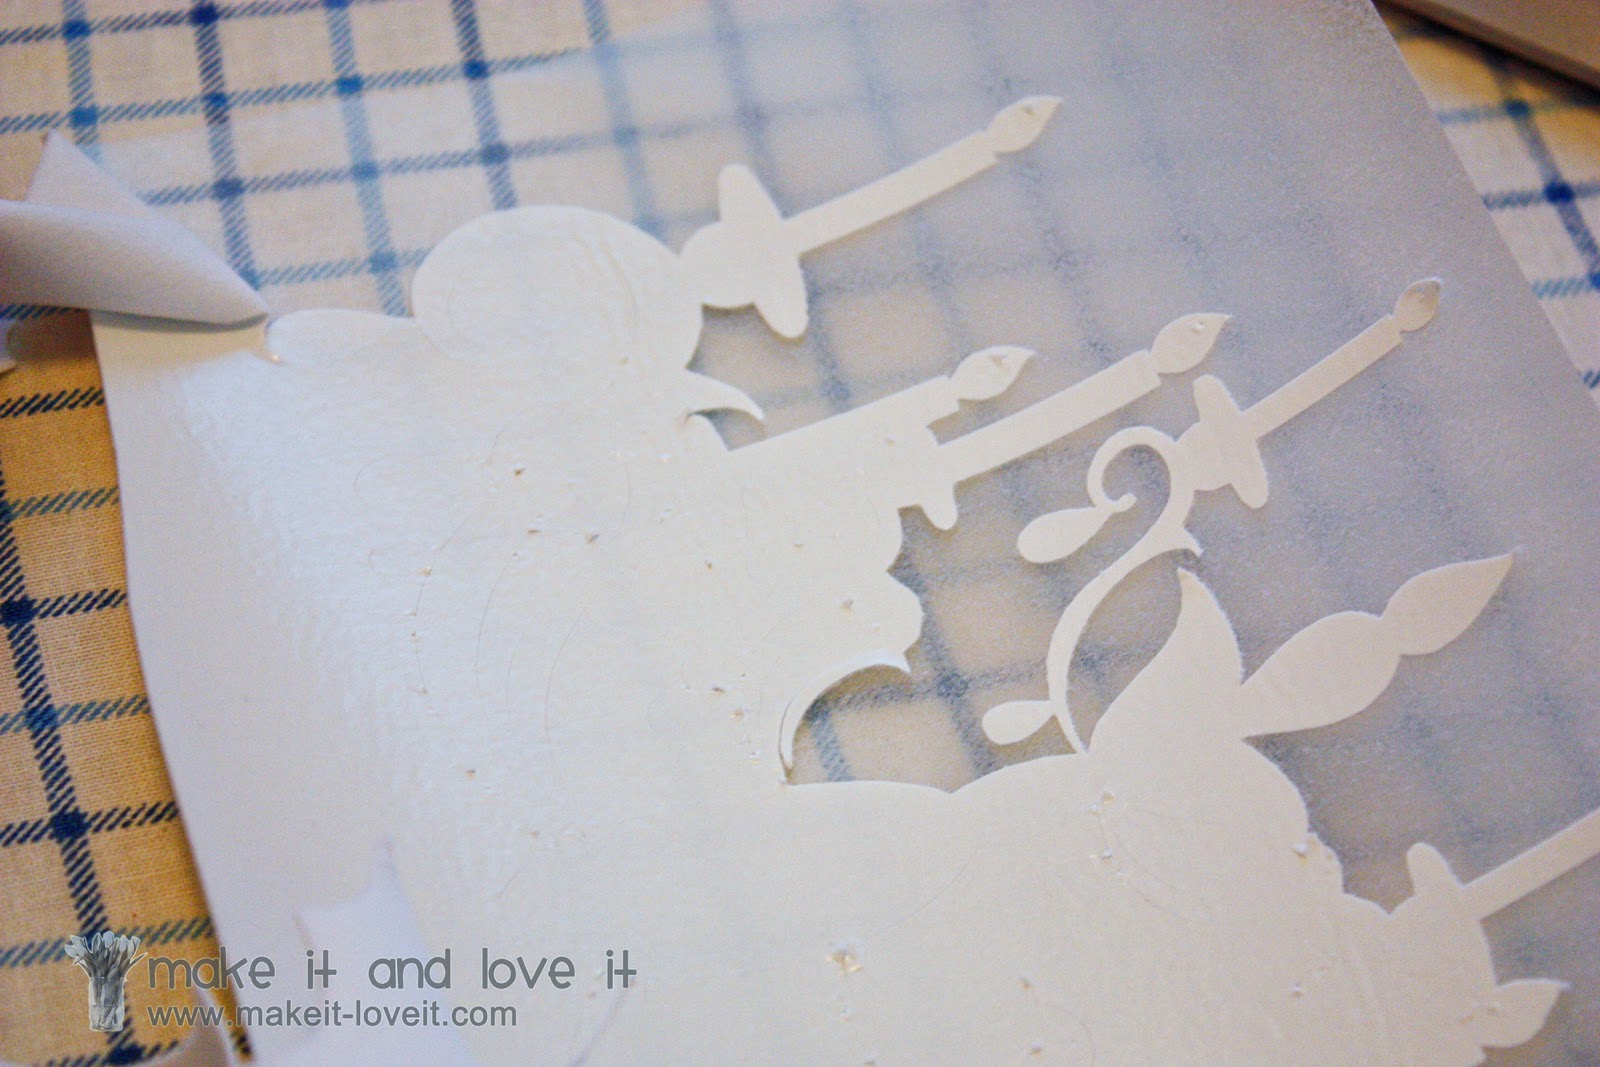
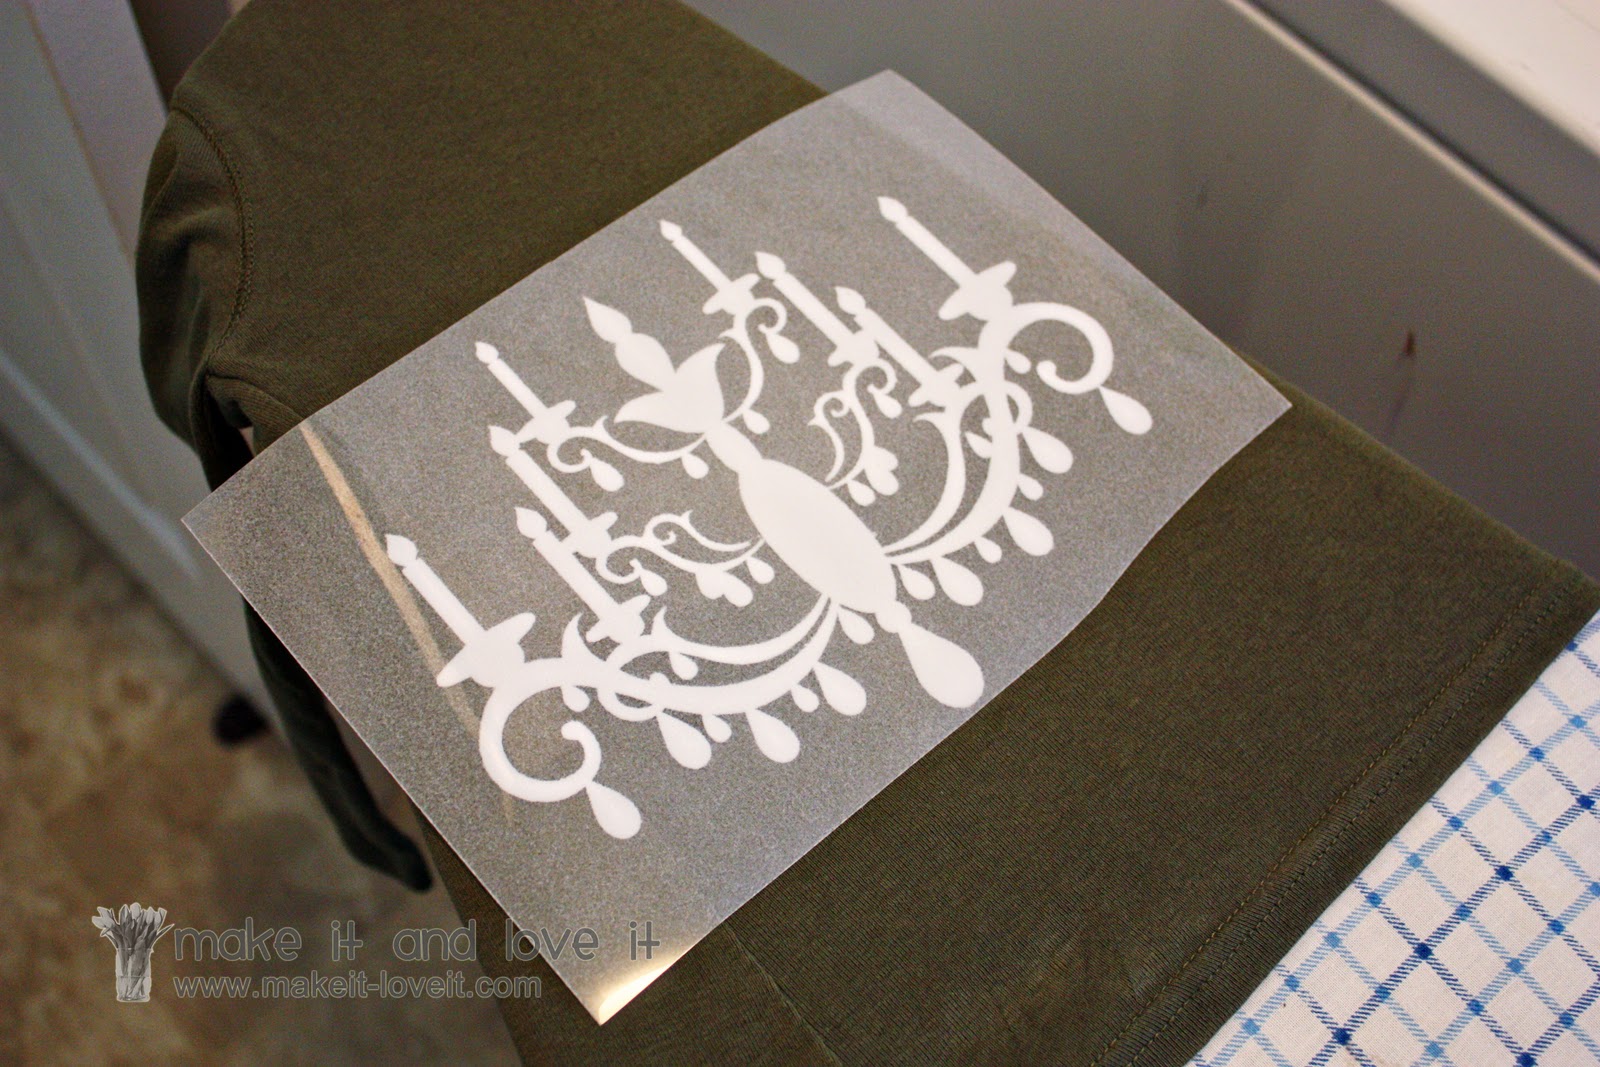
Well, I added a few damask cutouts right above the toilet.
The damask code is: damask_0852
Love how they turned out.
Then I hopped to the kids room.
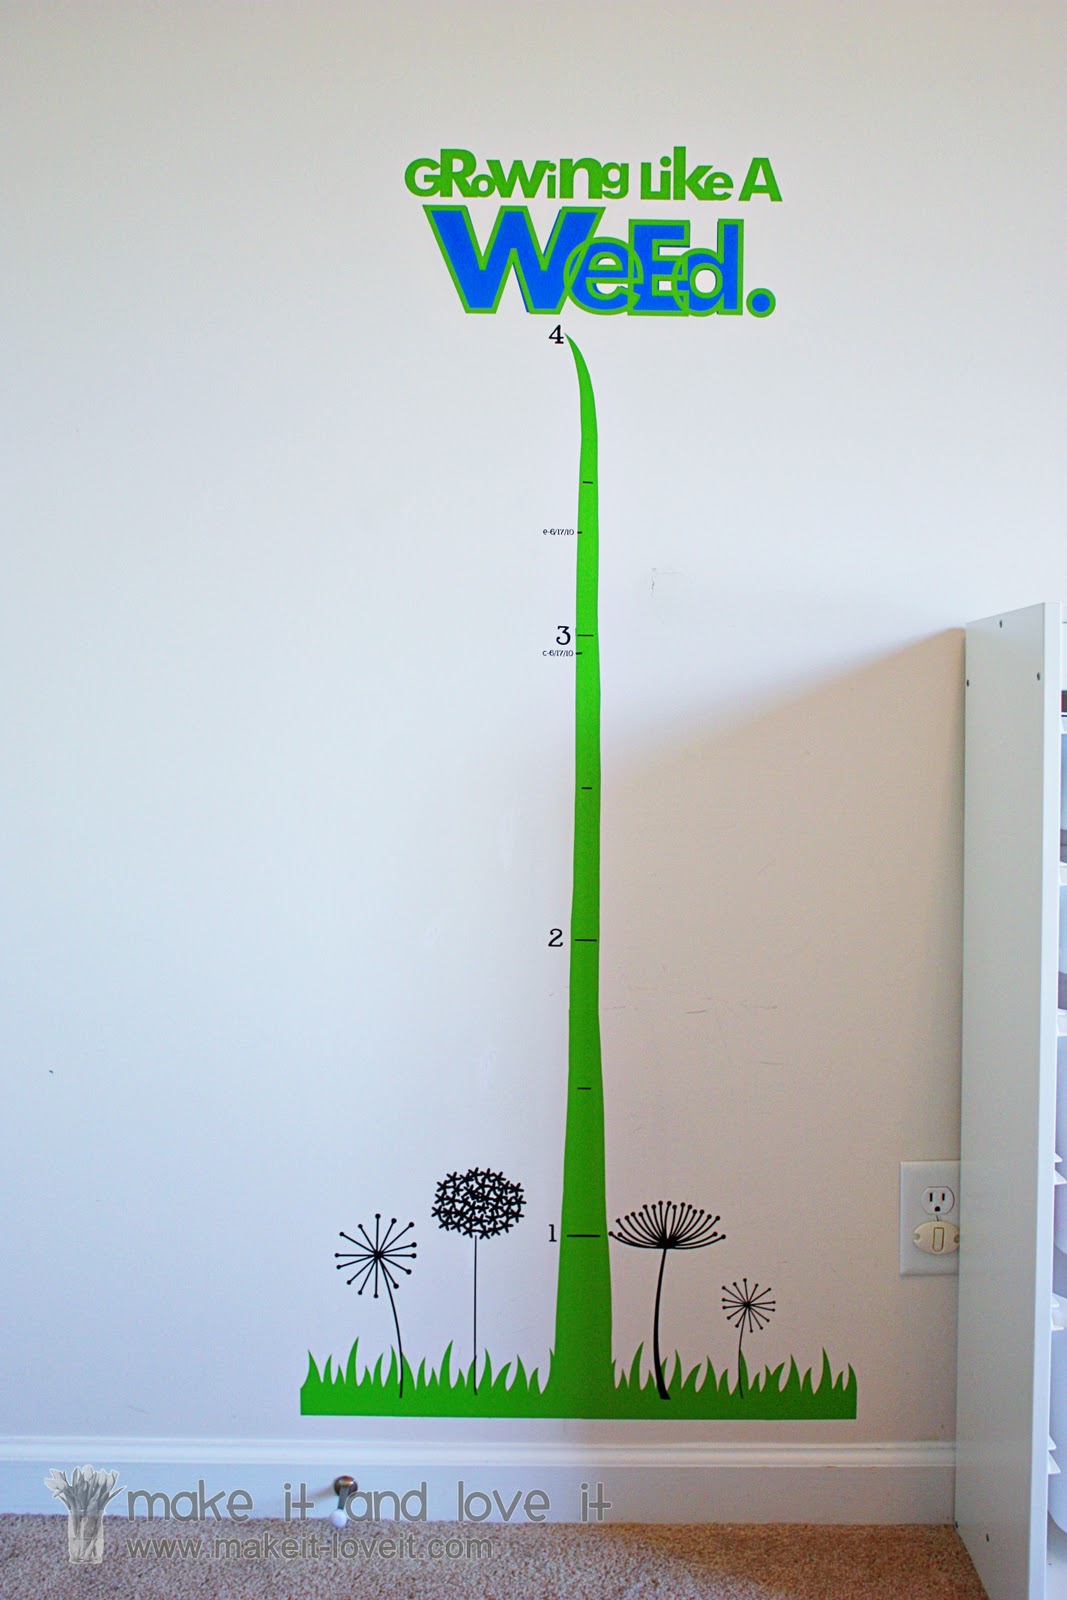
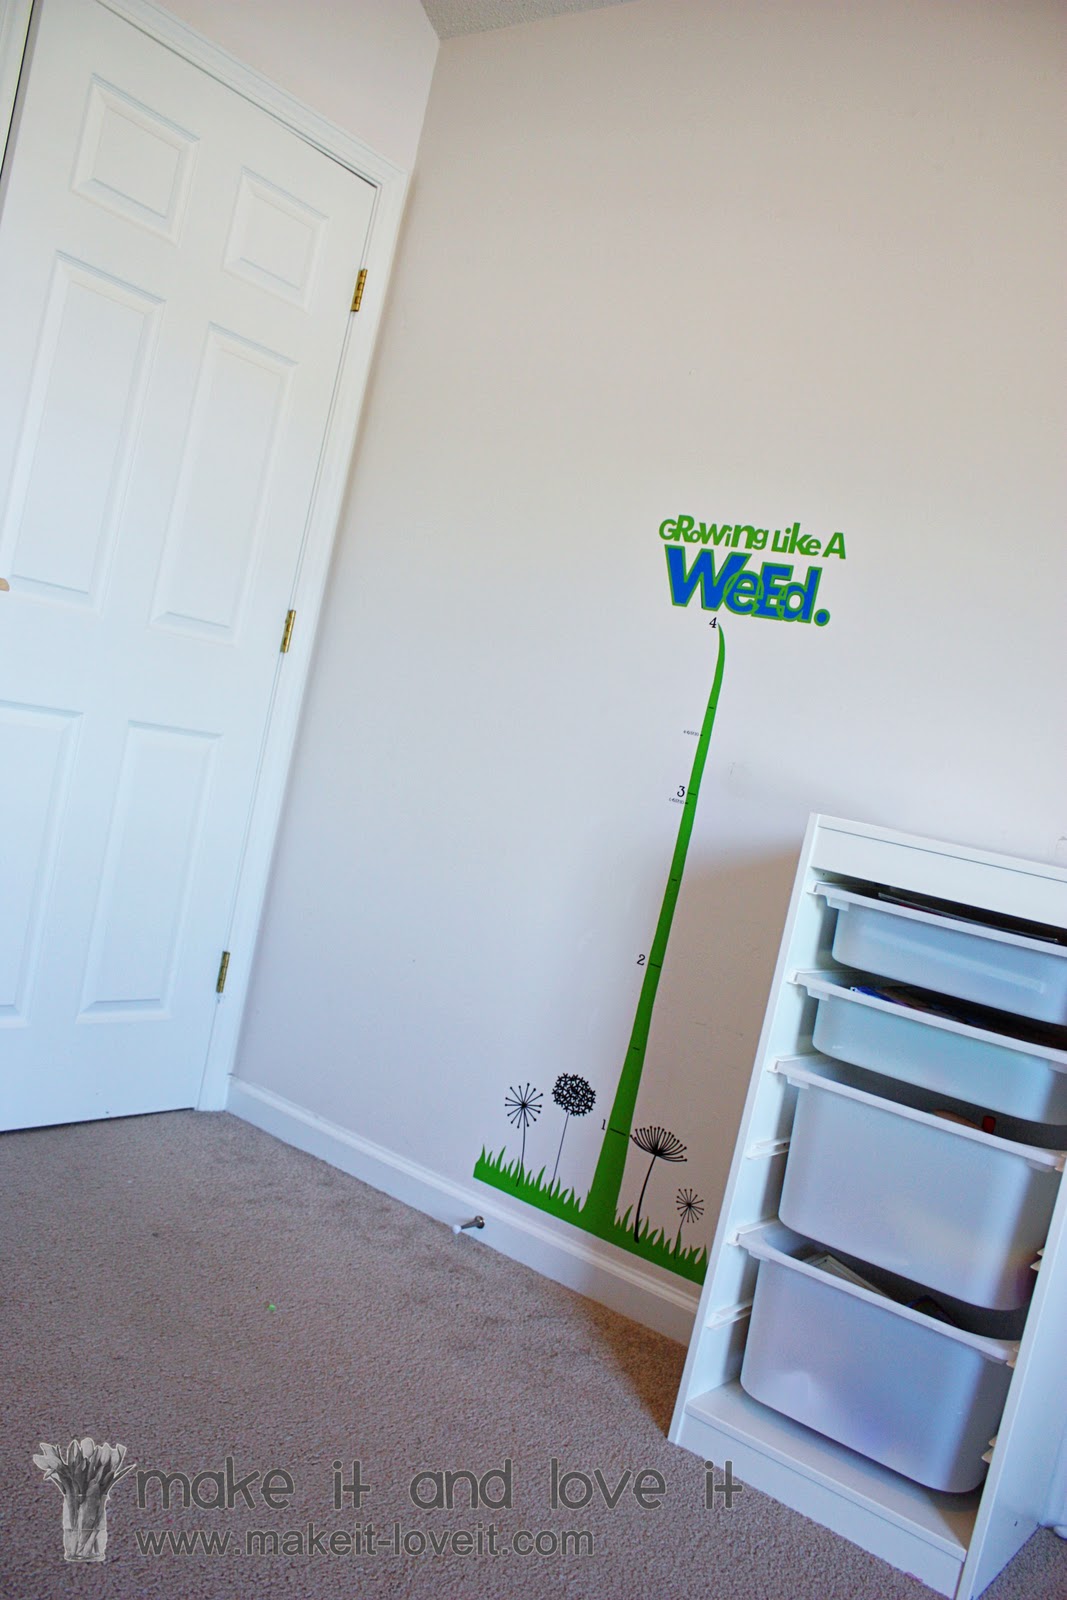
I decided to add a little growth chart to the wall.
I’m always curious where they’re at.
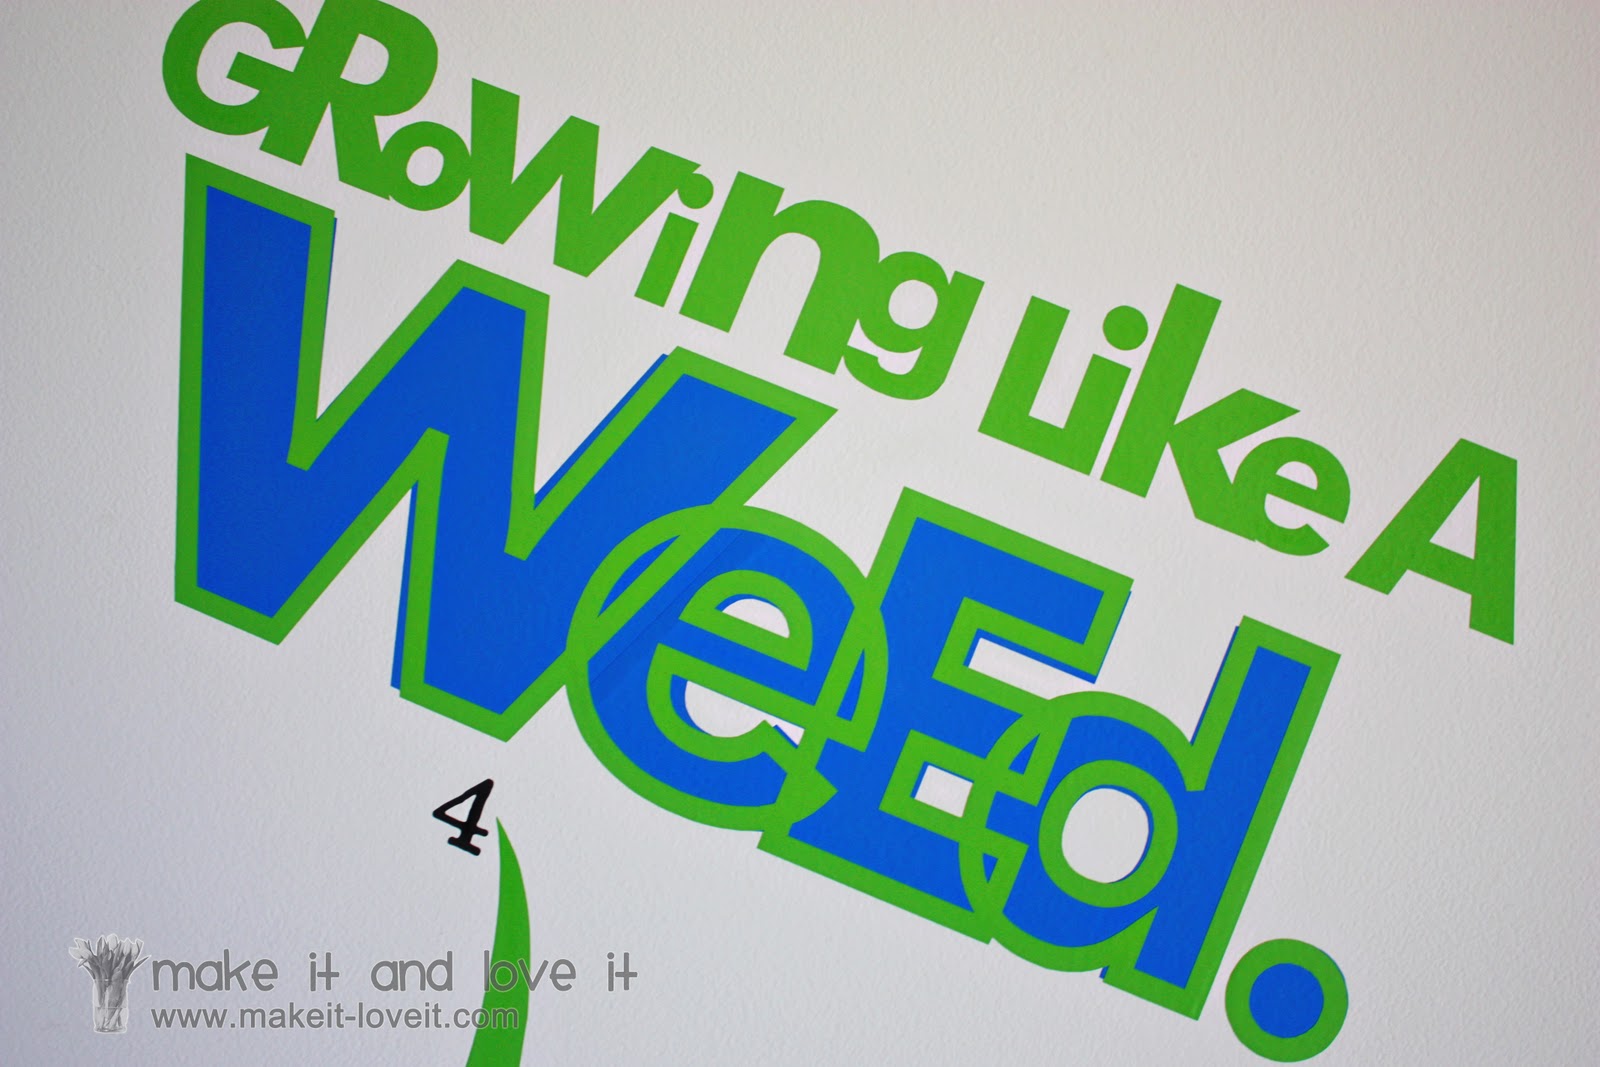
With fun letters that really pop.
The code for the phrase is: growing_like_a_weed_title_C00186_19547 03/01/2010
And little
grass/weeds and
dandelions along the bottom, all trying to grow.
The code for the short grass is: grass_1027
The codes for the dandelions are: vinyl_art_1170 03/12/2009, vinyl_art_1171 03/12/2009, vinyl_art_1172 03/12/2009
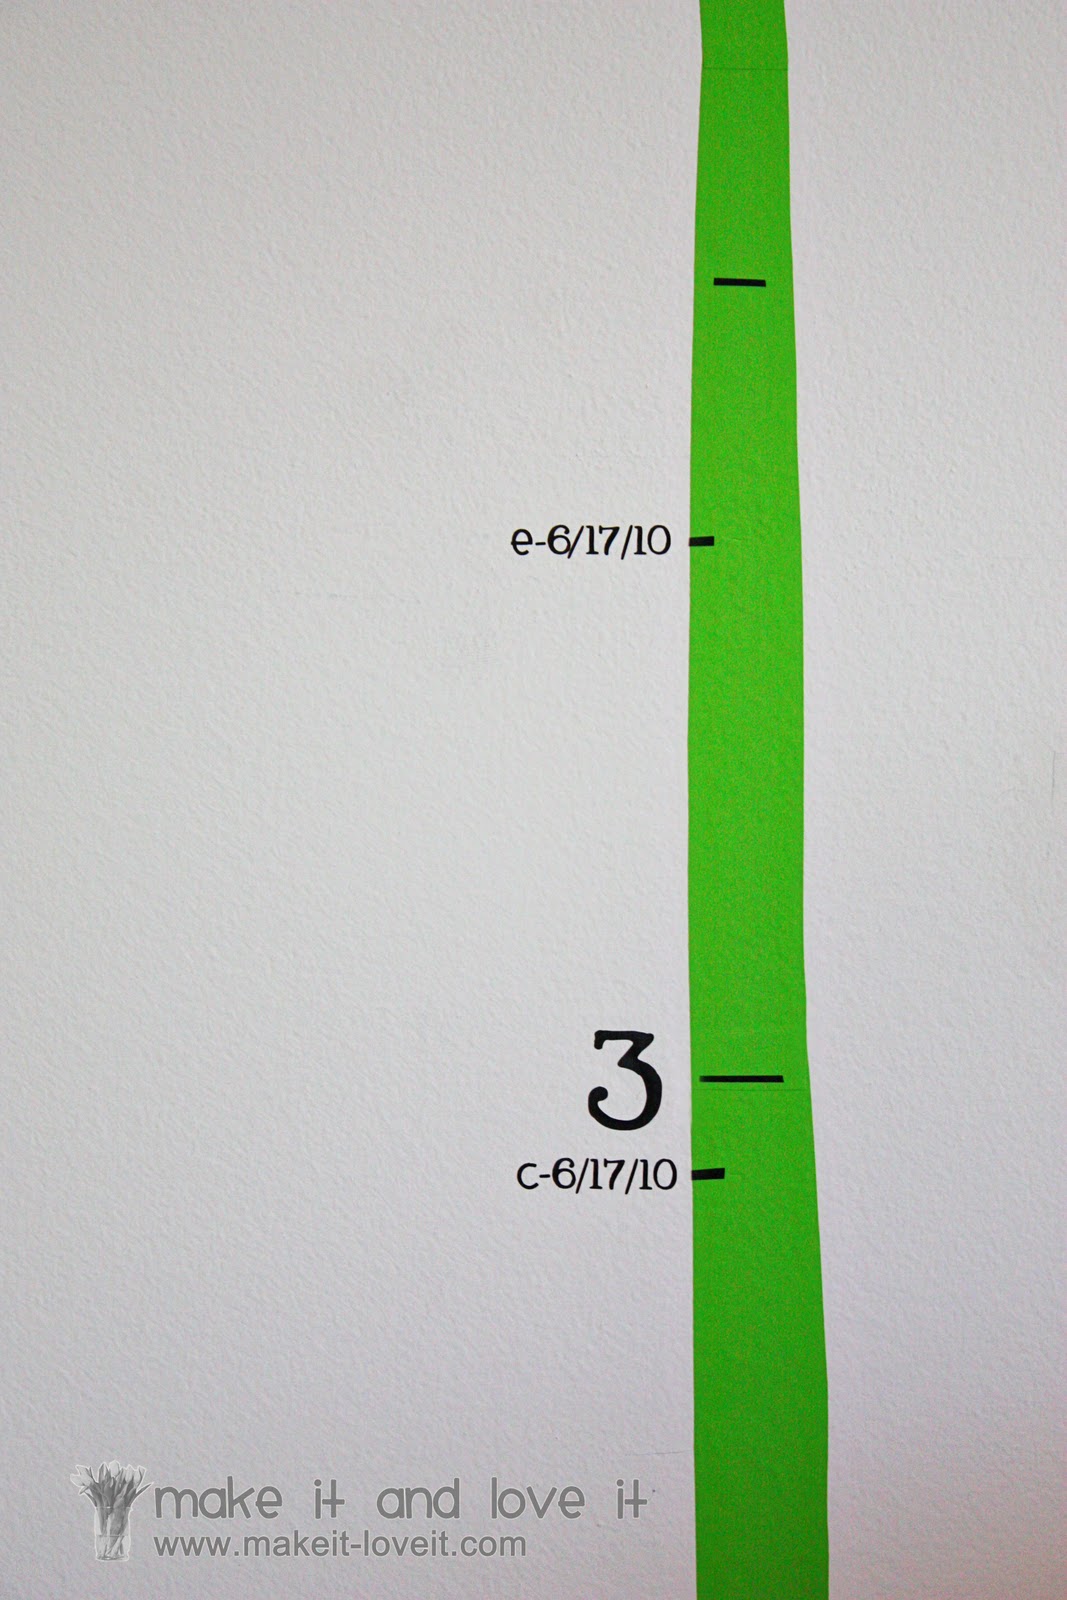
The long blade of grass that’s growing up the wall…….marks each foot of growth.
And the plan is to mark the height of both kids on one blade of grass and use their initials to distinguish them.
(We’re only renting, and hopefully won’t need a taller piece of grass before we leave. Ha!)
(I just cut the tall piece of grass freehand, out of some green vinyl.)
I also though it would look cute to put as many blades of grass as you have children, and keep them all separate. Or even use flower stems as the measured growth…..or whatever.
But the growth chart is tucked nicely beside a toy shelf……and not too far from the corner.
Kind of an empty spot, where nothing bulky could be placed.
Worked great!
I can’t say enough good things about their customer service and their prices. There’s no need to overpay for sheets of plain ‘ol vinyl. And even if they weren’t sponsors of mine, I would still recommend them….because their high quality/low priced vinyl has kept me a very happy vinyl user. Yay!
And did you already see the glass etchings shown
here?
And how about the post where I transformed some kid clothing, using the fabric heat transfer shown
here?Both were made by using the Silhouette to cut out the images.
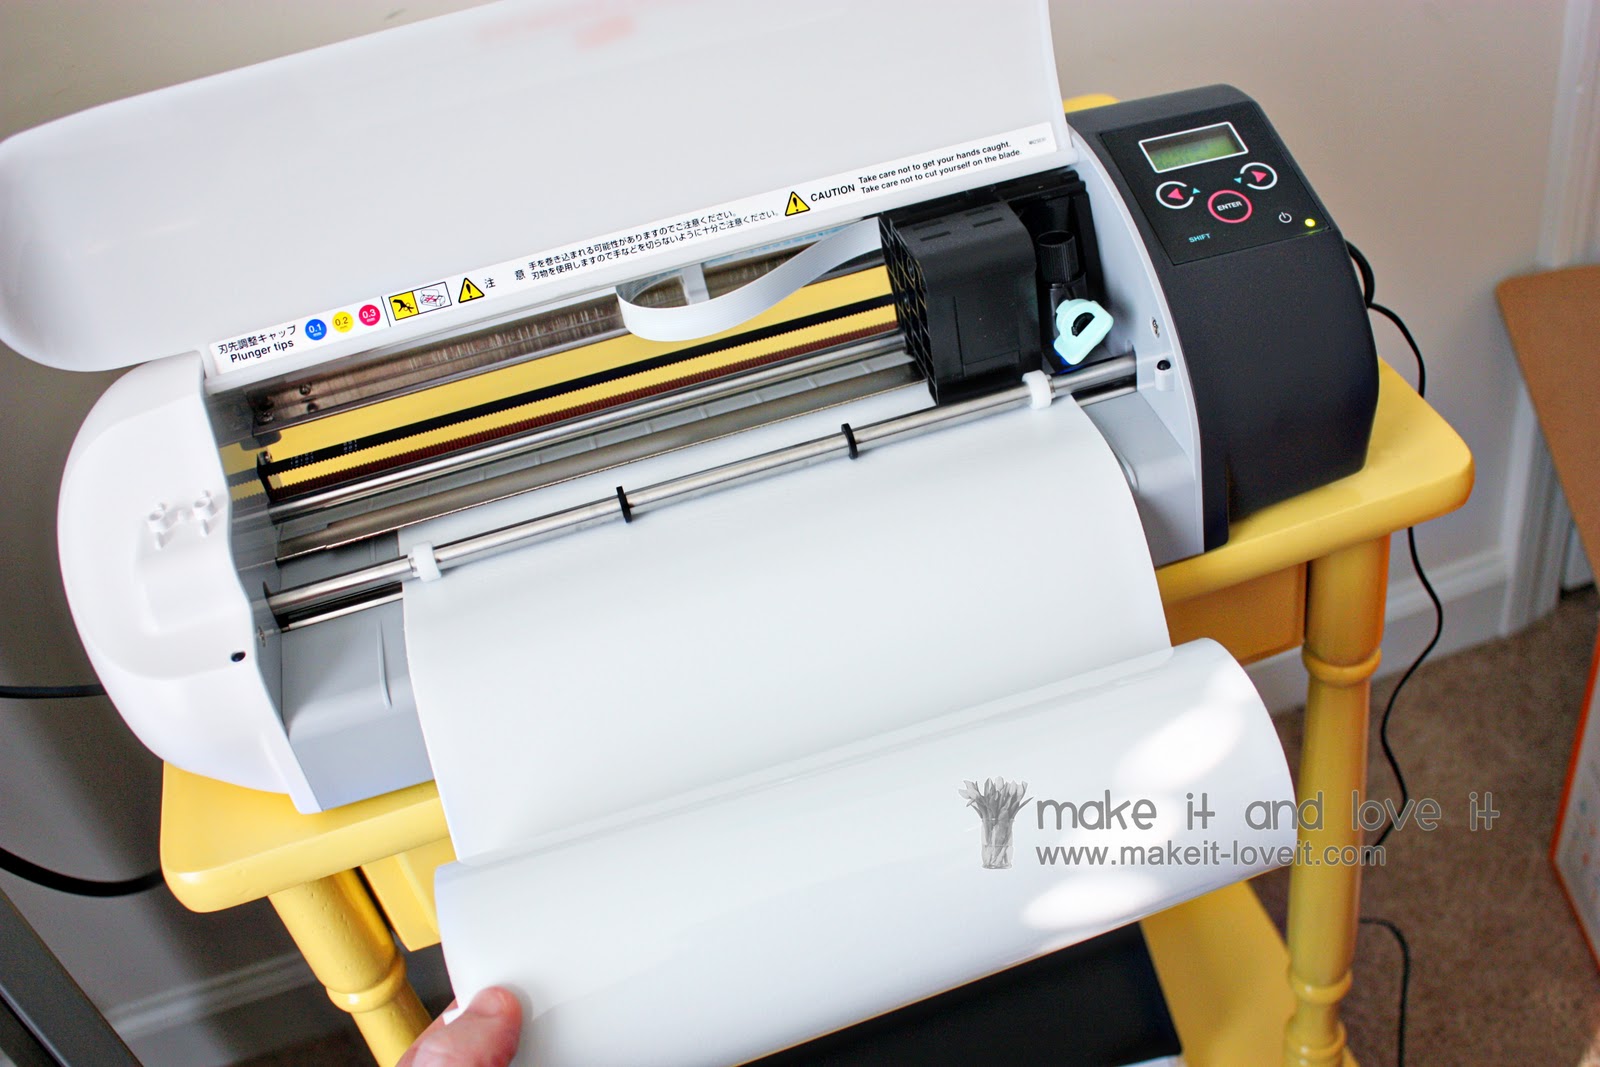
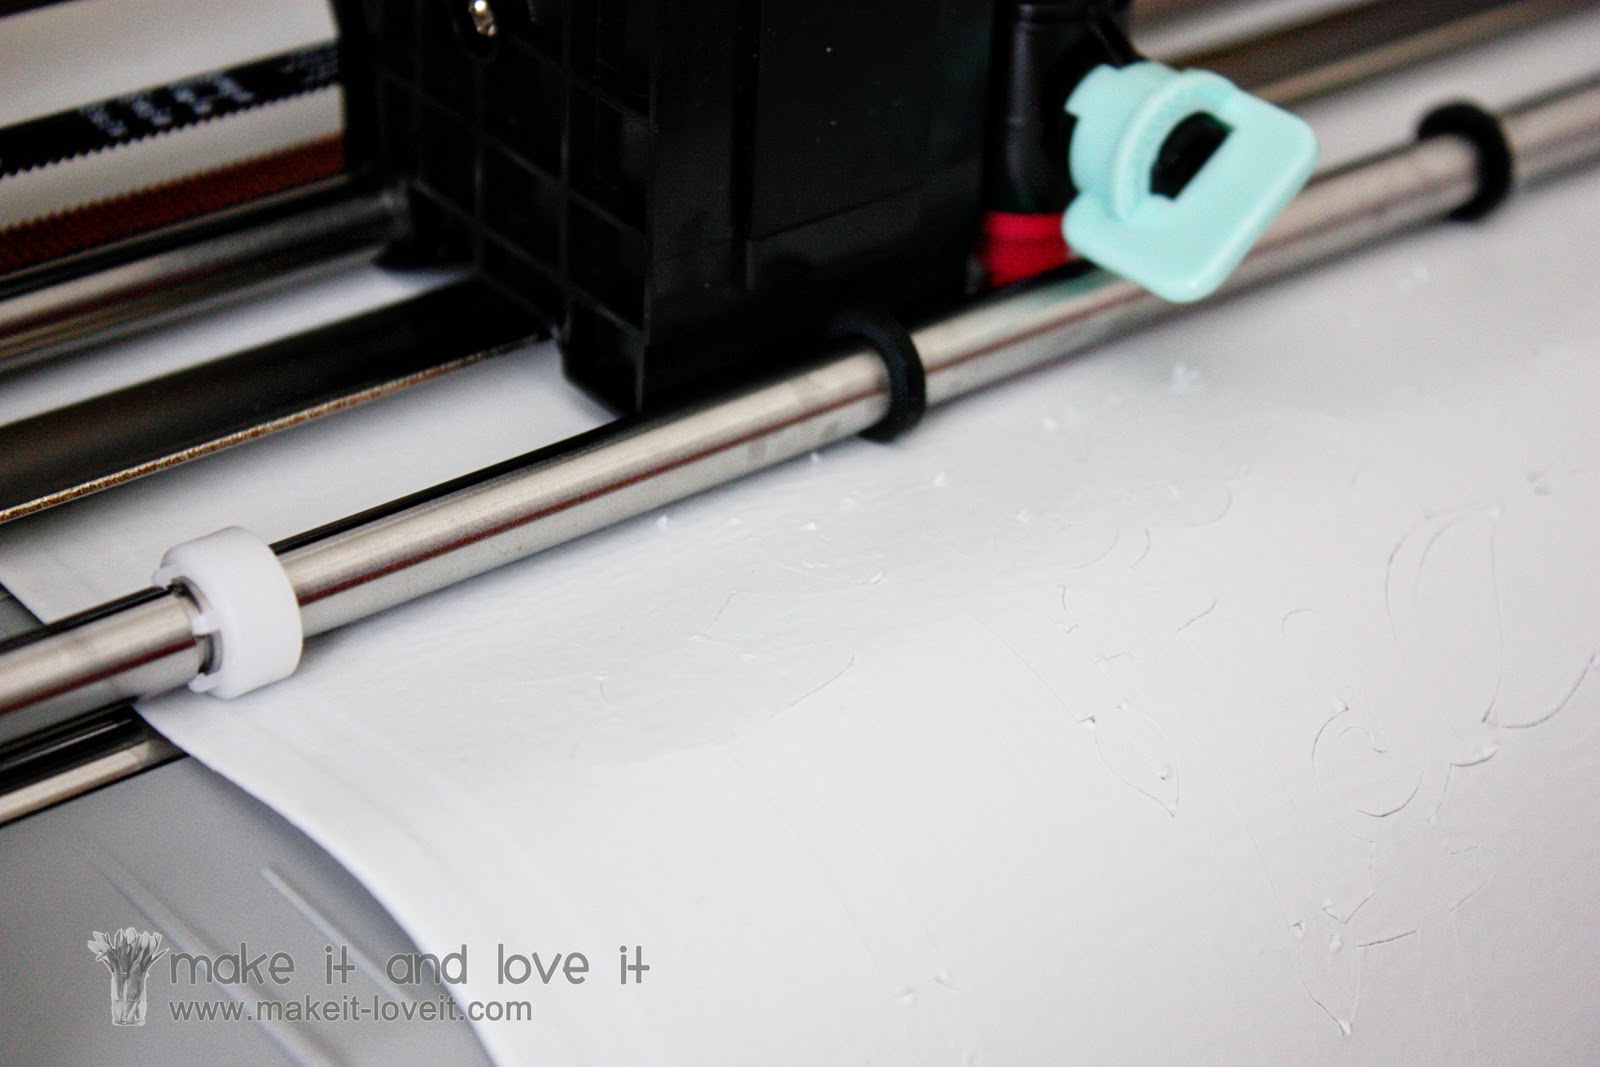
With all of these projects, I loaded my vinyl sheets or rolls into the Silhouette the same way.
(The lid is open to show you how it’s working…)
Look at that thing cut. Now that’s precision.
Once it’s done, just peel back the negative space, stick your transfer paper right to the top, peel off the backing, and then stick your vinyl to your object. (But this photo is the heat transfer that comes with a clear backing.)
So I flipped it onto the side of my little girls shirt. (Finished project shown
here.)
Then I placed a towel over the top, ironed it on nice and hot, then removed the plastic sheet. Done.
And that was just a few of the Silhouette ideas rolling around in my head this week.
There are more ideas that involve more fabric, but I’ll show you as I do them.
And if you end up winning
the free Silhouette, have one of your own, or purchase one using the special code from the post
here………….join me as I make more things with this mighty little machine.
And thanks again to Silhouette for offering the machine to one of you readers, and for the other great promos that will be available for a few more weeks.