Remember how it was only like 2 weeks ago that I announced here that we had our 4th little baby and time stopped so I could snuggle on that wee boy day after day? Ohhh, those were some precious days…..but it hasn’t only been 2 weeks, and that wee child isn’t so wee anymore. Oliver is a huge 19 month old now and is as full of fire as they come! Ahhhh, the sass of the youngest child is a real thing, my friends….but wow, we can’t get enough of him and constantly laugh as he figures out his own little personality each day.
And while Oliver’s been growing, his clothes have been shrinking (at least it seems that way). And that’s always been a pet peeve of mine, because dang it, STAY LITTLE! ;) No, but really, I am constantly wondering how he grew out of something already when he barely wore it. So, I was thinking of ways to get more use out of some really cute button-up shirts that he wears on Sundays to church…..and decided to cut one up, add it to a boring ol’ onesie, and create a little 2-in-1 Preppy Shirt that he can wear with a rugged pair of jeans or a nicer pair of pants to church!
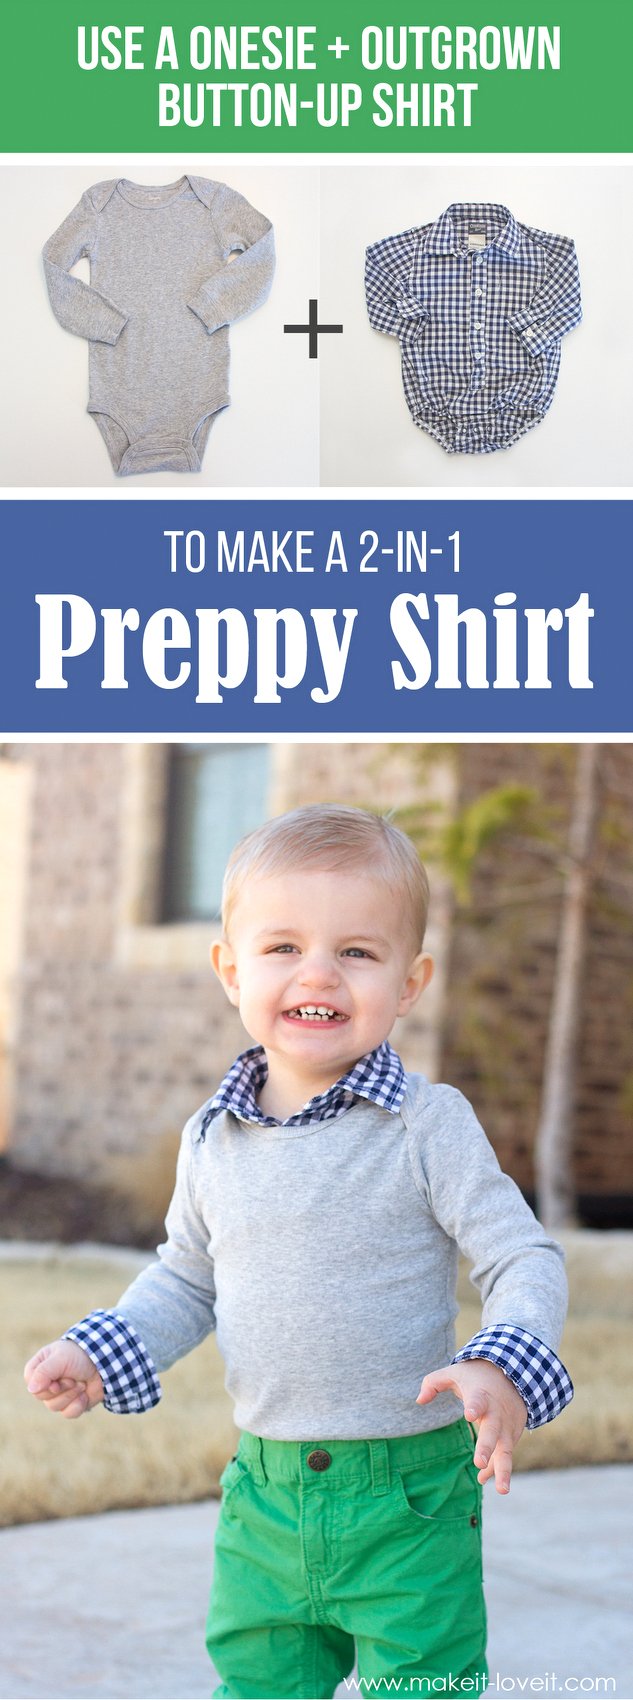
And yes, you can definitely get the same look by placing a button-up under a shirt of any kind…..but if the button-up is too small and you hate to give it away just yet, you might as well save some cash and extend its life a bit!

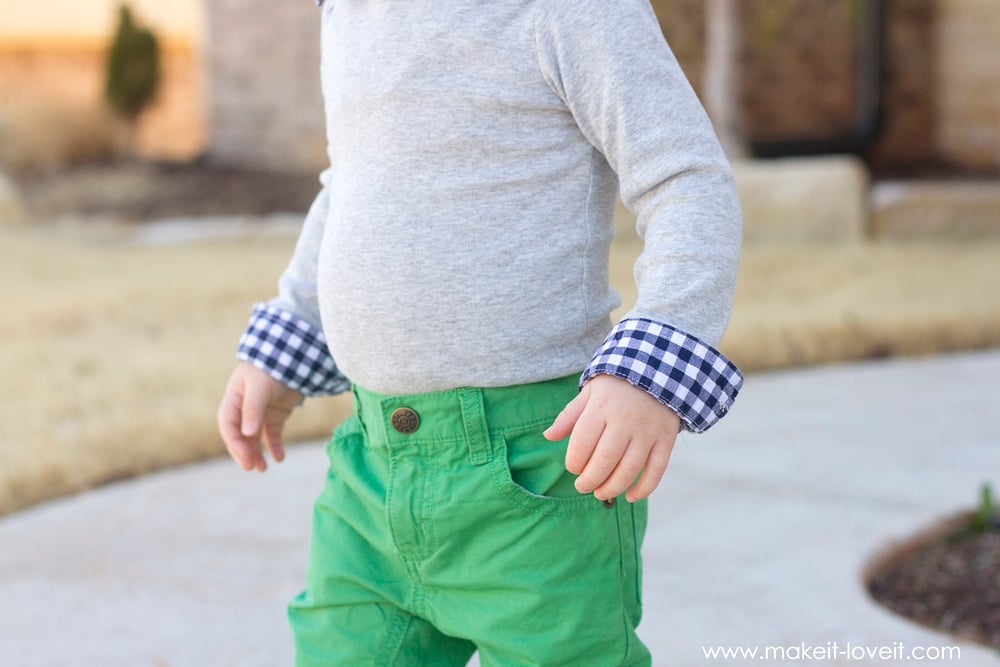
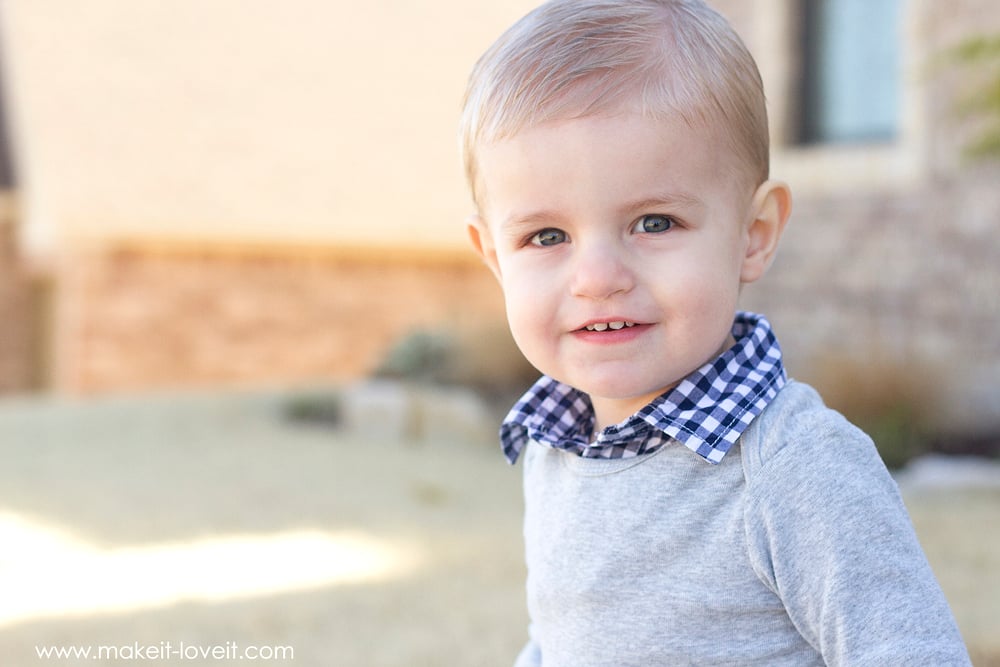
Those flipped up cuffs are so cute……and you would never know that they came from a shirt that’s too small!
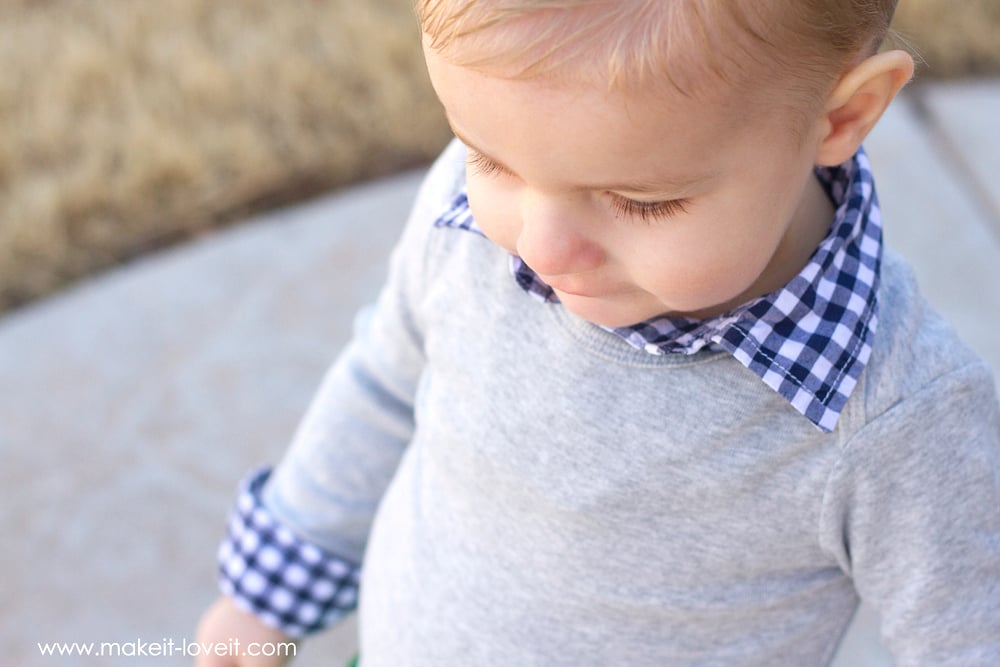
The collar folds down all the way around….making it looks as though there is really a full shirt under there. But really, it’s only part of an older shirt that’s sewn right to the neckline of the onesie.

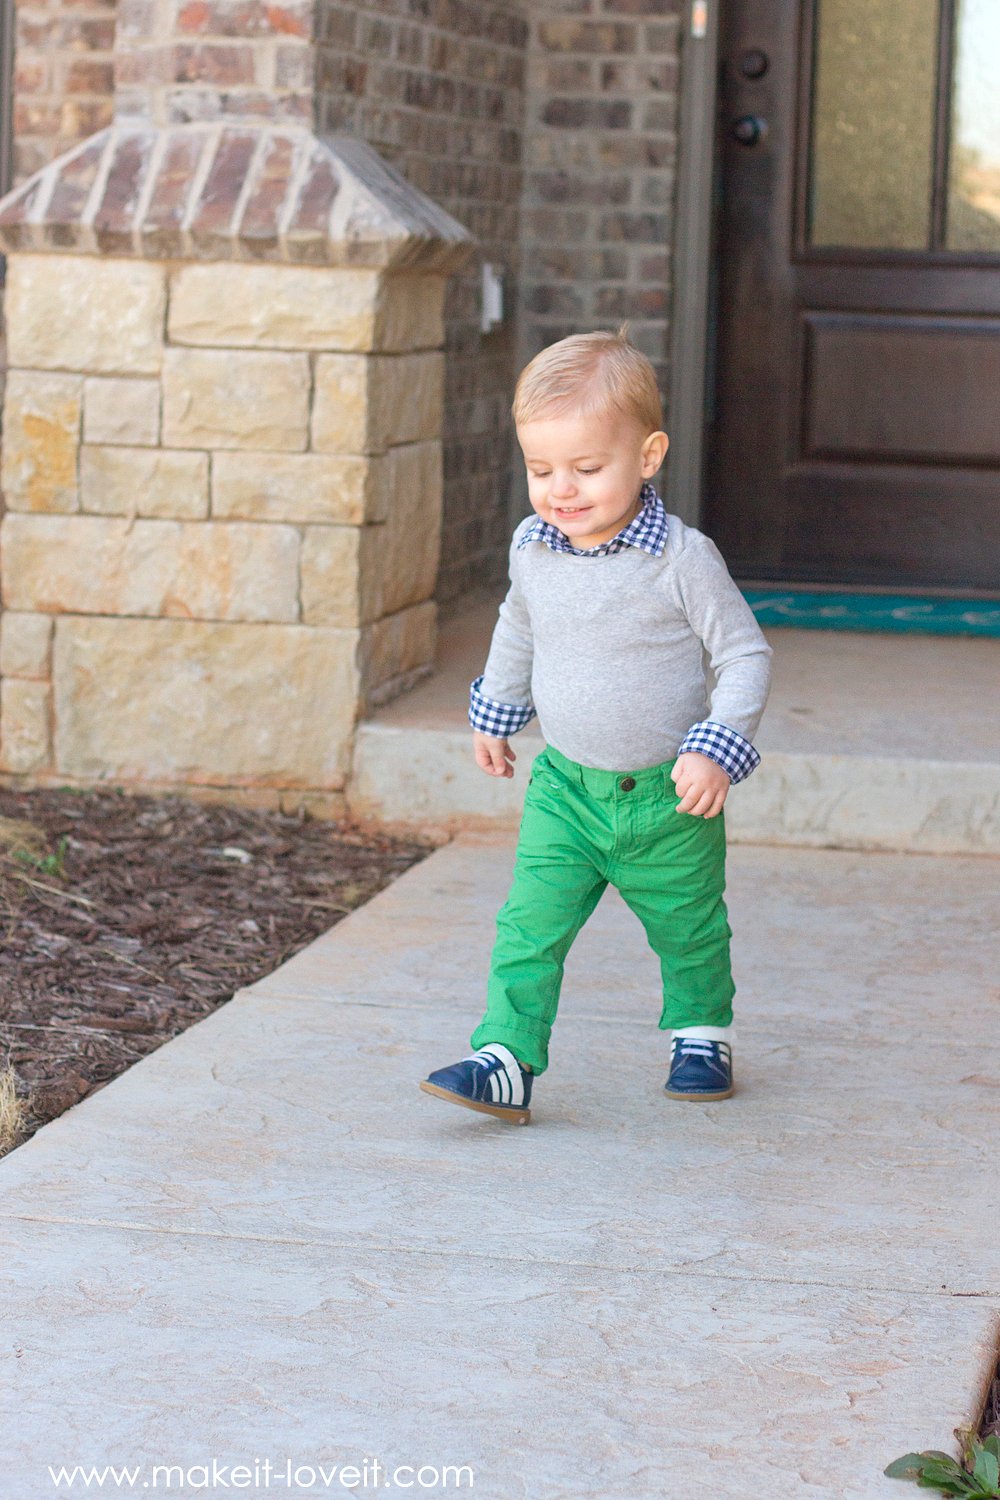
Ha…..this kid is just too cool for school! ;)

And since there’s only a collar attached to the neckline and then cuffs added only to the end of the sleeves…..this shirt is mostly just a regular onesie — comfy and stretchy and perfect for babies! (Would also work great added to a Long-Sleeved Tshirt for older boys.)
Just watch out though…..the shirt may age your child by years, and you’ll have sudden glimpses of them strutting their little stuff out the front door, onto their way to college and beyond!
But go on Oliver, grow if you must….I’ll just keep extending the life of your clothing the best I know how! :)
Oh man, I love this little guy.
Ready to whip one up too??
SUPPLIES:
***Check out my Sewing Terms 101 post, for additional help.
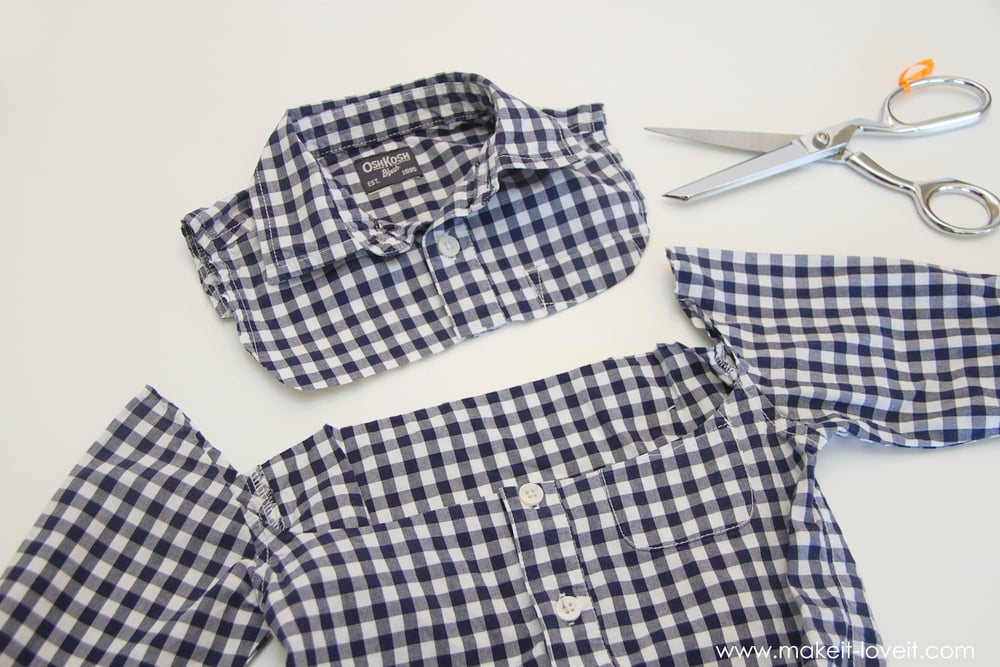
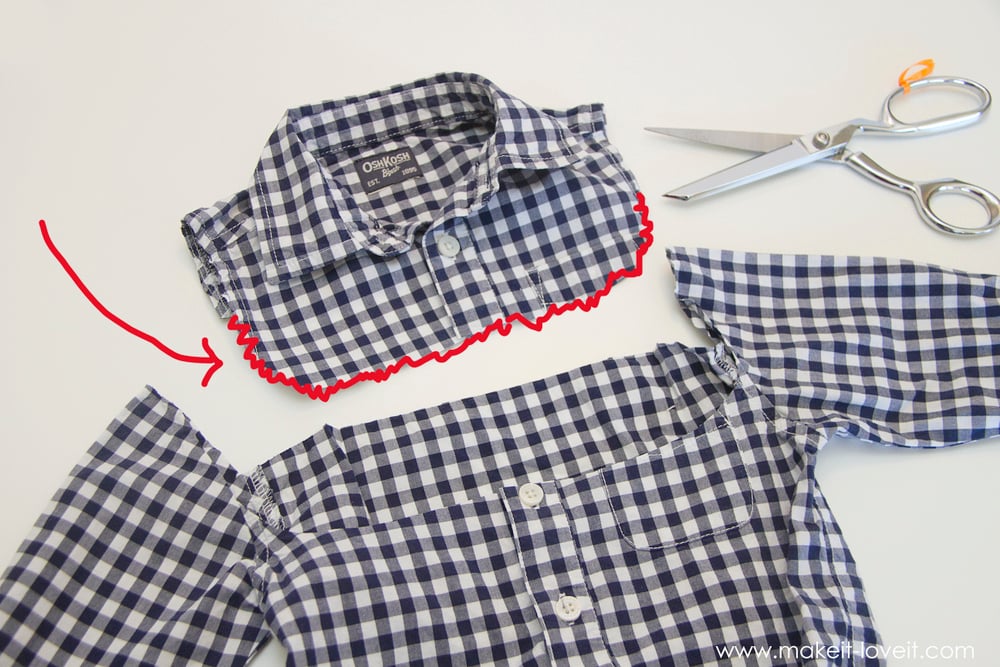
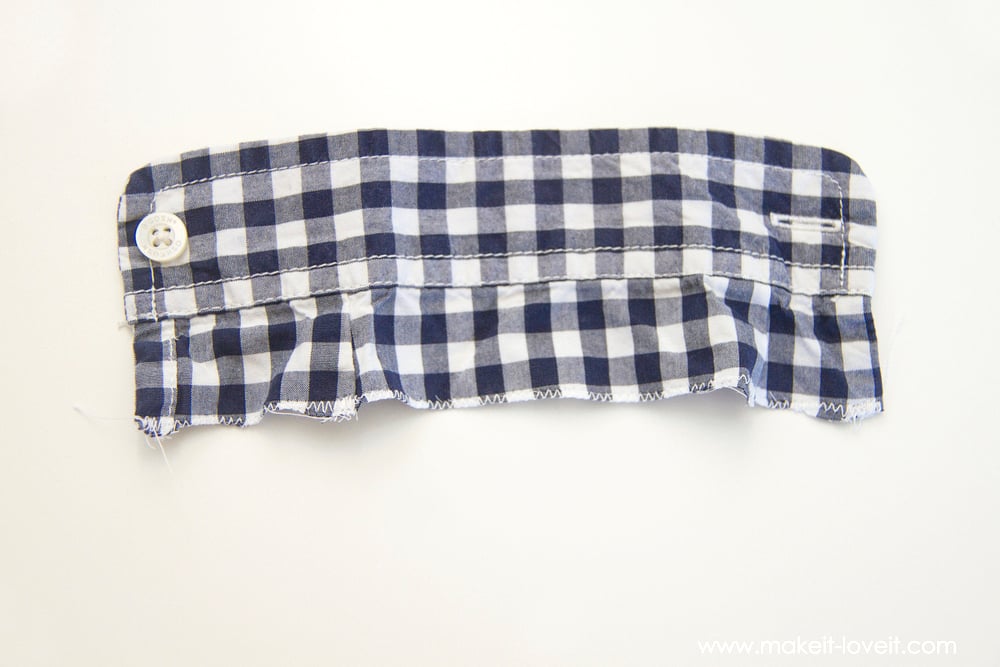
Okay, let’s get cutting! Grab your button up and cut out the collar section of the shirt, making sure to leave enough fabric to be tucked inside of the the onesie. It’s a good idea to cut as wide as you can up until the sleeves are attached and then cut down along the front of the shirt so that there’s at least one button that will still be used to keep the front of the shirt closed and also enough shirt so that it can stay tucked into the onesie once it’s being worn. (The button that you keep should be one down from the tippy top button, which probably won’t be able to close anyway if this shirt is too small for your subject.)
Then, zig-zag along the raw edges of the shirt.
You will want to test the opening of the shirt to see if it will fit over your subject’s head if you sew this closed. I ended up having to pick this out and just leave the shirt open, so that it would fit over Oliver’s head. But that’s okay, because that’s what the button is for, to help keep the shirt closed.

Now, slide the collar down inside the onesie and adjust it so that it’s centered and laying flat.
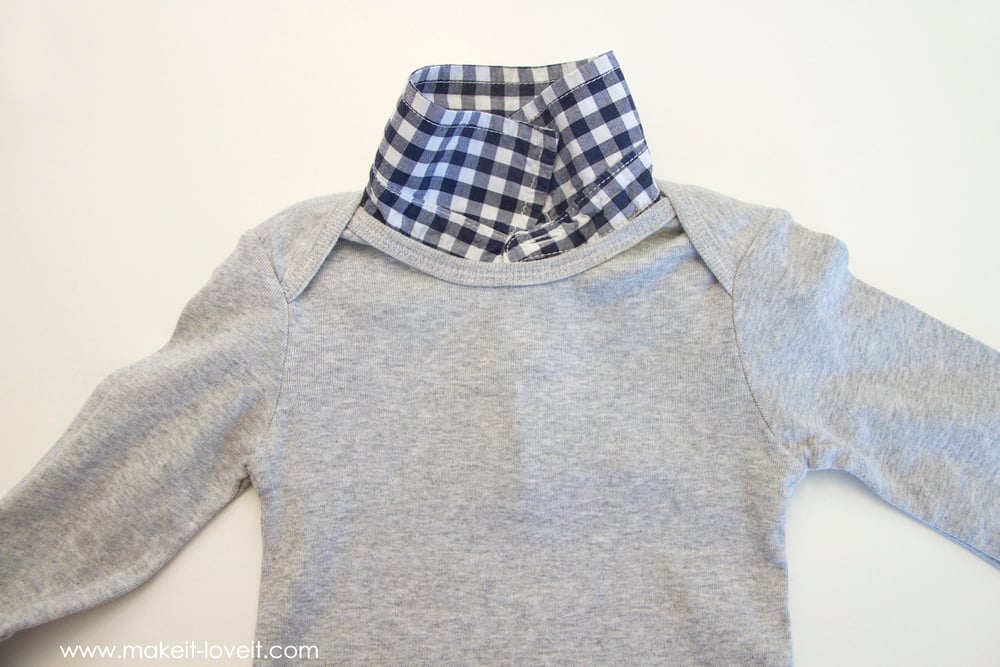
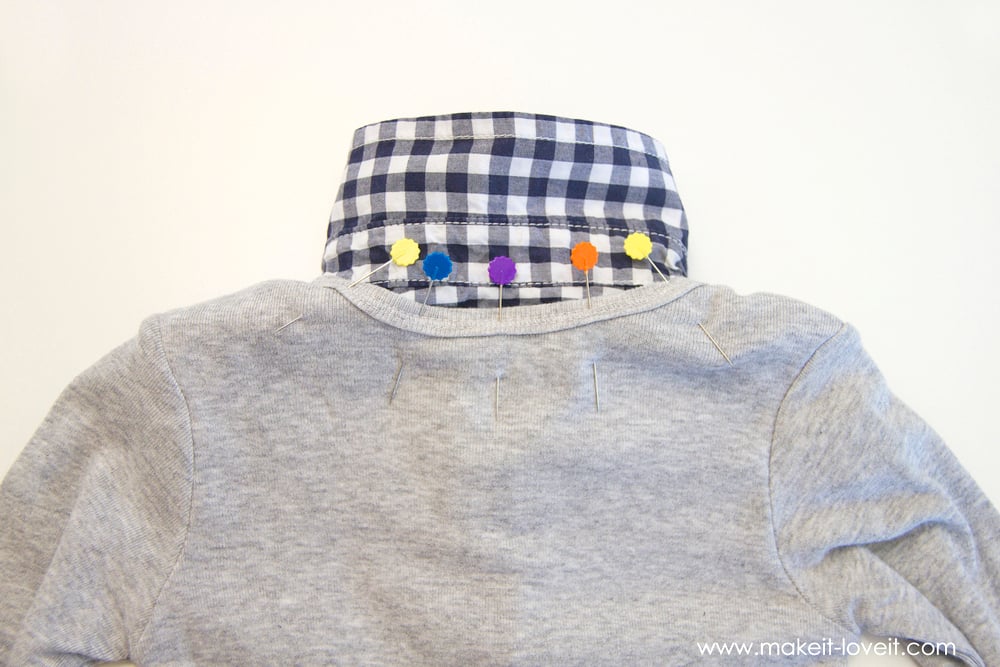
Now, turn the shirt over and pin the collar to the onesie along the back. (The neckline of a onesie sits lower on the neck than a collared shirt, so you can let more of the collared shirt rise above the neckline of the onesie.)
Now, sew in place along the BACK OF THE ONESIE ONLY, stitching right along the existing stitches of the onesie neckline.
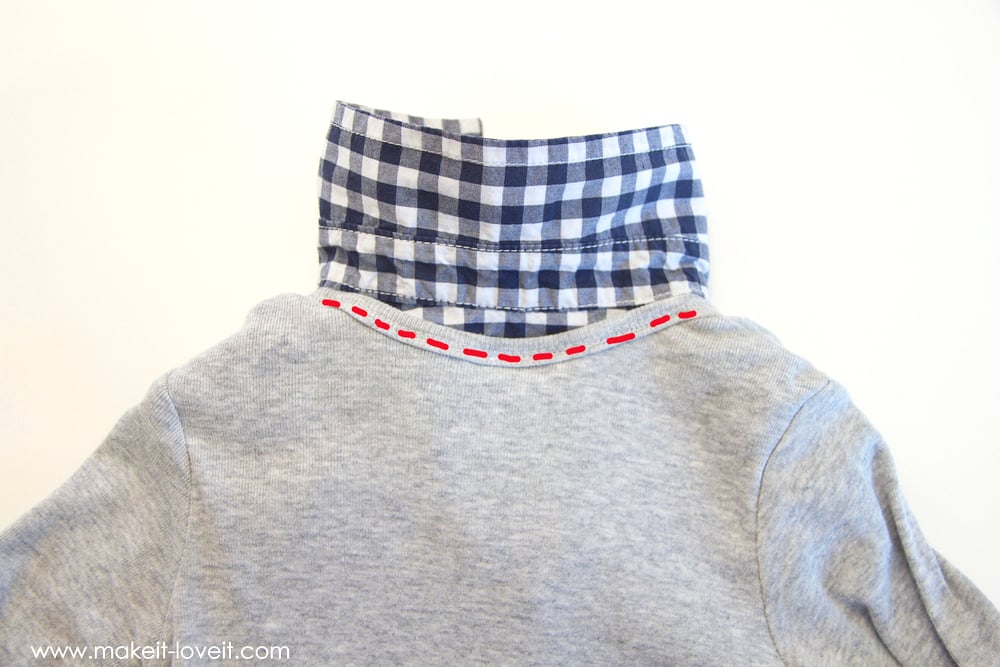
Sew right up until the back neckline of the onesie crosses over the front neckline…..but don’t stitch through it. You still want the onesie neckline to stretch open to fit the head through.
Now, use your fingers and manipulate the collar fabric and onesie fabric so that it’s laying nice and flat along the shoulders. Then, add a few stitches right along the shoulder seam of the onesie, to tack all of the layers of fabric together, to help the collar stay in place. (And I know you can’t see my stitches…and that’s the point. I sewed them really close to that seam and just sewed forward a few stitches, then back, and then repeated a few times.)

Now, onto the sleeves.
Cut the sleeves from the shirt, right above the nicely finished opening, giving you some extra fabric to tuck into the sleeve.
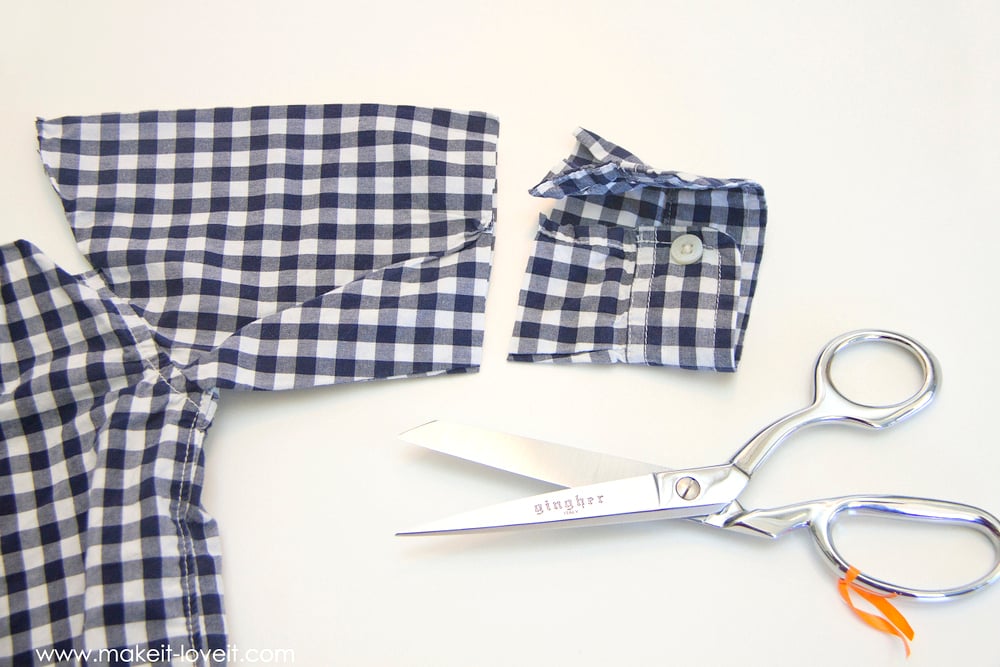
Zig-zag along the unfinished edge.
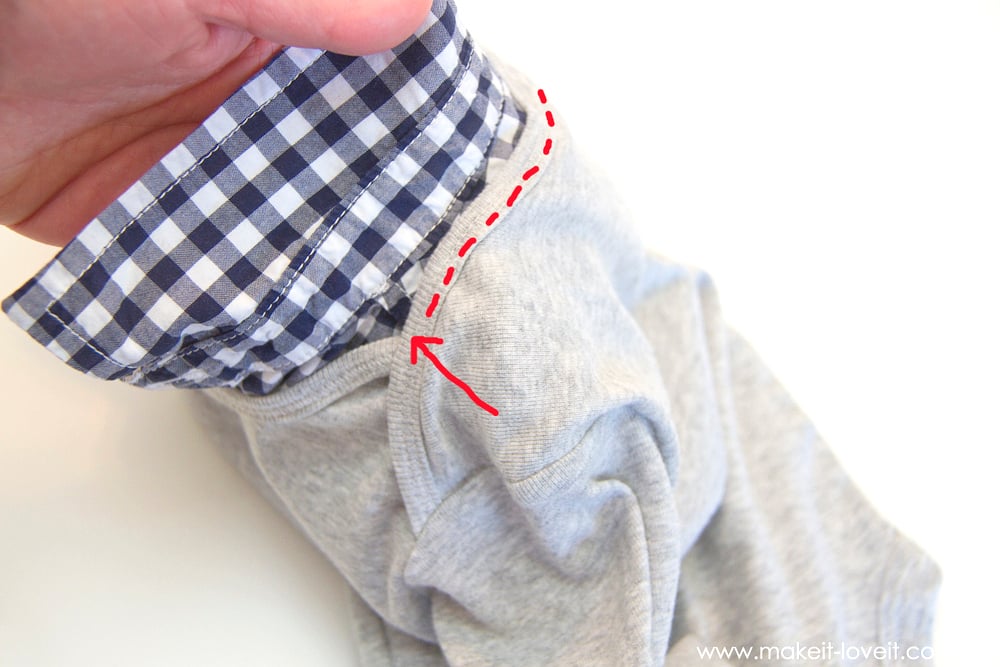
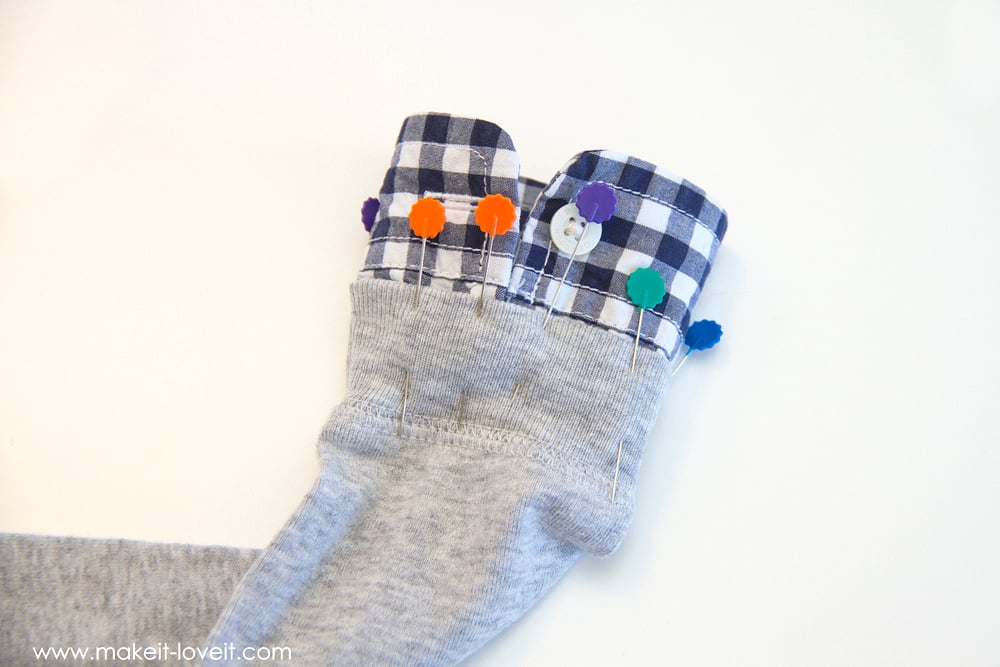
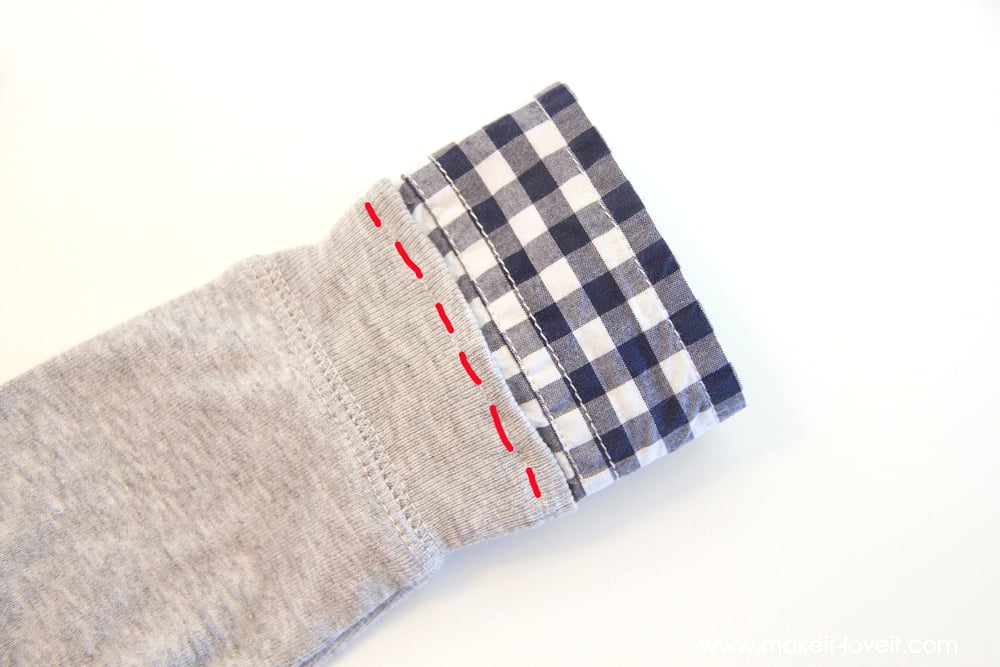
Now, if you look at a button-up shirt, the opening of the sleeve is centered on the back side of the sleeve……not with the seam along the bottom edge of the sleeve. So, fold your sleeve cuff so that the opening is along the back side and slide it into your sleeve that’s laying flat in front of you. Pin in place.
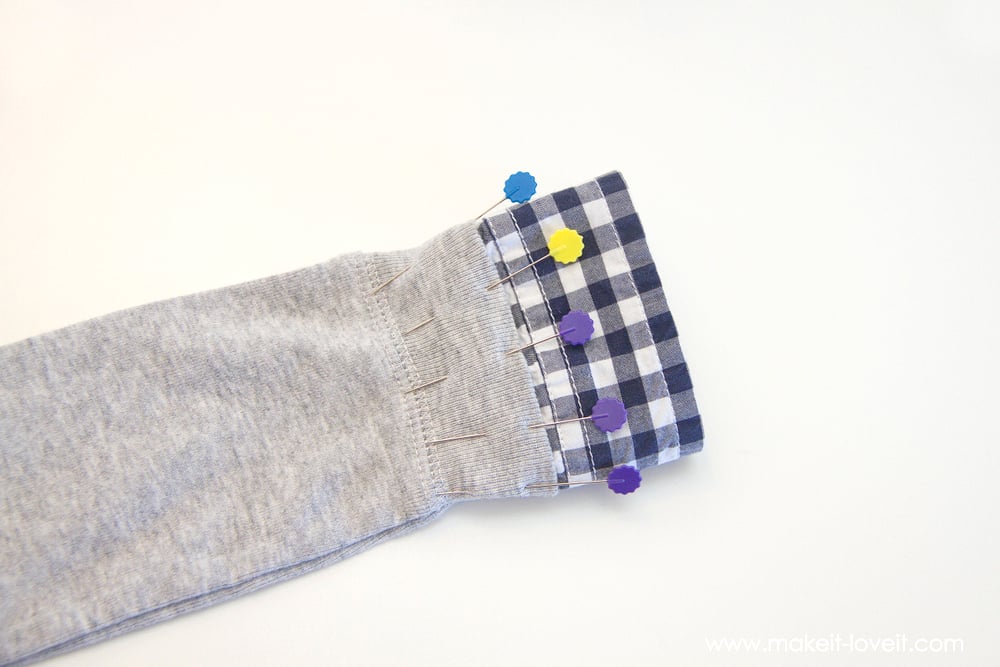
But be sure that you stretch the cuff of the onesie sleeve to the same size of the cuff of the collared shirt and pin as you stretch. (You don’t want the cuff buttoned….you want it completely open because it will always be folded up and never buttoned closed.)
This may seem a little tricky to sew the cuff in place….but the easiest way to do it is turn the sleeve inside out (carefully….since all the pins are in place) and then slide the cuff under the needle of your machine. Then, slowly attach the cuff to the onesie sleeve, sewing a few stitched, lifting the presser foot, adjusting again, and repeating until you’ve sewn all the way around.
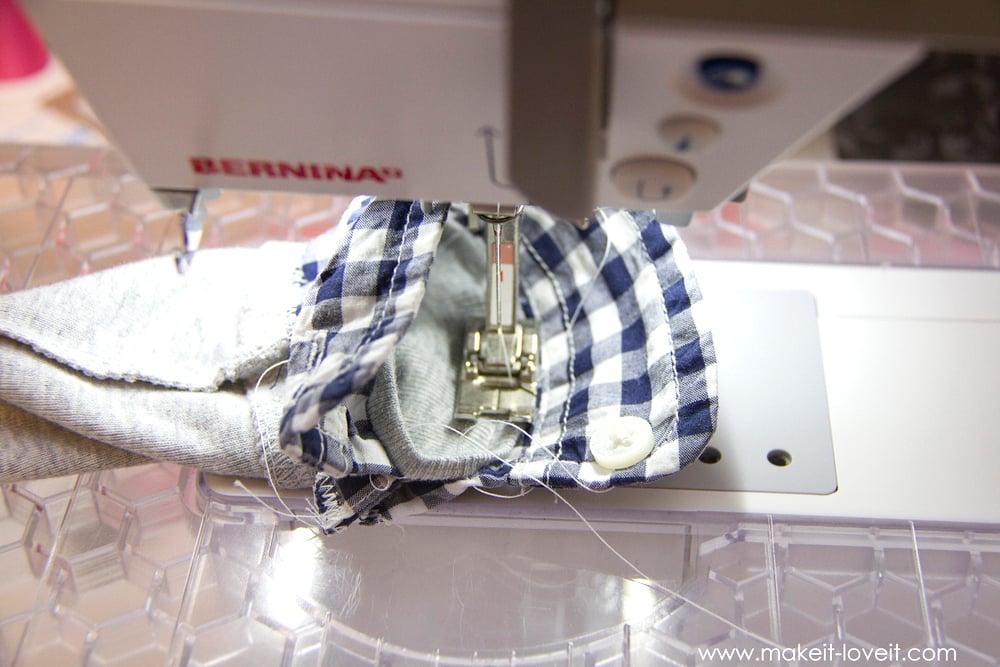
Once you’re done, you’ll have a seam all the way around the sleeve opening.
Now, you can fold down the collar and fold up the sleeve cuff…..and you’re done!

asdf

Hi, I’m Ashley—the DIY-enthusiast behind this crazy blog!


