Today’s contributor is Crystal from Stitched By Crystal. All posts written by Crystal for Make It and Love It can be found HERE.
. . . . .
Hi, it’s Crystal again from Stitched By Crystal!
Halloween is just a few weeks away, are your kids’ Halloween costumes ready? I am putting the finishing touches on my kids costumes. They got to choose what they wanted to be this year and I was surprised they decided on an adorable coordinating costume theme this year, I can’t wait to share!
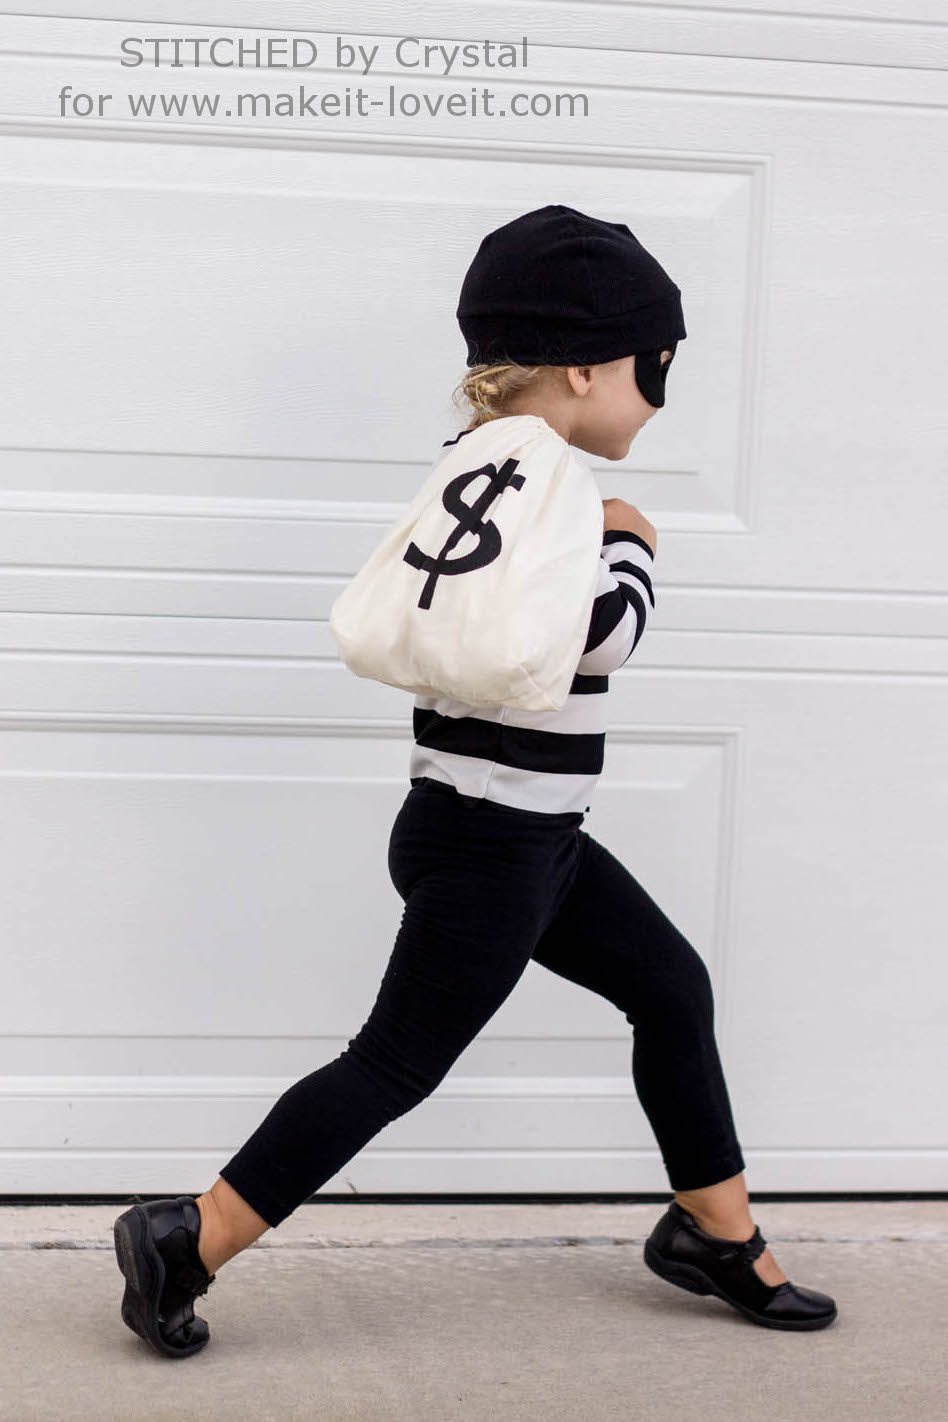
BUT… if you are still looking for some costume ideas for a boy or girl of any age. With just a few quick sewing tutorials and some things you might already have on hand, you can put together this last minute little bandit costume!
This costume requires very little sewing and it is great for beginners. It looks adorable on my toddler, but would work for older kids or tweens too. Or maybe you just got invited to a Halloween party and have no costume to wear? Make one up for yourself too!
Or if you have already finished your costumes, maybe sew up the hat, mask and bag for your kids’ dress up box…They make for a really fun game of cops and robbers!
The bag is a really fun addition to the costume, but also doubles as a bag for collecting all that trick-or-treat candy!
To put together this easy costume you are going to sew a felt mask, fleece hat and muslin money bag. Then add a black and white striped shirt, black pants and black shoes. (Black gloves would be great too, but turns out those aren’t easy to find in Florida in September!)
If you have trouble finding a striped shirt, you can make one of those too. I sewed mine out of some cheap polyester fabric and used one of my daughter’s shirts to draft a pattern. You could even buy a white shirt and paint on the black stripes with fabric paint.
Want to make a last minute little bandit costume? Great! Let me show you how!
You will need…
To make the hat and mask, I used some tutorials found here on Make It & Love It. I used the hat pattern from this cow costume and added about 1/2″ to all sides of the pattern to accommodate my 3 year old’s head. And I used the superhero mask tutorial found HERE. I made the eye holes extra big so the mask didn’t impair her vision while she played. You can find the patterns for both of those HERE! Then I whipped up a simple drawstring bag as shown below….
Start by cutting 2 rectangles of fabric. You can make the bag any size you want (maybe choose a size directly proportionate to how much…or little Halloween candy you want your kiddo getting!) I cut my rectangles 12″ wide and 13″ tall for my 3 year old’s bag. Finish all 4 sides of the rectangles with a serger or zig zag stitch on your sewing machine.
Find the center of one rectangle and paint your money sign on it with fabric paint. The muslin is a bit see thru, so you can print a $ using any word processing program and place it behind your fabric while you paint for a perfect shape. Once the paint drys, heat set it with your iron.
Place your 2 rectangles right sides together and sew around the sides and bottom, starting and stopping about 1.5″ from the top of the bag.
Fold back the top sides of the bag where they aren’t sewn together and sew them in place. Then fold the top edge of the bag down towards the wrong side of the fabric about 3/4″ and sew to make a casing at the top of the bag. Repeat to make a casing on the other side also.
Box the bottom corners of the bag by lining up the side and bottom seams and sewing straight across the corners.
Cut 2 straps from your muslin fabric that are 1.5″ wide and at least as long as the width of your bag x 2. (My bag was about 11″ wide after being sewn and I cut my straps 25″ long) Finish your straps by folding them in half, then open them and fold the raw edges into the center, fold them again on the center crease and sew the open ends together.
Use a safety pin to thread the straps through the casing. Thread one strap through both sides of the bag and knot the ends together. Then repeat with the other strap starting on the opposite side.
Now add the hat, mask and bag you made to the other clothing items you gathered and your little bandit is ready for trick or treating!
Want more Halloween inspiration? Check out the parrot costume I shared last month! Or you can find lots of inspiration on my blog, including some of my favorites shown below…a Superman costume, a fireman costume, a shark trick or treat bag, and a little red riding hood costume!
Thanks!
-Crystal

Check out Crystal’s blog here. Her darling shop here. Follow her on Instagram here. And her Pinterest page here.
***ALL contributor posts by Crystal, can be found HERE.
. . . . .
We’ve got a lot of DIY costume inspiration happening at Make It and Love It!
Check out some of these favorites for all ages:

Hi, I’m Ashley—the DIY-enthusiast behind this crazy blog!