Today’s contributor is Jill from Snugglebug University. All posts written by Jill for Make It and Love It, can be found HERE.
. . . . .
Hi, it’s Jill from Snugglebug University and I’m excited to be back here again. Today I’m going to show you how you can make your own woodland fairy costumes!
My kids are super CRAZY about fairies right now. We’ve made fairy puppets, fairy dolls, fairy beds and now fairy costumes! Today I’m going to show you how to make their fairy dresses here, and you can find the tutorial for the wings and shoes over on my blog today. I’m so excited! I love each girl’s fairy costume!
Both girls drew me pictures of what they wanted their fairy costumes to look like. (You can see their drawings over on my blog today!) My youngest wanted to be a “rose” fairy.
My oldest wanted to be a “purple flower” fairy.
You’ll notice that there is a lot that’s similar about their two dresses. They both have green bodices with an elastic neckline and the flower-colored sleeves. Both have lots of felt flowers, albeit different ones.
And then there are their flower wreaths….I love them and yet they are so simple! They’re just flowers glued on to a piece of fancy elastic.
They both have wings too. You’ll never believe how easy they were to make! I love that they look nothing like most of the commercial wings available (although you could easily substitute the commercial ones, too!) I stuck a few felt flowers on the wings too.
Both dresses are made of a two-layered skirt, with the top layer being special occasion fabric. The main difference between the two is the petals on their skirts! Today I’m going to show you how you can make both variations.
But I have to warn you. If you make woodland fairy costumes for your kids, they might not stay still enough for you to get a picture. They’ll tell you that they belong in the forest, and demand to go exploring.
Then they will remind you (after you ask them to smile) that fairies do NOT pose for pictures. Unless they can make silly faces. Oh yes, I got LOTS of silly faces.
And if you have a 3 year old, she’ll be absolutely convinced she can fly. I recommend avoiding bridges until you convince her otherwise. (We had a few close calls trying to take these pictures…let’s just say it was a good thing that we brought Daddy along for our photo shoot.)
But when I got back home and looked at my pictures and saw the one below, I started to second guess these little fairy costumes after all…Maybe they do have special fairy magic! How did she jump that high??!?!?!?!?
My kids will tell you that their favorite part about their costumes is exploring in them. It’s mine too. Lots of fun memories already with these costumes! They’ve already become a favorite in the dress-up bin, and the elastic neckline makes it easy for both girls to dress themselves.
A lot of times friends tell me that they want to make their own costumes, but that they’d rather use a pattern. I totally understand. What I tell them though, is that the best thing they can do is walk right past all those pattern books with oftentimes complicated Halloween costumes and instead, go for one of the “easy to sew” regular dress patterns. For this dress I modified a Simplicity 2377 pattern. It’s a very simple, very basic elastic neckline dress pattern.
But here’s the good news. You don’t need the same pattern that I used. You can look at the fabric store for a traditional elastic neck and sleeve dress pattern–trust me, there are lots! Any should work. Or you can modify the free elastic neckline dress template from Lorraine from Ikat Bag.
I picked up the Simplicity 2377 pattern a few years ago for $1 (a sale at Joann’s) and have modified it so many different times, mainly because my kids love the ease of getting dressed with elastic neckline and sleeves. I’ve used this same pattern to make a Cinderella and Rapunzel dress too!
Of course you can also draft your own like Ashley did here. There’s also nothing that says the neckline has to be an elastic one. The elastic neckline is just my kids’ personal preference. What really makes these fairy dresses is how you modify the skirt, and I’m going to show you how.
Alright, are you ready to make your own fairy costumes?
Supplies (used for BOTH dresses):
Additional Supplies used ONLY for the PINK dress:
***Keep in mind, the above amounts are what I used to make this costume for my almost 4 year old, who wears a 4T.
Additional Supplies used ONLY for the PURPLE dress:
***Keep in mind, the above amounts are what I used to make this costume for my 6 year old, who wears a size 7.
***As always, if you need a bit of help with the basic sewing skills used in this tutorial, don’t hesitate to check out the Sewing 101 post for more help.
Alright, let’s get started.
We’re going to start by cutting out all of pieces. I used both of my bodice pieces from my pattern, with no adjustments. I cut the sleeves out of the (pink or purple) fabric and the bodice out of the green velour. The velour behaves a lot more like a knit and has a two way stretch. If the fabric you choose has a two way stretch too, make sure that you cut your bodice pieces such that it stretches side to side instead of up and down.
Here are the basic pieces all cut out. The front bodice piece is on top and the back is the bottom in the picture below. Again, just follow your pattern here. I added a little length to the skirt (because my kids are tall) but otherwise no adjustments. In my case the skirt it made up of two pieces, a skirt front and skirt back.

Cut the same size skirt pieces out of a fancy special occasion fabric. Originally I planned on making all those ruffles myself, so when I saw the ruffly pink special occasion fabric I was totally sold. I cut out pieces the same size as the dress front and back I was careful to make sure that the ruffles would line up on the two pieces. Then I set them aside.
The Petals (Pink Fairy Variation)
Now here’s where we really start modifying the dress pattern. I wanted to make flower petals to go on the skirt. I used the skirt front as a guide, and made an petal pattern piece. My idea was to have 2 of these petals which slightly overlapped to go around the whole dress. Each layer was made of two pieces of fabric, so together that was 4 pieces total.
See how the petal pieces are the same width as the dress skirt? Cut 4 of these pieces.
Let’s go ahead and make the petals before we return to making the rest of the dress. First, finish the edges as desired. Leaving the tops open, sew around the curve. Clip curves, and turn right side out.


I also cut out 5 leaves of the velour for the dress as well. Since this velour acts more like a knit, I didn’t need to finish the edges of the leaves. The edges definitely curl up, but they don’t fray.
The Petals (Purple Dress Variation)
I cut out 5 petals, (10 total for a front and back). Sew around the edges of the petals, leaving the top open. Clip curves and turn, just as we did before with the pink petals.
Gather the top edge of the petals, just as you did with the pink petals.
We’re done with the petals now, and it’s time to start sewing the rest of the dress.
Sewing the Dress Top:
Begin by sewing the top half of your dress. In my case, this involved sewing the sleeves to the bodice front and back as shown, until both sleeves are attached to the bodice front and bodice back.
Once I sewed up all of the pieces, my top looked like this.

I folded over the edges of the neckline and sewed, making a passageway for the elastic to go in. Make sure that you leave room to thread the elastic through.
I used a safety pin to help pull the elastic through the neckline. Sew the elastic ends together and sew the passageway closed.
Repeat at the base of the sleeves, adding elastic to the passageway and closing it up as you did before.

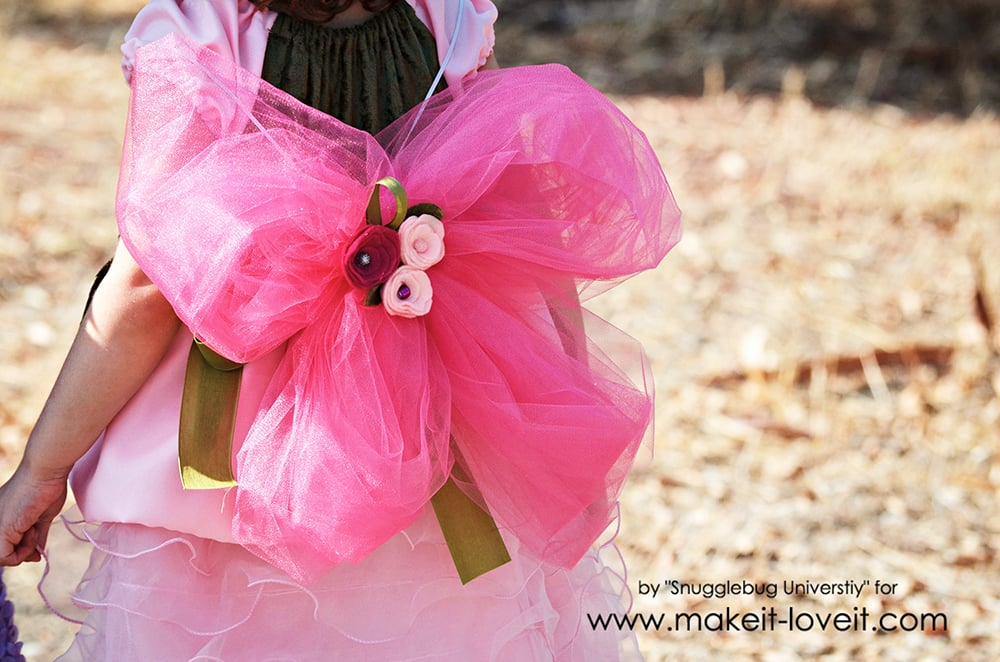
The dress top is almost finished at this point. All you have to do is sew up side seams. I included a piece of ribbon into each of the side seams for a back tie bow. Set aside.
The top is done at this point, and it’s time to switch over to the skirt.
The Skirt:
The skirt is made up of two basic layers. The first is your lining fabric. The top is your fancy frilly fabric. Each skirt layer is made up of a skirt front and skirt back piece.
I began by placing the “right” sides of my skirt together and sewing up one side seam. This should make one long skirt piece. Do the same thing with your special occasion fabric.
I went ahead and finished the edges of the skirt pieces now. Next I gathered up the top edge of the solid pink skirt. Then I gathered up the top edge of the ruffly special occasion fabric.
Place the two skirt layers on top of each other.
Fold the skirt in half, so that the “right” sides are facing each other and the special occasion fabric is folded over on itself. Sew up the side seam.
Adding Petals to the Dress Body:
Adjust the gathers on your skirt (and pink petals) so that they match the width of the dress top. I placed the petals so that they met right in the center of the dress front. 
Pin the petals onto the skirt pieces, and baste in place.  I placed the green leaves spread out around the dress and then basted them in place as well.

Then It was time to place the skirt INSIDE of the dress bodice so that the “right” sides were facing each other. I sewed the dress top to the dress bottom. At this point the dress is finished and just waiting for felt flowers. 

The purple petals are attached in same way as the pink ones, except that they 5 petals are evenly distributed around the skirt.
Adding (And Making) Felt Flowers- Pink Version
The pink flowers are simple rosettes made from felt circles.
I just started cutting on one end and then swirled around until the middle.
Beginning on the inner edge, I glued the layers on top of each other. Then I glued the beads in the centers of the flowers. I glued the flowers onto the dress front and onto the elastic headband (I simply sewed the ends of the decorative elastic together to make a circle and then glued the flowers on top of the elastic.) I glued on a few felt flowers and a few leaf ribbon “loops” before I glued the flowers on.

Adding (And Making) Felt Flowers- Purple Version
The purple flowers are also simple to make. I simply cut out two shapes that looked like the number 8 (without the holes cut out of the eight center).
Then I folded the pieces in half and just sewed a few stitches.
Then I placed the two layers on top of each other, and sewed another few stitches to attach the two layers together.

The purple flowers were mostly glue’d on as well, with the only exception being the ones that were hanging from ribbon on the dress front. I attached (sewed) the ribbon underneath one of the petals and then tacked the flowers onto the special occasion fabric layer.
The beads were just glued onto the centers of the purple flowers as well.
That finishes the fairy dresses! Since this tutorial is quite a long one, I decided to keep the tutorial for the wing and the fairy shoes over on my blog. So hop on over to check out how to make these fairy accessories!
Thank you so much for having me here on Make It and Love It! Until next time, you can find more of my projects on my blog or in my pattern shop!
–Jill
You can follow Jill on her blog (snugglebuguniversity.com), on instagram, and on facebook.
. . . . .
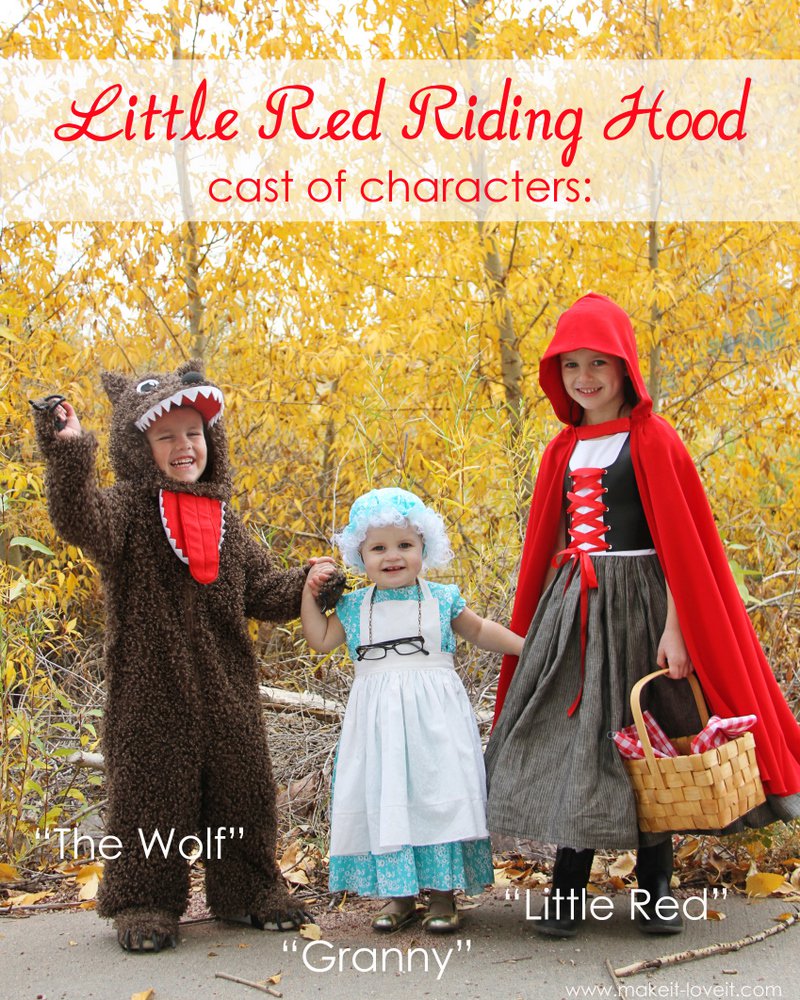
Want to see more DIY costumes?
Rapunzel, Pascal, and Flynn from TANGLED
Or, you can see all DIY Halloween Costumes HERE

Hi, I’m Ashley—the DIY-enthusiast behind this crazy blog!