Today’s contributor is Terra from Mama Says Sew. All posts written by Terra for Make It and Love It can be found HERE.
. . . . .
Hi everyone, it’s Terra from Mama Says Sew!
Are you looking for a fast, easy, last-minute Halloween project? This DIY Witch Headband is perfect! You can whip up one (or three!) in less than an hour, especially if you opt for the quick version. I’ve also included a free downloadable pattern for you.
These cute little headbands are perfect to add a little Halloween flair to an outfit. My children aren’t allowed to wear costumes to school, but this isn’t technically a costume, so…perfect!
Or if you want a simple costume for yourself, just throw on a black dress or top, throw on this headband, and you’re set.
You can add a bow or little flower to dress it up, or change the look of it altogether by making it in a different color. Try making a princess hat or maybe the Sorting Hat from Harry Potter.
Here she is modeling for me with her “scary witch fingers.”
Okay, let’s get started!
SUPPLIES:
***For additional help, check out this Sewing Terms 101 post.
Cut out your felt pieces from the pattern pieces above. Cut 1 of the smaller circles for the hat brim. For the hat, you can cut the larger portion of the large circle on the outside line for a wider, shorter hat, or the smaller portion of the circle on the outside line for a taller, narrower hat. I cut the smaller section for my hats. If you want a contrast band, trim off the bottom piece of the circle you used for your hat, and use that as a pattern for the band.
Sew on the contrast band to the hat. You can trim the band so that it’s slimmer or leave it as is.
Fold the hat in half with right sides together and sew along the straight edge.
Turn the hats right side out. Make sure the point of the hat is nice and sharp.
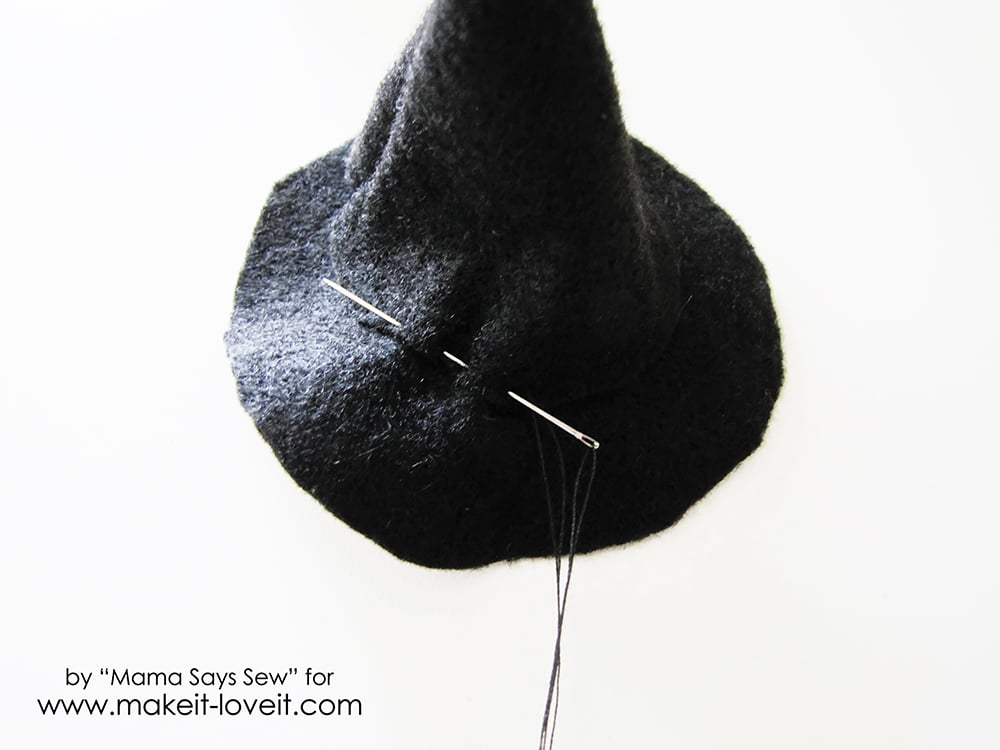
Hand sew the hat to the brim. Be careful not to pull too tightly or the hat will pucker. You may also use a glue gun to speed this step up.
Optional: You can cut out a little flower or bow to add to the hat. The bow is on the pattern page-just add a little scrap of felt for the tie. The flower I cut out using a die cut machine, but you could do a similar flower buy cutting a circle in a spiral and then rolling it up.
To make the bow, fold the edges in to the middle and sew or glue in place.
Wrap the tie around the middle of the bow and sew or glue in place.
Once your hats are ready, you can glue them to your headbands.
Cut a circle of felt to glue on the other side of the headband and help secure the hat to the headband.
And the hats are done! Wasn’t that quick?
Happy Halloween!
And enjoy!
-Terra
Find Terra at Mama Says Sew, here Facebook page, or follow along on Instagram.
. . . . .
Want a few more ideas??
Every little witch needs a cute little black cat bag to take trick-or-treating! Check out this easy tutorial and sew your very own:

If you are looking for more last-minute costume ideas, you’ll love this “Little Bandit” costume that comes together really quickly:

Hi, I’m Ashley—the DIY-enthusiast behind this crazy blog!