We’re excited to welcome back Terra from Mama Says Sew! You might remember her from her adorable Collared Baby Romper tutorial. She’s here today sharing a darling pair of shorts that would be perfect for girls and women both!
. . . . .
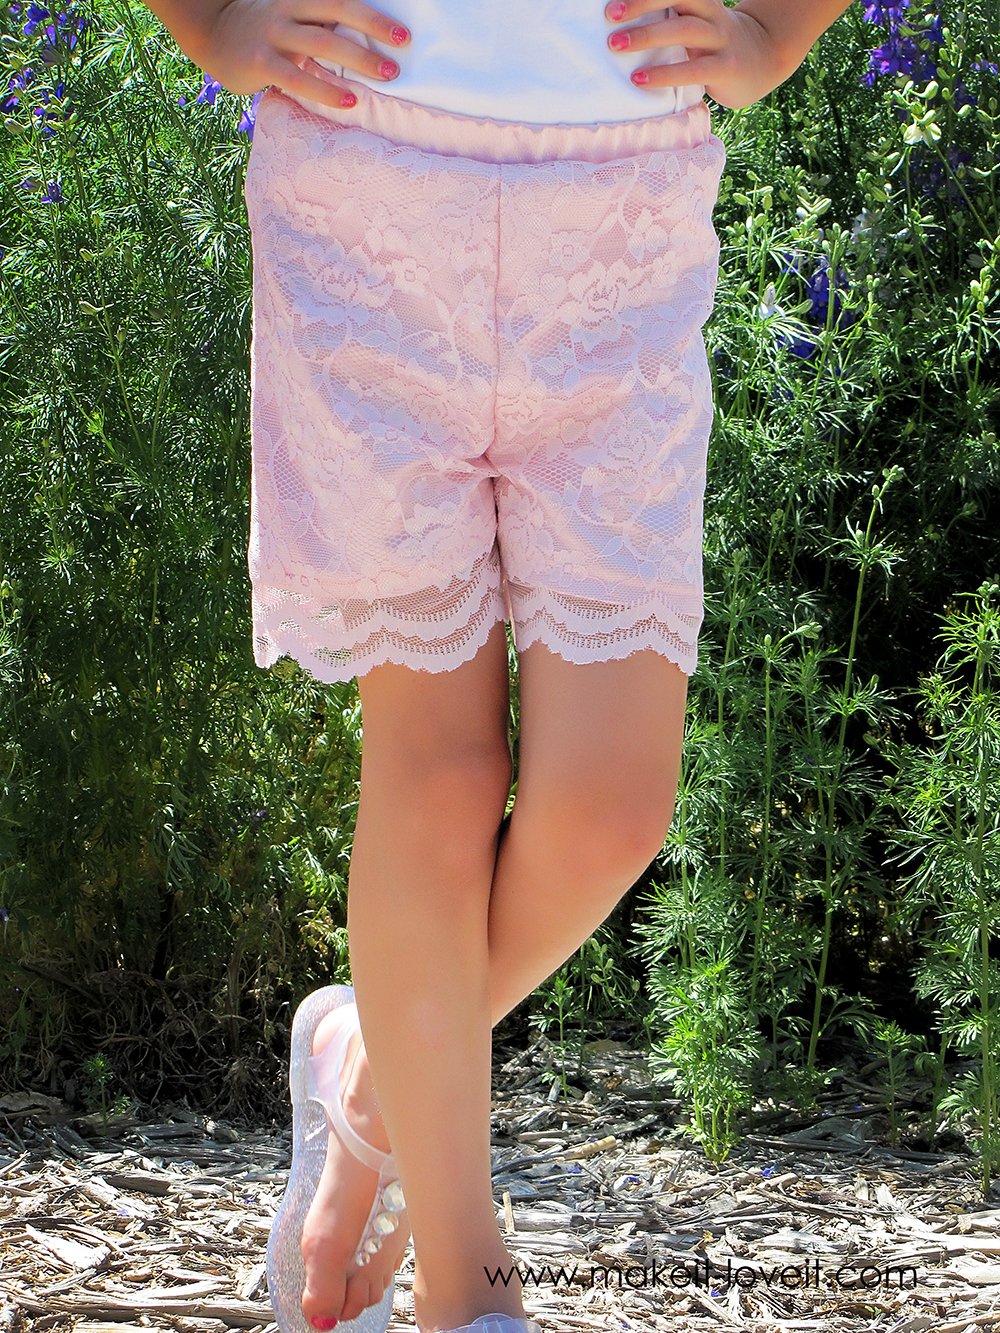
It’s Terra from mama says sew, and I’m here to share this tutorial for some cute lace shorts today.
These lace shorts are lined with a satin fabric to go with the nicer style of lace I used, but you could use cotton and a simpler lace for a more casual look as well.
They also have an elastic waistband for easy on and off for little girls.
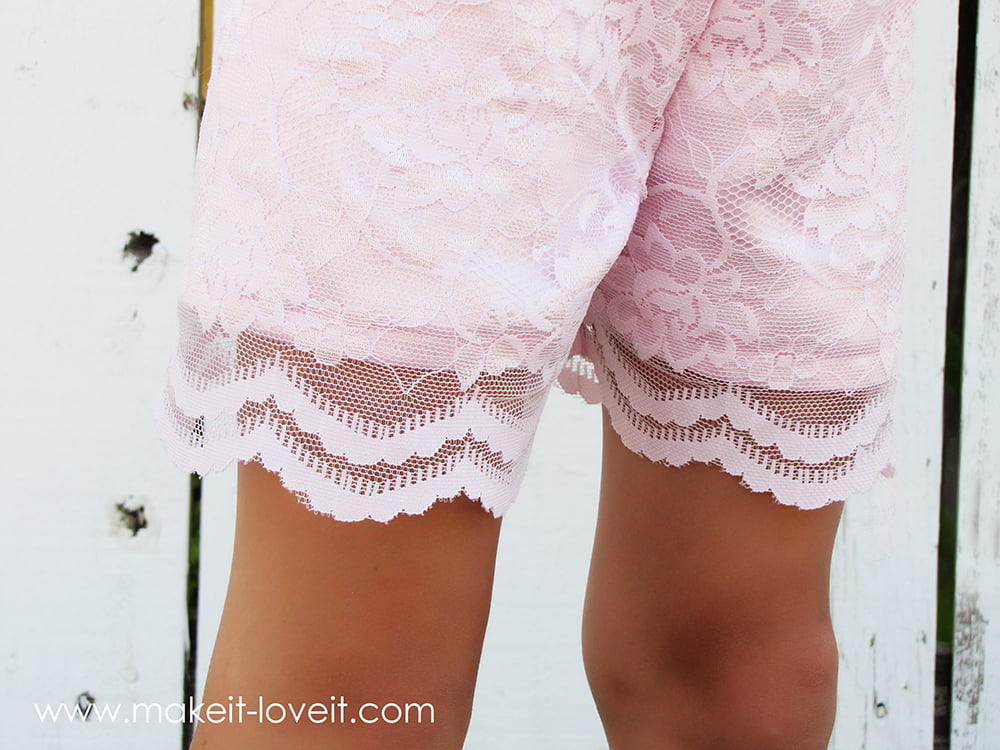
I really love the scalloped hem of these shorts. If you want to do the same, you’ll need lace with a finished edge along the selvages of the lace, but if not, you can use unfinished lace and just hem it.
***Before getting started, here’s a list of common sewing supplies, in case you need a few ideas.
***Also, check out this Sewing Terms 101 post, for additional help.
To create these shorts, you can use any shorts pattern that uses just one piece and has an elastic waistband. Lots of paper patterns come with basic shorts, and I just used one I already had. (Or if you’d like to create your own tutorial, browse through some of these clothing tutorials.)
Trace the pattern. Cut off the waistband allowance from the pattern, then add in a seam allowance. Cut out two waistband pieces, making sure to add a seam allowance for the waistband also. The bottom of these shorts are curved, so if the pattern you use is curved also, straighten out the bottom so it will line up with the lace border.
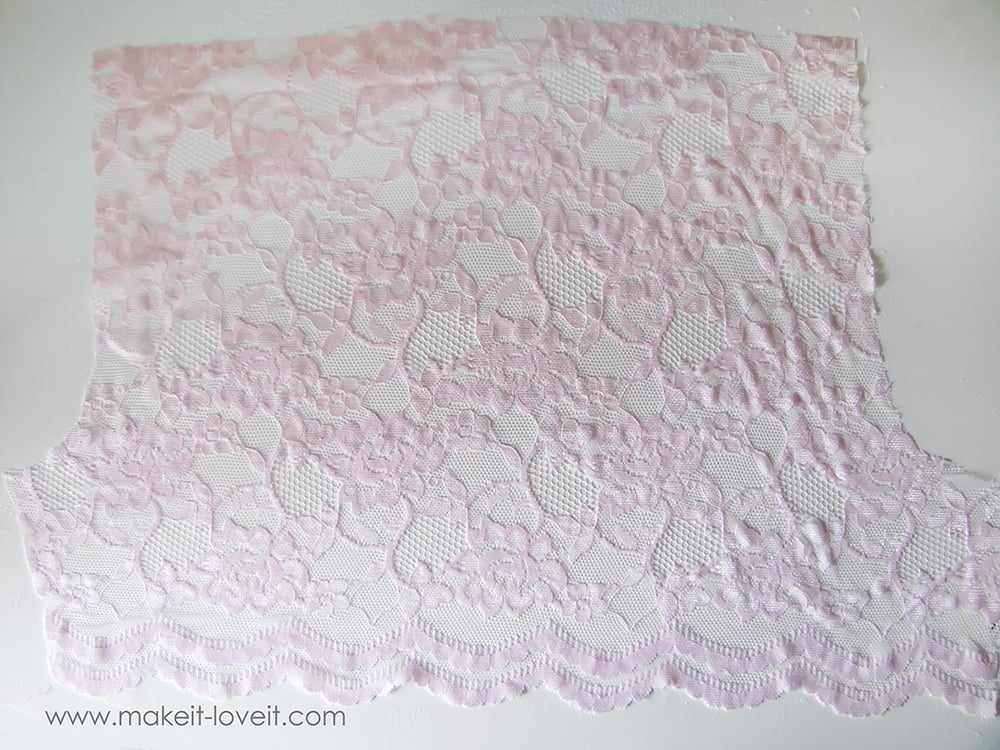
Cut out your shorts. You’ll need two lace pieces and two lining pieces.
Fold and press the hem of the lining twice. Stitch close to the first folded edge.
You should now have two lining pieces with the bottom edge hemmed.
Lay the lace piece over the lining piece for both shorts pieces. Baste the lace to the lining along the edges, leaving the bottom free.

Lay the shorts pieces together, with wrong sides together. Stitch with a 1/4 inch seam allowance along the front and back crotch areas (the 2 curved edges). Trim the seam to 1/8 inch.
Turn the shorts wrong side out and stitch the crotch seam again, enclosing the raw edges in the seam. This is a french seam. I used this technique for all the seams in this project. It is a good way to get clean seams without a serger, and works well for this project.
Sew the inseam of the shorts, using the same “french seam” technique.
Turn the shorts right side out and this is what your shorts should look like.
Sew the waistband pieces together at the side seams.
Fold the waistband in half with wrong sides together and press.
Sew a long stitch along the waistband to form a casing for the elastic, leaving a small opening to insert the elastic. Insert the elastic, stitching the elastic ends together.
Attach the waistband to the shorts.
Enjoy your new lace shorts!
-Terra
P.S. If you liked these shorts, you may also enjoy making these ruffle flower leggings.

Find Terra at Mama Says Sew, here Facebook page, or follow along on Instagram.
. . . . .
We’ve got a lot of cute summery clothing projects to keep your kids cool this summer.
Check out some of our favorites:

Hi, I’m Ashley—the DIY-enthusiast behind this crazy blog!