I found some really cute Aztec print knit fabric at the store, hmmm, maybe a month ago? The print is a vivid cherry red color with a basic white background……and looked very summery to me, so I had to buy it! It was in their seasonal summer fabrics and so I need to go back and see if they have more because after I finished this little tunic dress for Chloe the other day, I was mad I didn’t make it in my size. ;)
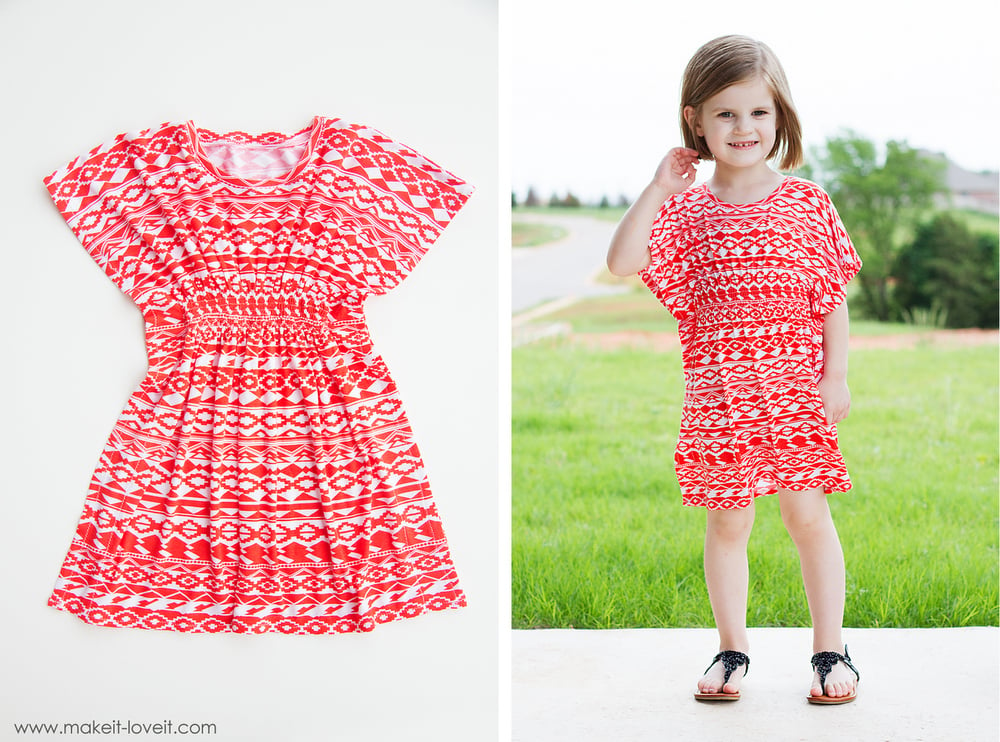
This little Butterfly Sleeve Tunic Dress took maybe 45 minutes……and turned out SO CUTE! (But if you’re newer to sewing, it may take a little longer. But truly, this is a very basic concept, not very tricky, and a great project to sew pretty quickly in an afternoon!)
It’s a really simple design with no actual sleeves sewn in, but when you pull in that waist line….it becomes the cutest little tunic dress!
The little sleeves are kind of like butterfly wings. But when she puts her arms down, they hang really nicely. And that waist line has several lines of shirring (that you could easily replace with regular elastic if you’re still unsure of shirring)….which pulls in nicely, giving the dress some nice shape.
If you’ve never worn a tunic dress like this, you are missing out. It really may be one of the comfiest things a gal can wear! So, if you need a new dress, this isn’t just for the little girls…….every grown gal needs one too.
The construction will make better sense down below but you are pretty much sewing a front rectangle together with a back rectangle…..and then sewing halfway up each side, several inches from the side edge. So each side is slightly open but it gives a fun flap to each side of the dress.
Such a fun and QUICK little tunic for my Chloe! Which she is definitely happy about….because, DRESS!
Would you like to make one too? Of course you do! :)
SUPPLIES:
***Check out my Sewing Terms 101 post, for additional help.
First, measure your subject before buying your supplies….and then you’ll know how much you need.
You need 2 rectangle pieces of knit fabric, exactly the same size, for the front piece of the dress and the back piece. Have your subject stick their arms straight out to the side and measure from one elbow, up and across the top of the shoulders, and then over to the other elbow. Write down that number. Then add 2 inches to that number, one for each side hem. This is your fabric WIDTH measurement.
***In case this helps anyone out there sewing one similar to Chloe’s size, she wears about a 5T in girls dresses and this measurement was 21 inches across. So I added the 2 inches, giving me 23 inches for the fabric width measurement.
Then, measure from the top of their shoulder (or the shoulder seam), down to the desired length that you want. Write down that number. Then add 1/2 inch for the seam allowance along the top edge and another 1 inch for the hem allowance at the bottom. This is your fabric HEIGHT measurement.
***This measurement for Chloe was 21 inches. So I added the 1 1/2 inches, giving me 22 1/2 inches for the fabric height measurement.
Now you should have your width and height measurement for your 2 rectangle pieces (or pretty much square in my situation). Now you know how much fabric to buy. Just be sure that the width measurement is the direction of the stretch. (Unless you buy fabric that has 4-way stretch….then it will stretch left to right AND up and down. And that’s okay too.)
Now, cut out your two pieces of fabric, according to your measurements from up above. (These are 23 inches across by 22 1/2 inches tall.)
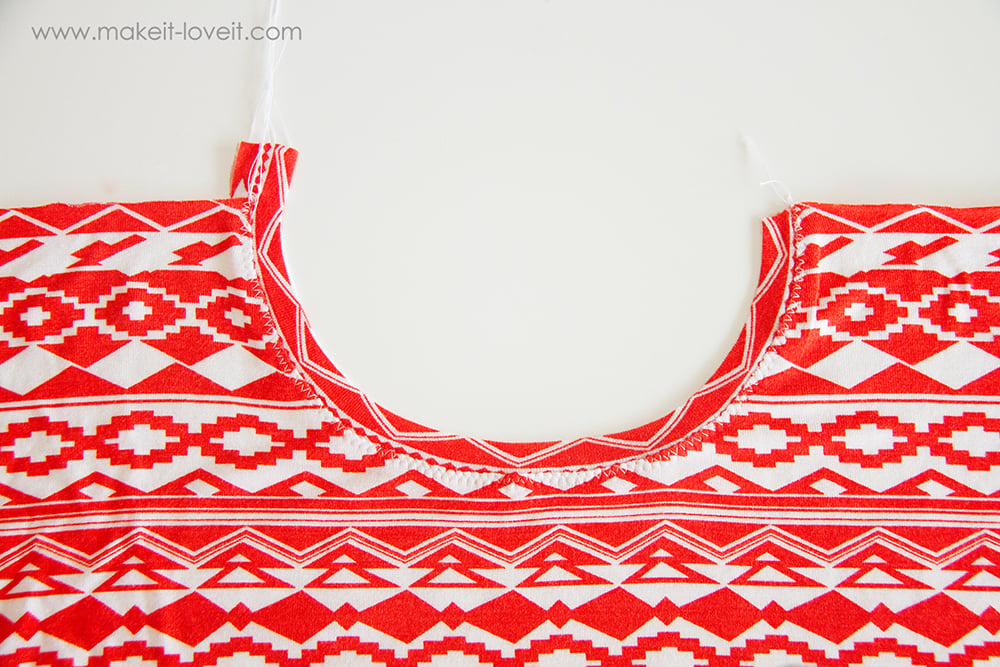
First of all, let’s create the neck line. Check out the Butterfly Sleeve Tunic tutorial from a couple years ago, to see how to create the pattern piece from paper. Instead of creating the entire pattern piece though, just create the neck line shape to place on your fabric. Place the pattern piece on your folded fabric, just like shown in the other tutorial, and cut out your neck line.
But if you want to know the real me….I like to speed up the process where I can, so I just set my shirt on top of my fabric and use that as a guide as I cut. But, until you’re comfortable doing that, recommend creating a paper pattern piece. :)
Then, attach your neck line piece, the exact same way as the tutorial above. (However, you don’t really have to cut on the bias of the fabric….just cut a strip from your fabric that stretches left to right. And then as you’re attaching it to the neck line, stretch is slightly as you’re sewing it to the curve of the neck line so that the strip will pull in a little tighter than the actual neck line. This will just help it to lay flatter after you’ve attached it.) Then, sew a seam right next to the neck line seam, which keeps the raw edges attached to the back and out of the way. (I used a zig-zag stitch, so that it would allow for more of a stretch.) Iron flat by lifting and pressing and using steam to help shrink back any puckers or pulls from your seam. Don’t pull your iron across the fabric…..or it will stretch it out.
Repeat with the back neck line piece on the other piece of fabric.
Then, place the two rectangles together with right sides together, then sew along the top edges, using a 1/2 inch seam allowance. Also, use a zig-zag stitch to allow for more stretch. Open it up and iron flat.
Next, fold one of the side edges over 1/2 inch and then another 1/2 inch…then pin in place.
Sew this edge in place, using a zig-zag stitch. Repeat with the other side edge.
Repeat with the 2 bottom edges as well.
Now, it’s time to determine where to add your waistline. Do you want it more of an empire waistline….or do you want it to cinch in right at the natural waist? (Trying it on your subject can help you determine what would look best on them too.) Then, use a straight edge of some sort and draw a line on the “wrong” side of your fabric with a light colored washable marker, or a chalk pencil, right where you want to start sewing your lines of shirring (or if you just want to sew in a piece of elastic like the tutorial linked above, that would work with this dress too). Draw the line on the front piece and the back piece….because you’ll need a guide for both.
Now, fold the fabric in half, WRONG sides of fabric together, and the neck line along the top. Match up the sides hems and the 2 bottom hems. Now, you’re going to sew two seams at both sides, about 1 3/4 – 2 inches away from the side hemmed edges. The seam should start right at the same location as the line that you have drawn on the opposite side, if you decided to go with an empire waist line. If you went with a regular waist line, you’ll want this line of stitching to go higher than that….otherwise your sleeve will be open too much and people will be able to see into the dress from the sides. Make sure the seam goes all the way down to the bottom edge of the dress at both sides.
Now, you can start adding your shirring (or add your elastic like the Butterfly Sleeve Tunic tutorial). To add the shirring, use the line drawn on the other side as your guide to create the first shirred line and then use the first line that you shirr as a guide for each line after that. And for each line that your shirr, only sew from one side seam to the other (that you just created in the last step) and back-stitch at the beginning and end of each line of stitching. Then lift your needle and sew your next line, about 1/4 inch from the first one, and start again……and then continue on down for as many rows as desired. 5 rows was perfect for this dress. Then repeat on the back side of the dress.
And that’s it. A really darling and comfy dress…….in no time at all!!! :)
Enjoy!
-Ashley

Hi, I’m Ashley—the DIY-enthusiast behind this crazy blog!