UPDATE: All of the Wizard of Oz DIY Costumes are done and can be viewed by clicking the link!! Enjoy!
My kiddos have been talking about Halloween for months. MONTHS! I’m pretty sure they decided right after last Halloween (remember, the Rapunzel days?) that they were going to dress up as the cast of Wizard of Oz this year. So every time they watch the movie now, they call out who they are (according to what costume I’m going to make for them) and they talk to each other’s screen character, as if they are really that actor/actress. For example, “look what you did there Connor, that was so mean!” Or, “oh come on Elli, why did you do that? Go on, help Dorothy!” Or sometimes I’ll hear them chant, “wake up Chloe, WAKE UP!” They really get lost in the movie and think they are the actual seasoned actors. :)
So, Wizard of Oz it is!
I have been thinking about how to tackle each of my kiddos’ costumes for several weeks. (Connor’s is still plaguing me. Ack!!!) If I know I am going to share something here, I stew about it for a while, because I know I need to figure out a way that translates well in pictures. Sometimes I have to stew about it, jot down notes, play it out in my head (that sounds weird I know…..but I have to visualize how I put it together, picture by picture), and then stew some more……before I finally decide to jump in. And that’s why I got sidetracked and started making those simple costume ideas that I have been sharing since October 1st. And my gosh, I got a little carried away with those simple ideas and just couldn’t stop. But then I went back to thinking about the Wizard of Oz costumes a few days ago, got excited about it all over again, and finished Chloe’s costume yesterday! (Elli’s is in the works, Connor’s is [[ACK]] making my brain hurt, and Oliver’s……hahahahahaha, I can’t wait for his!!!!)
And let me tell you…..there’s something about putting a handmade costume on for the first time. It makes your heart swell, your lips smile, and your eyes widen up so darn big! Know what I mean? If not…..it’s time to give it a try. Just remember this very important thing…..there is nothing in the Halloween Costume Rule Book (it’s real….I have one! ;) ) that says you have to make them perfectly. Or that you can’t take shortcuts. Just have fun with it.
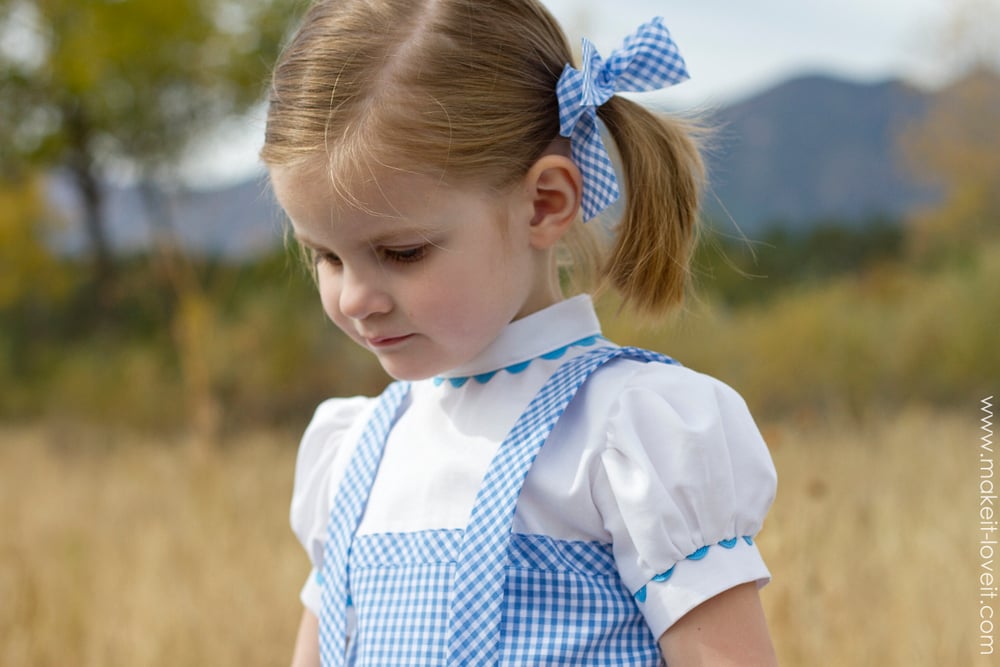
Once I put Chloe’s entire costume on yesterday……yep, a huge ol’ grin spread over my face! This girl — she makes the cutest little Dorothy!
She even takes her role very seriously and tries to remember parts of the movie. Which completely cracks me up.
She remembered though, that she had to run away from that mean lady on the bike, who was trying to steal her dog. So she took off down the road…
But her most important job? Returning back to Kansas, after a very long movie of trying to find that crazy guy they call OZ.
This girl. I melted, watching her little imagination finally come to life once she stepped into that dress. For months and months and MONTHS she has pretended to be Dorothy. And now, she was finally able to run around in her blue gingham dress, clicking her little heels, and spouting random phrases from the movie. Ha….such a funny little thing. :)
Oh, and Chloe found a new best friend…..Toto. I ordered him from Amazon and from the minute he arrived in his box, she has kissed and cuddled that thing to death! She even put a rubber band around his neck, tied a string to it, and pulls him all around the house. You know, because that’s what you do with Toto. :)
This dress actually came together pretty quickly and is simple to put on.
The shirt is actually attached to the dress….so the whole thing is one piece. I didn’t want any missing pieces, thankyouverymuch!
The back is zippered, all the way up! And the straps are buttoned in the front and back…..but don’t actually function. There’s no need since the shirt is attached and the dress is all one piece.
There is a bit of ric-rac around the neck collar and both arms…..just like the real Dorothy!
And of course, sparkly red shoes! (Oh, and that pettiskirt you’ve been seeing in all of these pictures?? Yeah, I know Dorothy doesn’t have a full skirt……but, well, you have to know Chloe. Spinning is kind of her thing. So I let her wear it! :) )
Also, Dorothy’s dress in the movie has a bit of bias-cut detail (meaning cut on the diagonal) at the top of the dress and along the very bottom. It’s all about the details with Dorothy! (And very simple to do, so don’t worry!)
Oh sweet Dorothy, er, Chloe…….you are so fun to sew for! Everything is ((gasp)) “SO beautiful” to you! I know you can hardly wait to see your brothers and sister come to life in their costumes. Don’t worry, they’re well on their way!
Okay, so Dorothy is first……so let me show you how I made her dress!
But wait, before we get into that, here’s where I found some of the other items I used with this Dorothy costume…
Okay, now onto the dress. Just keep in mind, amounts will vary, depending on the size dress you make.
Supplies:
Begin by taking a peek at this Cinderella Dress tutorial and this Baby Blessing Dress tutorial. Both tutorials show how to use an existing dress to create a new dress.
Also note: the tutorial below was made for my 3 year old (who wears a 4T). If making another size, adjustments will be necessary.
Cut 1 front bodice piece and your 2 back bodice pieces from the white fabric. I decided to add a zipper to this bodice, so if you do the same, be sure and add enough for a seam allowance along the center of the 2 back pieces. (Also, be sure that when you’re creating the pattern pieces, that the neck line is nice and high. The collar piece for Dorothy needs to wrap around the neck so the neck line on the bodice pieces need to be high…..without choking, of course!)
Place your 2 back pieces together with the front piece (with right sides together) and sew them together at the shoulders, using a 1/2 inch seam allowance (or whatever seam allowance you gave yourself).
For the collar, I decided a 1 inch high collar would work great. So, I cut a strip of white fabric that was 3 inches wide and along enough to reach all the way around the neck opening. Fold it in half lengthwise (with right sides together) and sew together, using a 1/2 inch seam allowance.
Next, place your ric rac on top of the strip, centering the ric rac over the seam you just sewed. Then sew the ric rac to the collar, right down the center of the ric rac.
Next, open up the bodice piece with the right side of the fabric facing up. Then place the collar face down and line up the raw edges of the collar and bodice……and sew them together, using a 1/2 inch seam allowance. (Sew slowly, sewing a few stitches at a time, adjust your fabrics, and continue…)
When you flip the collar up, this is what it should look like. :)
Next, create sleeves (just like the Cinderella costume), but before adding the band around the bottom of each sleeve, add a strip of ric rac, just like you did with the collar above. (However, I made these Dorothy sleeves a little longer than the Cinderella ones….so just add a little more height to each sleeve piece.)
Then, attach the sleeves to your bodice piece. (In the Cinderella tutorial linked above, the bodice was already sewn together and then the sleeves were attached. But I actually prefer attaching sleeves to an open bodice and then sewing the entire thing together…..more like this Play Dress tutorial.) Then, sew the bodice together along the sides, with right sides together.
Now, I decided to make the jumper dress and white top all one piece…….so that they would always stay together and not get lost. So to create the top portion of the jumper, you’ll want to create one piece to attach to the “shirt” portion of the dress. However, if you look at Dorothy’s costume (google it!), she has different strips of the fabric along the top and the waist, giving it a distinct look. To get this look, you want 2 strips that are cut on the bias to attach to the top and bottom of this bodice section. (Need more info cutting on the bias?)
Measure from right below where the sleeves attach to the bodice section you made up above, down to where your subject’s waist is (or where you want to attach the skirt section of the dress). You’ll now want to divide that number into 3 sections. The middle section will be the largest and the top section smaller than the bottom section. Just be sure that you add 1/2 inch to the top and bottom edge of each strip (1 inch total) for your seam allowance. (And just be sure that each strip is long enough to wrap around the entire bodice that you made up above.) Here are the measurements I used below.
Just a closer peek…….see how that top strip is cut on the bias? It makes it so those squares are now sitting diagonally.
Now, sew your 3 strips together (with right sides together), using a 1/2 inch seam allowance. Turn to the wrong side and iron open each seam.
Then fold the top edge down 1/2 inch and press flat. This is the edge that will be the very top of the dress.
Turn the whole thing over (with the right side facing up) and place on top of your bodice piece. Find the center of the gingham piece and match it up with the center of the bodice piece.
Attach the gingham to the bodice, sewing right along the very top of the bodice piece first (making sure the fabric is really straight and even, all the way around). Then, sew another seam along the bottom, 3/8 inch from the edge, using a long basting stitch. This will just help keep the fabric in place at the bottom.
Be sure you sew all the way around to the back……and that the gingham matches up in the back.
Cut off the the extra white fabric (if you had some).
Now, attach your zipper to the back of this bodice section. (More on attaching zippers.) Now the bodice section is complete…..and it’s time to attach a skirt.
Decide how long you want the skirt section of the dress to be, and attach it, just like the Cinderella Costume dress. Just be sure and multiply the waist by at least 4…..so that the skirt will be nice and full. (My skirt section is about 15 inches long and 75 inches around.)
However, if you look at Dorothy’s real dress, she has a little strip of the bias cut fabric towards the bottom of the skirt section. I decided to do the same and added a 1 1/4 inch strip near the bottom of the dress.
Here’s a peek from the inside of the dress…….make sure to zig-zag or serge your raw edges and iron flat.
In case you’re making a similar dress size, here are the dimensions I cut for the strips of the skirt section.
Top section: 12 3/4 inches tall (a 1/2 inch seam allowance for the top and bottom included) x 75 inches wide
Bias Cut Strip: 2 1/4 inches tall (a 1/2 inch seam allowance for the top and bottom included) x 75 inches wide
Bottom section: 3 1/2 inches tall (a 1/2 inch seam allowance for the top and a 1 inch seam allowance for the hem included) x 75 inches wide
Then, gather up the skirt section and attach it to the bodice (more on gathering here). Zig-zag (or serge) the raw edges and trim off the excess fabric.
Now, cut more fabric on the bias to create the shoulder straps. I cut strips that were 3 inches wide (to create 1-inch wide straps) and long enough to reach from the front waist line, up over the shoulders, and down to the back waist line. (Mine were about 22 inches long……but your may vary, depending on how long your bodice is.) Fold in half lengthwise, sew together using a 1/2 inch seam allowance and turn right side out. (More on turning a tube right side out.) Make sure to include enough at each end to fold under a 1/4 inch, another 1/4 inch, and then sew in place.
Attach the straps to the dress by attaching a button to each end.
And then attach buttons to the back as well.
I also sewed a few inches at the shoulders, so the straps wouldn’t fall off the shoulders.
And that is it. A sweet and happy little Dorothy Dress……ready to find that Yellow Brick Road!!!!
Good luck!
-Ashley
. . . . . . . . . . . . . . . .

Hi, I’m Ashley—the DIY-enthusiast behind this crazy blog!