Okay, FINALLY. The last little costume in our Wizard of Oz theme this year is complete. And in case you missed the others, there’s a Dorothy costume, a Glinda the Good Witch costume, and a Tin Man costume.
Or, if you want to see them all together (plus a VIDEO), you can click on the </p><p>Anyway, Oliver’s turn for his costume reveal. And what a good sport he was with his mommy in his face with a camera, laughing at his outfit, while clicking picture after picture. :)</p><p> </p><p><a href=)
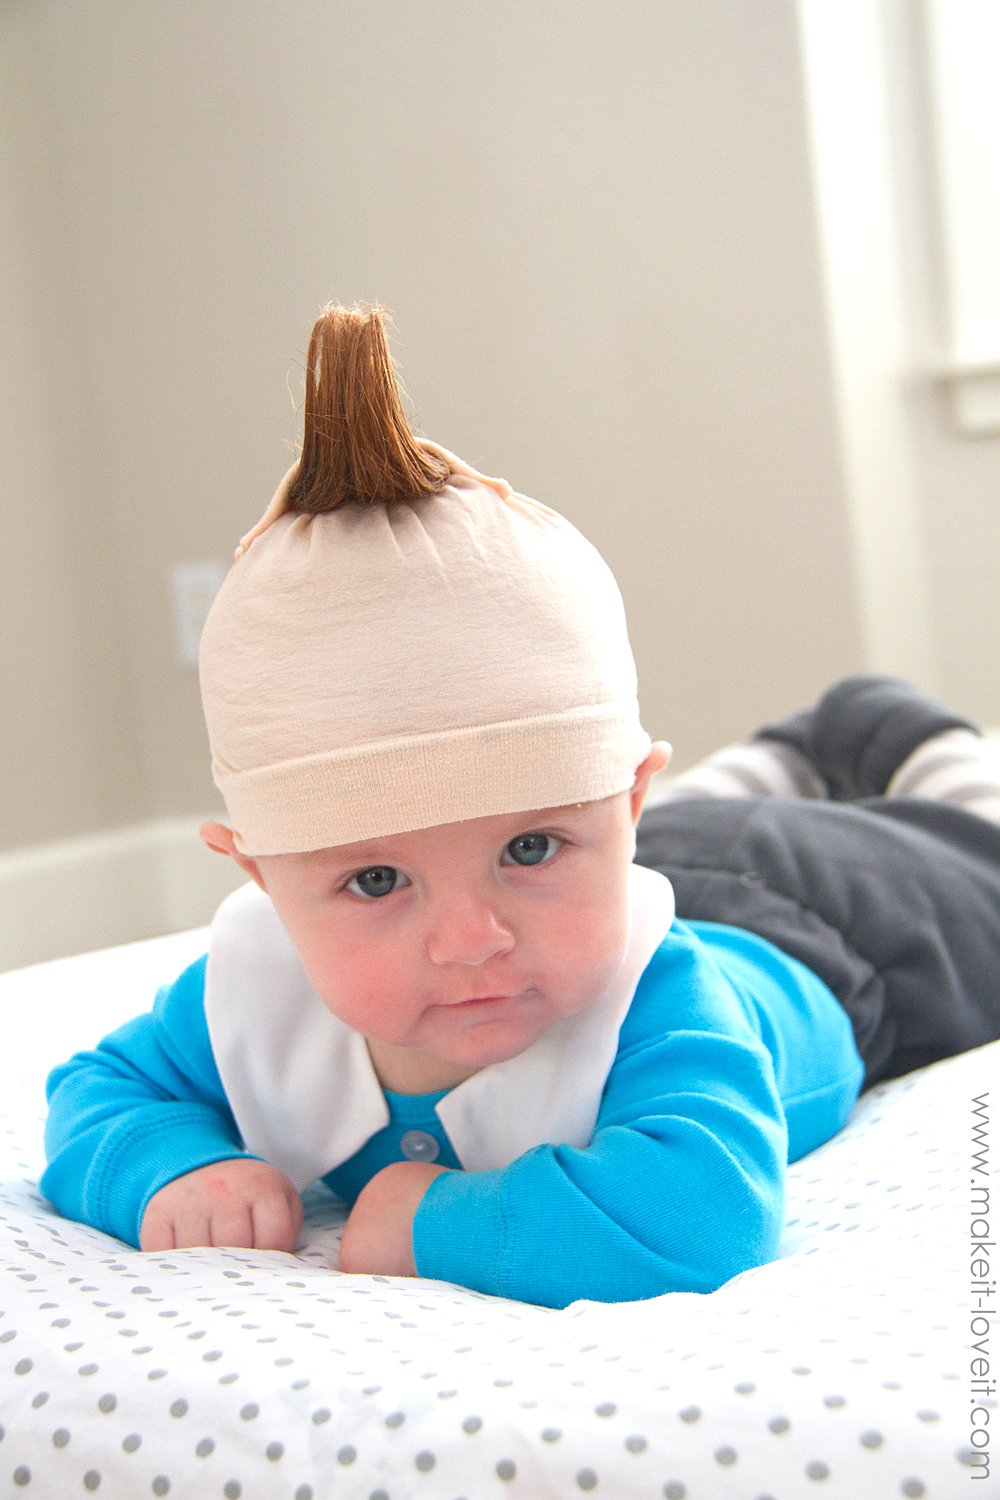
Hahaha, oh that hair. It’s awful, but so hilarious…….all at the same time. :) And just so you know, the hair is actually the ends of a wig that I cut off and gelled into one of those curved hair horns that the Lollipop Munchkins from the movie have. (So glad you have no opinion at this age, Ollie!)
And the Lollipop munchkins don’t actually wear this type of shoe in the movie, but some of the other munchkins do…..so I went for it. Because they’re more fun!
The cap is actually really stretchy and light (made from the top of some tights), so it doesn’t bother him one bit. (And look at this little guy, totally mastering holding up that heavy head. Remind me where my newborn went again?!!)
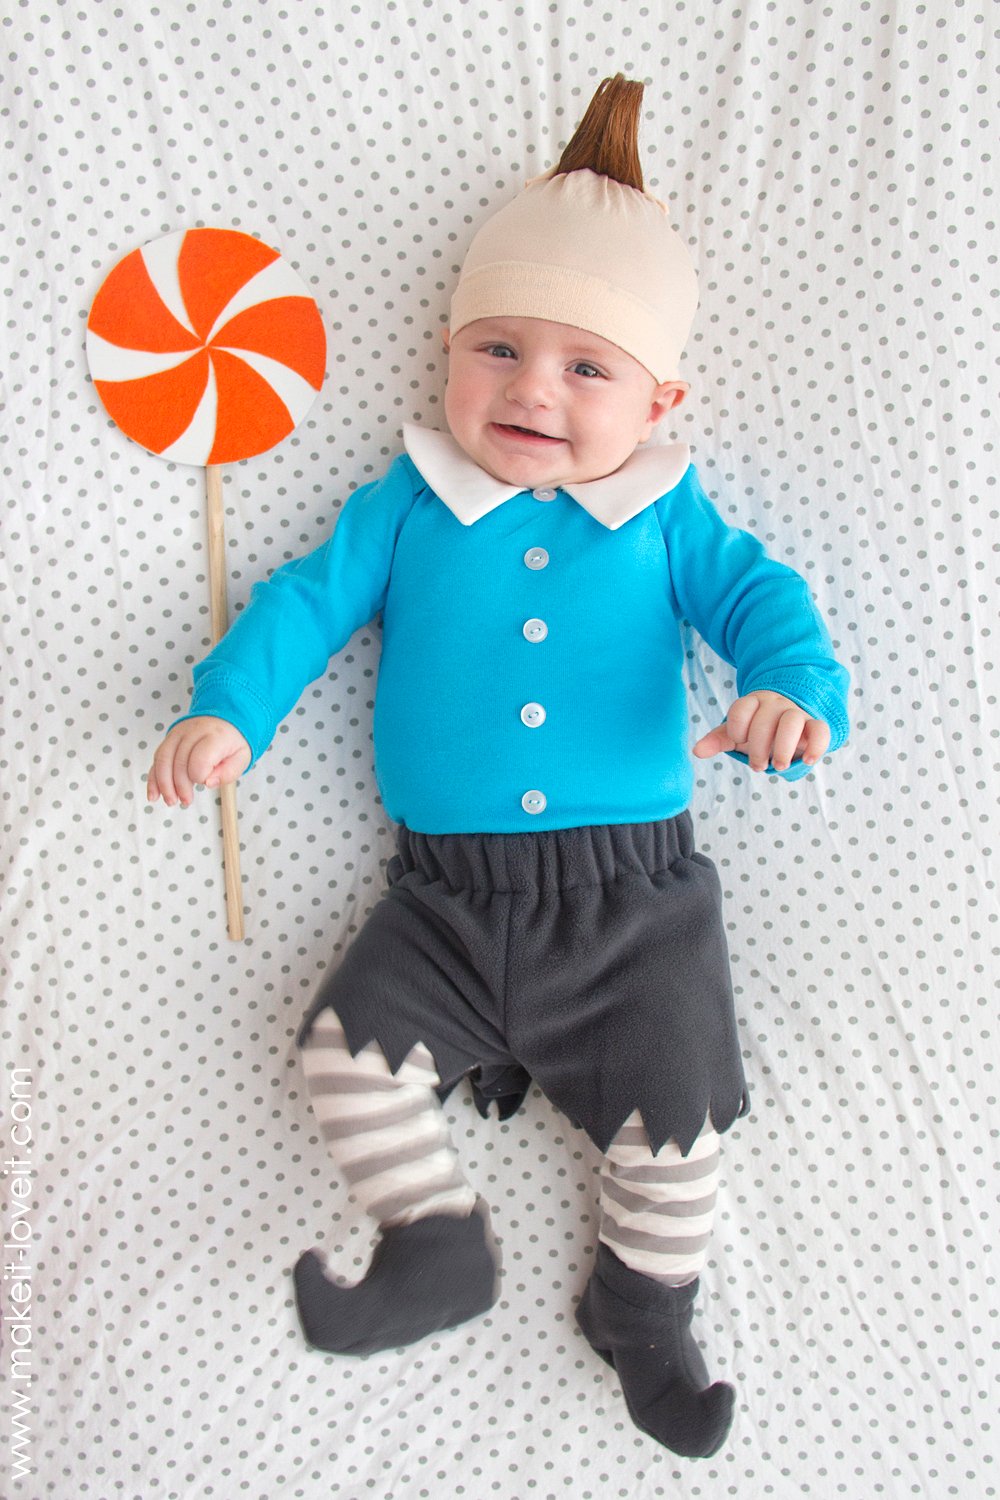
The top is actually a onesie. So, I made the little collar from some scrap white fabric and snapped it onto the onesie. You know, to try and look as much like the original munchkins as possible!
These little munchkin slippers are made from fleece and are very forgiving. And if the toe turns out wonky, meh, who cares! It’ll look like that’s how they’re supposed to be!
Our little Lollipop Munchkin surely completes the Wizard of Oz costumes that my kids were so excited to have me create. And ha, this little mister……..every little part of him just makes us giggle.
Now keep in mind, this costume doesn’t just have to be for a baby. It would be so easy to create in any size.
Want to put your own together?
Of course you do! :)
Supplies:
**Keep in mind, the directions below are for my 3 month baby but you could adjust these measurements and directions to fit any size.
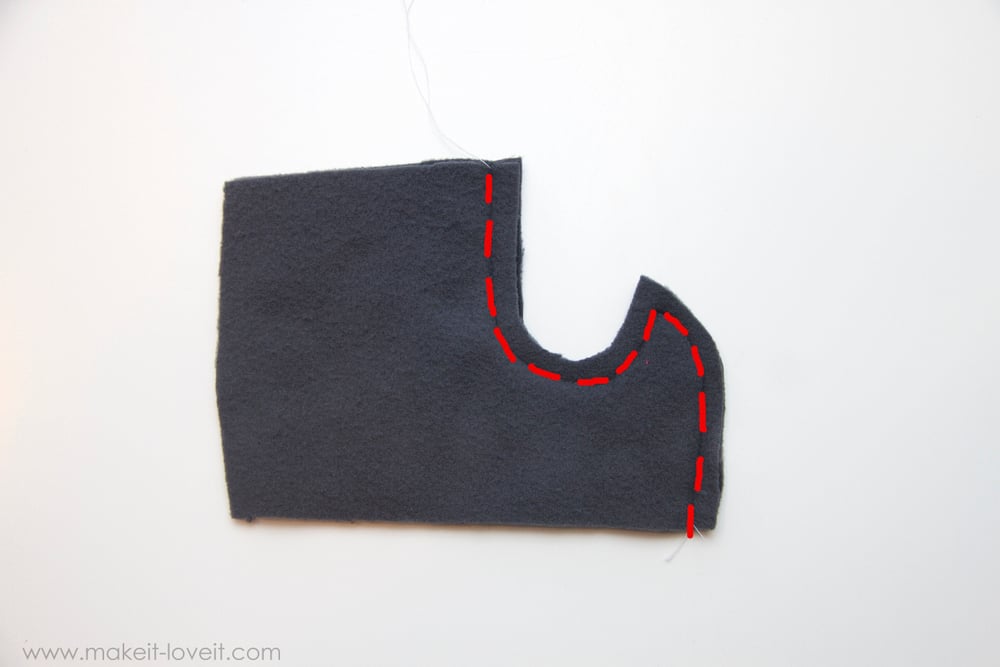
Let’s start with the slippers first. Print off the pattern piece above if you’re making a similar size, otherwise, use the pattern pieces as a guide to see the shape needed to create the slipper size that you need. (You may have to practice a few times with some scrap felt.) Cut 4 side pieces and 2 sole pieces. Make sure that the stretch of your fleece is going from left to right on the side pieces and up and down on the sole pieces (per the orientation of the pieces shown below).
Now, grab two of your slipper side pieces and sew them together along the scoop and right side of the slipper.
Then, grab the sole piece and put a pin at the center of each end.
Then open up the slipper piece you sewed together and line up the seam with one of the pins on the sole. Make sure “right” sides are facing each other.
Sew from where the pin was, down about 1/2 – 2/3 along this side of the slipper, using a 1/4 inch seam allowance. (Sew a couple stitches, re-adjust your fabric, sew a couple more, readjust, etc. Be patient and keep your edges even.)
Repeat along the other side of the slipper.
Get the sole out of the way and match up the ends of each of the side pieces and sew the two ends together, using a 1/4 inch seam allowance.
Now, locate the other pin that you originally placed at the other end of the sole and match it up with this new seam you just created on the slipper sides, making sure that “right” sides are facing each other. Pin in place.
Sew it closed, using a 1/4 inch seam allowance.
Turn the slipper right side out and fold the upper edge of the slipper down towards the inside about an inch. (You can fold it over more or less than this, depending on how tall you want the slipper to be.) Sew all the way around this cuff, about 3/4 of an inch from the edge…..but leave about an inch opening for your elastic.
Thread your elastic through this casing, using a safety pin to help you through.
Overlap the ends of the elastic and sew them shut (after you determine a snug length for the elastic). Sew the casing closed. To help the toe of the slipper stay full and pointy, I added a bit of batting to it…..and pushed it in as far as I could.
Now for the collar, I made it first out of a piece of felt, so that I could wrap around Oliver’s neck and decide if it was a good size, etc. (The outer circle was a medium bowl the inner circle was a smaller bowl….and then I cut open the front and made the points of the collar a little longer and pointier. In case that helps you keep your shape nice and even.) Then, I used my felt piece to cut out 2 piece from my white cotton fabric, but added 1/4 inch seam allowance around all the edges (including the inner circle’s edge).
Place the 2 collar pieces together, with right sides together, then sew all the way around, using a 1/4 inch seam allowance. But be sure to leave a 2-3 inch opening along the inner circle for turning right side out.
Trim off your corners, clip the inner curve, and cut notches into the outer curve. (More about clipping curves and corners.)
Turn the collar right side out through the opening, poke out the collar tips very gently, press flat. Also, clip the edges of the opening ever so slightly, fold towards the inside and iron flat as well. Then sew the opening closed, nice and close to the edge.
Now, place your collar around your onesie and center the points of the collar evenly in the front. Then, attach a sew-on snap to each collar and attach the corresponding snap piece to the onesie. (Add another one in the back if needed.) This will help keep your collar in place.
Sew-on snaps have little holes in the snap to fit your needle through. Just be sure you sew through each opening to make the snap secure.
Then hand-sew some buttons down the front of the shirt.
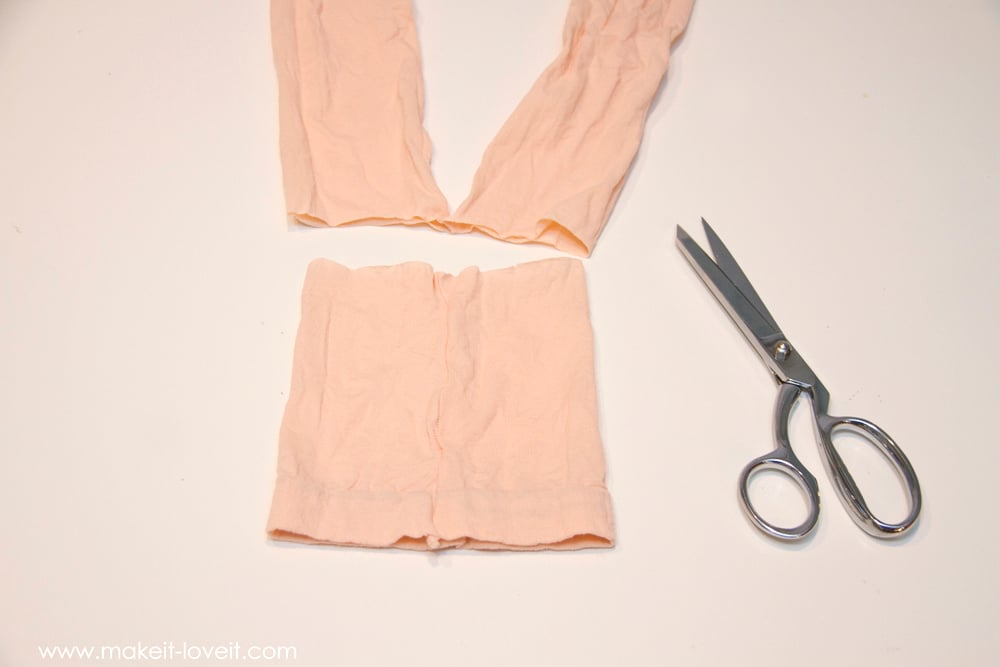
Now, onto the hat hair head piece.
Grab your tights and cut the legs off.
Turn it inside out and gather the top opening and pinch it together as tightly as you can.
Run a needle and thread through the top edges of the tights as best you can and then wrap the thread around it several times and knot if off at the end.
Then turn your new cap right side out. I found that the next step is easiest if you blow up and balloon to the same size as your subject’s head and then slide the cap on there. (And grab another person to help you hold it as you attach the hair.) Cut a section of hair from your wig, preferably one that already has a slight curl to it. Decide where you want it and place some glue under the section of hair.
Then place more glue on top and then add a section of the leftover tights over the end of the hair, to hide the ugly and messy ends. Add more glue under the front of the hair to keep it in place as best you can.
I used gel and hairspray to keep the curl in place better and all stuck together.
Now, the lollipop.
I just cut a circle out of my white foam and then cut orange pieces from felt to create the lollipop look and glued them in place.
Glue a dowel to the back of the lollipop. (You can create another circle of foam and glue it to the back of this so that your lollipop is 2 sided. I didn’t because my 3 month old can’t carry it anyway. So I just used it as a photo prop.)
For the striped leggings, I used the same tutorial as my Simple Leggings Tutorial.
For the shorts, I used the same tutorial as above, but made the legs a little wider than tighter leggings would be. Then, I just cut zig-zags along the bottom, instead of hemming.
And that’s it! A sweet little munchkin, all ready to help Dorothy find her way down the Yellow Brick Road!
Enjoy!
-Ashley

Hi, I’m Ashley—the DIY-enthusiast behind this crazy blog!