Home » DIY Tutorials » DIY Crafting » Crafting: Miscellaneous » Make your own BATH SALT SOAKS in a TEA BAG!
Make your own BATH SALT SOAKS in a TEA BAG!
October 6, 2014 - By Ashley Johnston 17 Comments
Cami from “Tidbits” is back today, sharing a fun and RELAXING tutorial, to make your own Bath Salt Soaks in a simple little Tea Bag. Gather some friends, a few supplies, and whip up several different bath aromas that are perfect for tossing in a tub and relaxing. Such a fun gift idea too! :)
-Ashley
. . . . .
Hey everyone, it’s Cami from Tidbits!
That time of year is creeping up on us again. You know what I am talking about, don’t you? That time of many celebrations and get-togethers and parties. The season for many reasons to celebrate with family and friends and neighbors. Of course, it is also the time when we all try really super hard to not over stress ourselves about all these gatherings and turn into “that” crazy person. It’s the time when we all just secretly yearn to create enjoyable moments and memories for everyone, ourselves included.
For me, this takes planning, preparation, pinterest, and perhaps . . . . a little prayer. Just recently, I had the opportunity to plan a “get-together” for the women in our church. And because I am a crafty woman (and tend to go overboard), I figured all the women would love to make something at the activity to take home with them. And wouldn’t it be great if that “something” was meant to help them relax before the hustle of the busiest season set upon them – you know – so they all don’t turn into crazy people (that’s better left to me).
Let me tell you – THIS PARTY FAVOR WAS A HIT – in so many ways! I just couldn’t wait to share it with you! Whatever your next celebration may be, set up a table for a “spa bar” and have your guests make their own bath salts in a tea bag to take home with them to create their own spa in the comforts of their own bathroom, for whenever the need arises.
The purpose behind the gift is really two fold.
#1 — You create a beautiful, memorable experience at the gathering. They don’t even have to be crafty minded, and they still get to make their own party favor personalized to their needs (more on that below).
and #2 — You provide a sensory experience for them, to help them relax and internalize the event even more.
It’s a WIN/WIN!! You’ll be the talk of the town!
I might add, you’ll also enjoy the leftovers of the “Spa Bar”. You are likely to need a little recoup time after planning the event, no doubt. ;)
Okay, so I am going to walk you through the things you might need to create a simple “Spa Bar” in order for your guests to each go home with a simple Bath Salt Soak in a Tea Bag. The materials are inexpensive, really simple, and they go a long way!
Following the post, I will also provide you with the printables to place around your spa bar.
These are simple tags, meant to guide your guests through the steps to making their bath salts, so you don’t have to ;)
Are you ready?
Let’s talk Tea Bag first.
Tea Bags are great for bath salts because whatever you put in it to diffuse into your bath water, will stay in the bag. Meaning, you get the lovely smell and benefits of lavender and other herbs, but not the mess afterwards in the tub. Lets face it, an exhausted person doesn’t need another mess to clean.
I ordered 100 Tea Bags for a great price
here. Very affordable for a big party.
If you wanted to go for a more elegant look, you could go with a jar for each guest. You just add the bath salt by the scoopfuls to your water. I enjoy doing that from time to time as well.
Now lets talk options.
I gave my guests 3 of them.
The first was Peppermint Bath Salts. Peppermint oils are good for relieving pain/tension/headaches and for healing soreness etc.
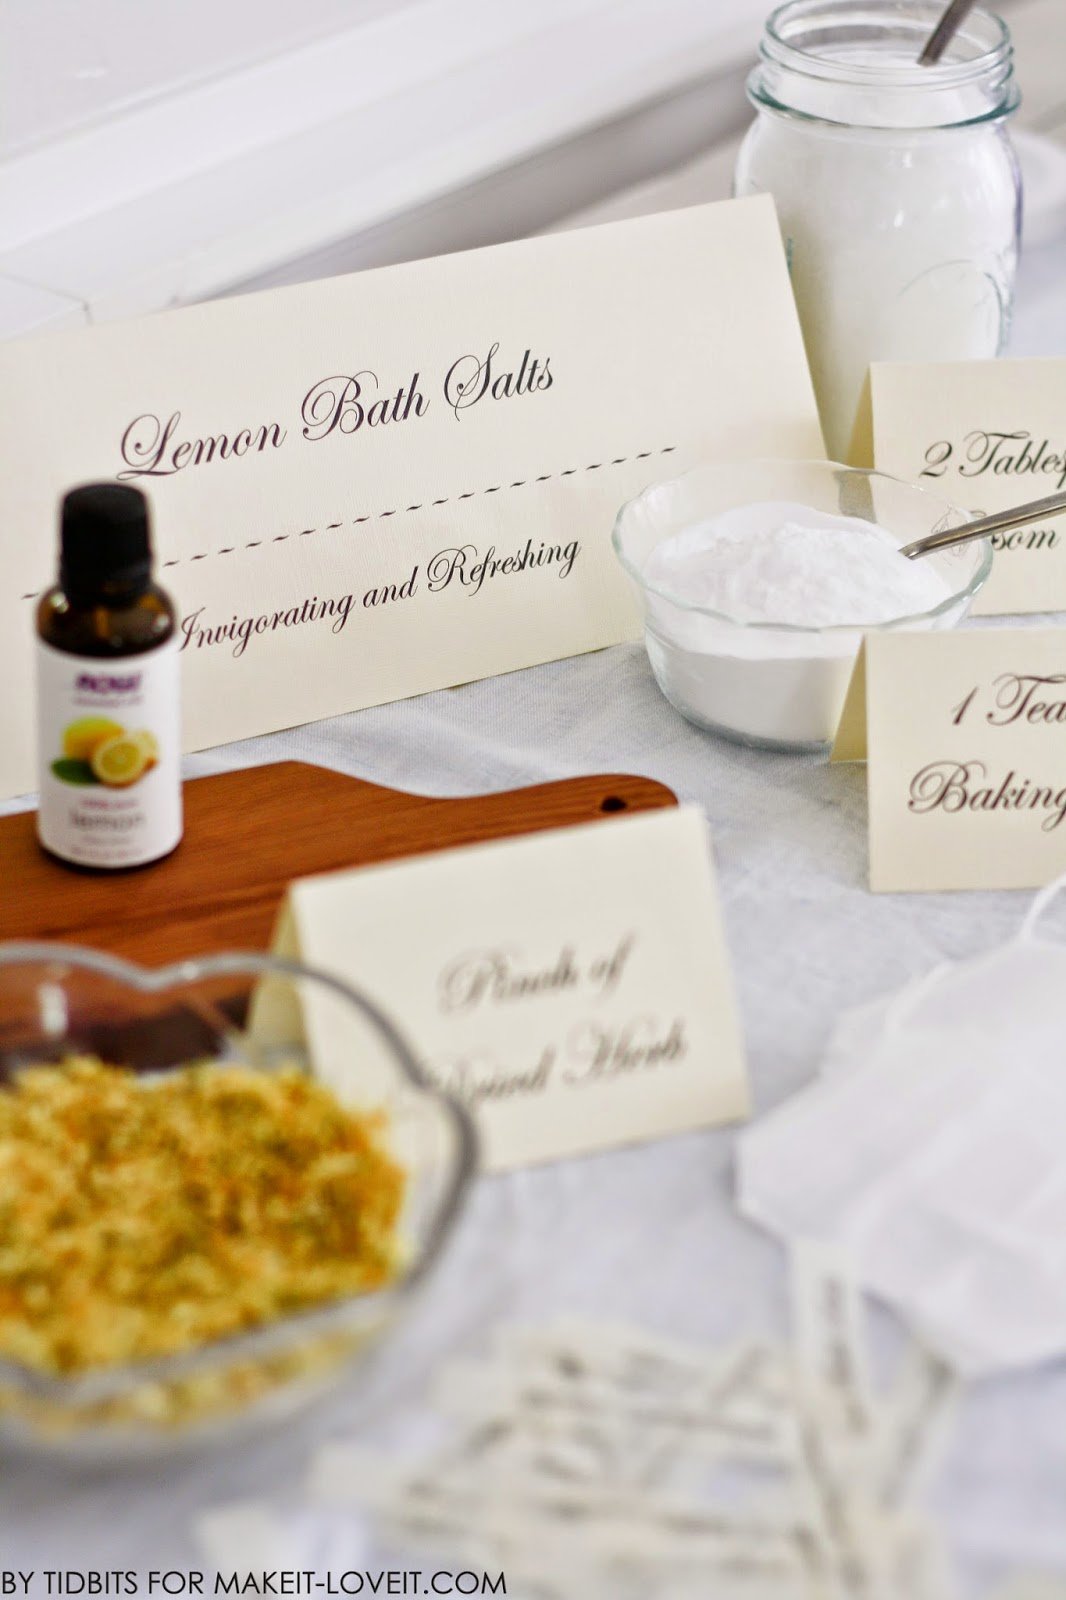
Next I created Lemon Bath Salts. Lemon, as you may know, is great for refreshing and invigorating. I swear my house feels cleaner just because I use a citrus spray!
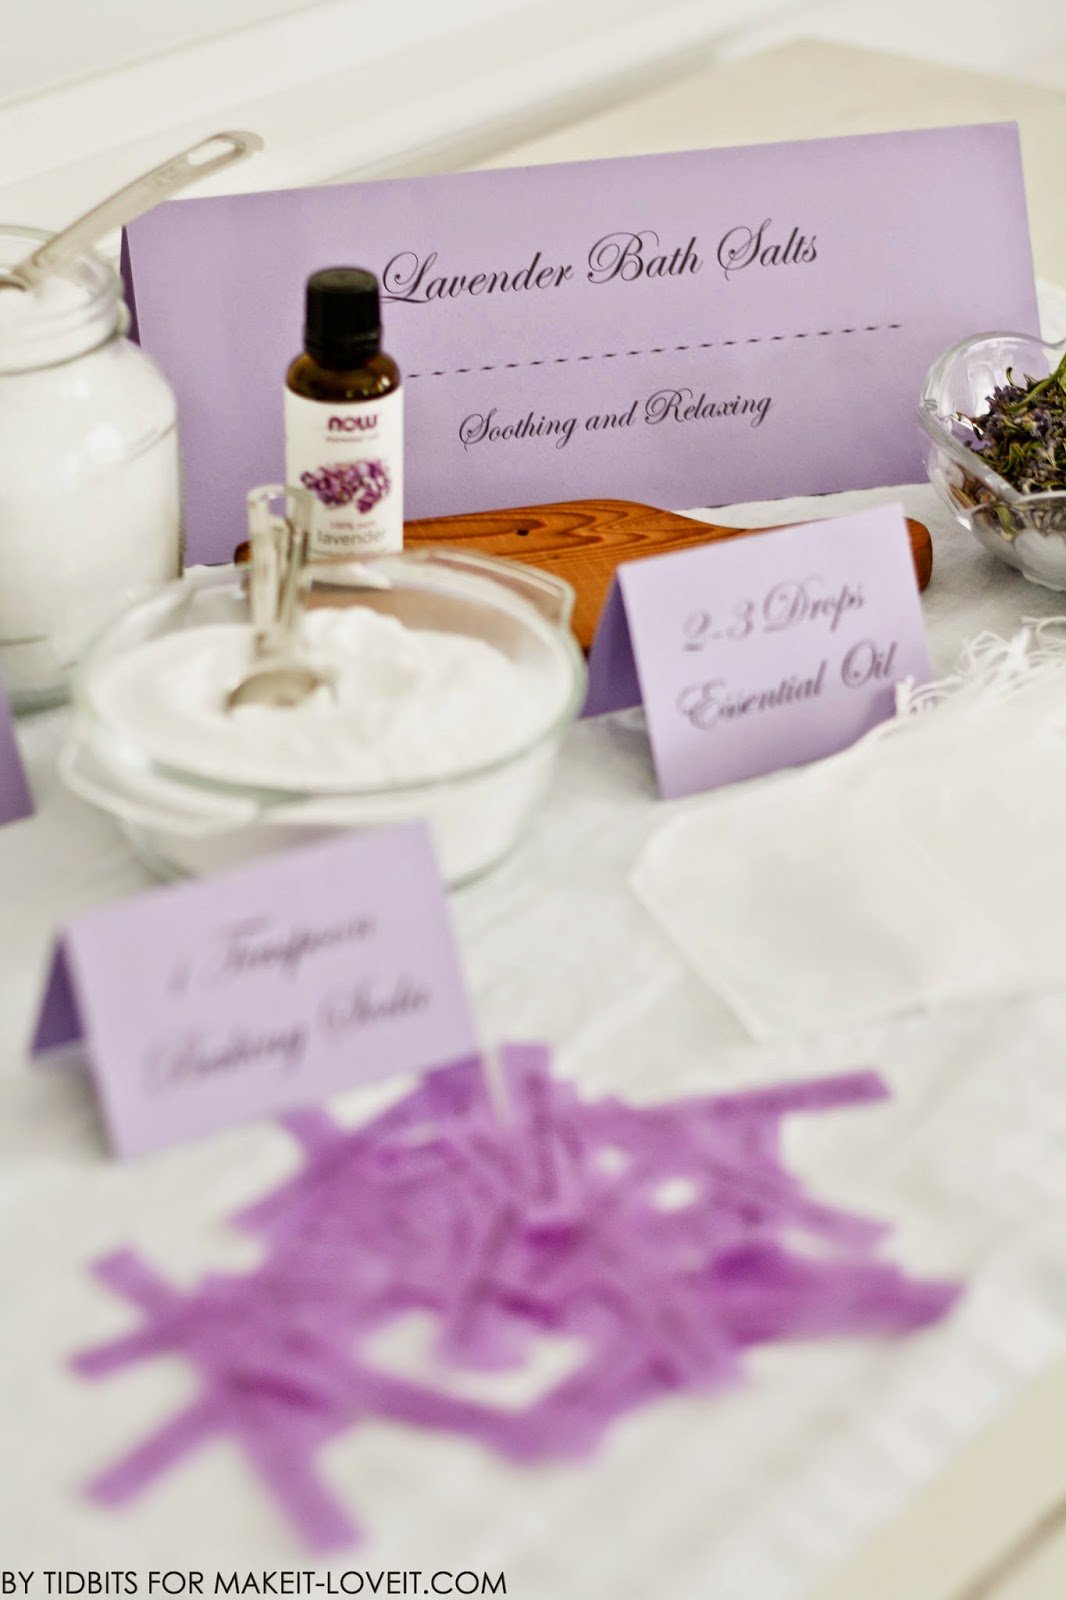
Lastly, I made some Lavender Bath Salts. These are great for what we all need the most – soothing and relaxing.
Now for the ingredients and measurements. I will explain what each guest will need to fill one tea bag. It will be up to you to fill the pretty jars with the needed supplies for each station. ;)
And the prettier the jar, the better.
Begin by filling the Tea Bag with 2 Tablespoons of Epsom Salt.
Then 1 Teaspoon of Baking Soda.
Add a Pinch of Dried Herb of choice (I will discuss those next).
Finish with 2-3 drops of Essential oil of choice.
Find the appropriate label for your Tea Bag.
Create a hole in the label, with a hole puncher of choice.
Tie up the tea bag tightly and then secure the label onto the strings.
A bit about the herbs.
The essential oils are what really adds most of the smell to the bath salts. But I think the actual dried herbs are such a special touch. Here is what I did for each one.
I didn’t have any actual peppermint leaves, so I went to the grocery store and bought dried mint from the baking aisle. It smells almost exactly like my peppermint essential oil. I figured it would work!
For the Lemon Salts, I used 4 lemons and 2 limes (for variety) and grated the peels off with a zest peeler. Smelled sooo good! Then I laid the zest flat on a cookie sheet for one day and they were dry by the next day. I thought this was so pretty!
For the lavender, I’ve had my harvested dried lavender sitting in my sun room waiting for the perfect occasion all summer. I removed the buds and bagged them up. I believe there are also places you can buy lavender buds online.
And that completes the bath salts spa bar!
Do you think you will give it a try? Wouldn’t the adults love this after the Thanksgiving gathering, or to save after the crazy of Christmas settles down?
Or maybe organize a girl party just to make these and chat and eat good food. I’m sure you can find a reason!
In case you need them, here are the printables I used. Print on standard 8.5 x 11 paper.
For best results, print on nice, high quality, textured, cardstock paper.
If you are interested, the small labels for the bags were printed on slightly sheer scrapbooking paper, found at Hobby Lobby.
All print outs are for personal use only.
Enjoy!
-Cami