>>>>>> Happy October 1st!!!! <<<<<<
I’m kinda nerdy and still get really excited for Halloween. And if you know me very well……you’d think it would be because of the candy. Yes, yes, I do love my sugar……but even more than that, I love, you guessed it, COSTUMES!! Just last week, I asked Steve to help me think of simple costume ideas that I could share here. So I started writing down anything that came to mind. The list began to grow and grow and I’ll admit, Steve laughed at me at least 100 times as I shrieked at some of the ideas we were coming up with. We’d think of a basic concept and then my mouth couldn’t catch up with my brain, as I tried to explain what I was envisioning in my head.
But the whole time, I was trying to keep things really simple. So anything we thought of, had to be simplified to something that could be made within an hour or two. Because I know not everyone has the time/desire/skill/tools to make elaborate costumes. (However, the Halloween Costumes that I have made each year are really fun and so many of you have duplicated them and improved upon them. So cool. High fives!)
And let me tell you what……I have a list long enough to share something new, every single day of October. I’m not sure I have enough hours in the day to make/photograph/explain all of them, but if I can swing it, I’ll sure try.
Now, these ideas that I want to share all month long, aren’t my kids’ actual Halloween Costumes. Their actual costumes are something that I’d like to start sharing in another week or so (and will be a little more elaborate)……but these simple ideas will be just as fun! And can be made from tiny babies all the way up to adults. I am going to include SIZE VARIATION notes with each simple costume post, to give ideas of how to make the costume in a different size than the particular size I share here. Does that help? (And, I may have some local friends who might want to use some of these costumes……but if any of you think you could use any of these extra costumes that I make this month, let me know!)
Anyway, I’m hoping these simple ideas will get more of you cutting and sewing and gluing and creating for Halloween this year. Because, no joke, there’s something really cool about making costumes. It’s seriously pretty fun to see your child, a friend, or yourself walking around in something you made. And since it’s a costume, who cares if you made a mistake. Or have crooked seams. And the more obnoxious you make it, the better, right? :)
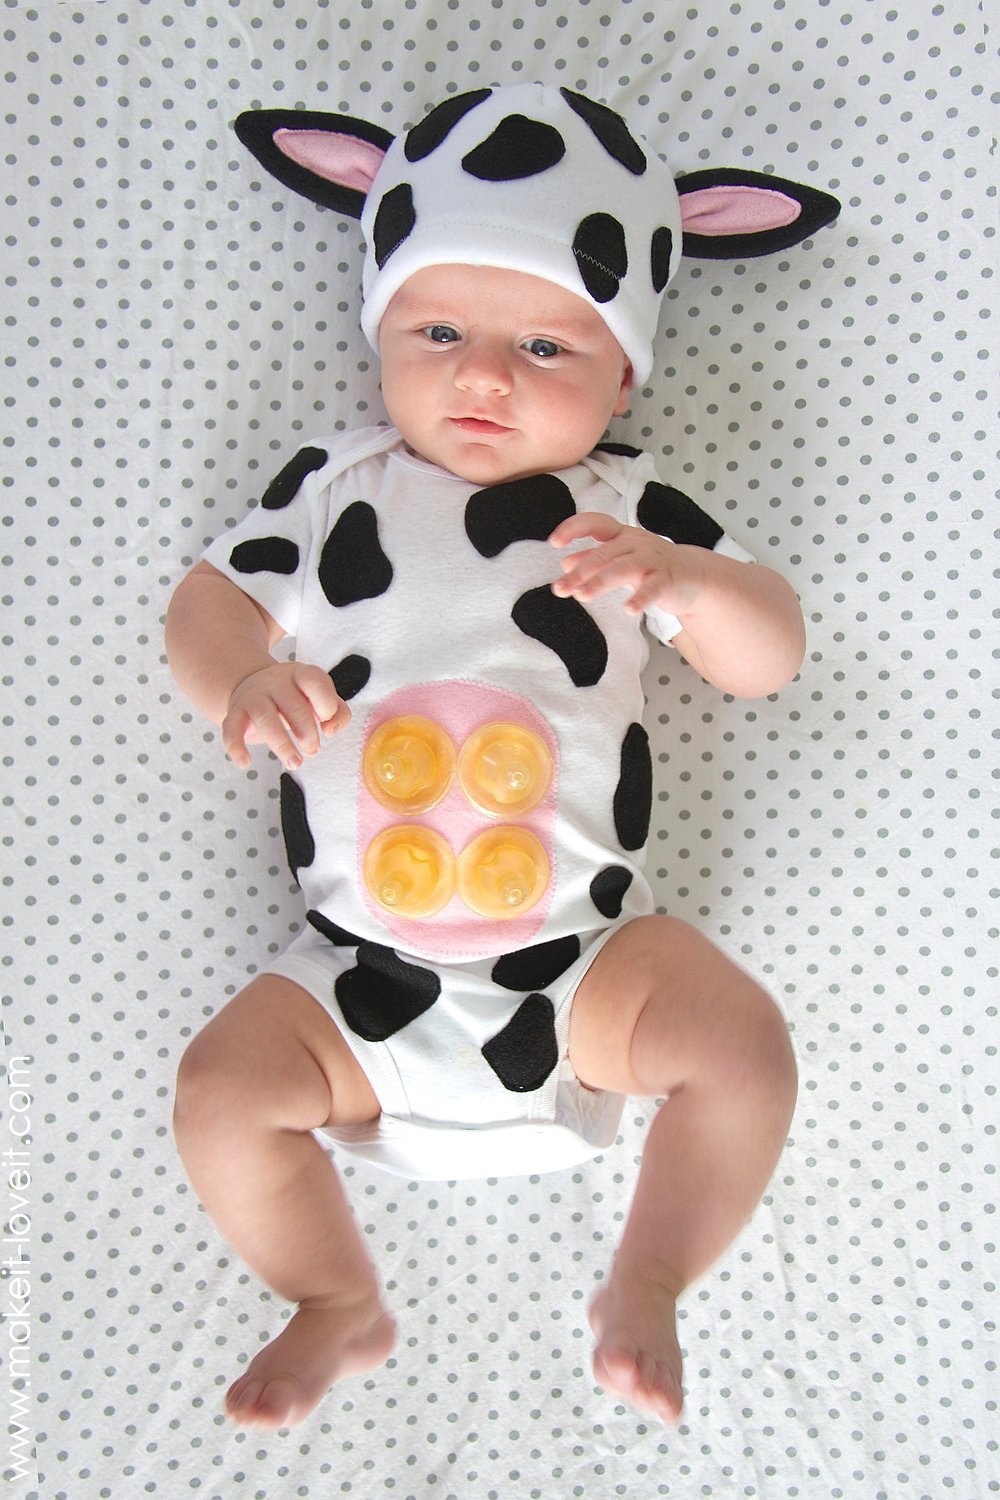
Anyway, for the 1st Simple Costume Idea of the month……..Oliver helped me out and let me put him in this little Baby Cow Costume. Complete with an UDDER!
And maybe you already guessed it……but that udder is actually baby bottle nipples, attached right to the costume. I’m not going to lie, I couldn’t stop laughing while attaching these little “teats”. And yes, it’s probably because I never matured past 5th grade……but hahahaha, that udder seriously cracks me up. (Oliver doesn’t look amused but that’s because he’s, well, 2 1/2 months old. Ha.)
And you can’t be a cow without cow ears. Easy fix……..attach them to a stretchy warm hat. But wait, don’t let this little fleece hat scare you because it’s actually VERY simple to make. (And I’ve included a pattern piece for you down below.)
Cow ears, cow spots, cow udder…..check, check, and check. This little cow is ready to graze in a grassy field.
And if you’re worried about this costume being too cold…..use a long-sleeved onesie instead and add some white leggings/sweat pants. (However, I figured little babies won’t be out trick-or-treating in the cold uncovered…..but this would be fun for an indoor Halloween party that you’re bringing your baby to.)
A simple and kinda humorous costume for baby. Nothing cuter!
Thanks for helping me out, Oliver!
Okay, time to get crackin’!
First of all, in case you’d like to make this in a different size…
Size Variations:
Okay, now here’s what you’ll need…
Supplies:
***Remember, the pattern pieces above and the instructions below were created for a size 3-6 month baby. If you are making this costume for a different size, slight adjustments will be necessary.
First, cut 2 hat pieces (a front and a back) from your fleece MAKING SURE that the stretch of your fabric is going left to right (to stretch around the head) not up and down.
Then cut random black shapes out of your black felt and arrange them on “right” side of your hat pieces. Then machine sew them in place with black thread. Be sure that your spots aren’t attached any closer than 1/2 inch from the sides and 3/4 inch from the bottom. (Or, you could hot glue them down or use epoxy glue.)
Next, cut out 4 ear shapes from black fleece….with the stretch of the fabric from left to right.
Place two ear pieces together (with right sides together) and sew around the two sides, using a 1/4 inch seam allowance. Then turn right side out (poking out the point with the tip of your scissors) and press flat with your fingers.
Then, cut a piece of pink felt that is slightly smaller than each ear and sew in place, nice and close to the edge of the pink felt.
Now, to give the ears some shape, fold the base of each ear into a sort of accordion fold and sew in place with a single stitch. (Using a 1/4 inch seam allowance.)
Now, decide which hat piece you want as the front of the hat and then position the ears on the hat, with the pink sides of the ears facing down. Line up the raw edges of the ears with the outer edge of the hat piece. Sew each ear in place with a single stitch.
Flip your ears out and be sure they were attached correctly.
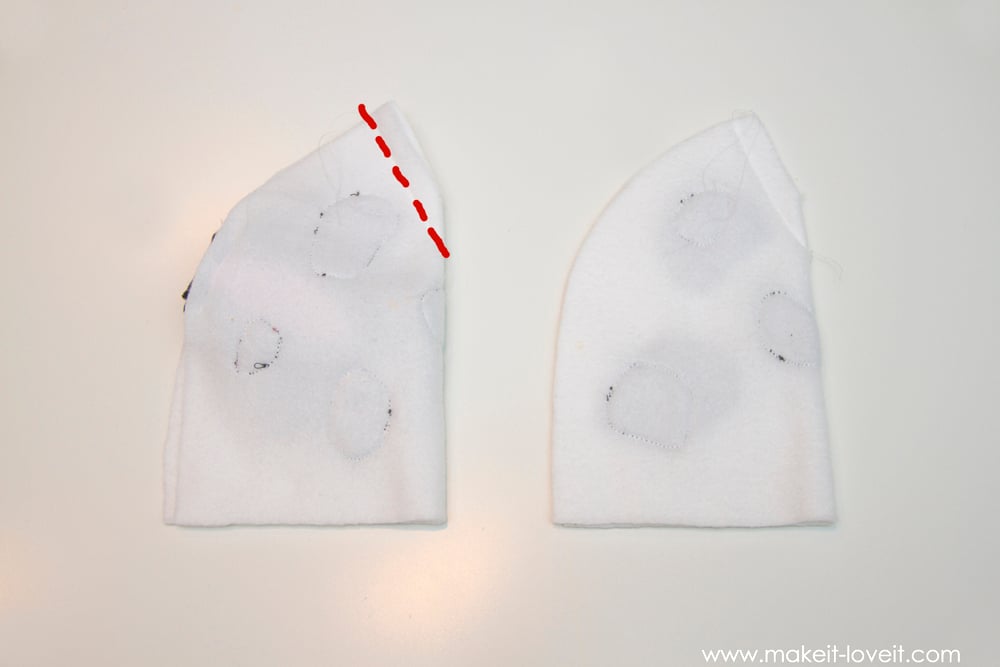
Now, fold each of your hat pieces in half lengthwise (with right sides together), and line up the edges of the “V” cutout at the top of the hat piece. Sew the edges of the “V” together, using a 1/2 inch seam allowance. Repeat with the other hat piece.
Be sure that you stay 1/2 inch away from the edge of the fabric and continue sewing down in a straight line, until you run off the fabric.
Then place the hat front and back pieces together, with right sides together. Sew along the curved edge, using a 1/2 inch seam allowance.
Trim off the excess fabric (about 1/4 inch), so that it’s not too bulky after turning right side out.
Turn under the bottom edge of the hat 3/4 of an inch and sew in place with a ZIG-ZAG stitch (so that it will still stretch).
Now, cut out your Udder Base from pink felt and more black felt spots and attach them to the onesie. (Again, you can sew these down or use hot glue/epoxy glue.)
I sewed my udder base down using a zig-zag stitch and then attached each of the spots with a straight stitch.
Now, I first thought I would attach the bottle nipples by hand-sewing them with a few stitches at the top and bottom of each nipple. However, I didn’t like that I could see the stitches. (But you can still do it this way if you prefer….they were nice and secure using this method.)
I then decided to use an epoxy glue to attach them. I just added a ring of glue to the outer base of the nipple…
…and then pressed them down to the center of the pink Udder Base.
Let them dry completely before wearing. (I used the glue shown in the pictures first…….but it took so long to dry that I pulled them off, wiped off the wet glue, and then used the clear Amazing Goop brand of epoxy glue. It dried much faster!)
And that’s it! A cute little spotted cow….ready to be worn!
Let me know how it turns out for you!
-Ashley
. . . . .
Check out these other baby costume ideas:
Baby Mermaid Costume
Princess Leia Baby Wig
Baby Owl Costume
Baby Ice Cream Cone Costume
Baby Weeping Angel Costume
Good & Plenty Baby Costume
Baby Crayon Costume
Bumble Bee Costume For Baby
Baby Football Costume
Onesie Costume
. . . . .

Hi, I’m Ashley—the DIY-enthusiast behind this crazy blog!