Father’s Day is only 4 days away……ACK, I know! SO SOON. I had the best of intentions to have the kids help me make Steve several gifts from the Father’s Day Gift Ideas post a few weeks ago. Buuuuut, well, I had about 100 other things come up. But then Home Depot asked me to participate in their Father’s Day Program and well, that got me thinking……..Steve is really into word-working lately and loves his tools. What he’d probably really love this year more than anything else, is some new kind of drill attachment, a better funtioning tool box, some fancy blade for his monster saws, or I don’t know……some other type of man toy from our closest home improvement store, Home Depot.
So, yep, a gift card it is. That way, he can pick whatever cool new gadget he wants. And even though Steve would probably be really happy with a lonely little gift card, I had to pair it up with something. (Maybe that’s because I don’t just want a measly little gift card, no matter the amount on the card. I love when there’s a little thought added to gifts.) So — I transformed a few pieces of scrap fence wood (no, we’re not building a fence….it’s just inexpensive wood that I had on hand from another project), into a little picture frame. Showcasing his 3 most favorite little people in this world.
***And just remember, this could be a frame for anything. Not just Father’s Day. Just imagine how cute this would be hanging on your wall, sitting on a dresser, or up on a mantel…..with any ol’ pictures in there.
However, I had the hardest time choosing between the “sweet and cute little faces” to attach to the frame (option 1) or the “silly and crazy” ones (option 2).
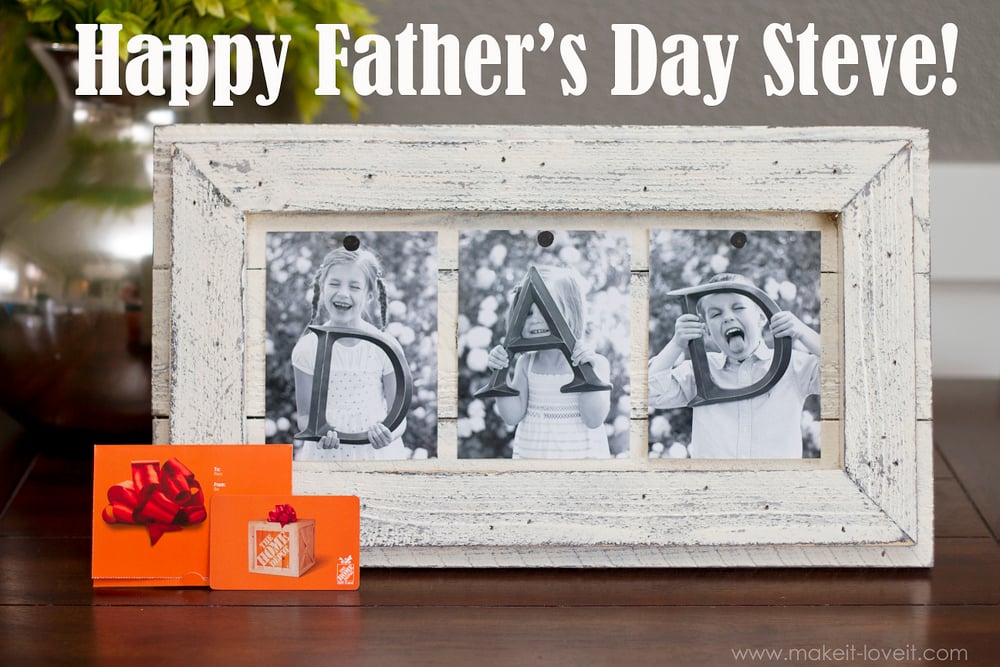
So, I’m giving him both. And Steve can swap out whatever little crazy faces he’s in the mood for……and keep his frame right on his desk at work. (Those photos are 4×6 inches in size, trimmed down a bit on the bottom.)
If you look closely, there are just 3 horizontal pieces of wood with some strips of wood on top. A cute 10 x 18 inch frame, made from two raggedy pieces of fencing wood. So quick to make and VERY inexpensive……2 of my favorite things! :)
Oh, and each picture is attached by some fat roofing-type nails (that I painted black on the heads).
And yeah, because I couldn’t decide on which photo group, I just put both under each nail. That way, Steve can decide.
Oh, and the nails aren’t hammered in all the way…..and pull in and out like a thumb tack (but stay really snug, so don’t worry!)
Yes, I’m sure Steve will treasure this frame.
But I know he’ll REALLY love what’s on that gift card. A perfect gift for Father’s Day! :)
Oh wait, did you forget one of you gets a gift card to spend too?
Yep, you can use it for a belated Father’s Day gift (because this won’t quite arrive in time for Sunday)…..or hey, use it for an upcoming birthday/anniversary/etc. (Or use it yourself……haha! I buy just as much at our Home Depot down the road as Steve does.)
But if you don’t win — head to your local Home Depot (or Home Depot online for eGift Cards) and give dad what he really wants this year!
***GIVEAWAY entry down below, after the picture frame tutorial.***
EDITED: WINNER CHOSEN!!!
Okay, let’s get started.
Supplies:
Now, your supplies may differ a little, depending on the type of wood you buy. But I bought 2 pieces of fencing wood (which is pretty rough and jagged at some points, but adds to the look of this distressed frame) that were 6 feet long, 3 3/8 inch wide and about 1/2 inch thick. I cut them down to the dimensions below.
The three pieces on the left are for the base of the frame, the 2 pieces on the right are for the more narrow framing on the top of the frame. But both of those will be cut in half lengthwise, creating 4 total pieces. But in case your wood is a little different width and such……this is how I figured out those measurements. I first decided how wide I wanted to make my frame and I decided on 18 inches (so that it would fit four 4×6 photos inside the added framing on top). Then, I had to decide how many pieces I needed and if it would stack tall enough to fit the picture size I wanted. When I stacked those 3 pieces together, the height was about 10.25 inches and I knew that would work, if I cut down my 4×6 pictures just a tad. So I went with it. And then I decided that I would stack the more narrow frame on top, about 1/2 inch from the edges. So I cut a piece of wood that was 1 inch shorter than the length of the frame and another piece that was 1 inch shorter than the height of the frame…….which is where I got my 17 inch piece and my 9.25 inch piece. Make sense?
Okay, so with the 2 shorter pieces of wood (shown on the right in the photo above), we cut right in half lengthwise.
Then, we cut each end off those 4 pieces, at a 45 degree angle (making sure you cut the 45 degree in the correct position so the pieces will fit together as a frame—see below).
Here are all 4 pieces, with their ends cut off at a 45 degree angle.
See how nicely they fit together?
Now, line up your 3 base pieces in front of you (I kept an ever so slight crack between the 3 pieces…..just for effect). Then, center the top frame pieces on top of that. Add some wood glue to the back of the frame pieces and then place them right back where you had them. Once all is glued, nail each piece in place. (I used a nail gun, so all my nails were buried. If you’re using a hammer and nails, just buy a small nail head and nail them right in. This is more of a distressed look, so if your nails show a bit, don’t worry….it’ll still look great!) Oh, and you can add more nail holes and/or dent up the wood a bit more, if desired.
Now, you can either add a picture hanger to the back to be hung on the wall……or create 2 little legs for your frame to stand with on a desk/shelf/table. Cut 2 pieces from your leftover wood that are 3.25 inches long. Then, cut one end off at a 20 degree angle. (Or a 70 degree angle……however you look at it!)
Once you place the long edge of the wood on the table, you’ll see the angle that you cut gives the frame the perfect angle to rest against.
Then place some glue along the angle of the 2 wood legs and place along the back (and bottom edge) of the frame. Positioning can be a little tricky though, so I placed the frame halfway off the edge of a table facing up, so that I cut see where I was placing each leg. I placed it directly below the thickest part of the frame, so I could nail through that frame that’s set on top of the base……so that the nail holes would kind of blend in with the others. I added my first nail hole where the arrow is above and then several more behind the first, securing the rest of the leg in place.
Then, I added a bit more glue to the sides of each leg, for added stability, and then let the whole thing dry completely.
Okay, next…..painting. How your frame looks is completely up to you. You could stain, paint, or even sand it a bit and leave it alone. However, I decided to go with a more shabby rustic look. And I wanted a lighter frame, so that my black/white photos would show up a little better. But before adding the white paint, I mixed some brown/black acrylic paint…
…and then painted it onto all of the edges and corners of the frame. I didn’t cover it completely because I didn’t want it too dark but mostly the areas I knew that I would be sanding later on to reveal the dark edges.
Once, that was dry, I painted with a creamy white paint. (I have some from our baseboards we’re painting.) However, you could use more acrylic paint, some spray paint, or whatever you have on hand. :)
Once that’s dry, grab some sandpaper and start roughing it up a bit, letting some of that dark paint come through. You can now seal with some clear glaze (you can purchase it in a spray can, which is super easy to apply) or you can just leave it plain…which is what I did.
Now, decide on some photos and print them out. (If you need to buy letters, you only need one “D” and one “A”, since the letters never appear in a photo at the same time. Or, you could cut letters out of thick poster board. Or cardboard. Or whatever you have on hand!)
Oh, and 4×6 inch photos are a little too tall for this frame so I had to decide early on if I wanted to add one more piece of wood to the base and make it 4 pieces tall……but decided that would swallow up the pictures a bit. So, I decided I would print pictures that had some empty room at the bottom that could be cut off about 3/4 of an inch.
Then, I used short and squatty roofing nails (with a nice big head) and nailed each picture in. However, I only nailed them in slightly so that I could pull them out to swap pictures. And since the nails have such a big head, they pull in and out like a thumb tack.
Once I was finishing hammering the nails and positioning them just how I wanted them, I pulled them out and painted the nail head black.
And that’s it!!!
This would be darling in any room. Or on any shelf. Are the ideas brewing in your head?
Have fun with it!
Okay, ready for the $100 giveaway?? Yeah, me too. This is the fun part! :)
EDITED: WINNER CHOSEN!!!!
Good luck!
-Ashley
. . . . .
Need MORE Father’s Day inspiration??
Check out these 40 DIY Father’s Day Gift Ideas…
Or how about these 25 Handmade Father’s Day Gift Ideas…

Hi, I’m Ashley—the DIY-enthusiast behind this crazy blog!