Hi, it’s Cami from Tidbits here again today!
And I have a project that would be great for any type of collectors cards! Baseball cards, Pokemon, business cards, even family photos . . . . you name it! By using faux leather or vinyl, this mini book is durable enough for any little hands. Or you could even make it more manly for such a cute Father’s Day gift. (Which is only 6 days away!)
And guess what? This is the perfect nap time (or after lunch/after work/quick evening) project for you. Yep, a nice quick one!
Because sometimes you just need to feel like you accomplished something from start to finish, all in one sitting.
Because sometimes the only time you have to do something for yourself is while that baby is napping or the toddler is glued in front of the T.V.
Because sometimes it is really nice to have something tangible to show for a days work.
Because sometimes it’s not enough just to keep your kids from being found naked, starving and in a gutter somewhere.
Because sometimes you really need something to distract you from a sink full of dirty dishes and week old clean pile of laundry.
But most importantly, because sometimes your 5 year old has become completely obsessed with collecting miniature My Little Ponies (the Collectors Addition), equipped with the cutest little “collectors cards” and is afraid that the younger 3 year old little sister is going to destroy the cards if she doesn’t have somewhere special to put them. Sometimes that happens.
And because sometimes you are the coolest mom ever, you take that ever-so-sacred nap time and make something that will knock her socks off — which will also result in the biggest hug and kiss a 5 year old has ever given you. So – put the baby in the crib, and turn on some Daniel Tiger, because I am going to show you how to make the cutest little Card Collectors (or photo/business cards) Mini Book. It is so easy and quick to make up, and the possibilities are endless!! Keep reading, and I will show you 3 different ways to make a closure. Because sometimes . . . . . you need options.
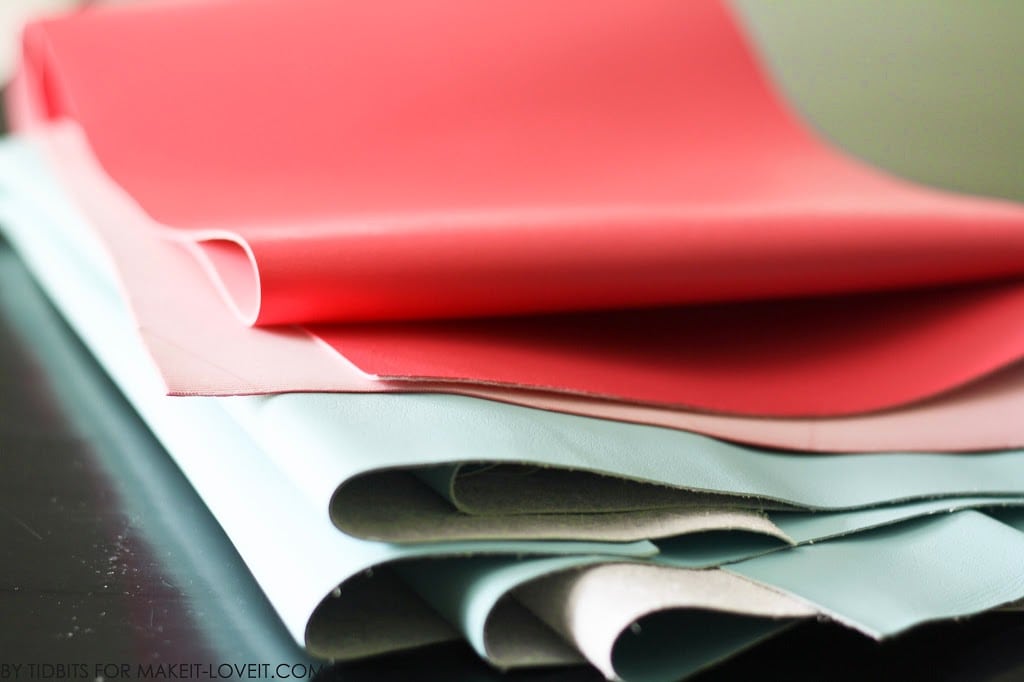
All 3 book types begin the same. (I will specify the differences for each closure type down below.) Materials: You will need some vinyl or faux leather. The blue I had on hand seemed to be more like a faux leather because of the suede-like backing. The pink (that I found at Joann’s) was definitely vinyl. I used both as a cover for my books, and they worked great. You could also take a trip to the thrift store and find an old leather purse to cut up because you don’t really need much. Just two 5 x 7 inch rectangles, plus a little extra for embellishments.
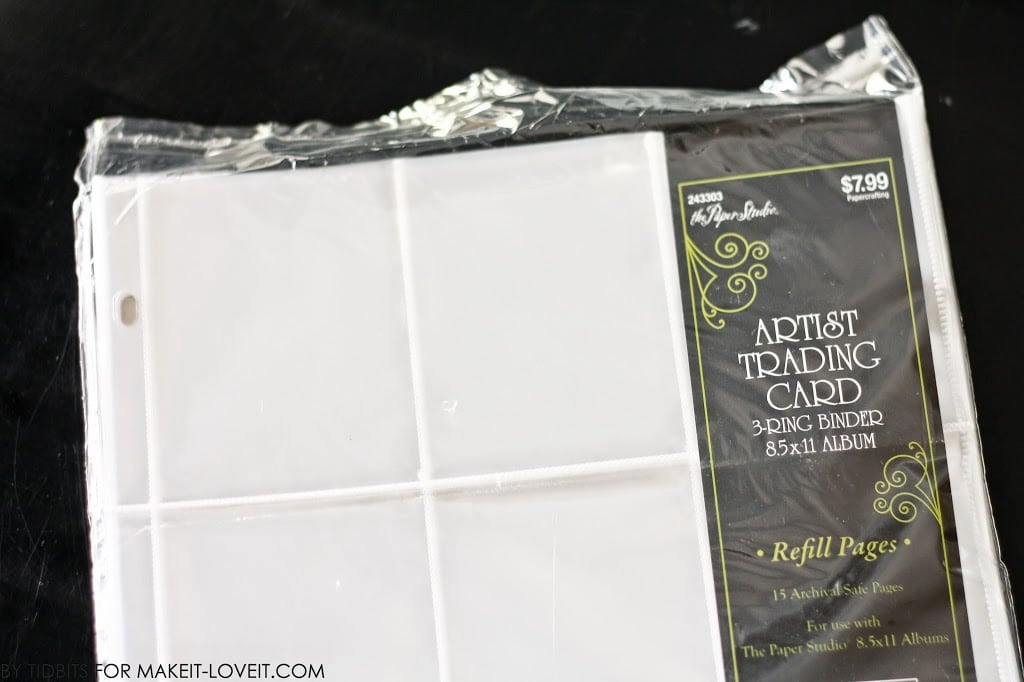
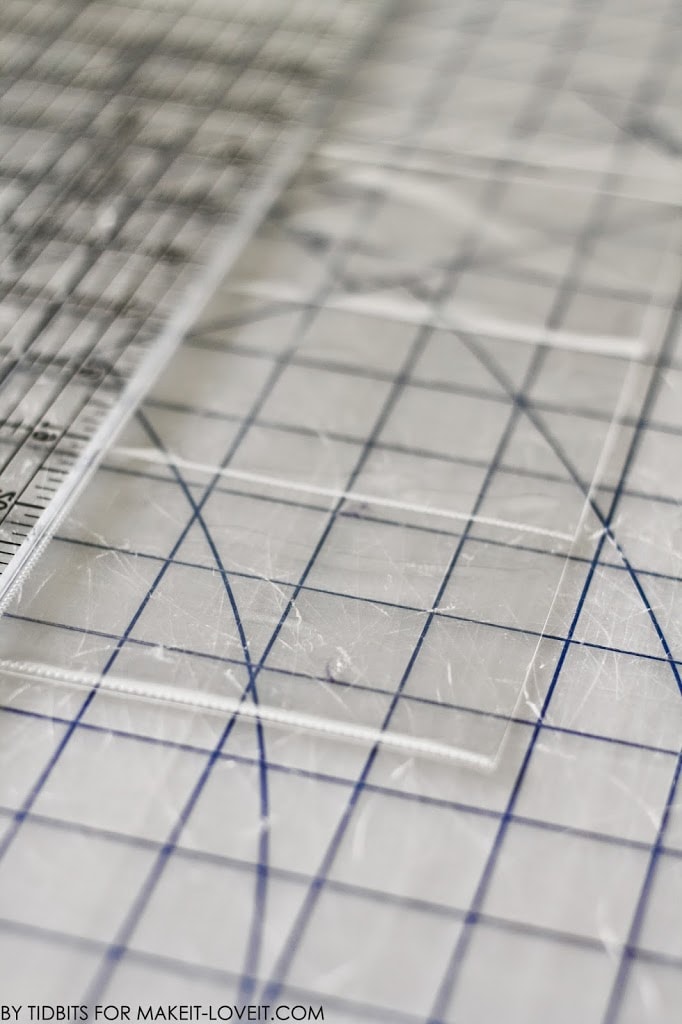
Cuts: My plastic sheets came with 3 card sections across, however, you only need 2 slots for this project. If yours is the same, begin by cutting your full sheet of plastic sheets into 2 slot sections. You must be careful to not cut through the seal that divides the slots from each other. It’s also helpful to line up a ruler just under the sealed line and slice with a rotary cutter, or use scissors. Cut and separate each row. **Quick word of advice – do not try to do multiple sheets at once. They slip and you will end up cutting the seal.
Cut as many of these sheets as you want for your book. That is really up to you.

For the vinyl cover of your mini book, you want it overlapping the clear card protectors by about an inch. I centered the protector up with the vinyl and found that cutting my vinyl to 5 x 7 inches, worked out great. 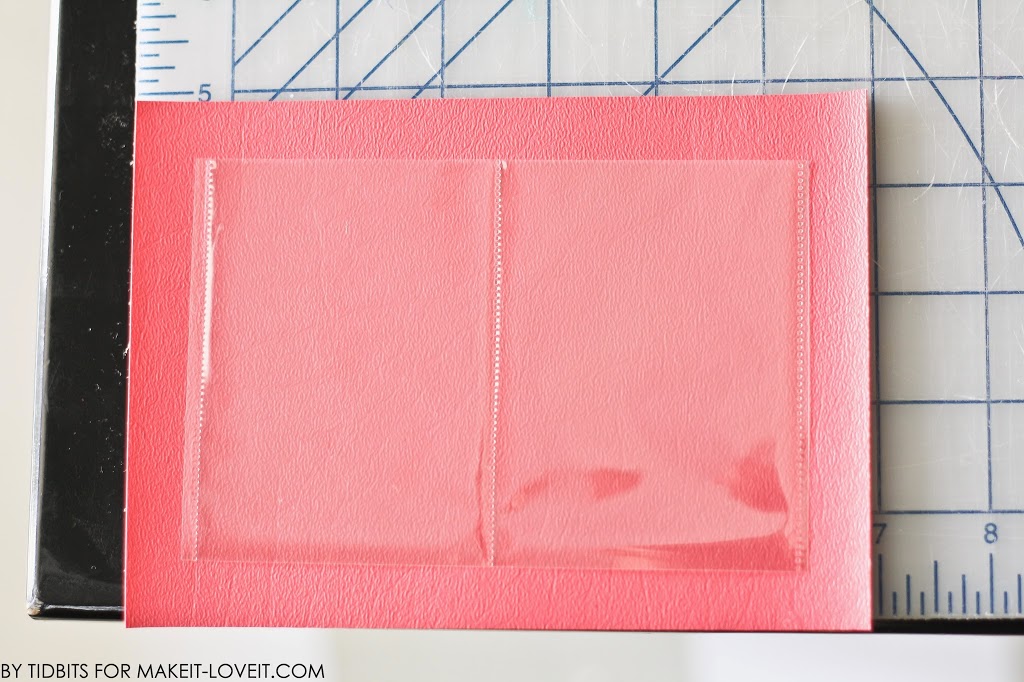
Cut a 2nd piece of vinyl the same size. One is for the outside of the cover and the other is for the inside cover of the book. 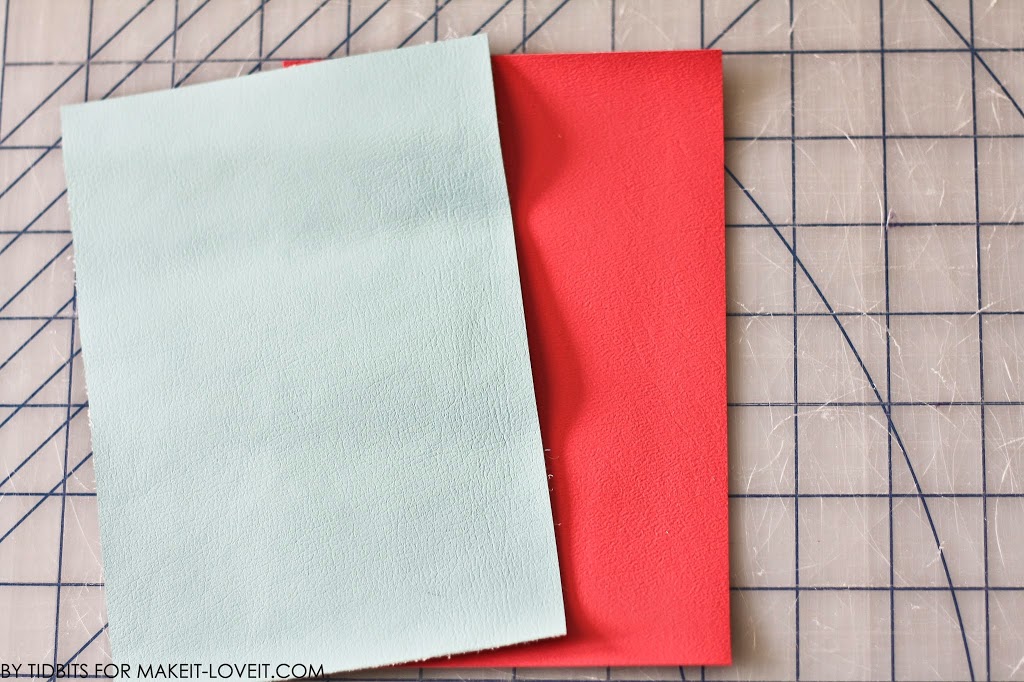
Next, stack your card protectors as evenly as you can. Clip them together with hair clips or paper clips. 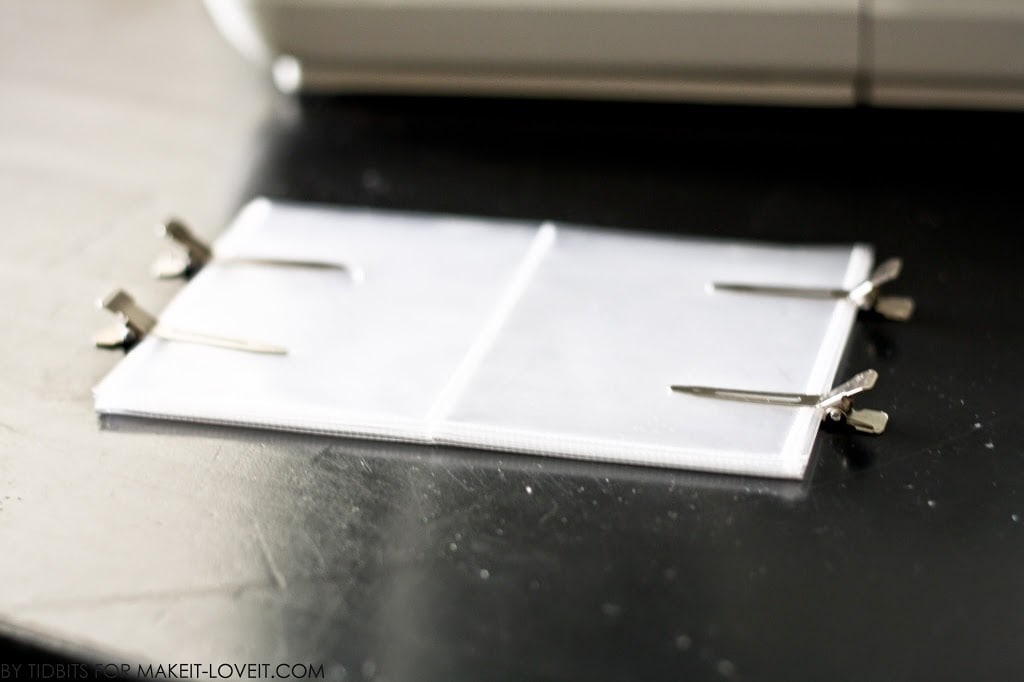
Carefully and slowly stitch down the middle of the 2 sections, right on the seam. This project really goes well if you have a walking foot for your machine. (If you don’t, Ashley has some tips for sewing on slick fabrics, here.) The key is really to keep a firm grip on the layers and stop and adjust if you need to. 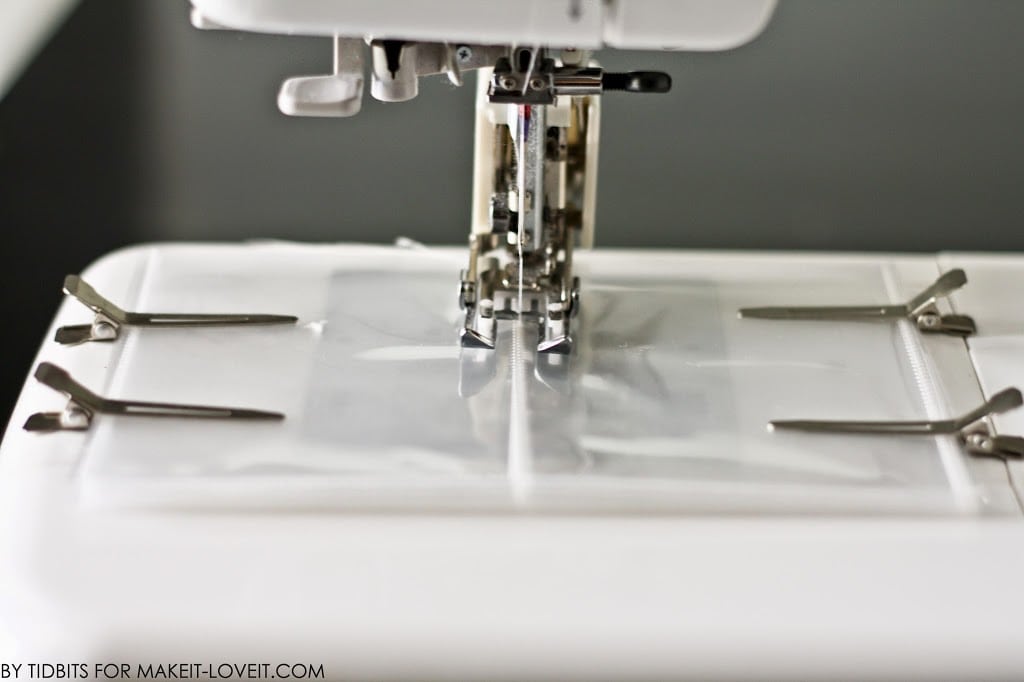
Next, you are going to sew the protectors onto the inside vinyl piece. Center them on the fabric and clip in place. 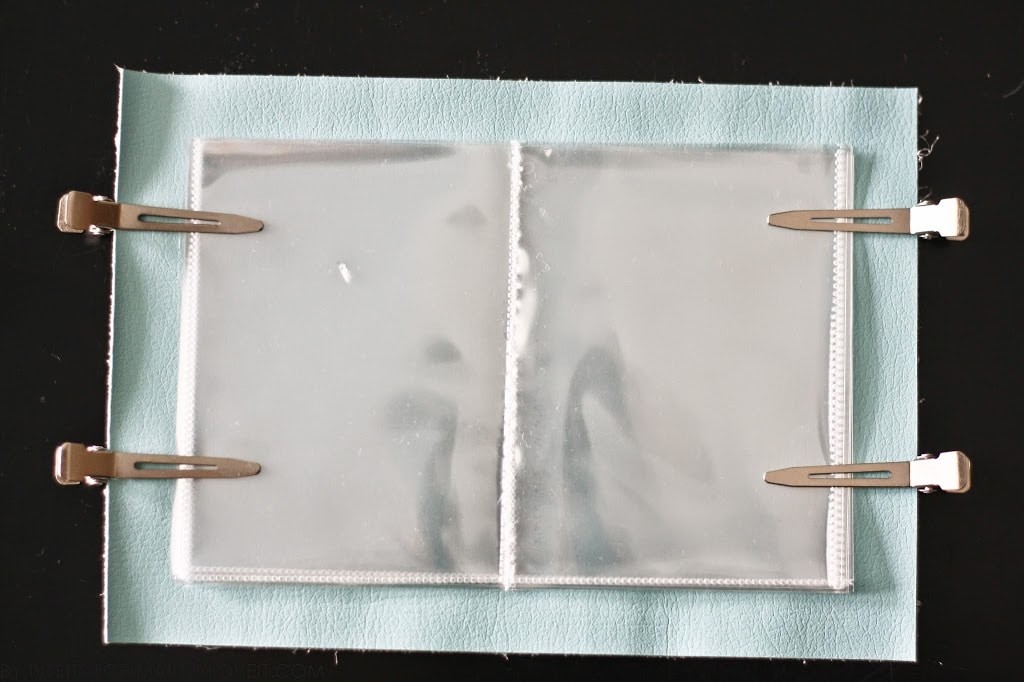
Sew together, only right on top of your stitches you made that are holding the protectors together. 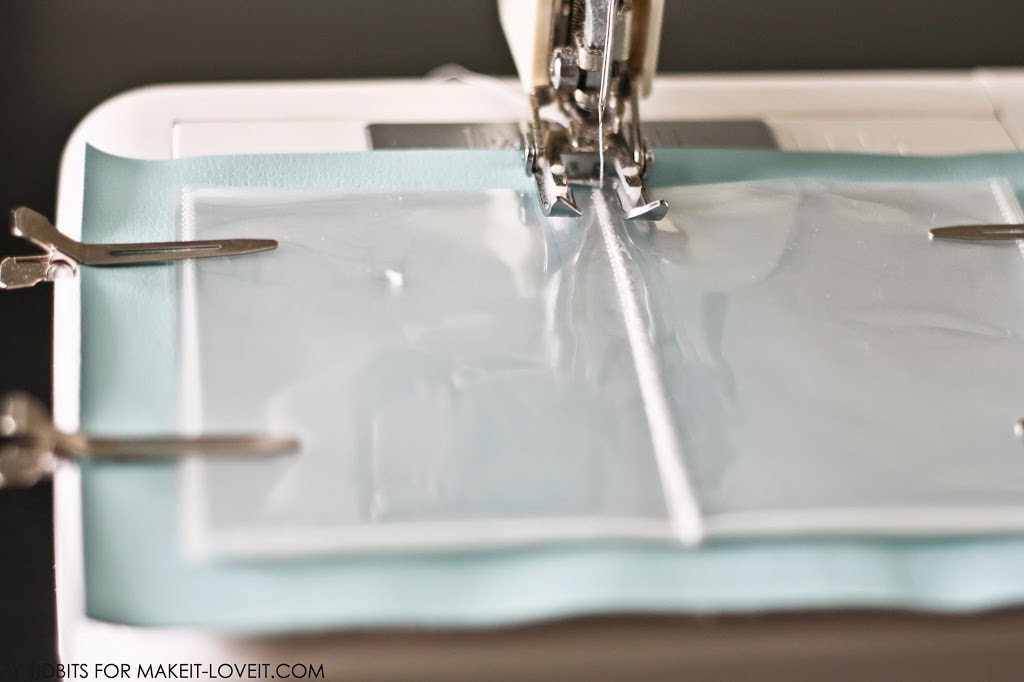
Now they are attached to the fabric. 
I’ll stop here for a few words of advice. Before you topstitch on your vinyl, you need to play around with the tension on the machine. I found if I increased my tension as high as it goes, the stitches looked great on the front and back. 
***Another thing to keep in mind – generally speaking, the machine stitches look best from the top thread rather than the bottom bobbin thread. So you want the cover of your book to be on top when you sew.
Okay, now we enter the part where you do things differently for each closure type.
First option –
Elastic ring with button closure:
If you have a hair elastic, this works great. You can also buy elastic from the fabric store. 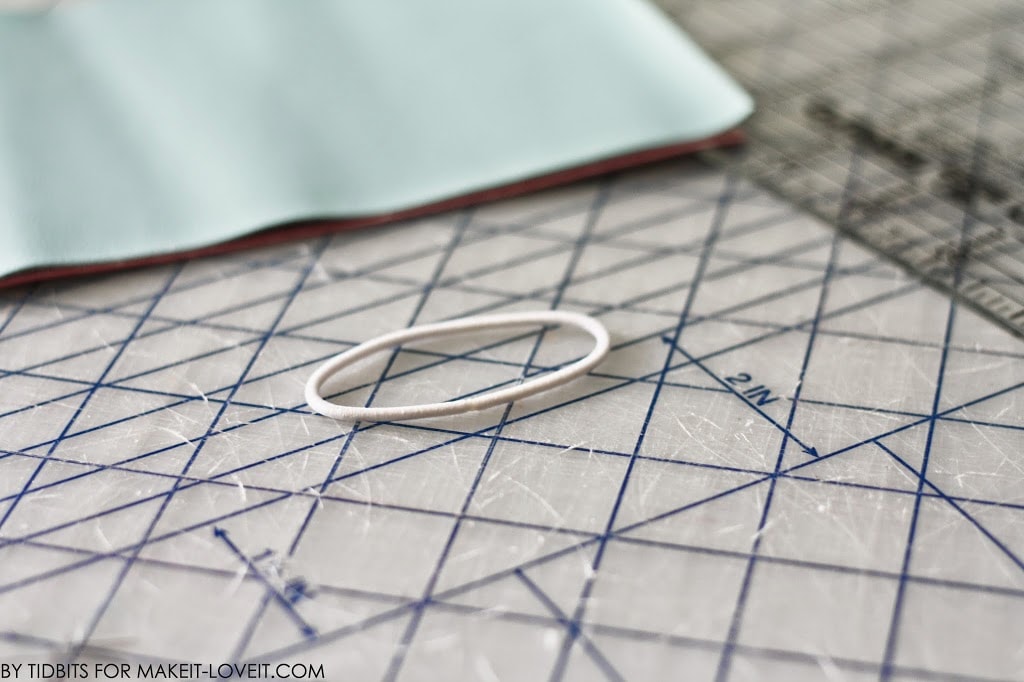
Snip the elastic down to the size you’d need to slip around your button (plus a little extra for a seam allowance). 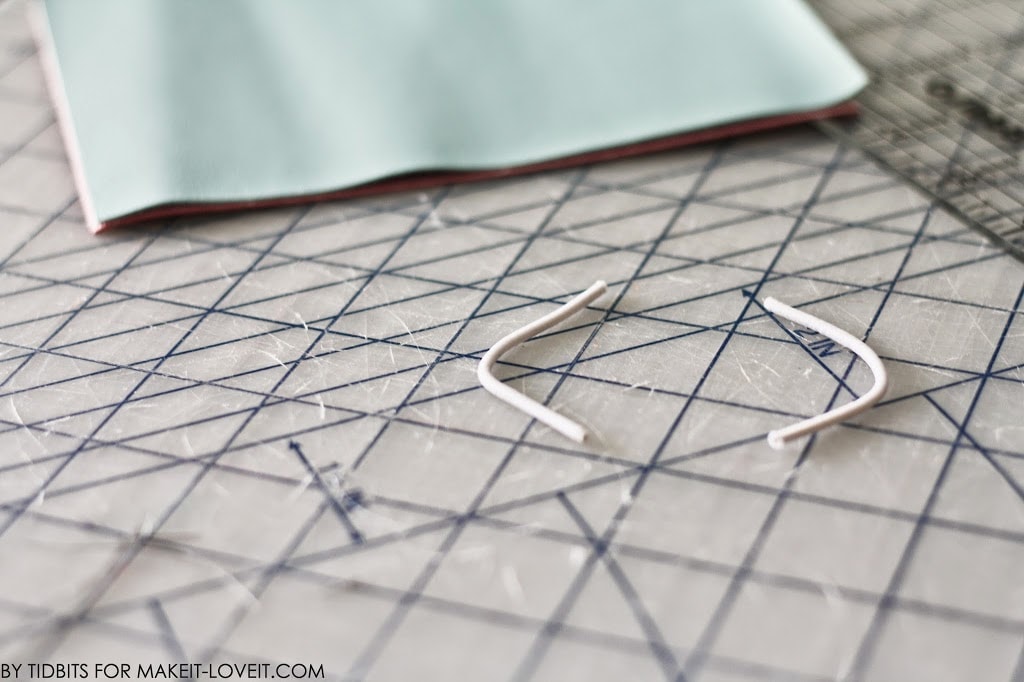
Take your outside vinyl piece and line it up evenly with the vinyl piece which has the protectors sewn onto it, with wrong sides together. Clip these together. 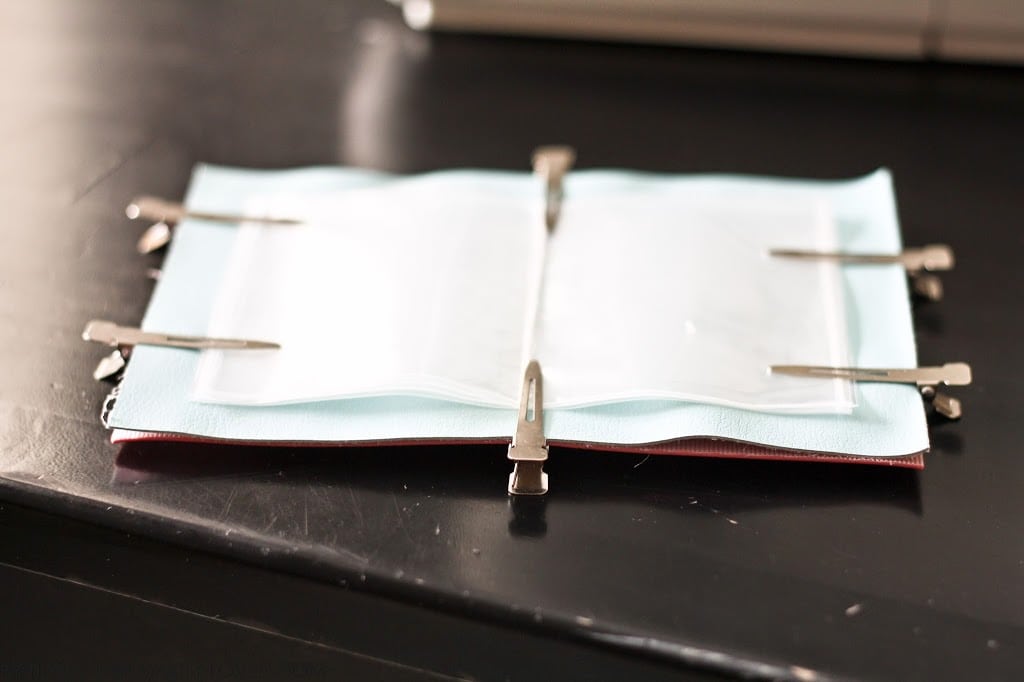
Find the center of the book on the right side and insert your elastic ends, folded and sandwiched between the layers of vinyl. There really is no way to clip this in place effectively, so try to hold it there as best as you can, while you’re carrying it to the sewing machine. 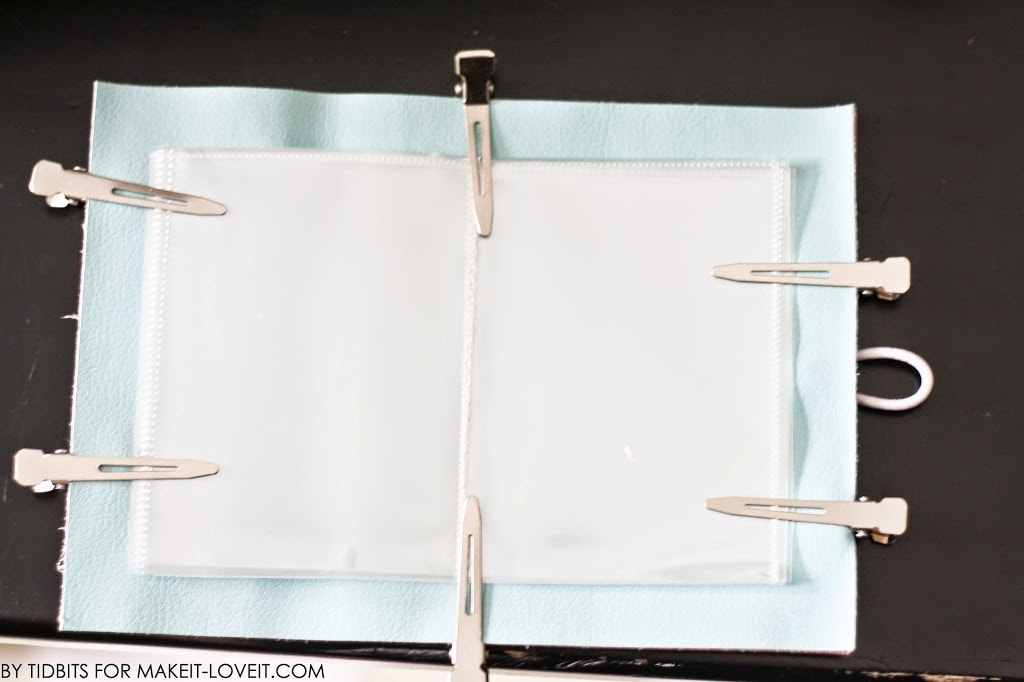
Begin at the elastic so you can get that secured while you sew around the book. (And notice that I flipped the book over, with the pages face down, so that my nicer stitches would show from the outside.) Put the edge of your presser foot along the edge of your book, so you are stitching about 1/8th of an inch from the edge. I suggest you back stitch where the elastic is inserted, to reinforce it in place. 
Sew all the way around the book cover, stitching your two layers together. 
Now close your book and mark with a pin a good place to hand sew your button on. It is a little tricky to sew through the 2 layers of vinyl but it is possible. 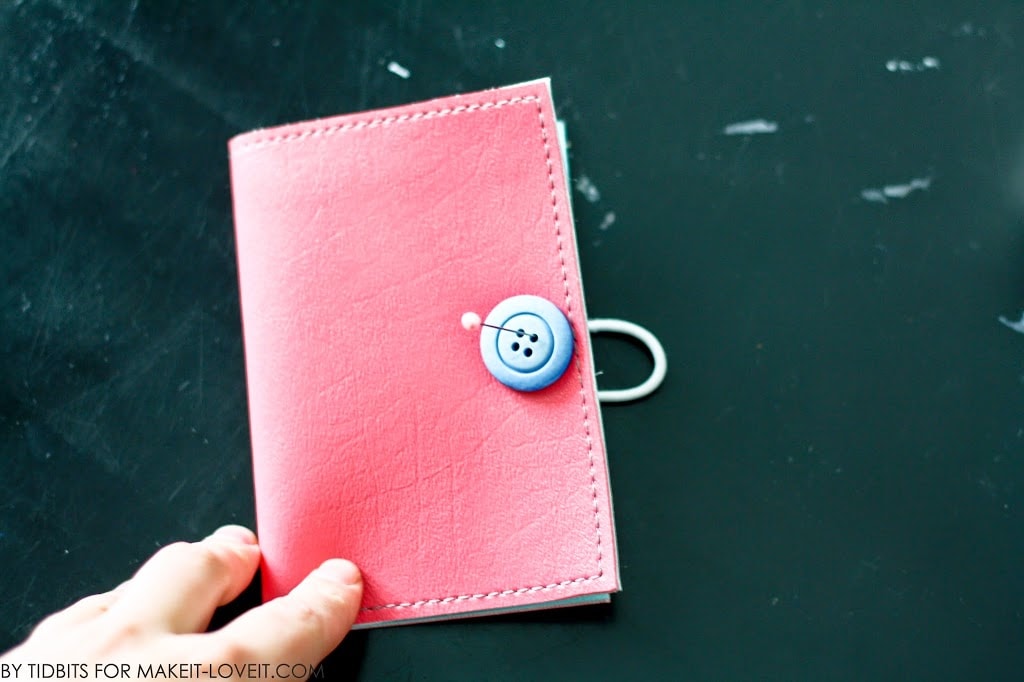
Second option –
Embellishment with Ribbon:
Really you could do so many cute things for an embellishment on your cover, but I chose a simple flower. I cut 3 layers of flowers. As you can see, they kind of look goofy alone. I didn’t use any template, just cut big, medium and small. 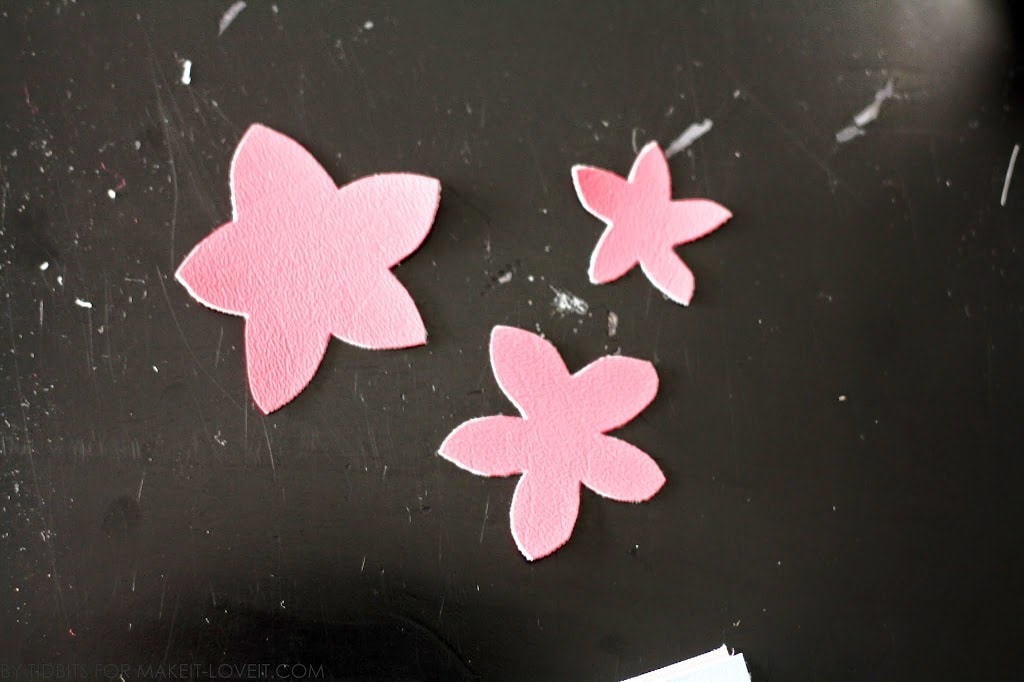
Once they were stacked, they didn’t look so goofy any more. I attached the flower on the top cover only, by hand sewing a button on, through all layers. A little tricky – but it worked great. (If you are really struggling to get the thread through all 3 layers of vinyl, you could also try sewing the button through the top flower only and then gluing the rest of the flower layers together and then gluing the entire flower to the book cover. An epoxy glue works really well on most surfaces.) 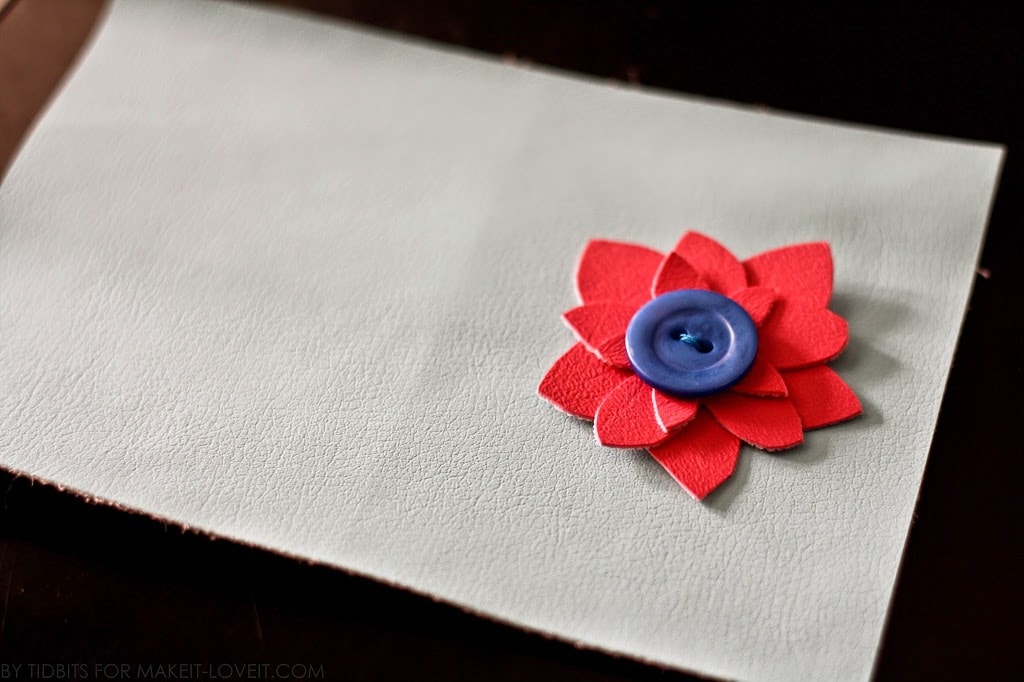
Read through the 1st option (the elastic and button closure) to see how you sew the front and back pieces of the vinyl together. In this option, you will insert a ribbon between the layers on the opposite side of the embellishment and sew it in place. To close the book, you wrap the ribbon around the button. So fun. 
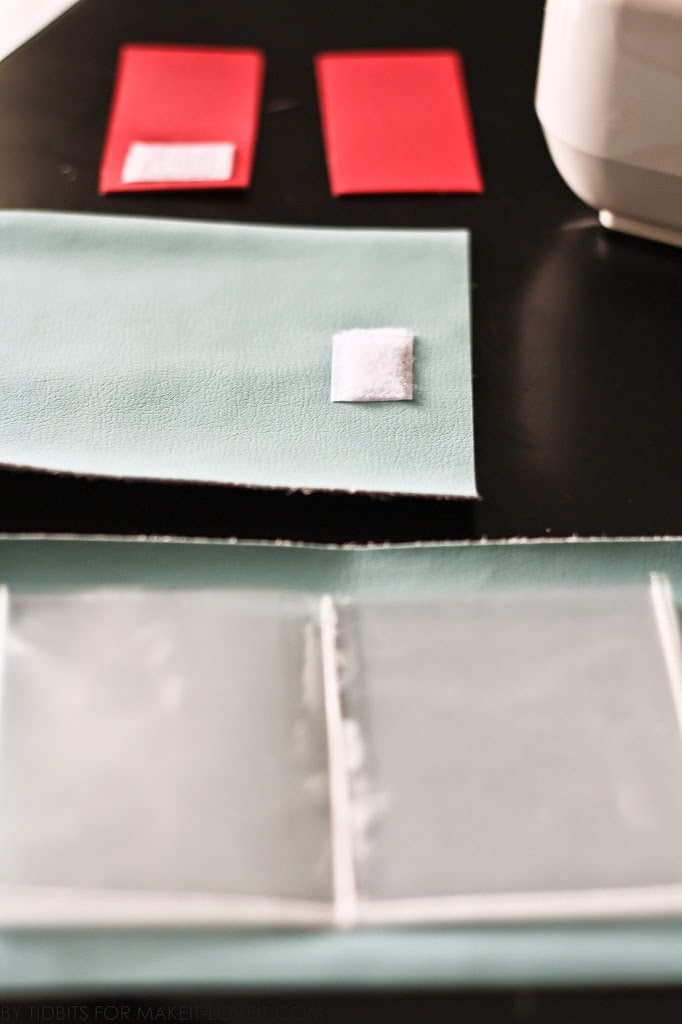
Okay, last one — The Third option – Velcro Tab: You will need some velcro for this option. Cut two pieces of vinyl measuring roughly 1 1/2 x 3 inches. 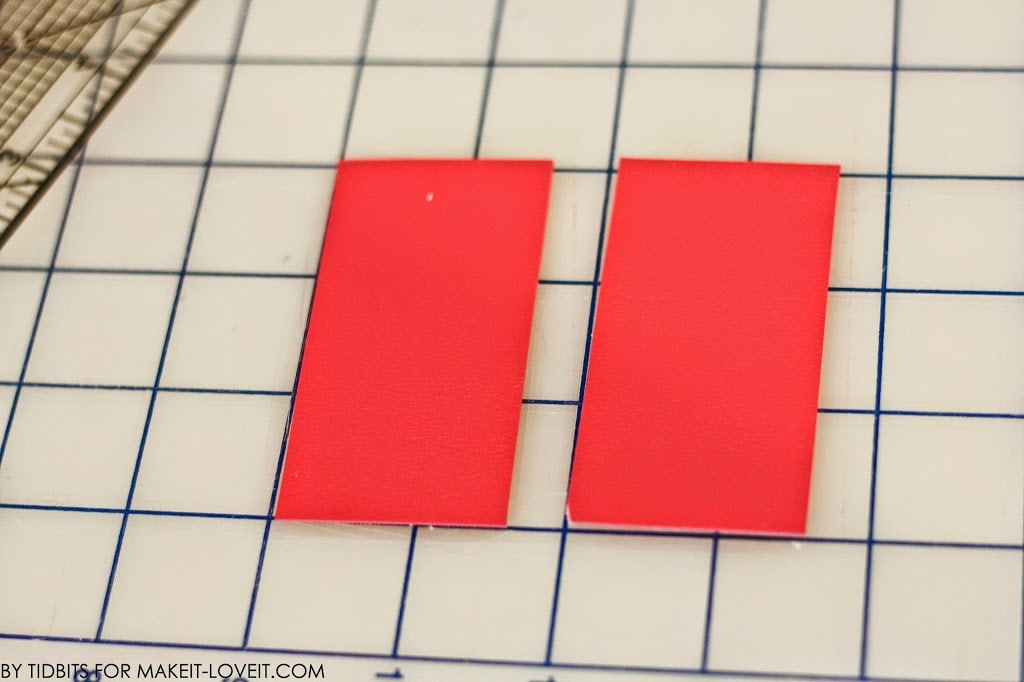
Cut a small piece of the scratchy side of velcro and sew it on the right side of one of the pieces you just cut. 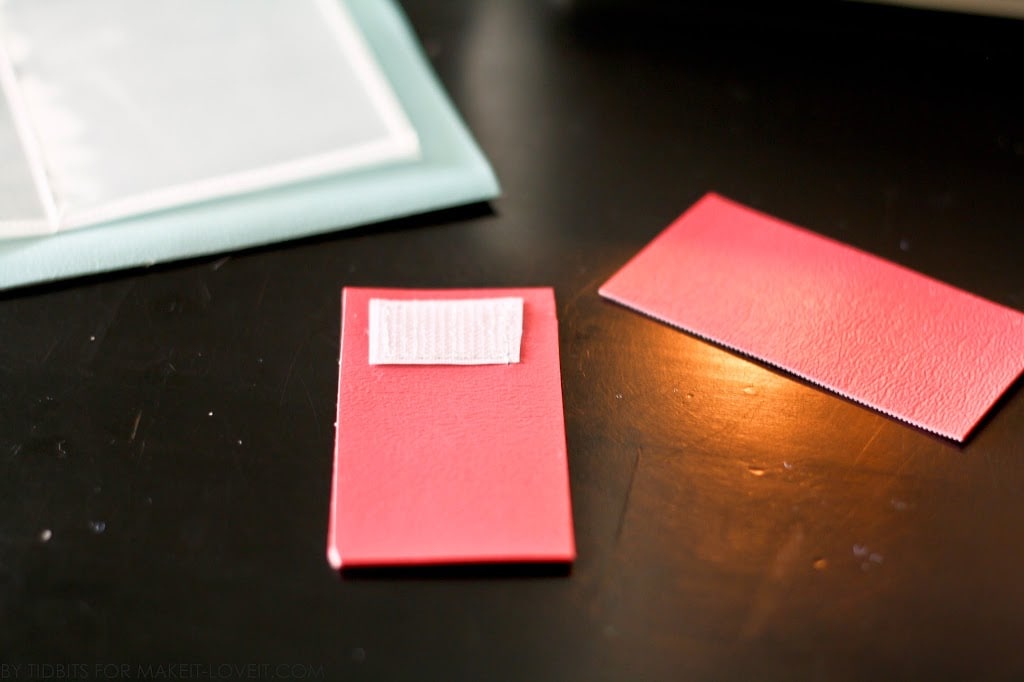
Now take the soft side of velcro, and cut a piece the same size as the scratchy side you cut for the tab. Sew it on the right side of the cover for your book. (Below, I used the blue vinyl for both the front and inside of the book).
Make your tab by putting the wrong sides together of your 2 rectangle vinyl pieces and top-stitching around them with an 1/8 inch seam allowance. 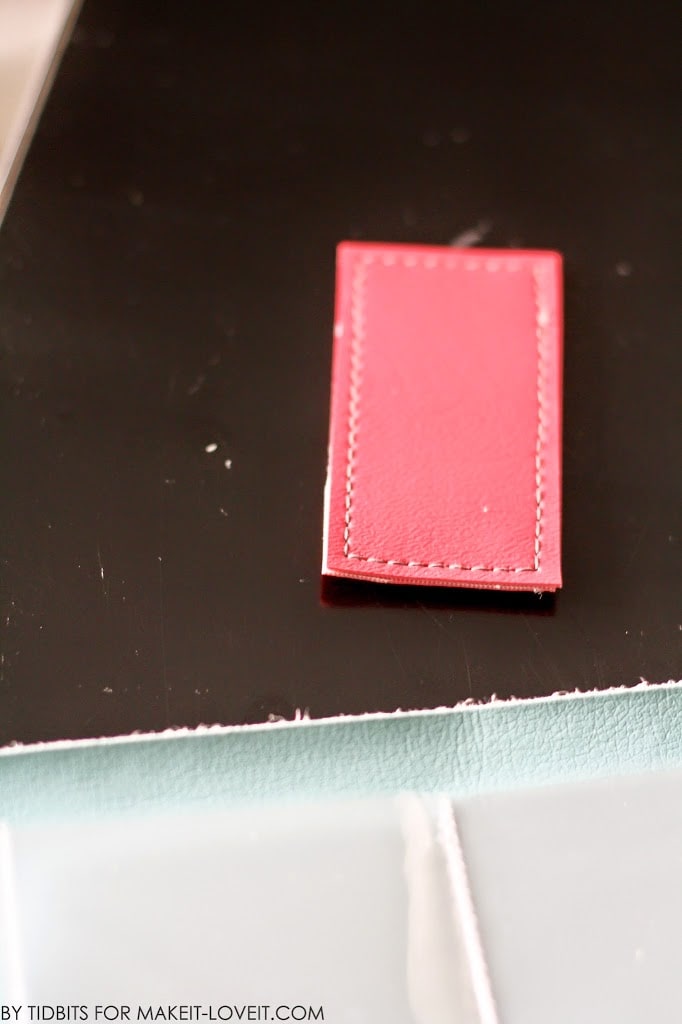
Now attach your tab piece to the cover by the velcro so they are stuck together while you figure out where to sew the tab on. Fold the book cover in half like it will be when it is finished. Pull the tab over and use a removable marker to draw the outline of the tab where you will sew it on. Do you see the blue outline in the picture below? It is on the opposite end of the velcro attachment. 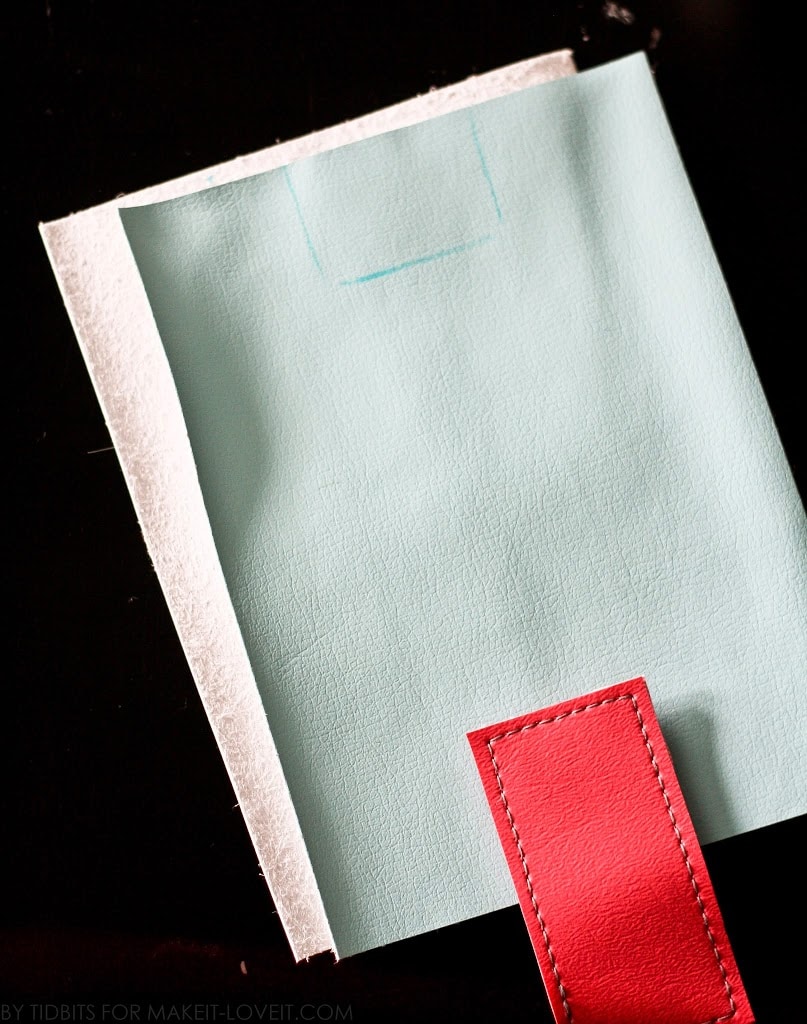
Pull the tab off where it is held on by the velcro. Now you are going to sew the opposite end of the tab (without the velcro) onto the place where you made your markings, on the top cover only. You are basically following along the top stitches you already made on the tab to sew it onto the cover with an additional stitch on the bottom, making a small rectangle of stitches. This will hold it in place. This is all a bit confusing. Hopefully the pictures explain it better than I am ;) 
For an added touch, sew an X through your rectangle. 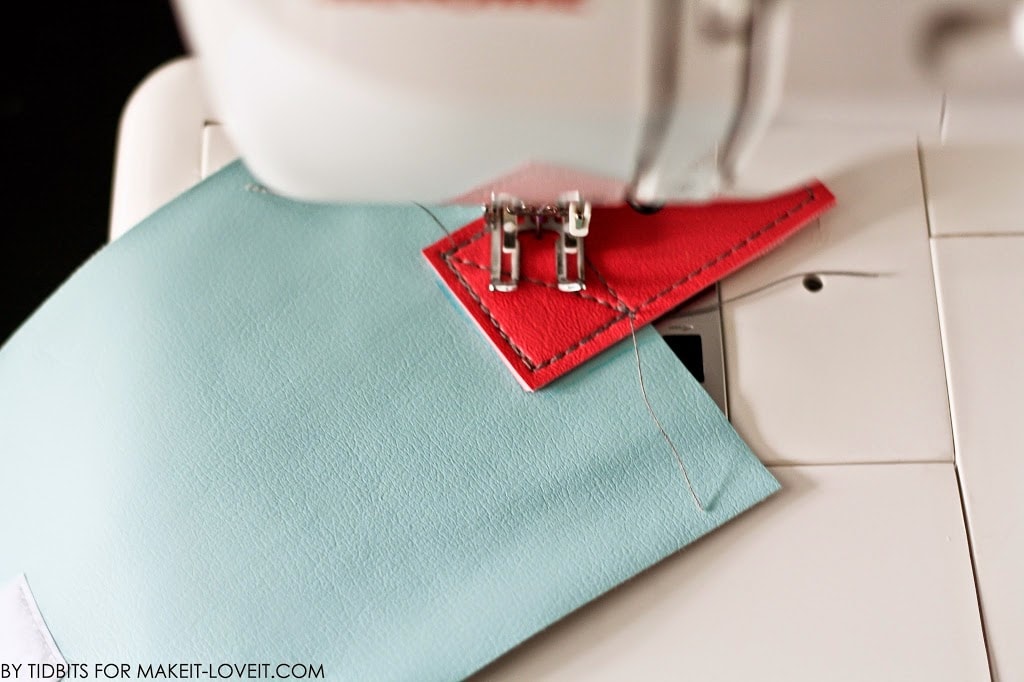
So, here is what you should have now. 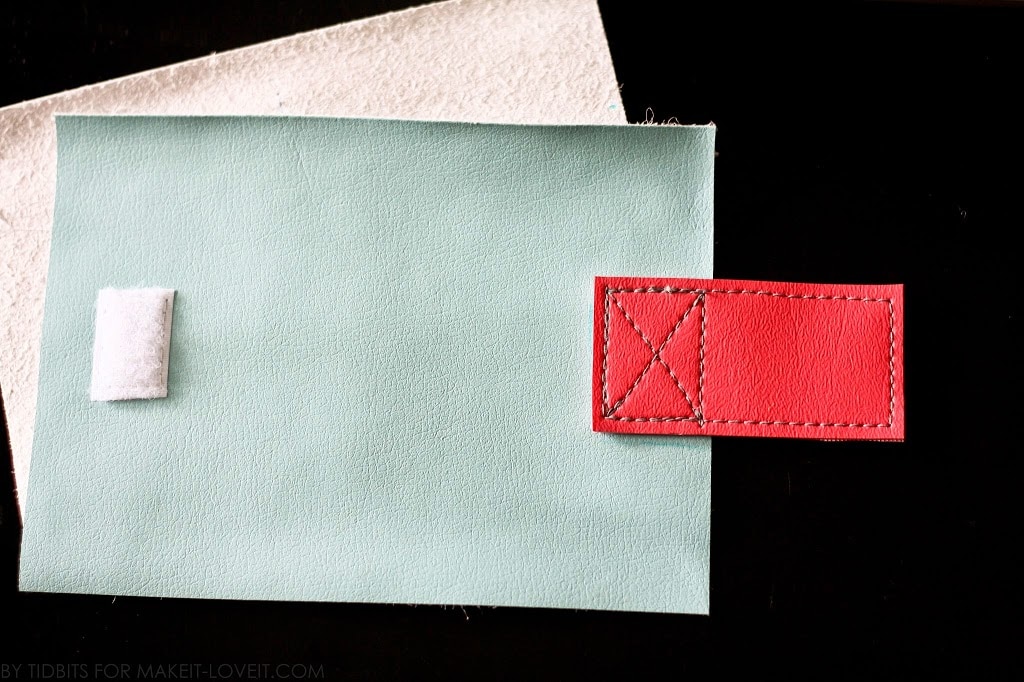
Even up your top cover with the inside of the book (the part with the card protectors sewn on it). Clip them together and top-stitch all the way around (an 1/8 of an inch from the edge), making sure that the cover is facing upwards. 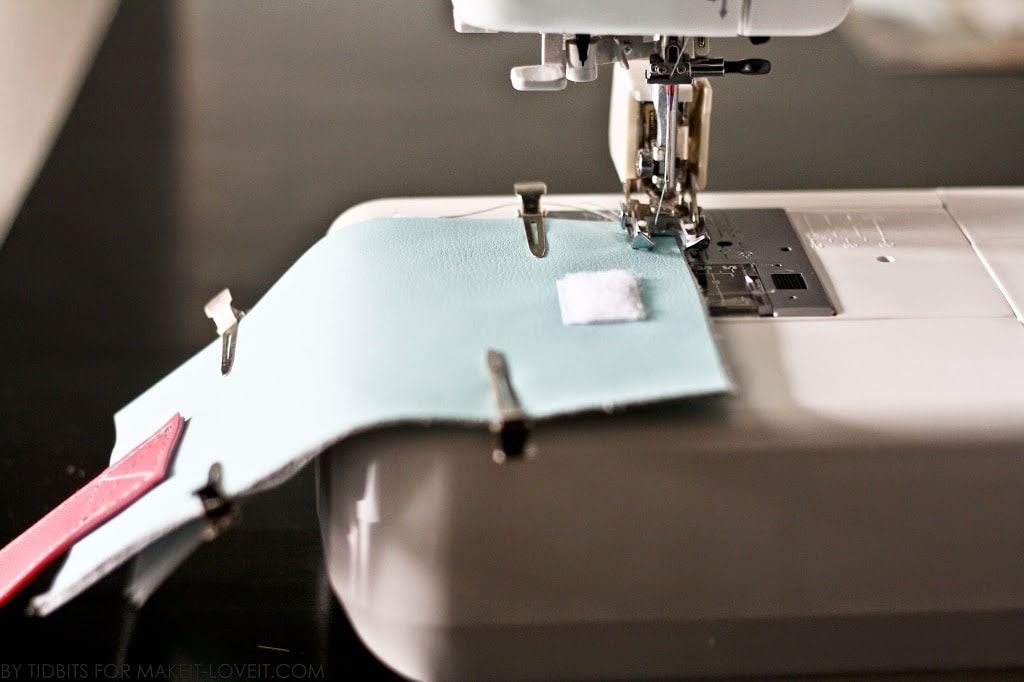
When you come to the tab, you should be able to follow along the same stitches you made to attach the tab. 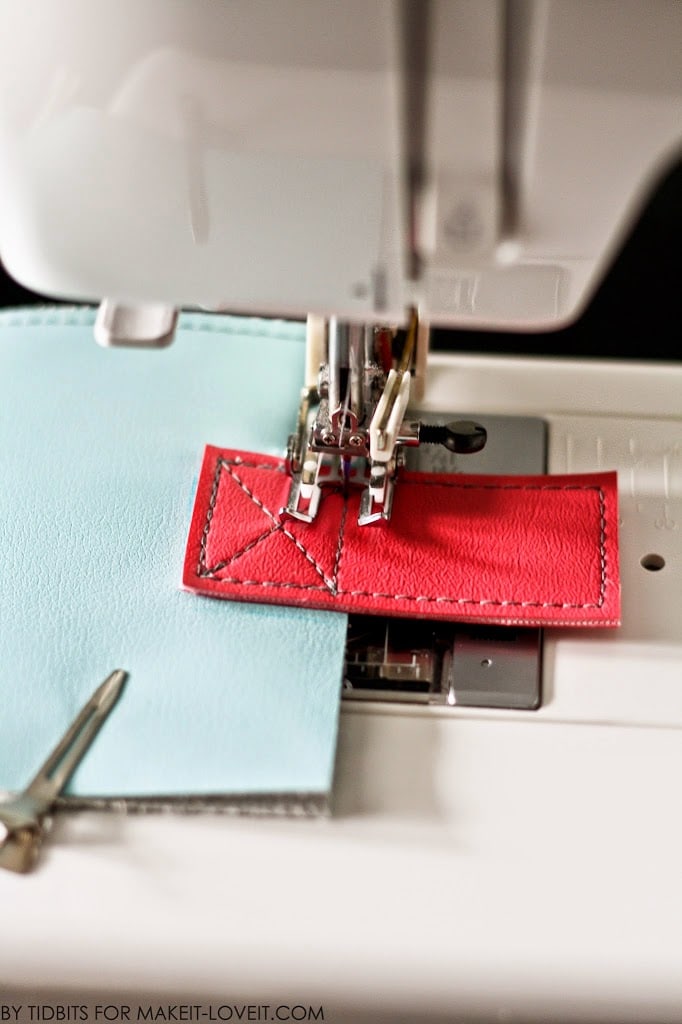
For all the books:
If you have a rubber mallet, or something that you like to pound things with (that won’t ruin the vinyl), fold the book and smash along the fold. This will help the card protectors to stay folded. It is also a beneficial way to let out any stress. :) 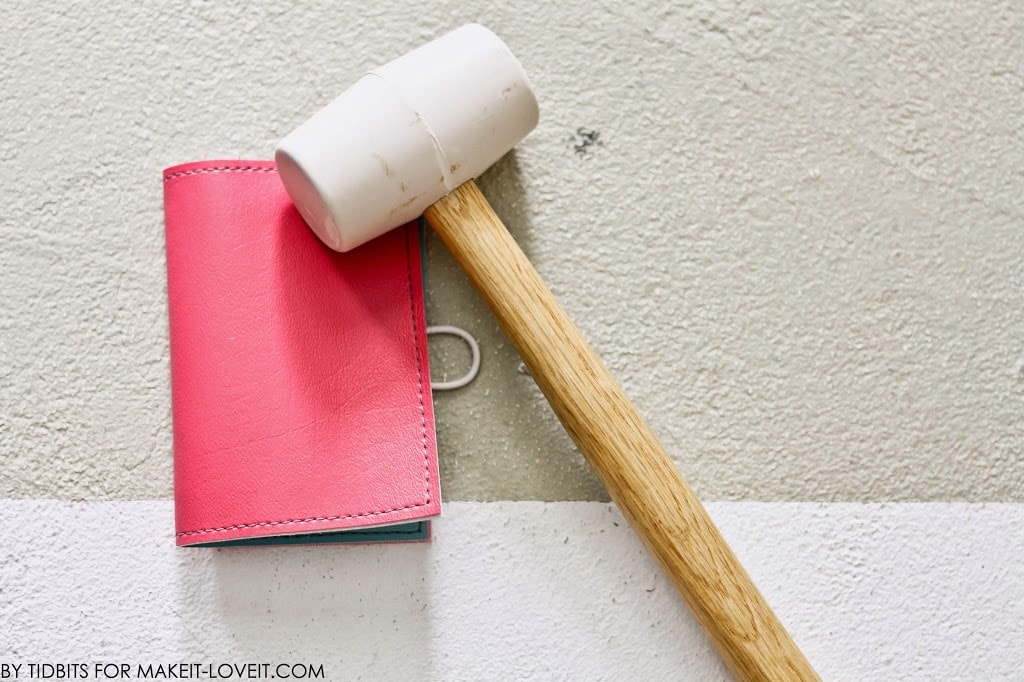
And there you have it! You are all done!
Check out Cami’s blog Tidbits, her Pinterest Boards, and her Facebook Page. 

Hi, I’m Ashley—the DIY-enthusiast behind this crazy blog!