Home » DIY Tutorials » DIY Sewing » Knitting/Crochet » ‘Learn to Knit’ MINI SERIES, Week 5: Knit and Purl in One Project
‘Learn to Knit’ MINI SERIES, Week 5: Knit and Purl in One Project
April 5, 2011 - By Ashley Johnston 8 Comments
.
Yay……it’s knitting time again!
Are you keeping up?
If not, click the picture below to check out all of the other knitting lessons you’ve been missing.
That Rebecca…….I sure love her step-by-step, instructions. And her clarity.
Thanks again Rebecca, for teaching us all how to knit over here on Make It and Love It!
~Ashley
Hey Knitters! (See, you can officially be called a knitter now, neato!) Rebecca Danger here, back for Week 5 of Learning to Knit.
.
This week I am going to show you how to combine the knit and purl stitches together in one project. This is pretty simple, especially once you get the rhythm down, but very important to learn since most every knit project out there is made up of combining these 2 stitches together.
.
So here’s the deal, when you KNIT every row of a project, like on our first washcloth, it is called “Garter Stitch.”
When you PURL every row of a project, like on our second washcloth, it is called “Reverse Garter Stitch.” (This is very uncommon, since Garter stitch and Reverse Garter Stitch look identical).
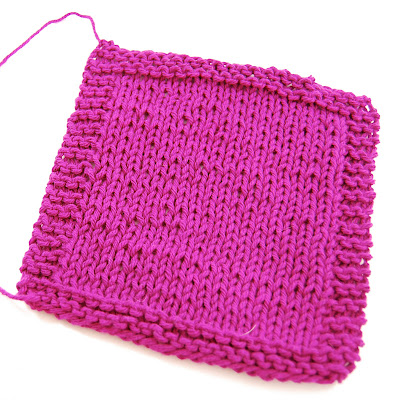
When you Knit one row, then Purl one row, it is called “Stockinette Stitch,” which will create a fabric that looks like what you would expect a knitted project to look like:
.
Stockinette Stitch is great, but if that is all you do, the edges will curl up as you knit. The only way to avoid the curling is to combine knit and purl stitches in one row. I am going to show you a very common way of avoiding the curling problem as we make up a third washcloth this week by making a Garter Stitch border around a square of Stockinette Stitch. Okey, dokey?
.
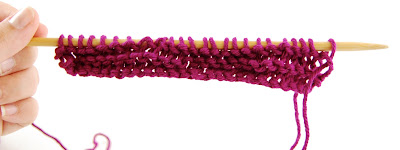
Work Garter Stitch for the first four rows (just knit for 4 rows)
As you start this next row, knit the first three stitches. Now, we are going to purl. You will be set up to knit like this
But in order to purl, you will need to bring your yarn between the needles to the FRONT of your work
Once you popped your yarn around to the front of your needle, purl until there are three stitches left. Now we are going to knit, so we will need to move the yarn to the BACK of your work
See the yarn in the back now? Knit the last three stitches.
Knit (only) across the next row. See the little “V’s” starting to take shape?
On the next row, repeat what we did on the first purl row: Knit the first three stitches, move your yarn to the front, purl until there are three stitches left, move your yarn to the back, knit the last three stitches
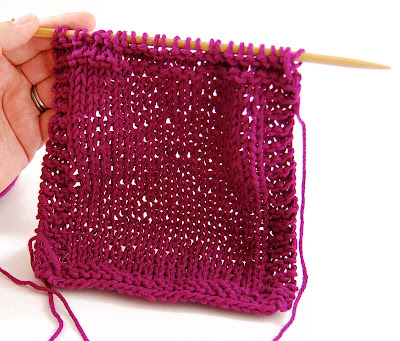
Got it? Good, keep going. Alternate so you are knitting one row, then knit and purling the next row. When you see this side you will want to knit the whole row
When you see this, you will want to do your knit and purl row
When your washcloth is about 7.5”, you will want to just knit the last four rows to create a matching border to the first four rows
Tah-dah! Good, now bind off and weave in your ends (see here). Awesome, finished washcloth!
(Apparently one of my pugs decided to share in my post by adding a dog hair to my washcloth….)
.
Yeah! You’ve made something beyond a “first project” now.
.
Next week I am going to be back and help you to read a pattern so you can tackle the knitting world. Sound good?
.