Home » DIY Tutorials » DIY Sewing » Sewing: Clothing » Accessories » Interchangeable Flip-Flop Back Straps
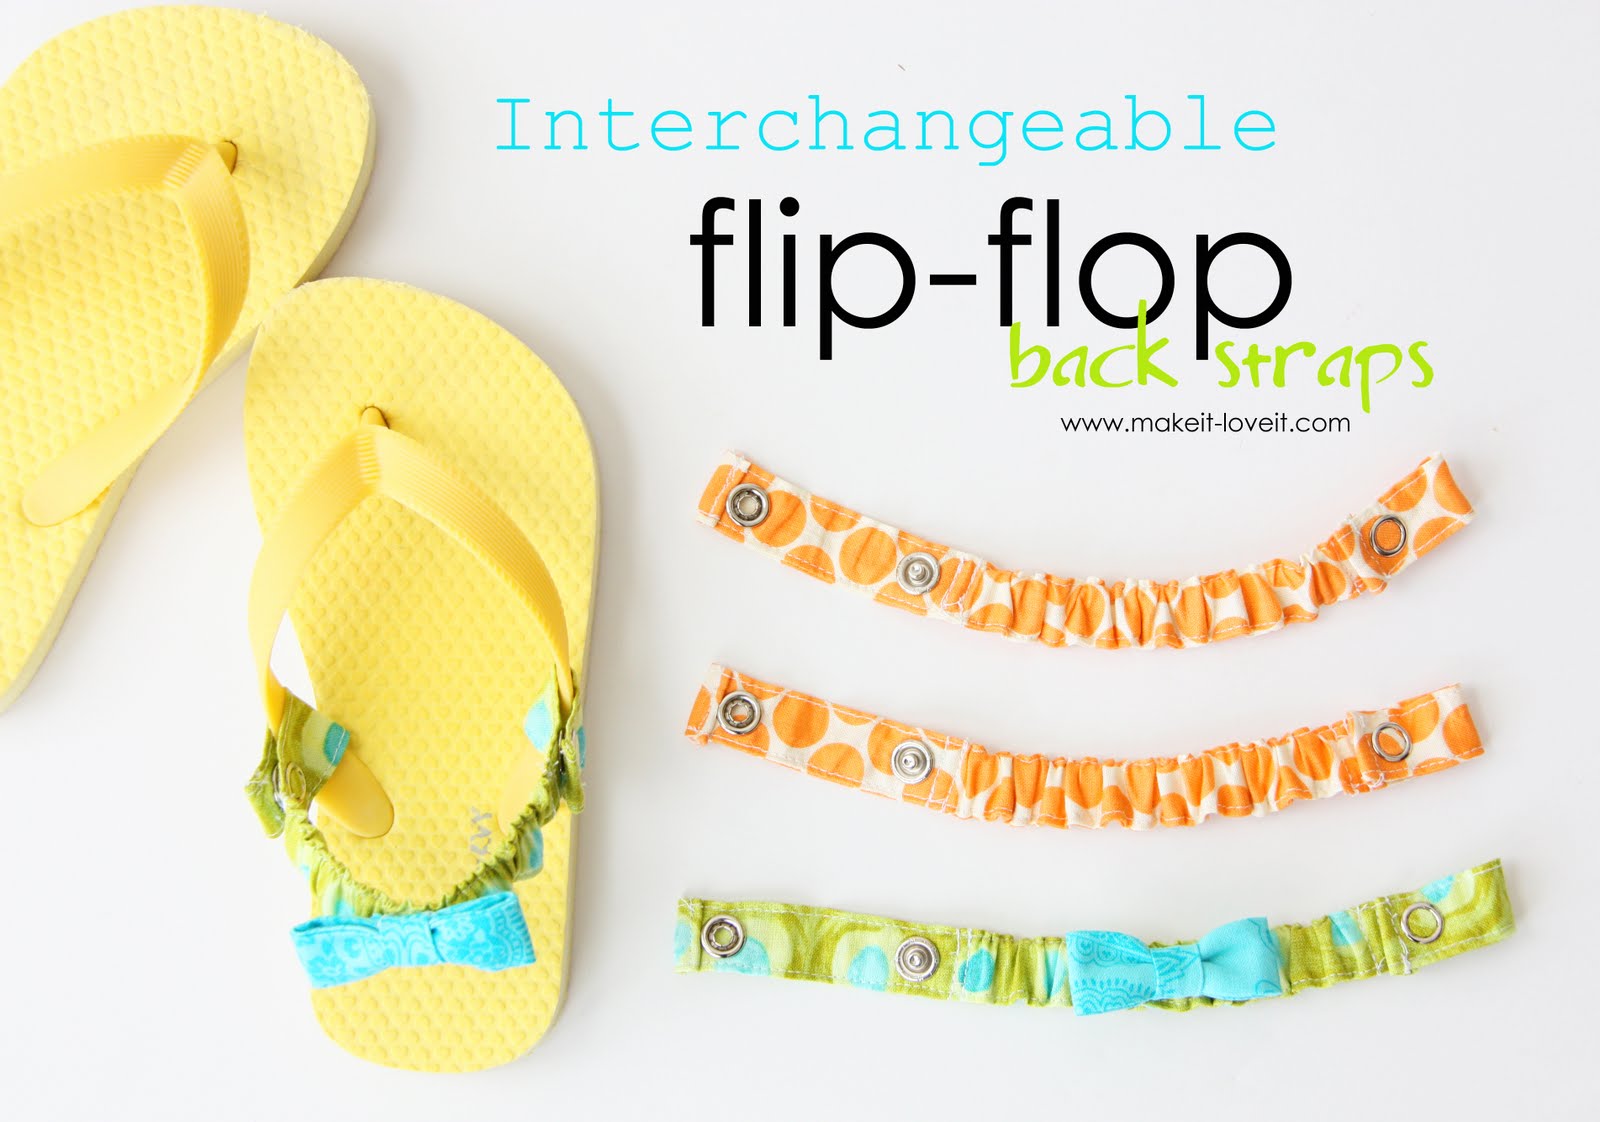
Interchangeable Flip-Flop Back Straps
April 29, 2011 - By Ashley Johnston 173 Comments
We have a love/hate relationship with flip-flops this year.
Flip flops are easy, comfy, super cheap, washable, and easy for the little ones to put on themselves.
Therefore, we love them.
However, my 4 year old girl just outgrew the toddler flip-flops with the added stretchy strap around the back. (At least at Old Navy she has.) So we had to buy her regular flip-flops, figuring if the stores say she’s old enough to keep them on her feet……..then she must be old enough to keep them on her feet.
Who am I kidding?? She’s only 4. Well maybe age has nothing to do with it and she’s just not as skilled as the Old Navy designers think she should be. That girl flips those things off constantly, trips on them as they shift, and is constantly hopping on one foot as we’re trying to walk somewhere because one of her flip-flops is several feet behind us. My favorite thing, is when this happens at the store……..and people are waiting for my hoppy little chicky to get out of the way as she struggles to retrieve her other flip-flop that is now underneath someone’s cart.
The strapless-back-flip-flops for kids…………hate them.
So instead of throwing those frustrating $2 flip-flops in the garbage, I’ve decided to make them work for us.
And made these. Because options are always fun, right?
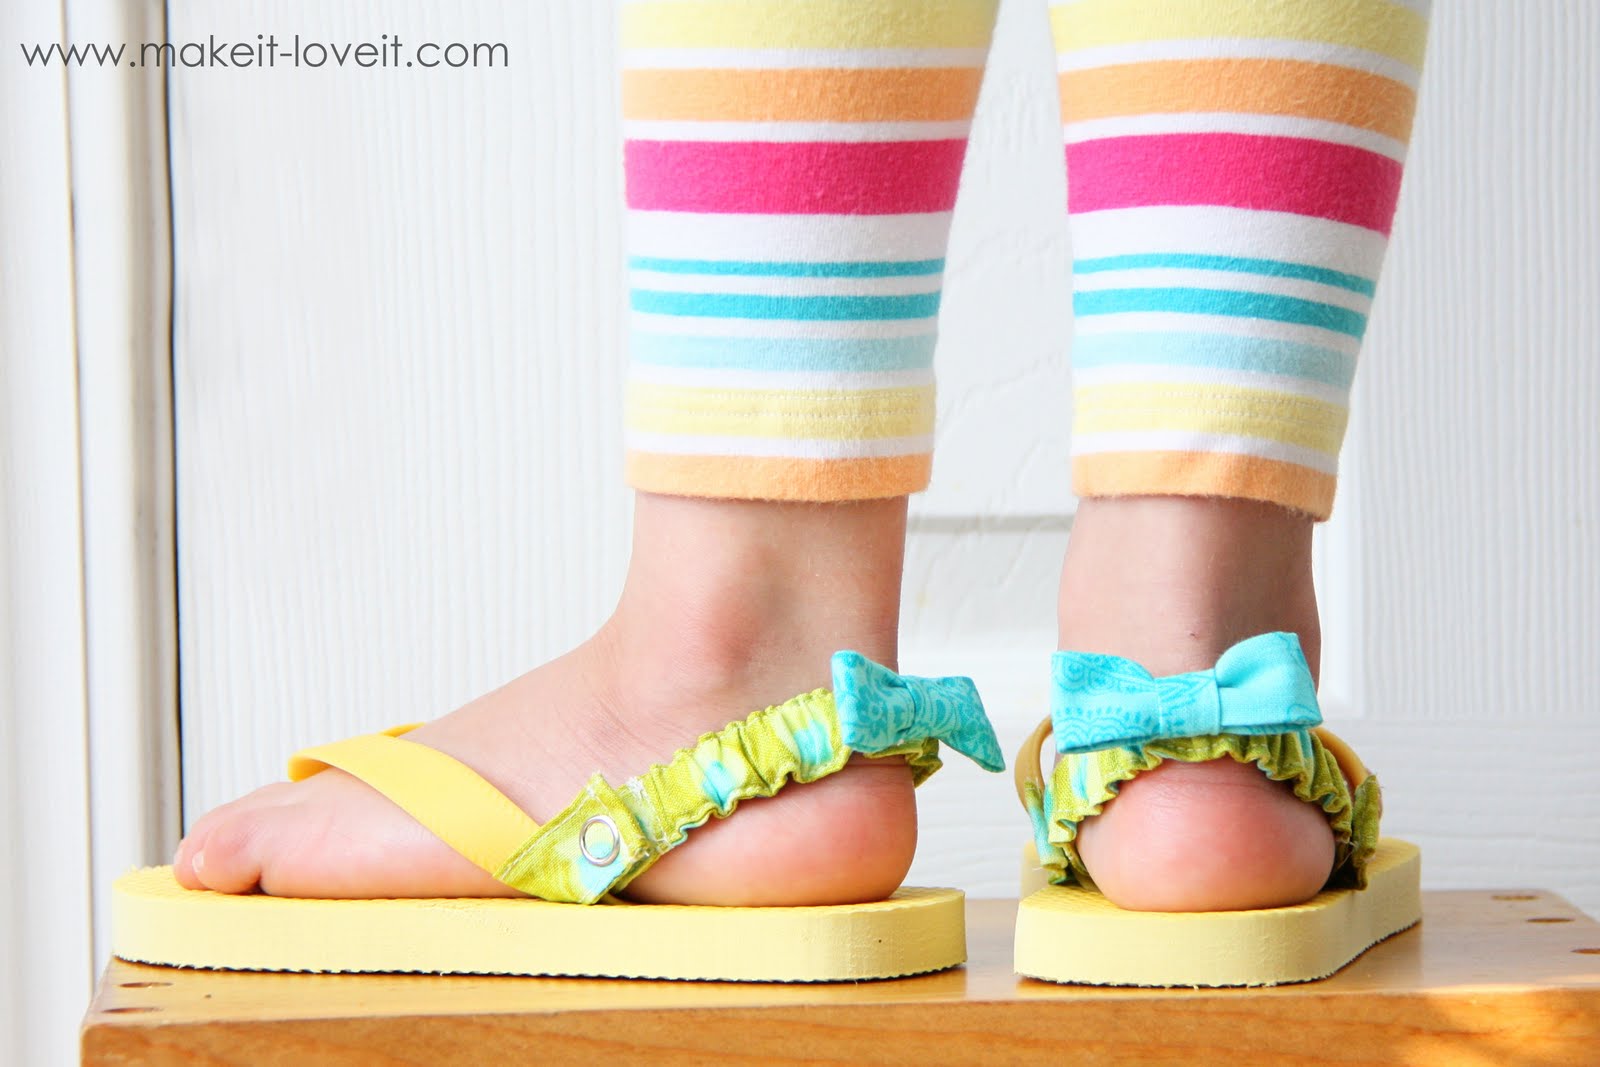
The straps are stretchy, so they fit snugly around the back of the foot…….also making them easy for your little one to take on/off all by themself.
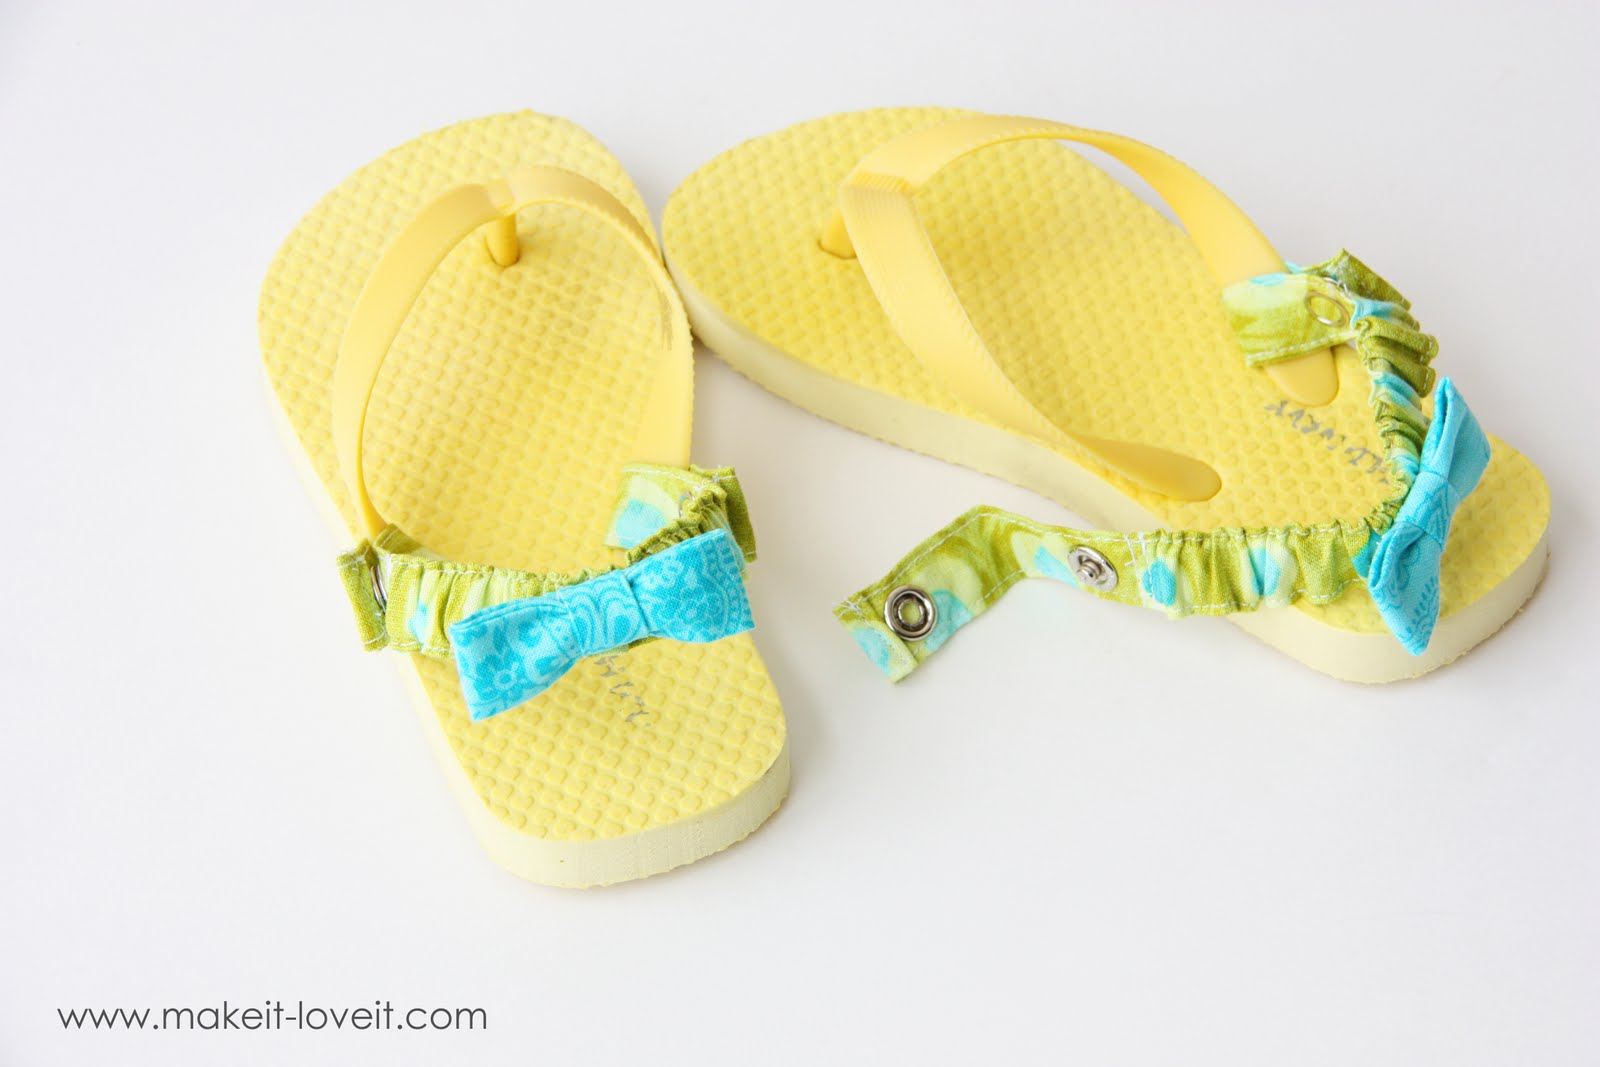
And you know, I’m kinda crazy about that pop of color around the back.
So, the frustration turned into a happy surprise of a solution.
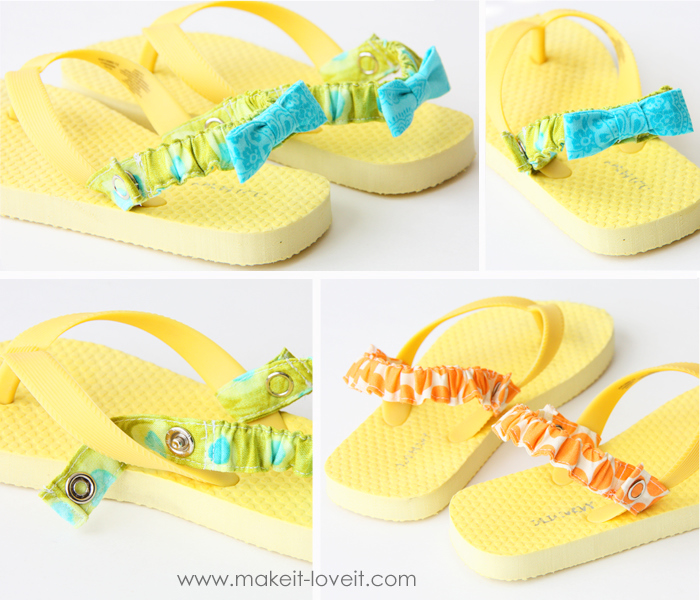
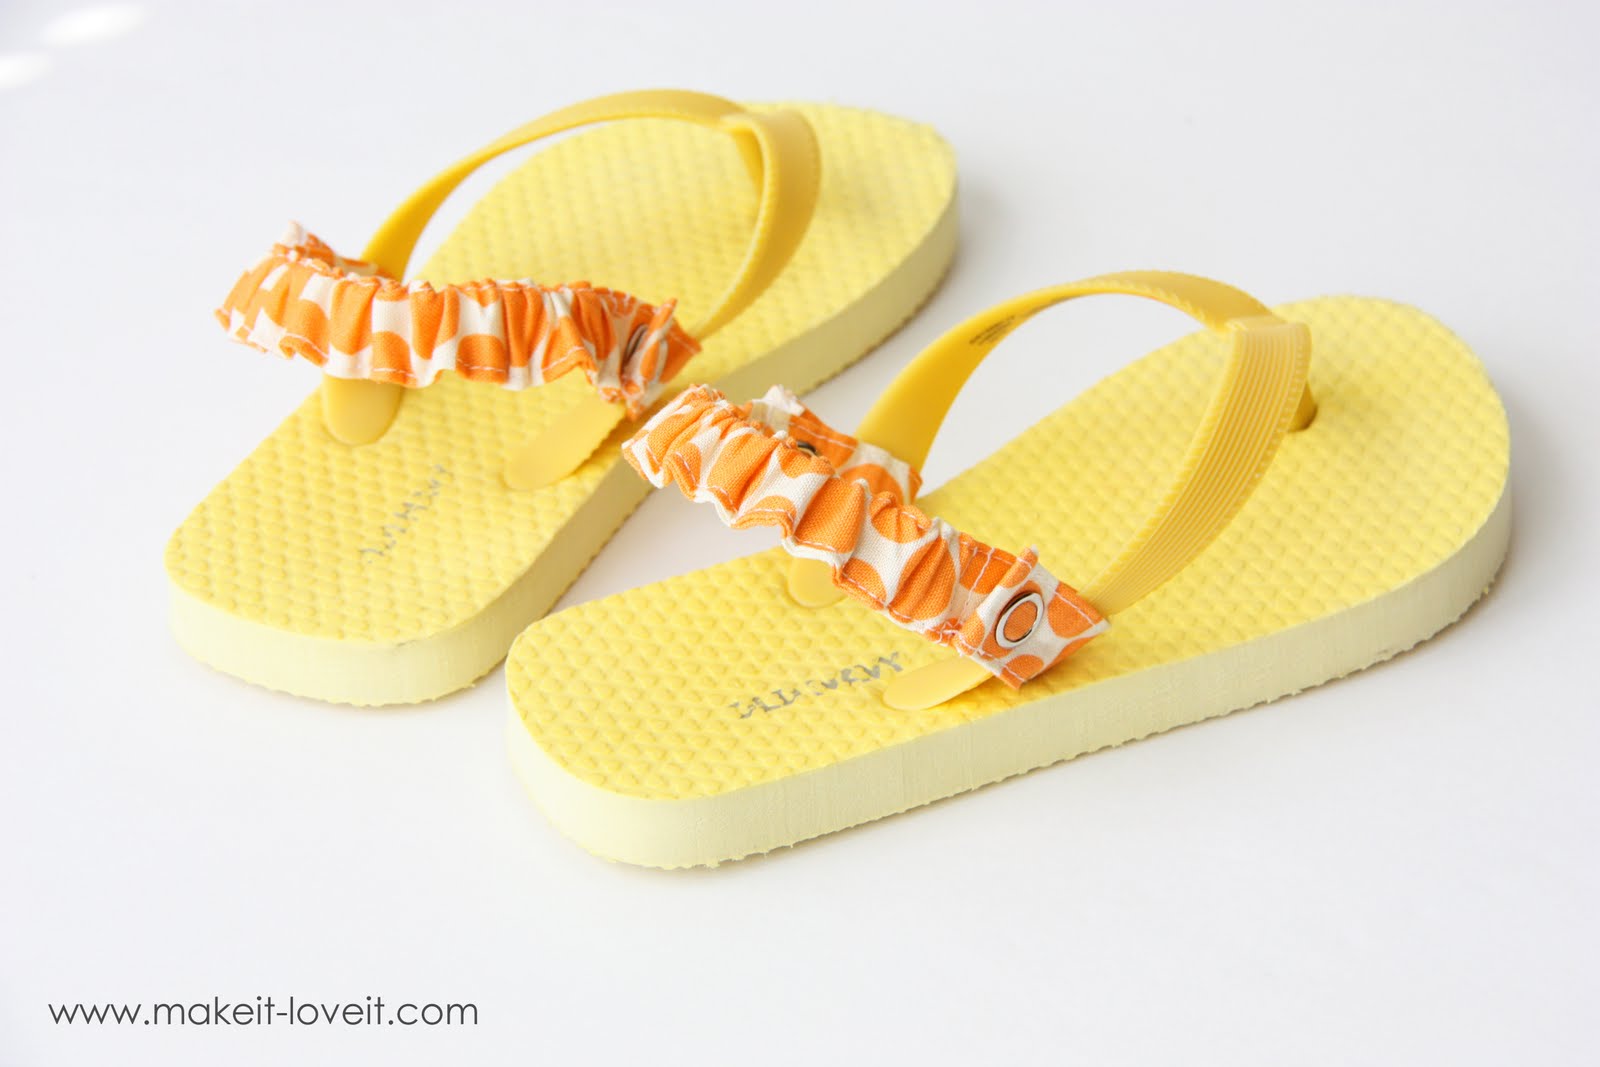
You can leave the straps plain (especially for the boys)…..or attach a simple little bow right to the back, for a girl.
It may cause excessive smiling while looking at it. But I’m okay with that.
No more hop, hop, hopping around looking for the stray flip-flop.
They stay on perfectly while she runs, skips and twirls around.
Relief.
(My son will be getting these too when his feet are too big for the pre-made ones. Just more boy-ish!)
Would you like to make your own back straps for your flips-flops?
Since you may be making a different size, I’ll show you how I made mine for my little girl…..and then you can make the adjustments you need.
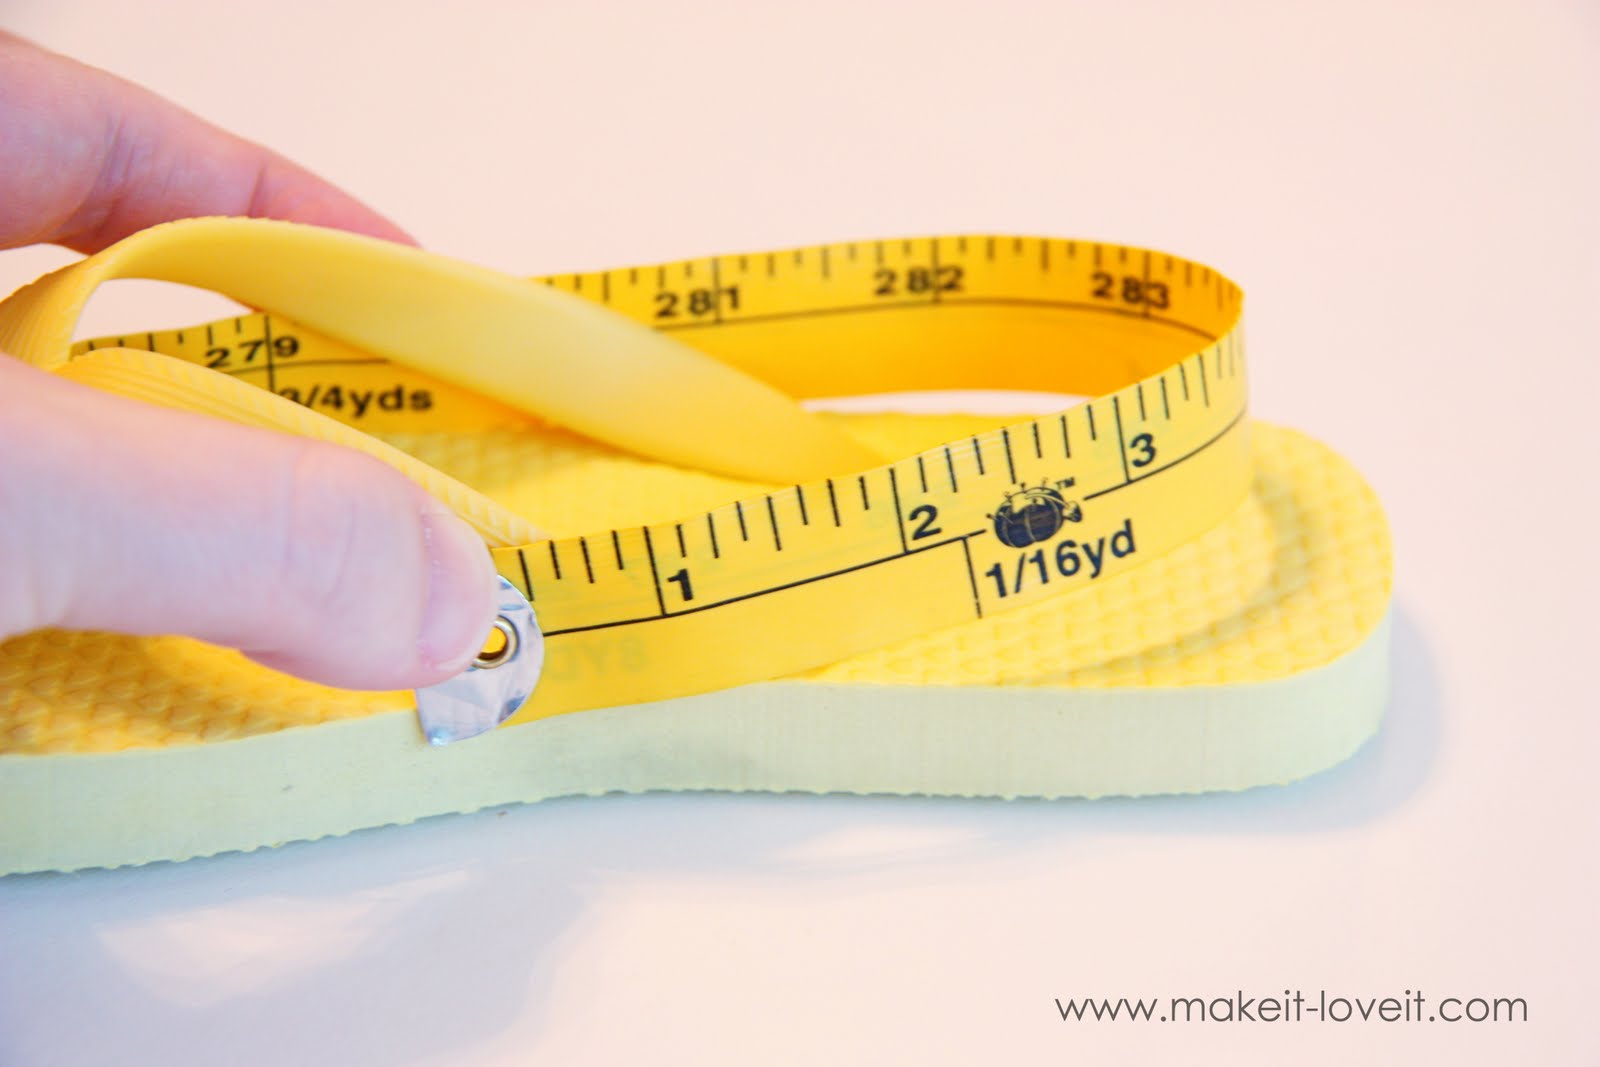
I purchased these flip-flops at Old Navy…..there’s always a lot of colors and sizes to choose from. These yellow ones are a size 10/11 (toddler size) but found in the little girl section…..not the baby section.
First, you’ll need to decide how long to make your strip of fabric. So you’ll need to measure around the back of the flip-flop. You’ll need enough fabric to wrap each end of the strap around each flip-flop strap and then be snapped shut…….plus a little extra to all the fabric to shrink a bit with the elastic and look a little bunched (I added about 2 inches for this.) You’ll also need a little extra at each end to fold under and sewn shut…….finishing off each end. Then decide how wide you want your strap then double that and add your seam allowance.
I wanted my straps to be 3/4 inch wide so I cut my strips 2 inches wide (that includes the 1/4 inch seam allowance) and then calculated out that 13 inches would work great for the length.
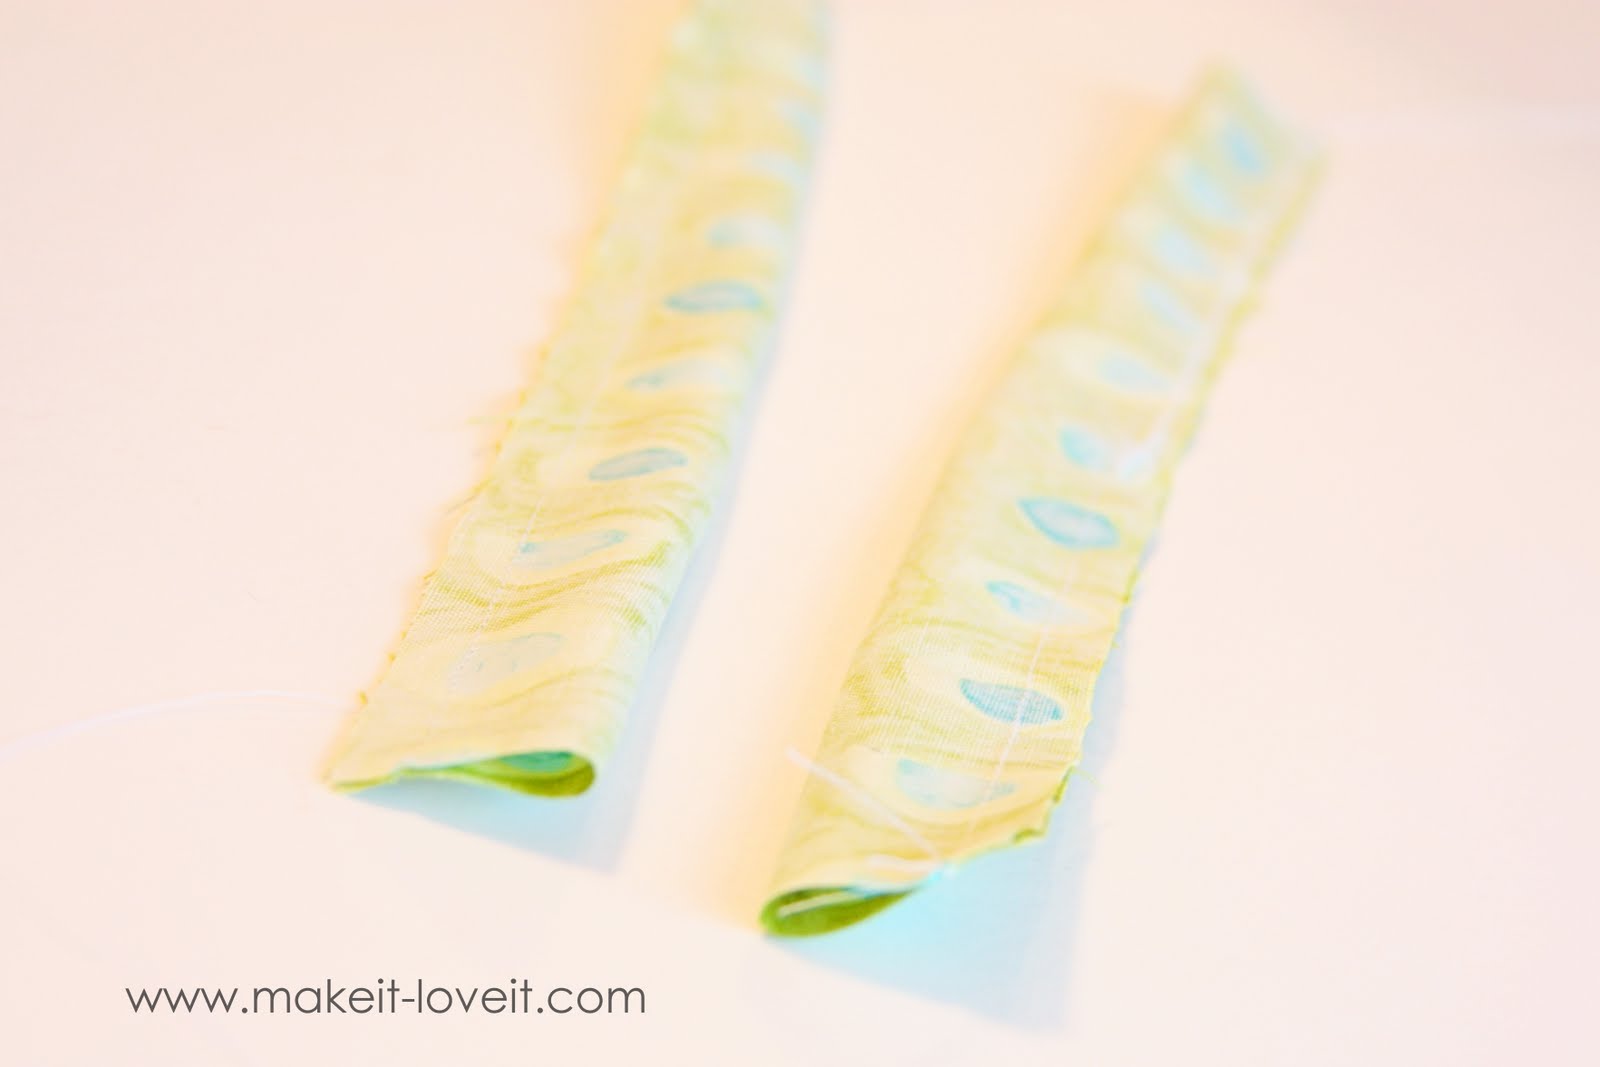
So, I folded each strip in half lengthwise, with right sides together, and sewed them together with a 1/4 inch seam allowance.
Then I turned each strip right side out (
need help with that? click here) and ironed each strip flat. (The seam is along one edge, not down the back or front.) Then I sewed a seam down each edge of both strips……nice and close to the edge.
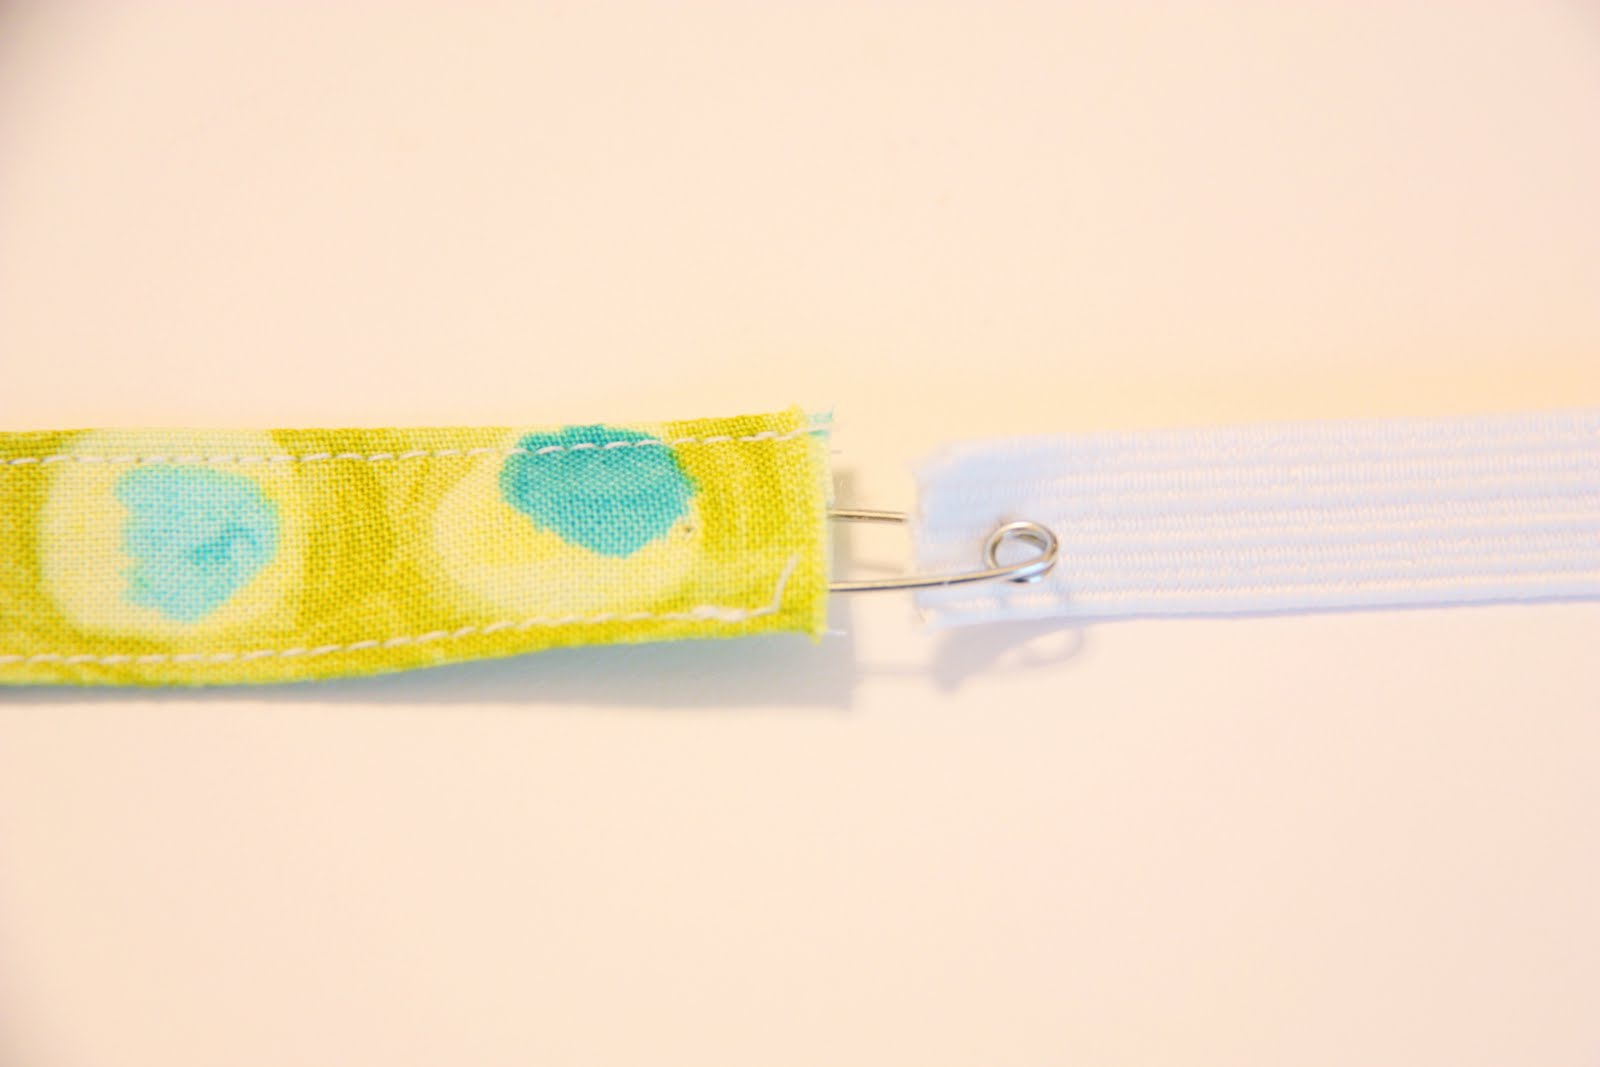
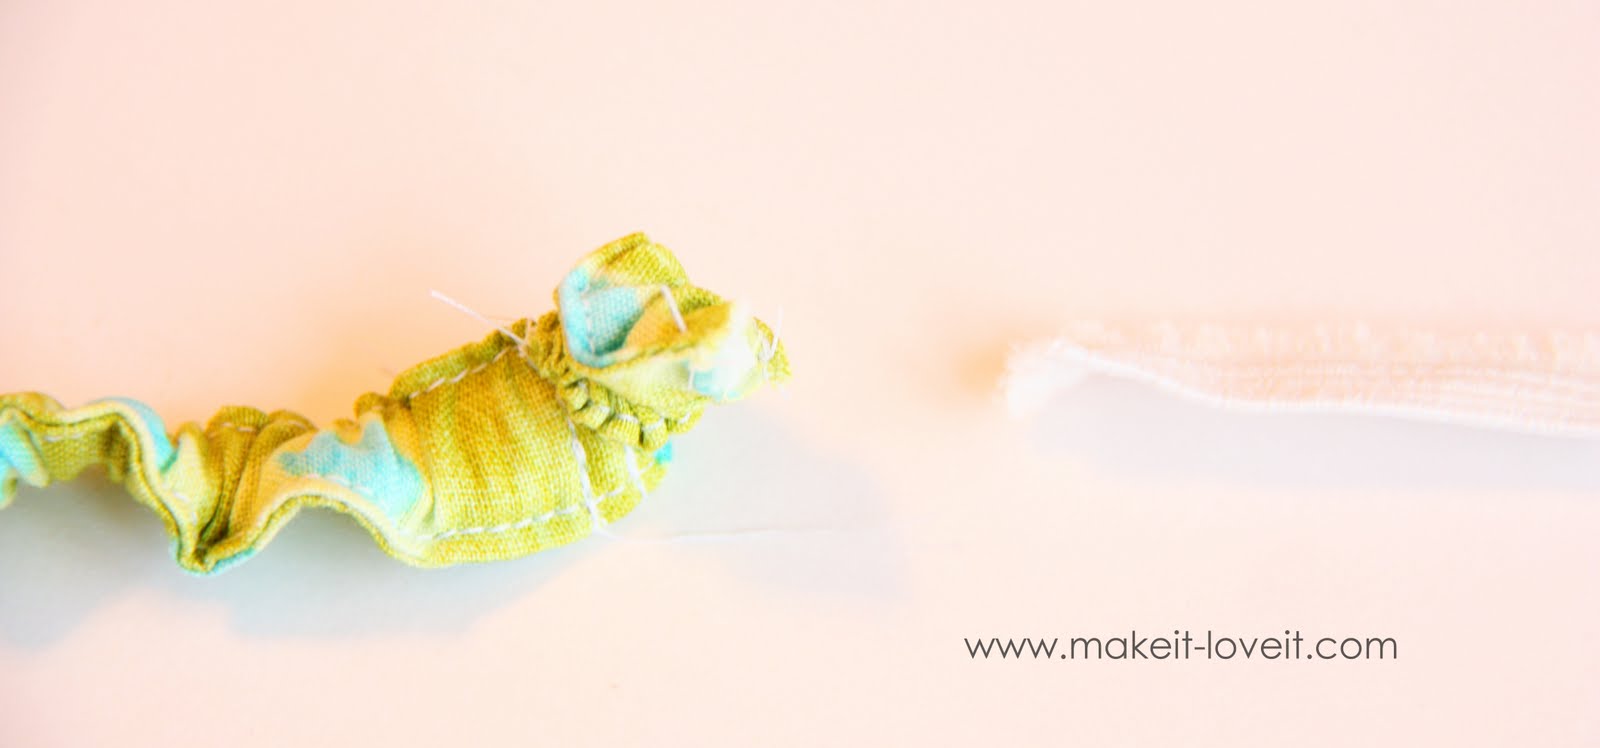
Neck, I cut a piece of 1/2 inch wide elastic that was about 10 inches long. (I cut more than I knew I needed, because I wasn’t sure exactly how much I would need. More is always better at this point.) Then I started threading it through one of my strips.
I threaded it all the way through, slowing down as I was pulling the elastic all the way through.
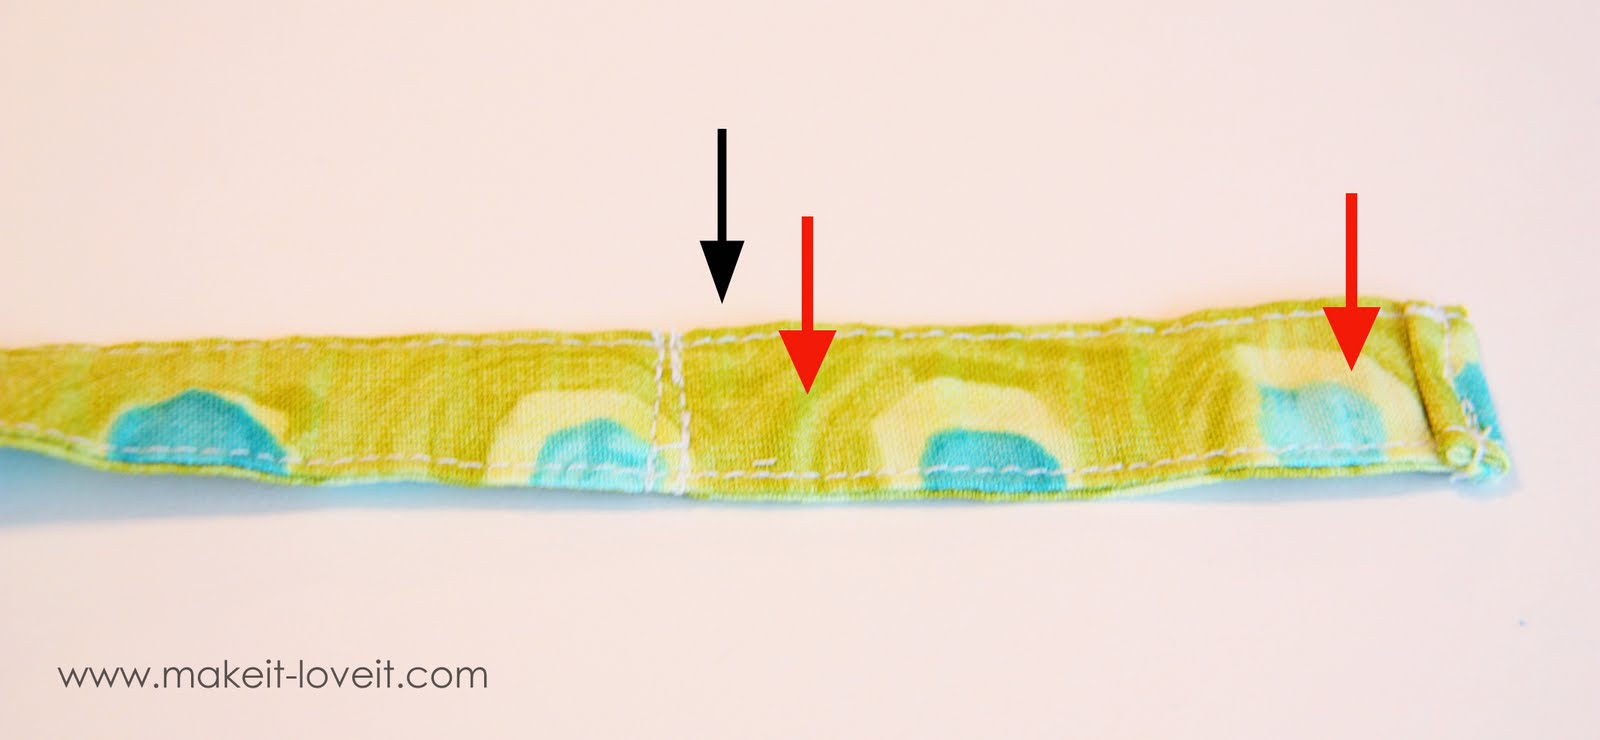
Then, I pulled the elastic through a little bit more, really slowly, and only let the end of the elastic slide inside about an inch and a half from the end. You can see one end of the elastic on the left……the other end is right where that arrow is. Then I let the elastic sit there in place as I folded over that end about an 1/8 of an inch, then another 1/8 of an inch…..then sewed it in place.
Then I wrapped this end around the flip-flop strap and decided where the snaps would go.
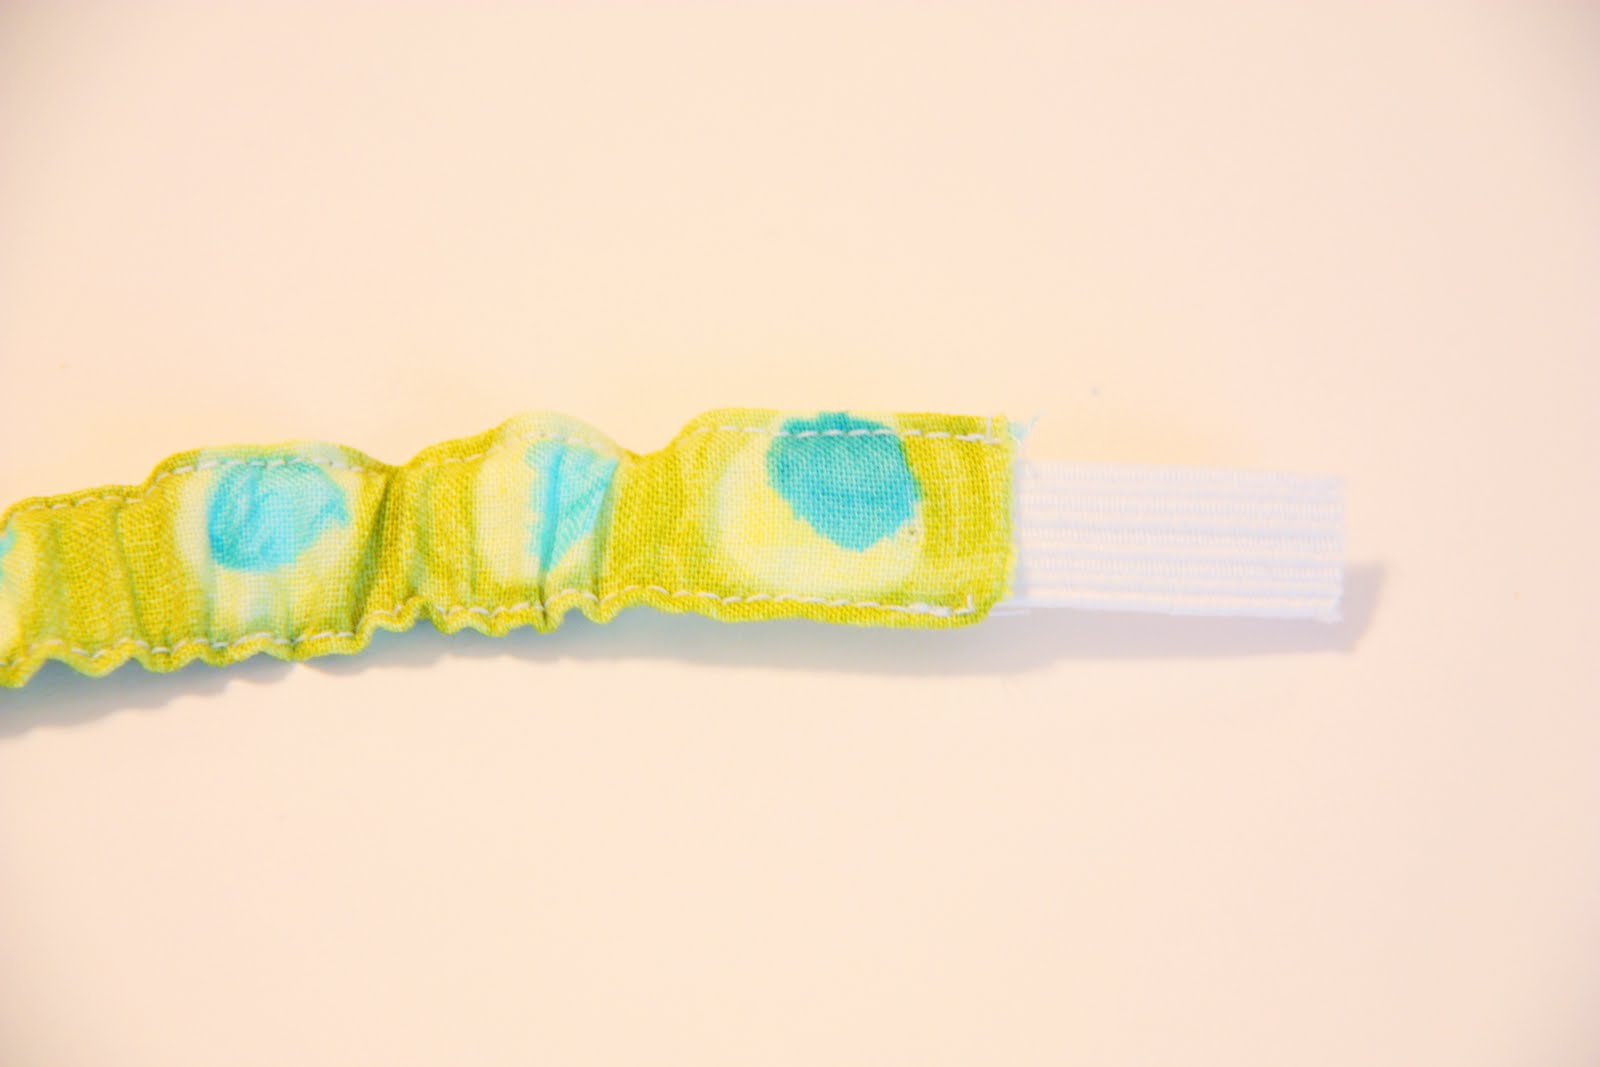
I knew I didn’t want the elastic in the part of the strap where the snaps were being attached (because it makes it too thick for the snaps and more bulky around the plastic flip-flop strap), so I made a mark where the snaps would go (the red arrows) and then decided that the elastic couldn’t go beyond where the black arrow is. So I pulled the elastic from the left end really slowly, until the right end of the elastic was about even with that black arrow. Then I made 2 seams right to the left of where the black arrow is, to be sure and catch the elastic and sew it in place.
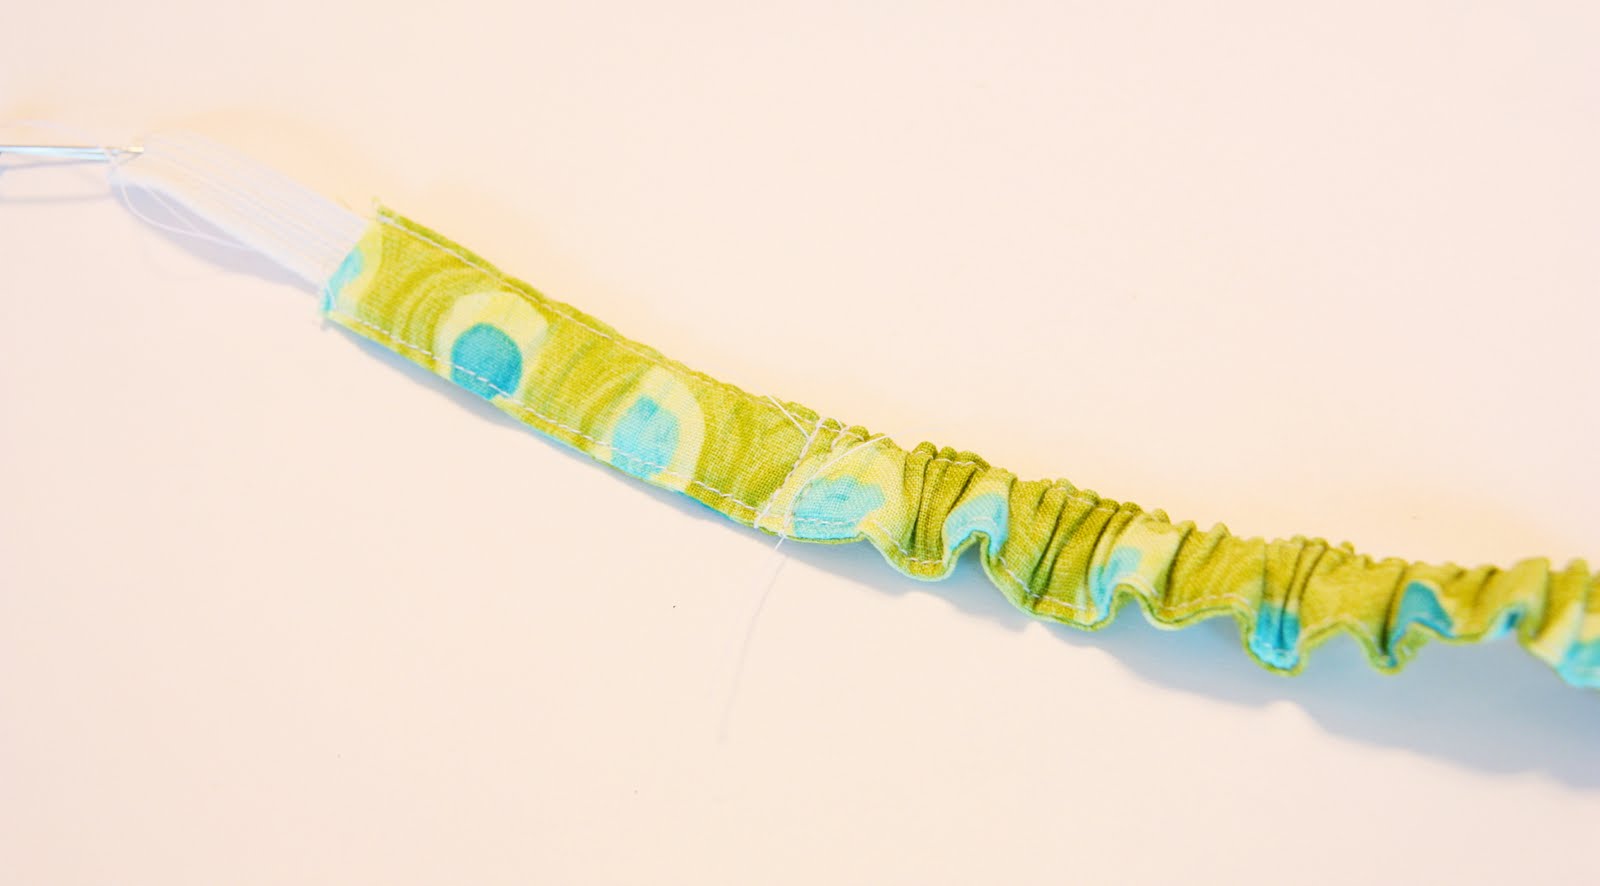
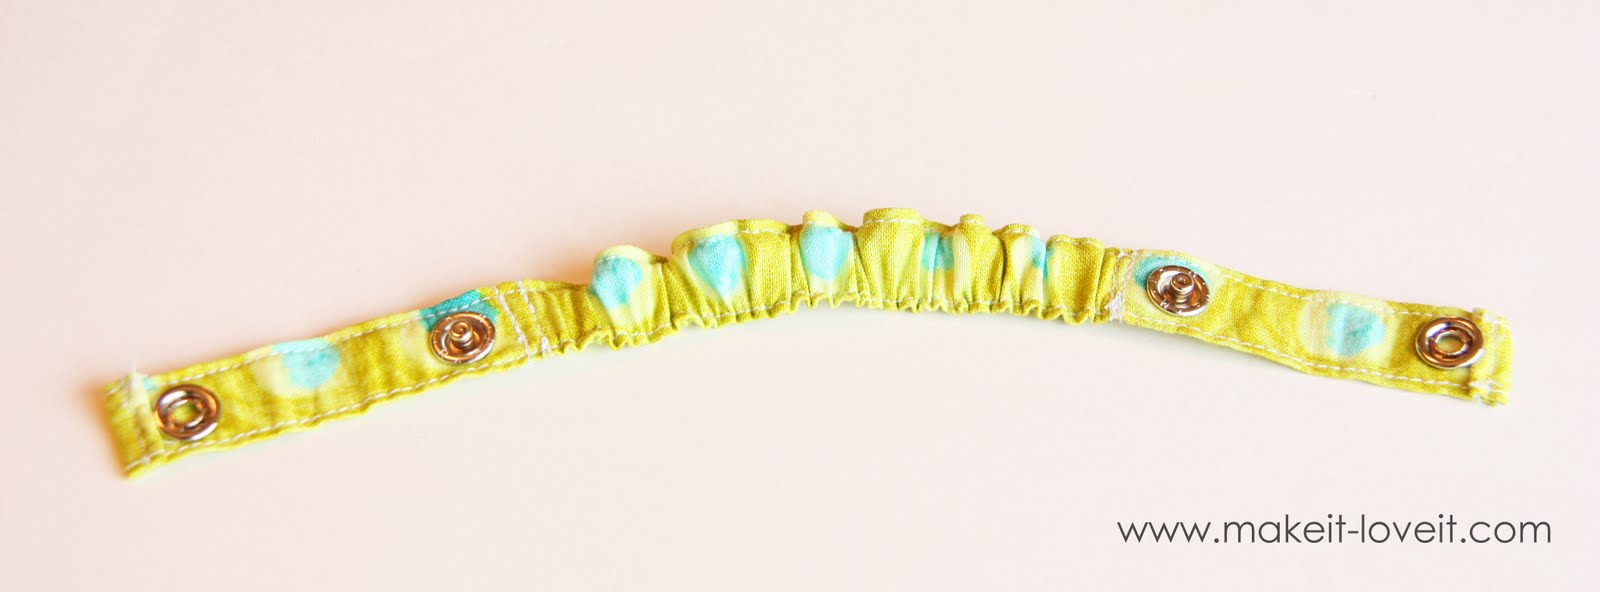
Then, I pulled the elastic from the left side a bit more, bunching up the strap a bit………and giving it a nice stretch as it’s being pulled. You can measure on your child’s foot to make sure that the elastic isn’t too tight or too loose and looks just right. OR, if you’re making this for someone you can’t measure on, you can hold it up to the flip flop and be sure that it looks right. You’ll want the strap to not go all the way to the heel as it’s resting there in place, because you want it to stretch and fit snugly when it’s on the child’s foot.
Then you want to leave just as much fabric on this end of the strap as you did the other end, and make 2 more seams to secure the elastic in place.
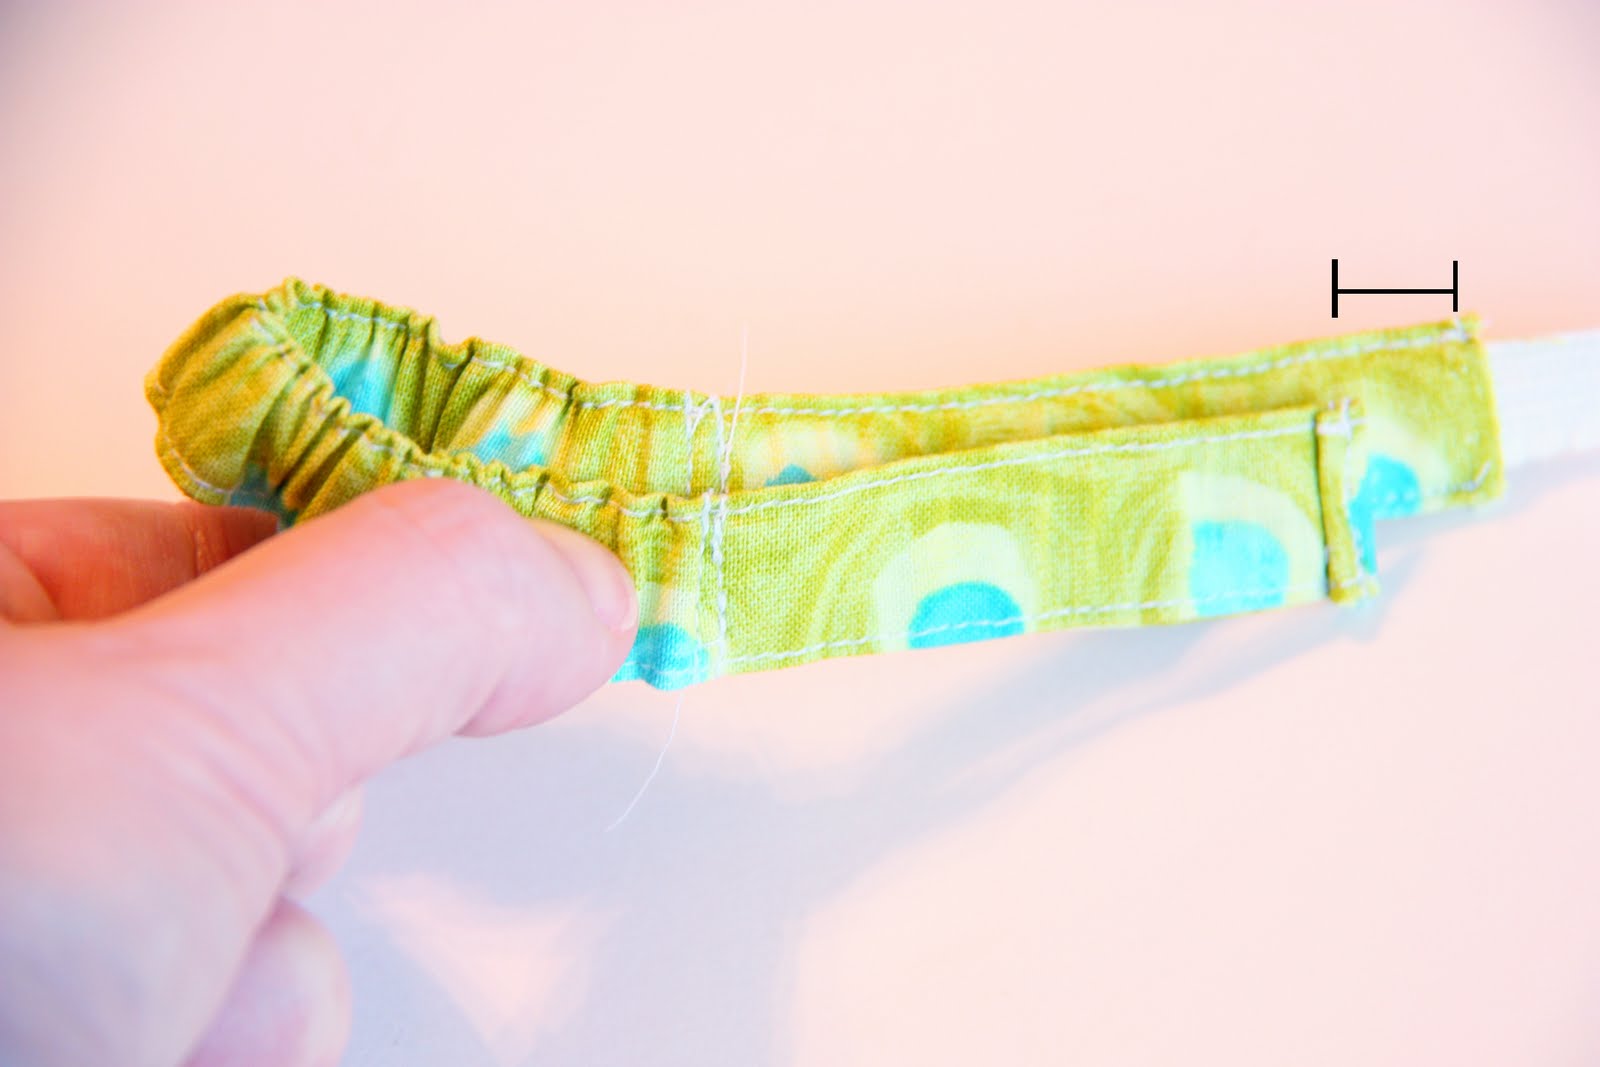
It may help to fold it in half and let the unfinished end go a little longer because it still needs to be folded and sewn (between the brackets below) and mark where you would need to make your two seams by comparing it to the finished end.
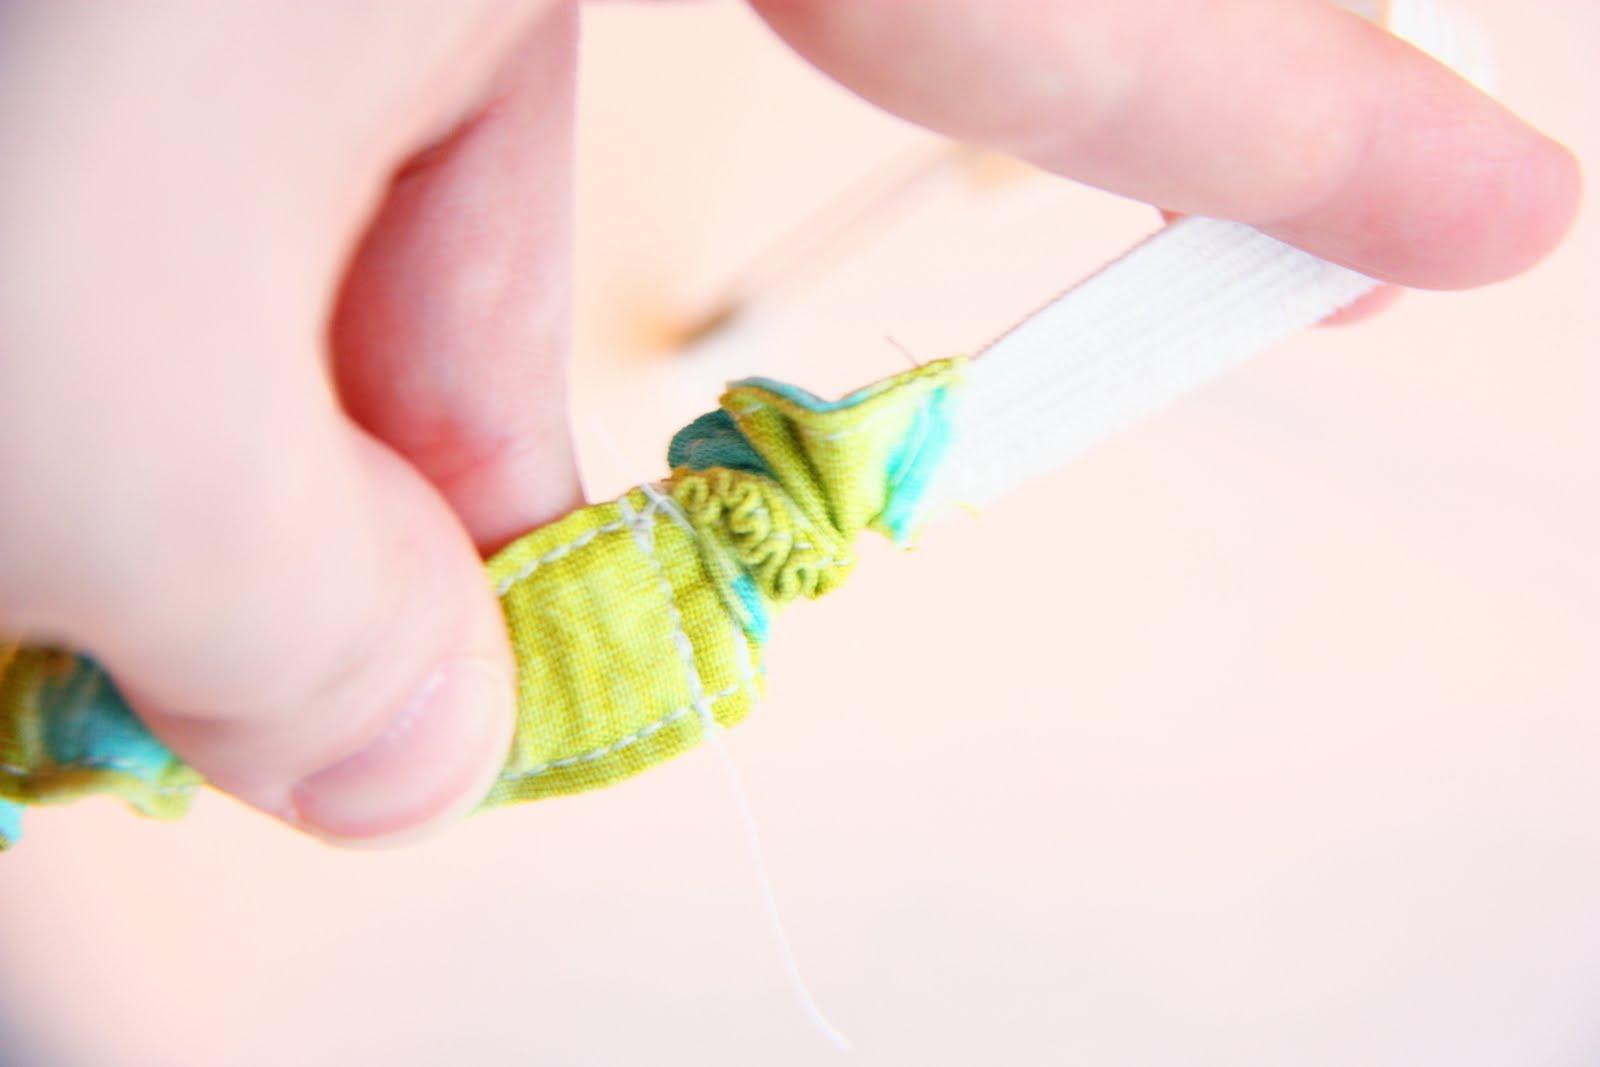
Now, you have this extra elastic to deal with. Pull it and slide the fabric down as far as it will go.
Then cut the elastic as far down as you can, so there isn’t a ton of elastic left inside……because you don’t want the elastic in the way when you’re attaching the snaps. Then flatten that fabric back out, turn under the ends and sew it just like the other end.
Now, attach your snaps to each end, making sure that your snaps are facing the right way of how you’d like to attach your strap (and that the folded under seams will be facing inwards while the straps are snapped in place. (Need help attaching snaps? Click
here.)
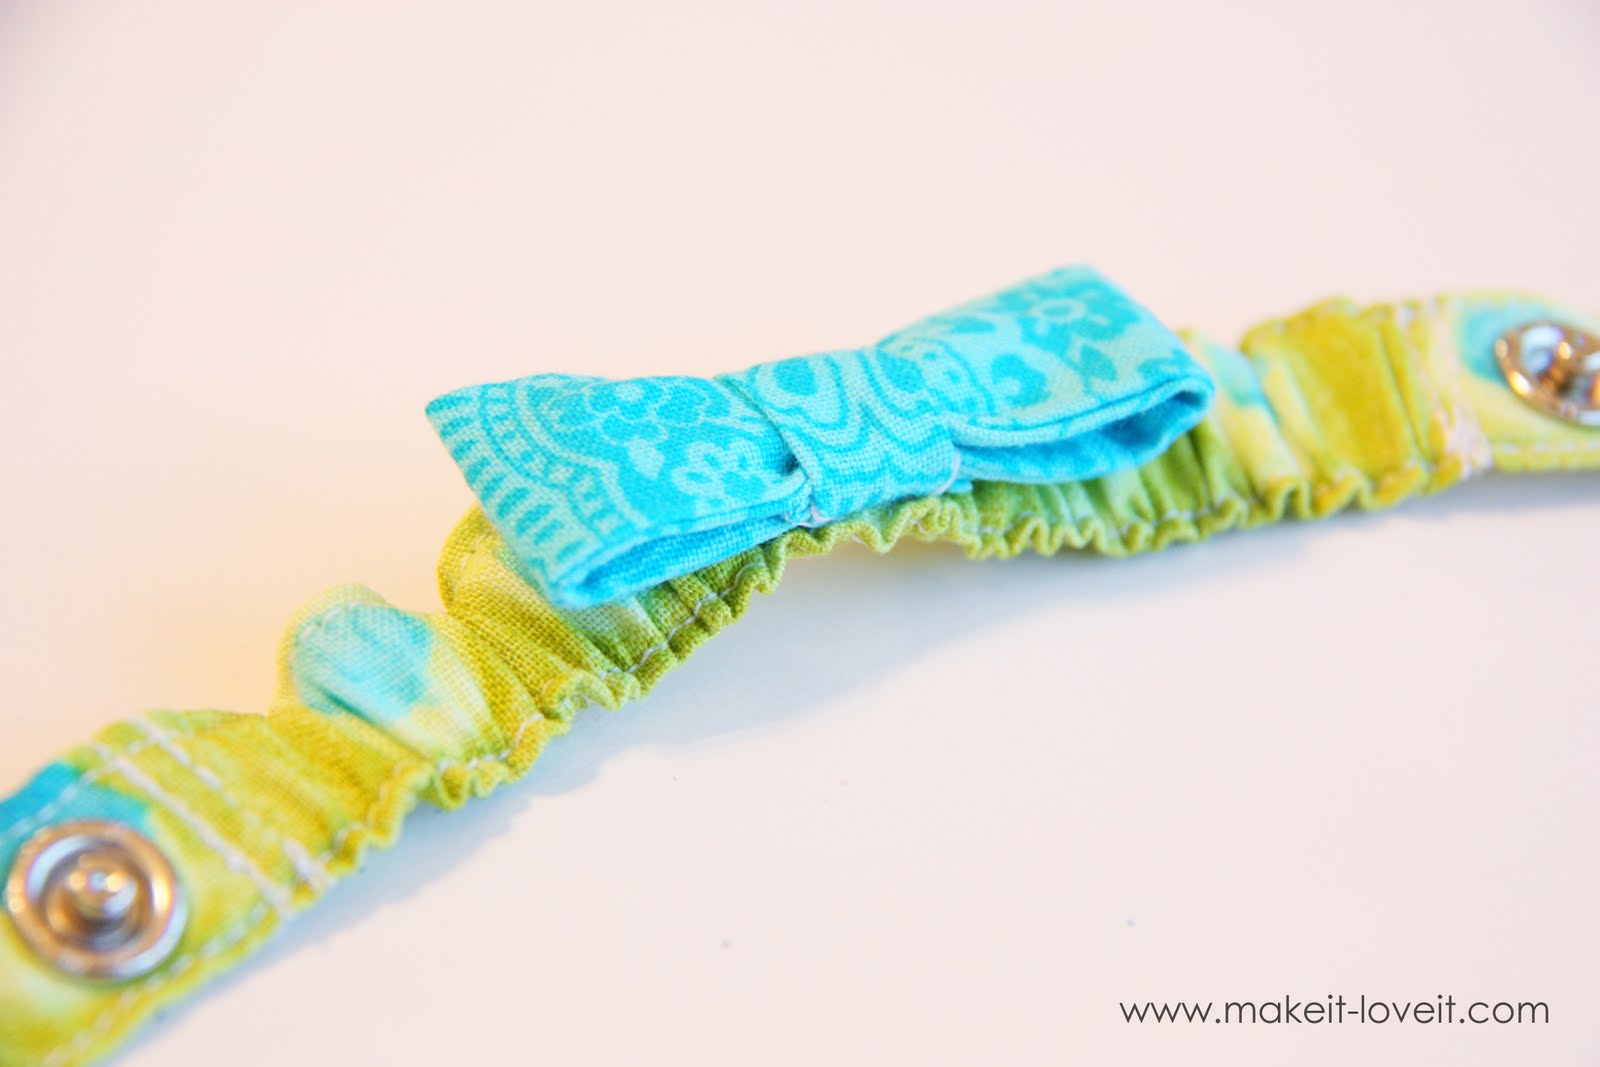
Now, you can either stop here and be done (hallelujah!!) or you can create a little bow.
All I did for the bow was cut a strip of fabric that was 2 inches wide by 4.5 inches long. I sewed it into a tube with a 1/4 inch seam allowance, turned it right side out and ironed it flat.
Then I folded the ends over, overlapping them by a 1/2 inch, then sewed them in place right down the center.
Then I cut another little strip of fabric that was 3/4 inch wide by about 2 inches. I folded each side edge in towards the center and pressed it flat.
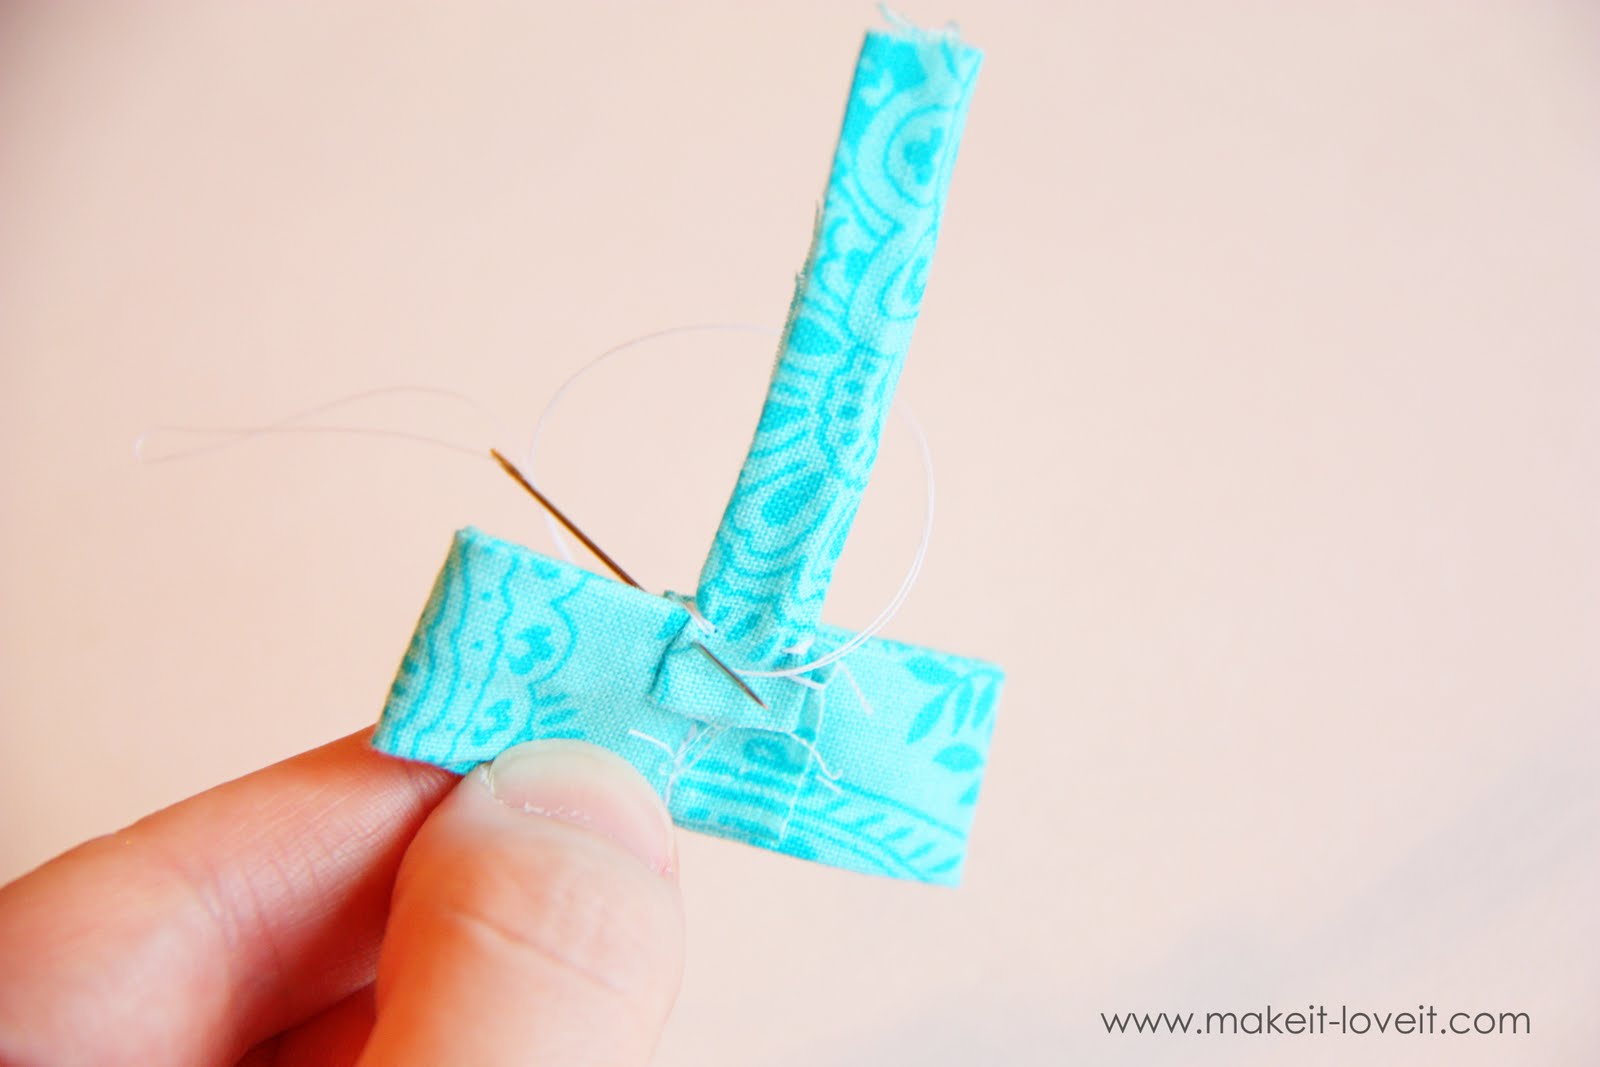
Then I hand-stitched one end of this little strip to the back of the bow…… (need help with hand stitching? click
here.)
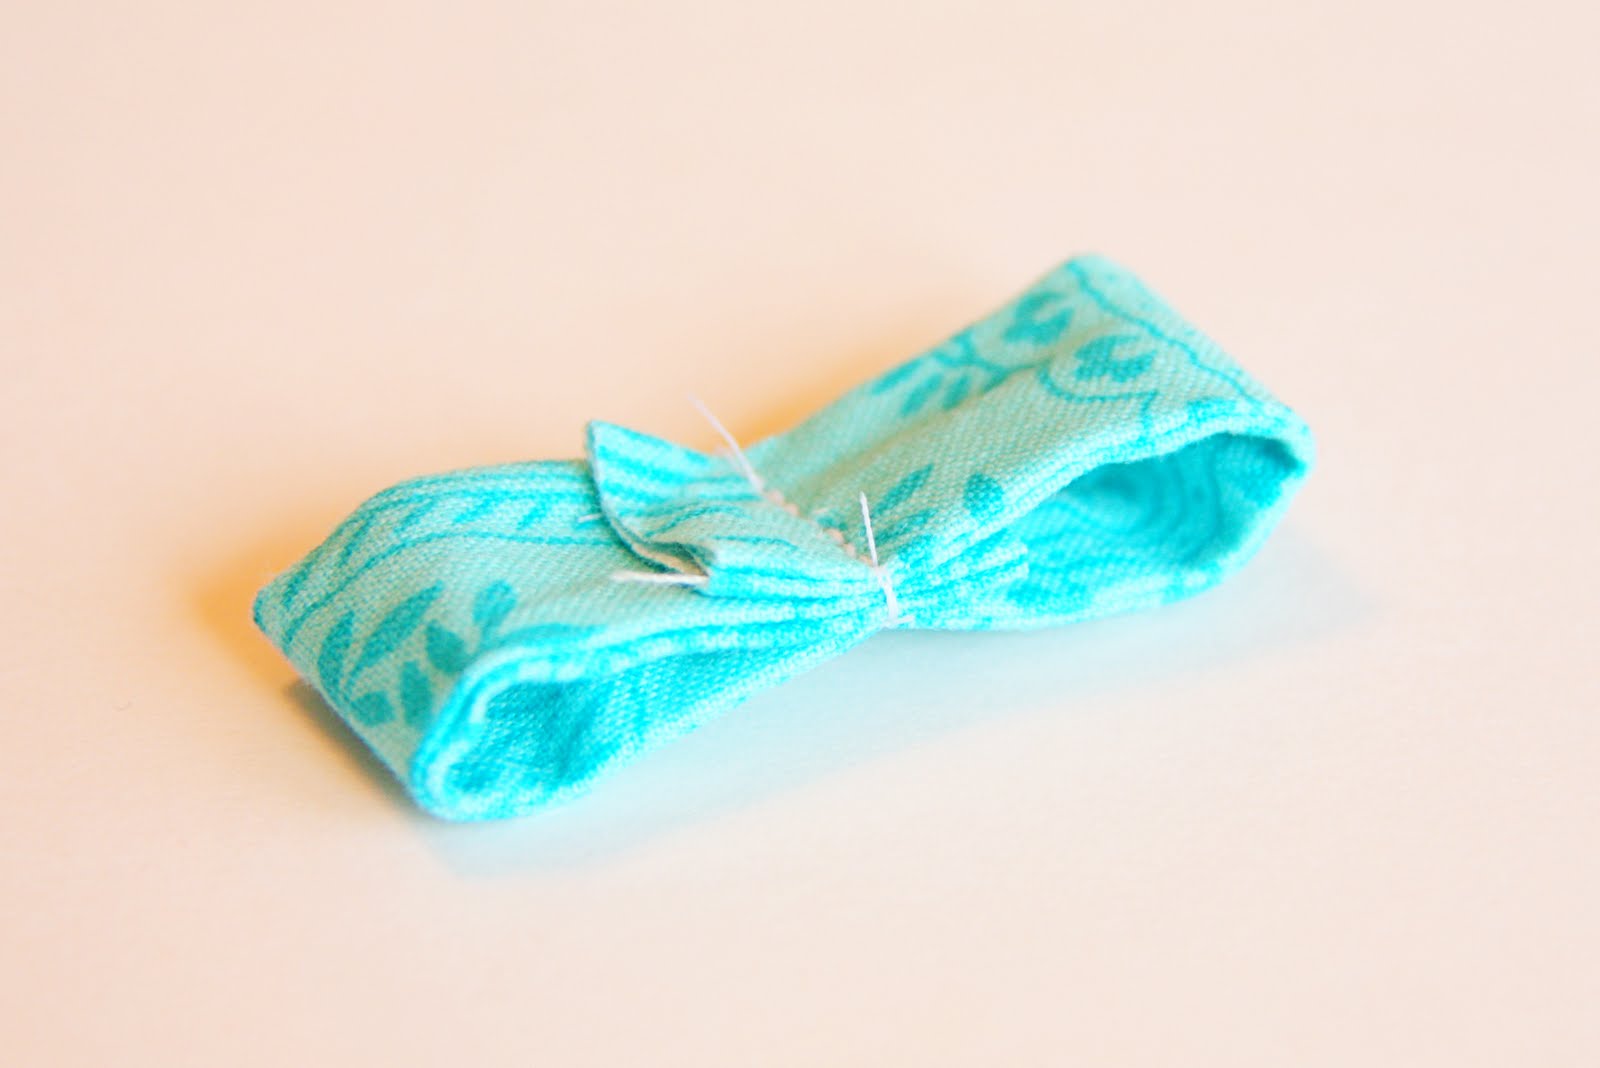
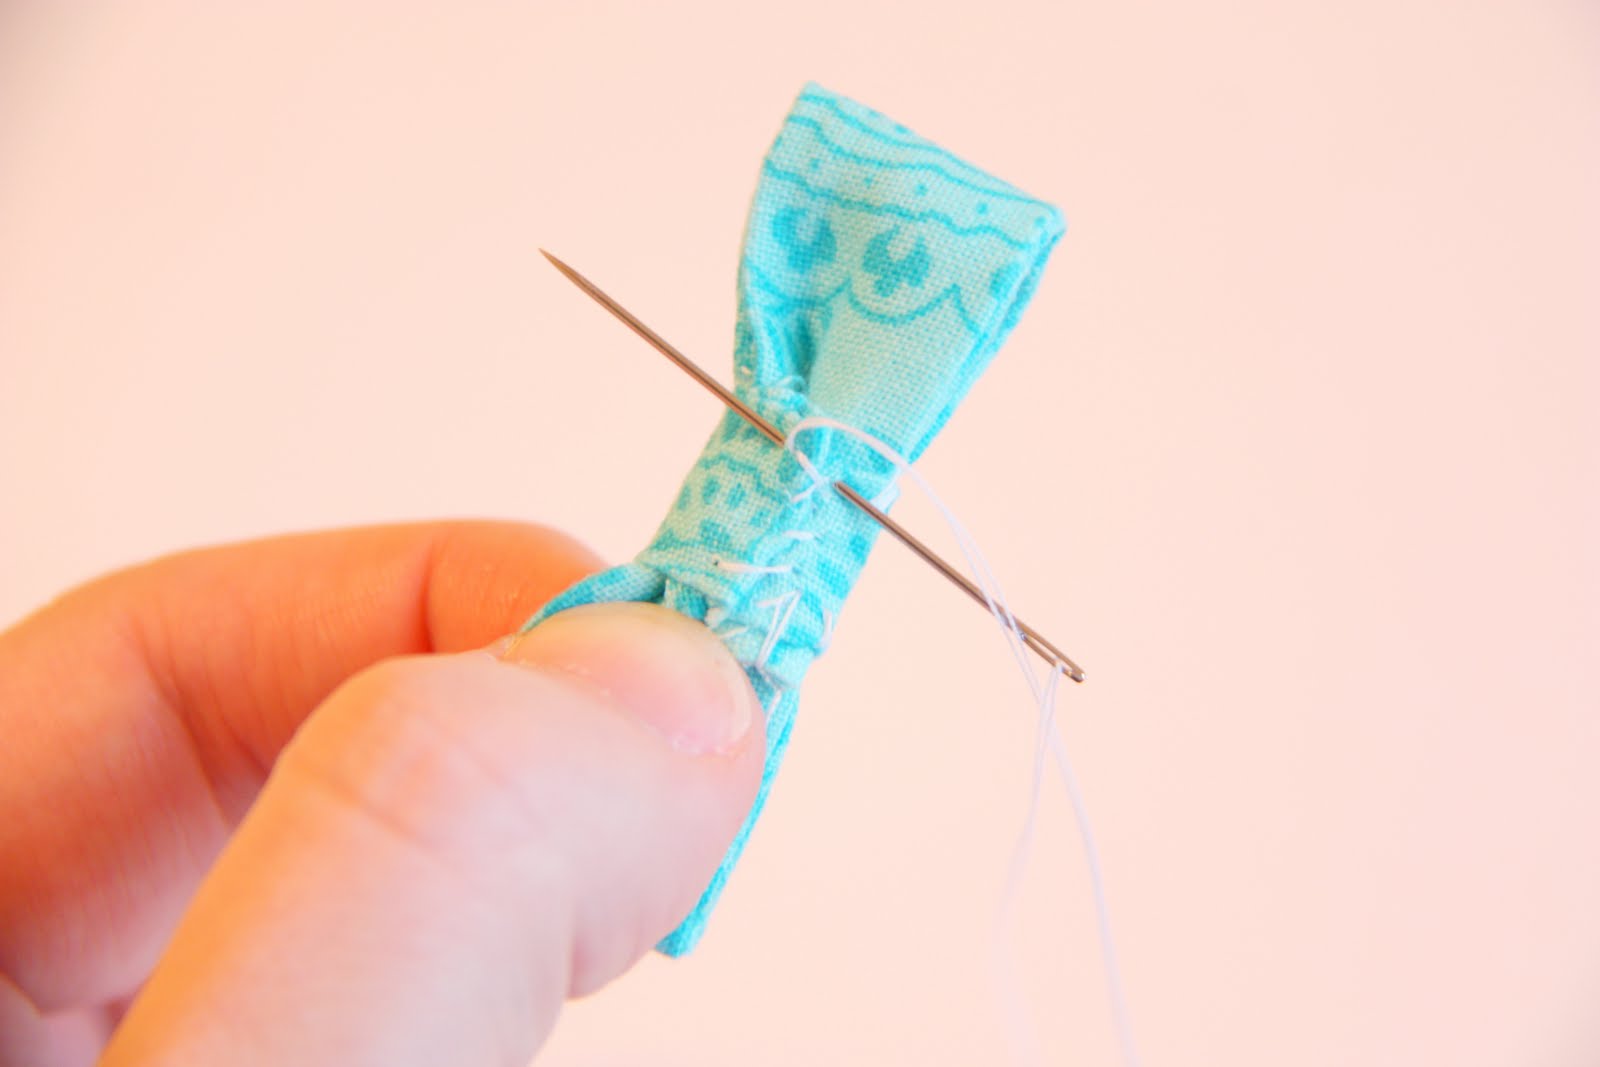
Then I pinched the center of the bow (to create a smaller bow center) and then wrapped the narrow strip around the front and back to the back of the bow. I pulled the strip tightly as I wrapped and then tucked under the second end (trimming off extra fabric if necessary) and then hand sewed it into place in the back.
Then I hand-stitched the bow right to the center of the strap.
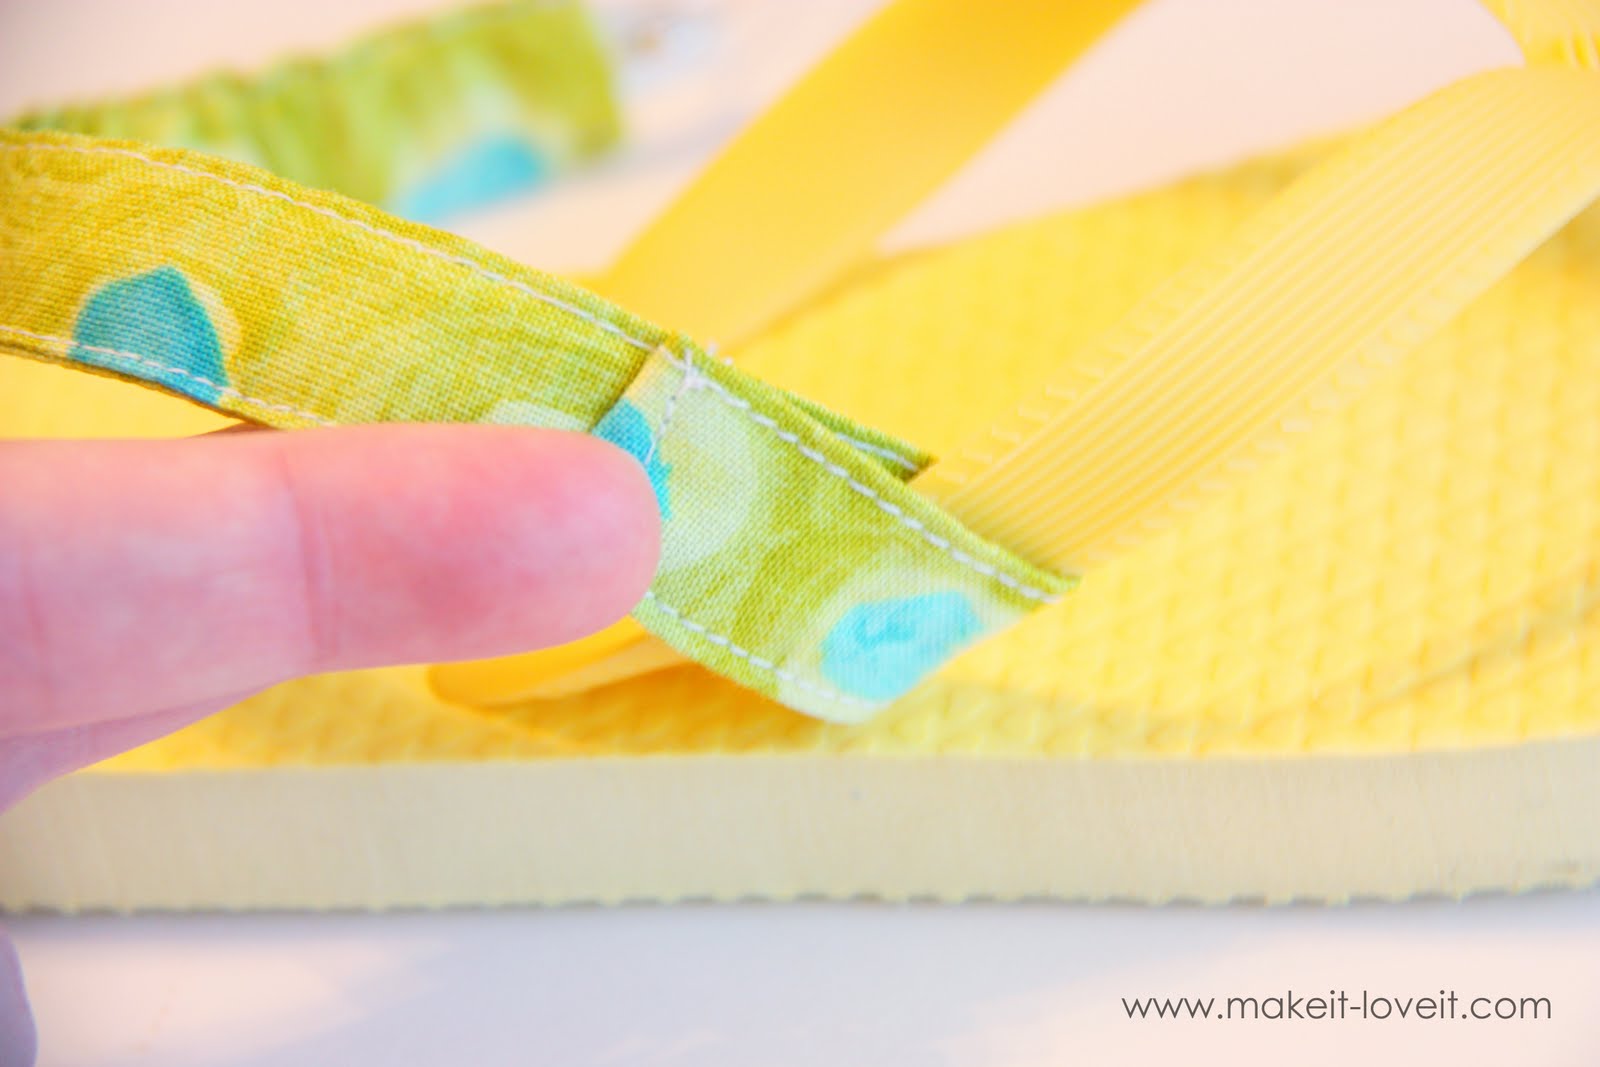
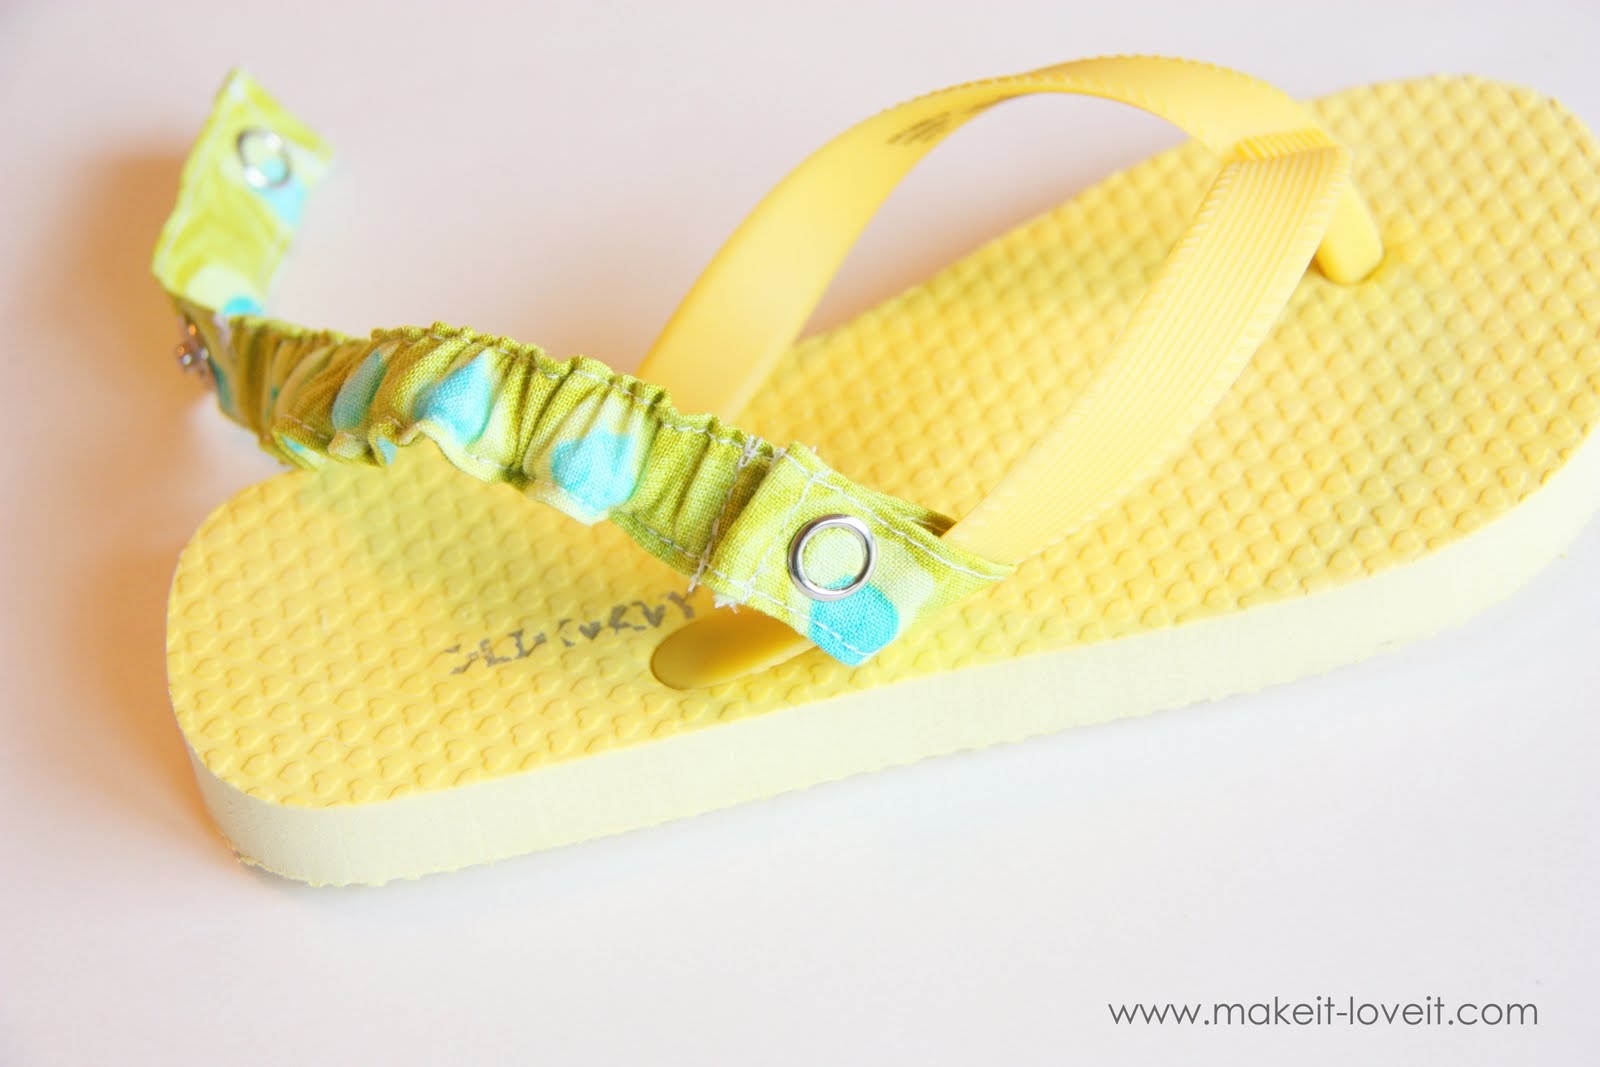
Then I attached the straps to the flip-flops.
And then made more (without the bows). You know, for that added color option.
No more tripping, hopping, or scrambling to retrieve a stray flip-flop.
We are back to a love/love relationship with these little sandals. Whew.
. . . . . . . . . . .
This post is sponsored by: