Home » DIY Tutorials » DIY Sewing » Sewing: Clothing » Women's Clothing » Cascading Ruffle Front, Woman’s Shirt
Cascading Ruffle Front, Woman’s Shirt
April 26, 2011 - By Ashley Johnston 46 Comments
.
Spring-time makes me think of light and ruffly things.
My post-baby-mid-section makes me think that I need to hide it.
Put those two thoughts together and I needed a new shirt for spring.
So here’s my solution: a flow-y top of cascading ruffles. Which, will be just as fun to wear even after things shrink down a bit more.
So no, you don’t have something to hide, to enjoy this top.
It’s just a perk in case you are.
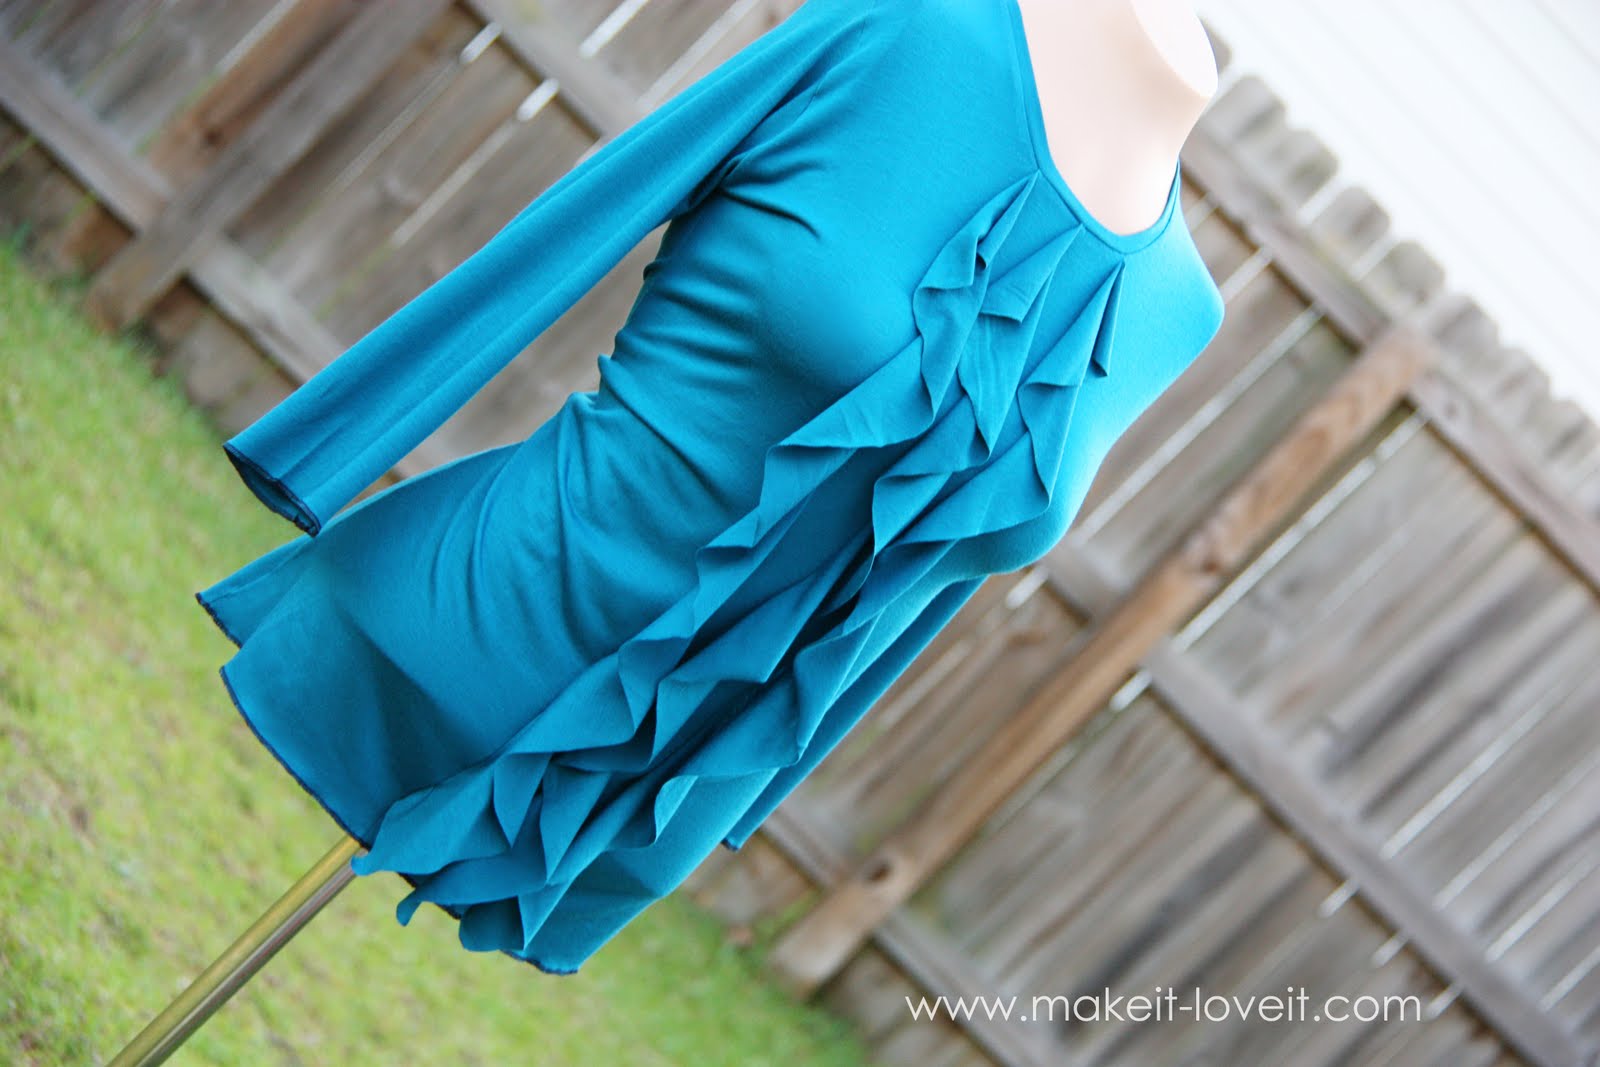
The ruffles are simple and flow-y……..
……..and extend all the way to the bottom of the shirt.
They kind of make me happy. And less cranky about post-baby-body.
I know, I need a new mannequin. Her shape is a little too perfect.
Also, her torso is tons shorter than mine, so I’m always adjusting……but you get the idea.
Would you like to create some of your own cascading ruffles?
You could also put some cascading ruffles on a skirt or only for the top half of a shirt. Or maybe a bag or pillow…..
For this shirt, I used a thin and flow-y jersey knit. It seemed more slinky than the knit you would use on like leggings or an under-camisole. And because of that, it provided a really great flow to the ruffle. But a thicker, more standard jersey knit will work too. (I’m not sure how to name the different jersey knits. The label on the bolt of fabric only tells me so much. Sorry about that.)
How much fabric to buy? It depends on your size and your height. I bought about 2 yards of fabric, just to be sure to have enough (because you’ll see below you have to cut out good sized circles). I am pretty tall and wanted it long enough…..plus I made my shirt with a 3/4 sleeve. You could make yours sleeveless, short sleeve, whatever. But 2 yards worked for me.
. . .
First, you’ll need to create a shirt, using an old shirt as your pattern. (
Here’s another tutorial with more pictures of the process.)
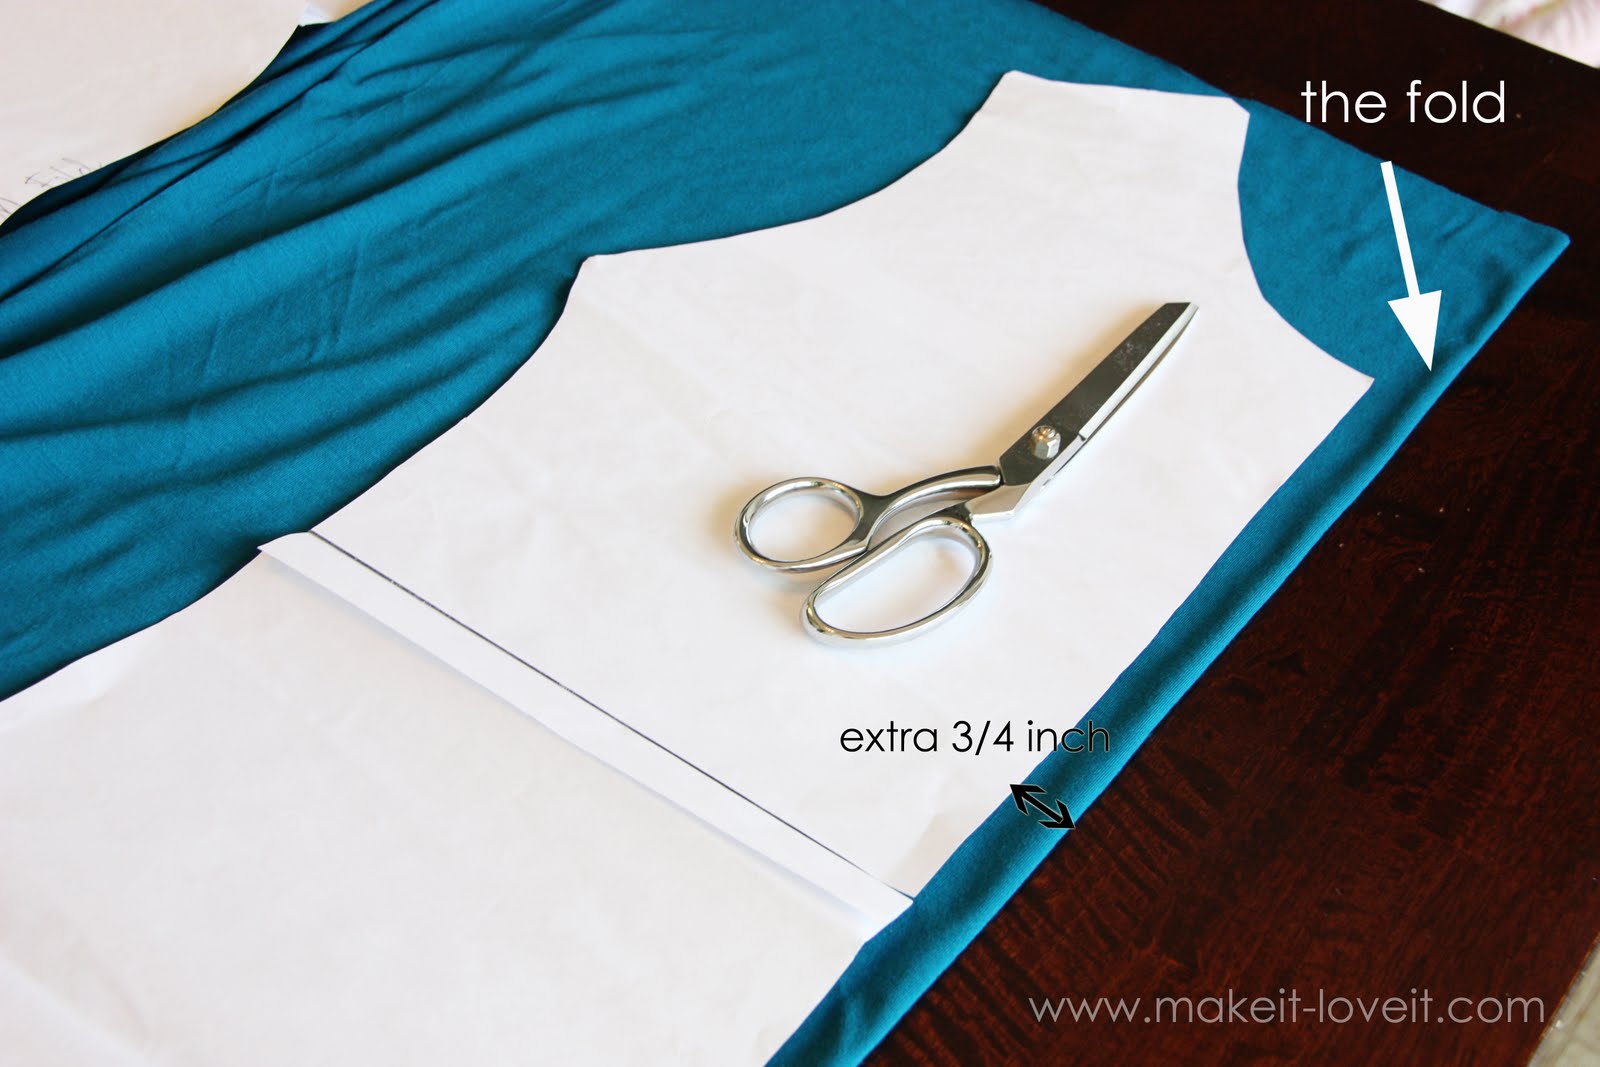
However, when cutting out your pieces, you’ll need to adjust how you cut the front shirt piece. You’ll be cutting the front up in the next step and will need extra fabric for seam allowances. So lay your front shirt pattern piece 3/4 of an inch from the fold (adding 1.5 inches to the front width of the shirt after opening it up) and then cut around your piece like you normally would.
Set all of your front/back pieces and your two sleeve pieces aside.
To make the cascading ruffle, you will need strips of fabric that are curved. I’ll explain more.
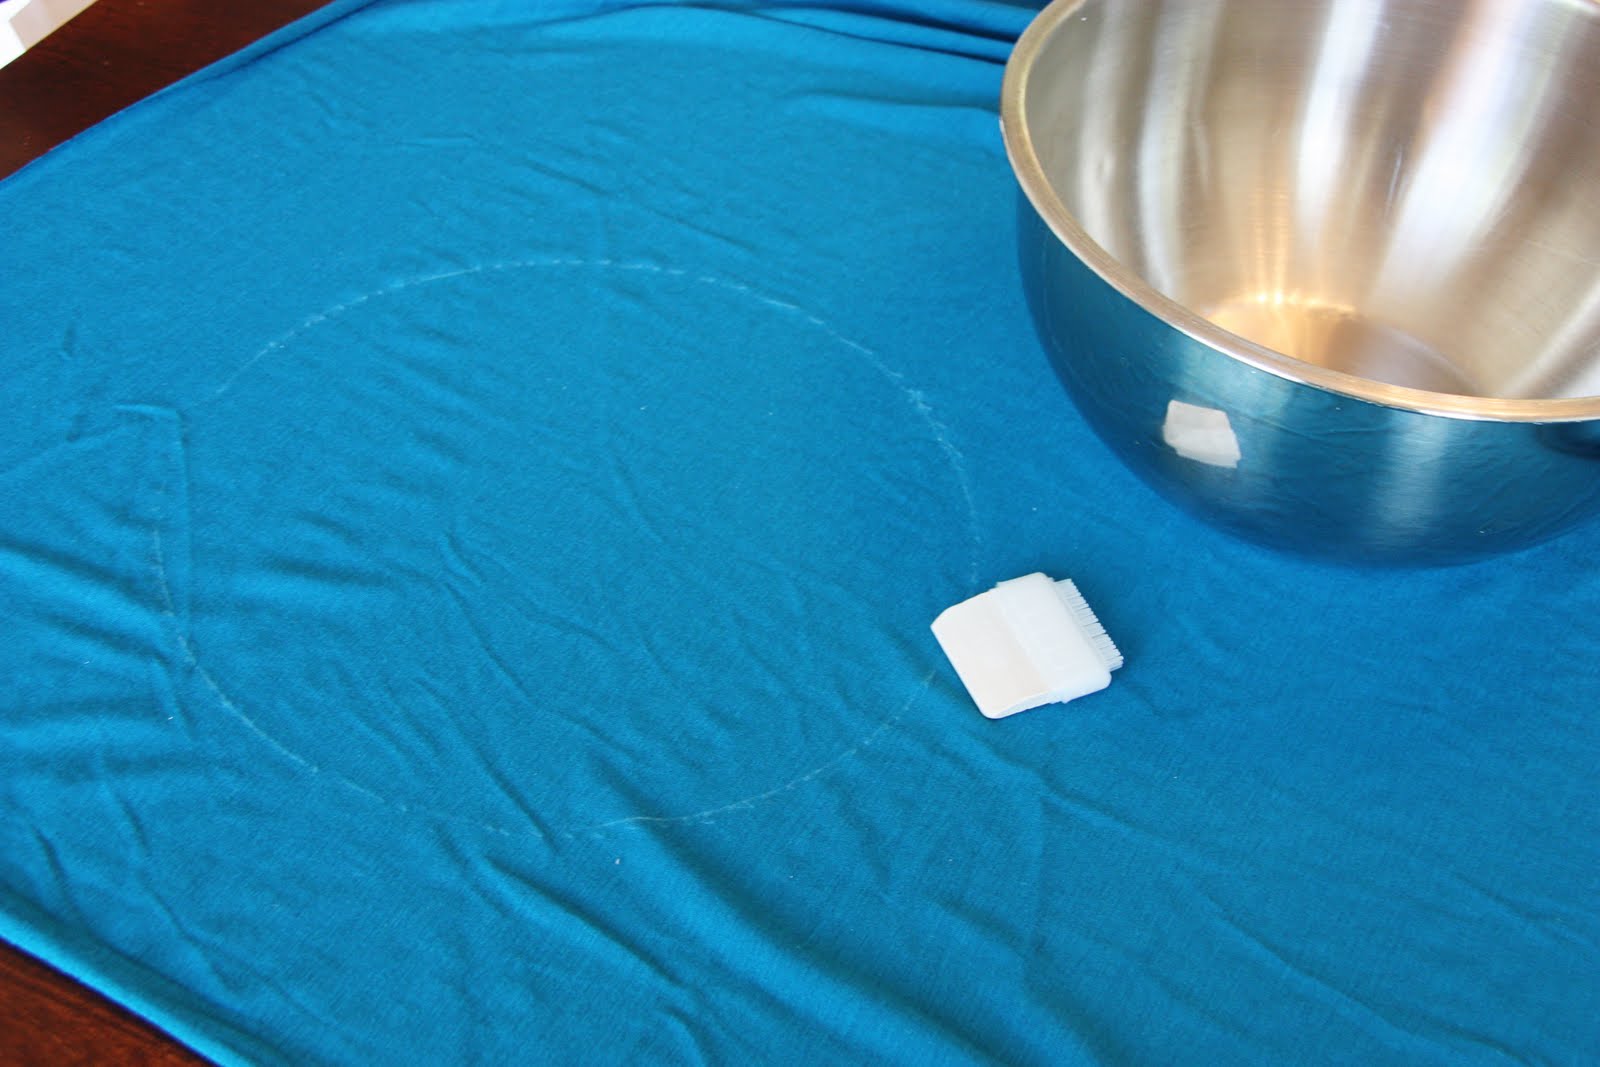
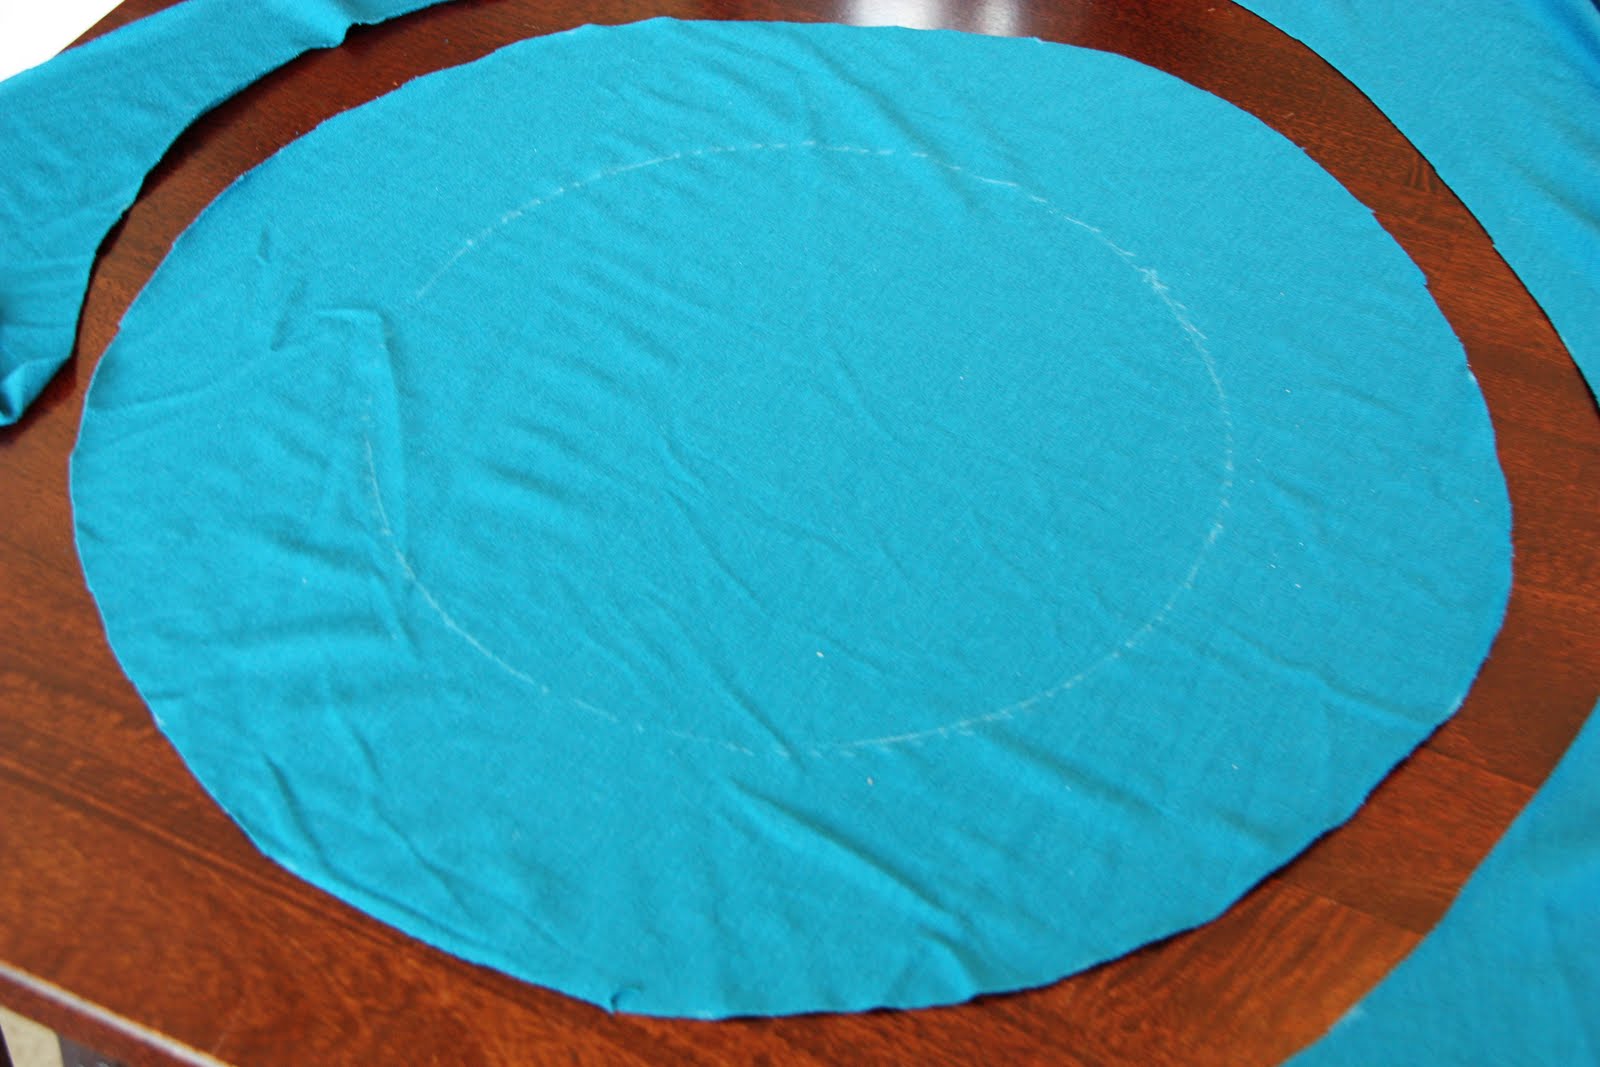
First, measure the length of the front of your shirt. You will need ruffles that are at least that long around the inner curve of the curved strip of fabric. So find a bowl with the same circumference measurement (or similar) as the length of the front of your shirt. (Or make your own circle.) My shirt was was about 20 inches long down the front…..so I found a bowl that was about 20 inches around. I turned it upside down and traced the shape onto some of my knit fabric with some fabric chalk.
Then I made another circle around the first one, measuring 3 inches out from the smaller one. (Because I want a curved strip that is 3 inches wide.) I marked with chalk again.
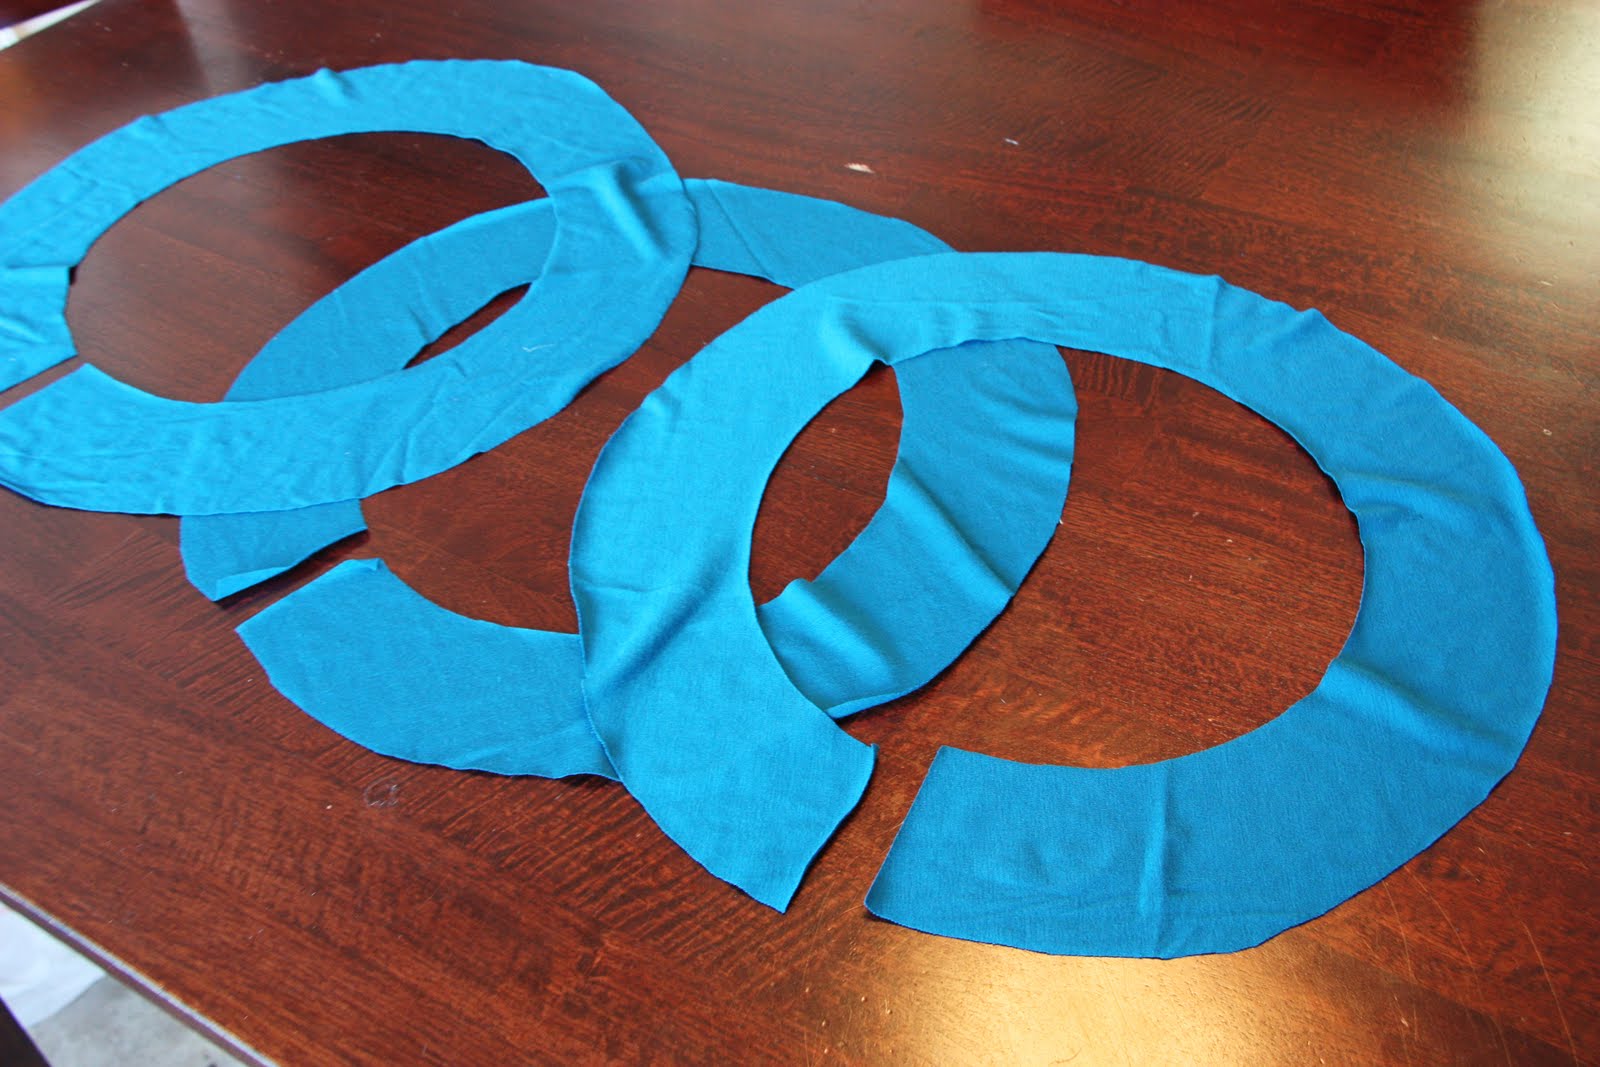
Then I cut out the larger circle…..
……..and then cut a straight line in towards the smaller circle and then cut out the smaller circle. You will be using the outer ring that is 3 inches wide as your cascading ruffle. Hold it up, you’ll see how it drapes so nicely.
Now make 2 more of these circular strips of fabric, making a total of 3 strips.
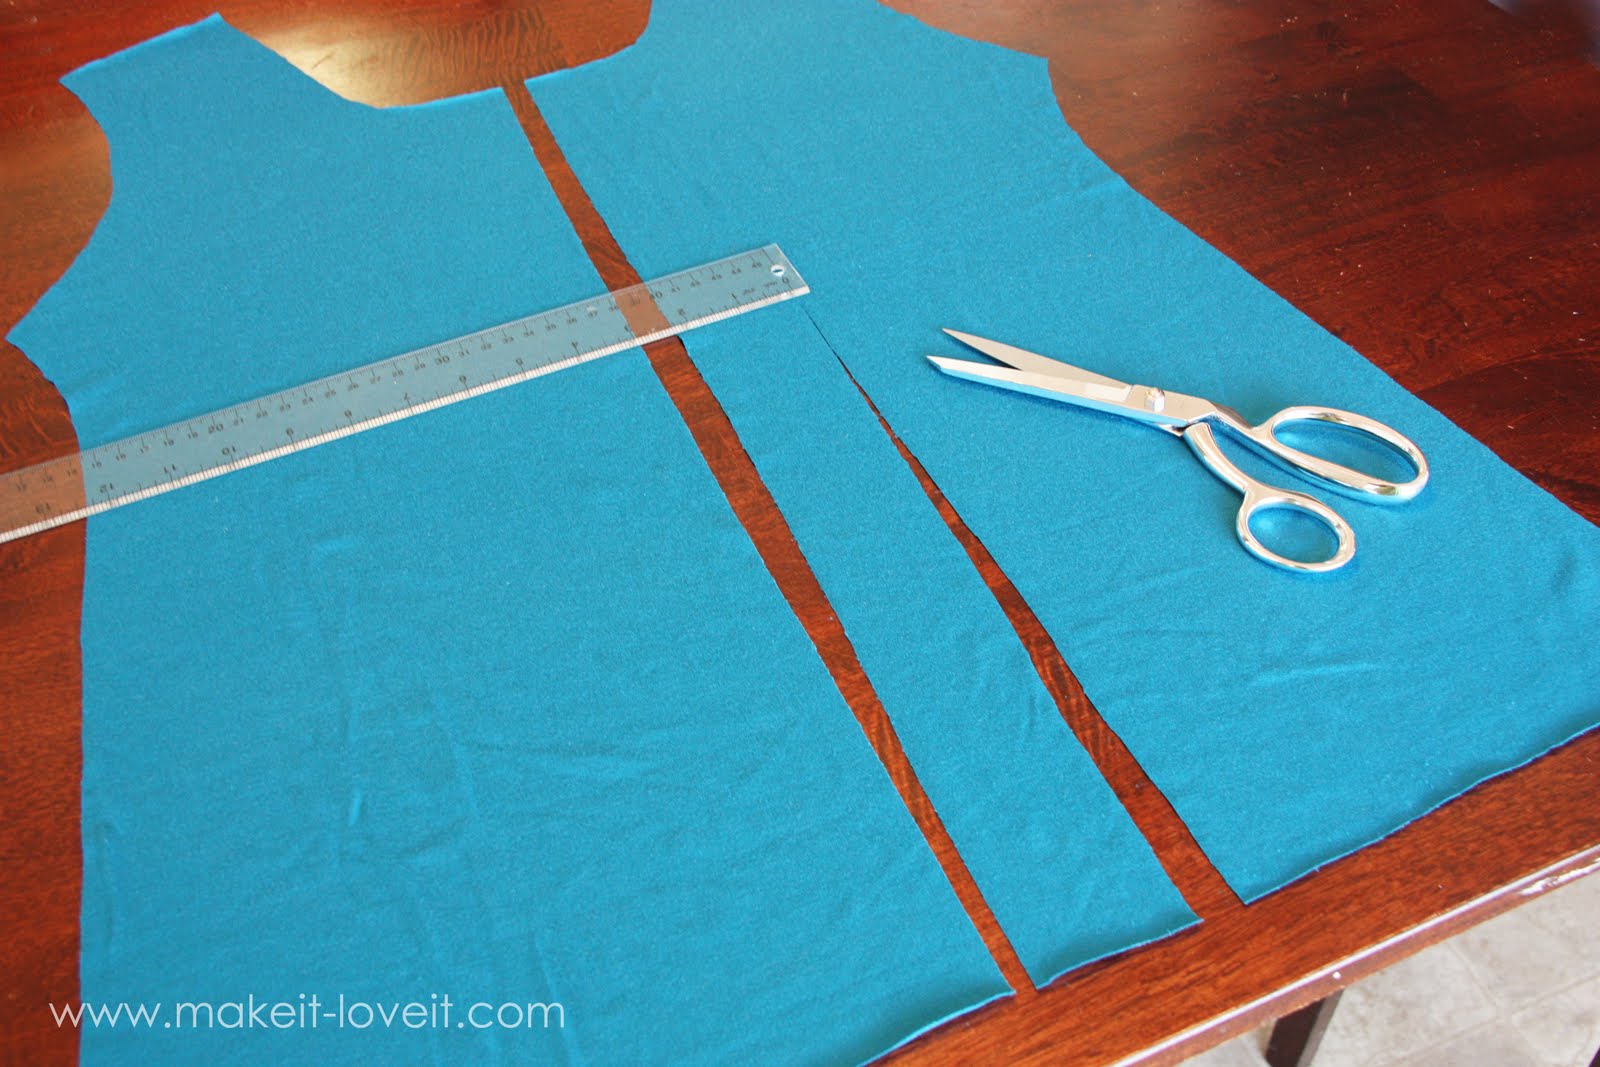
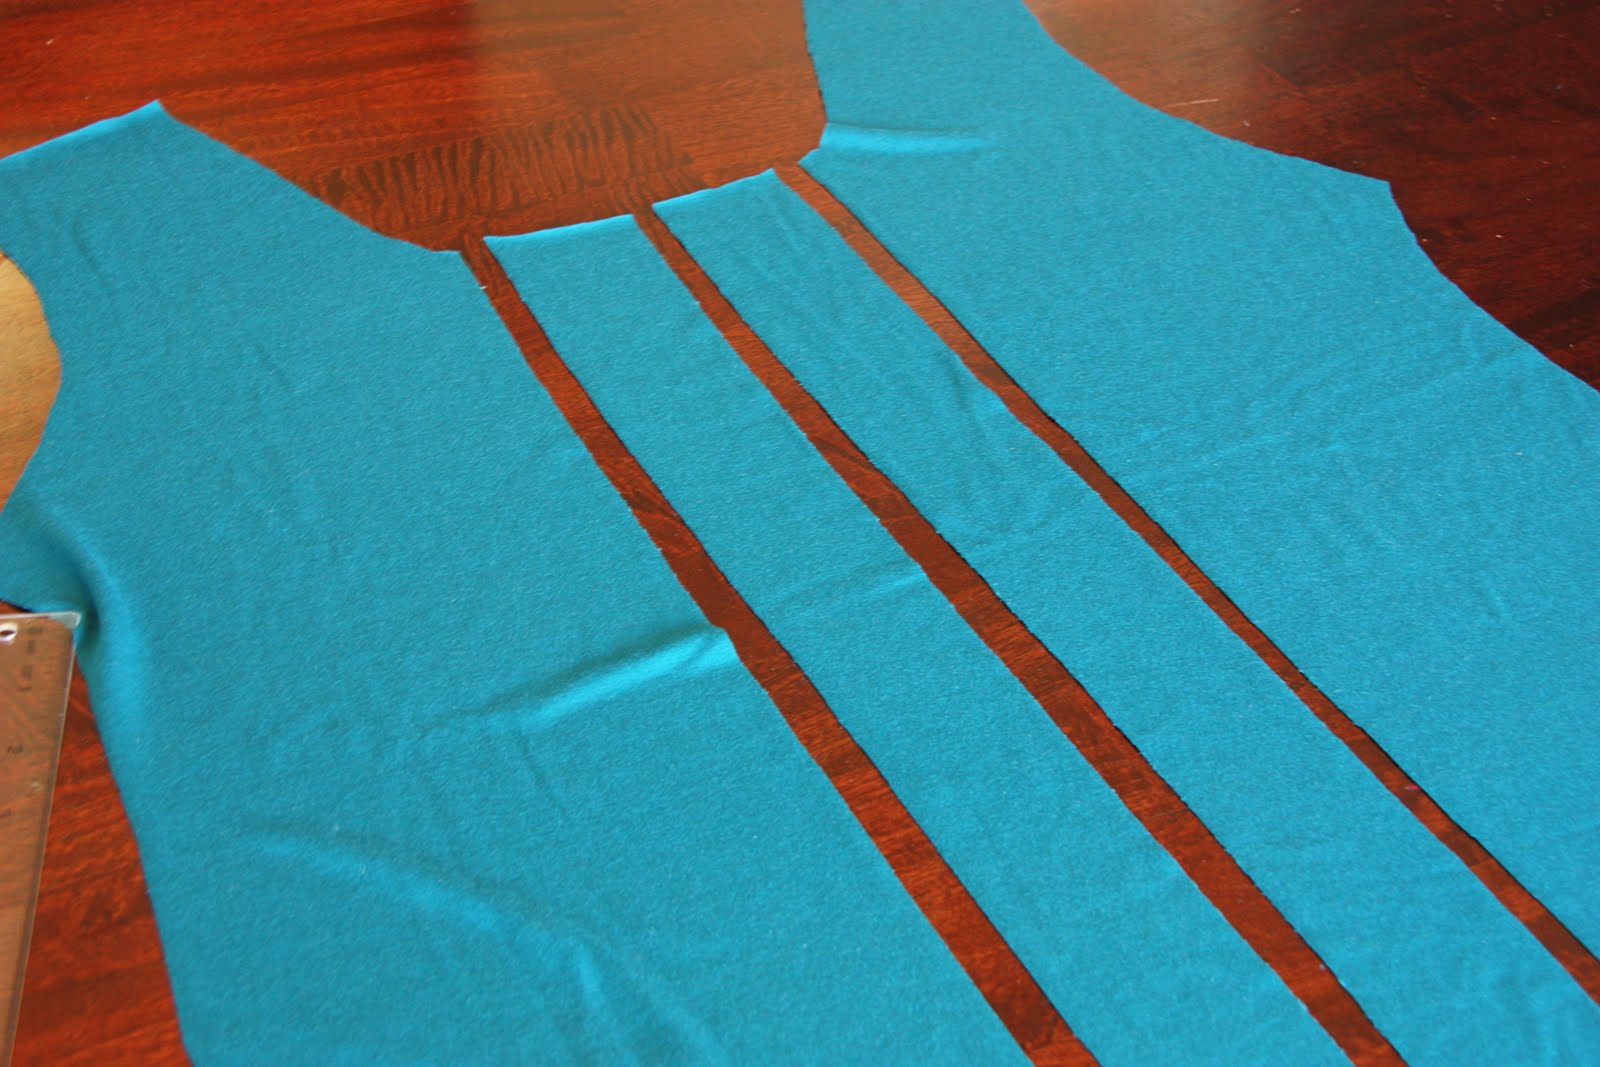
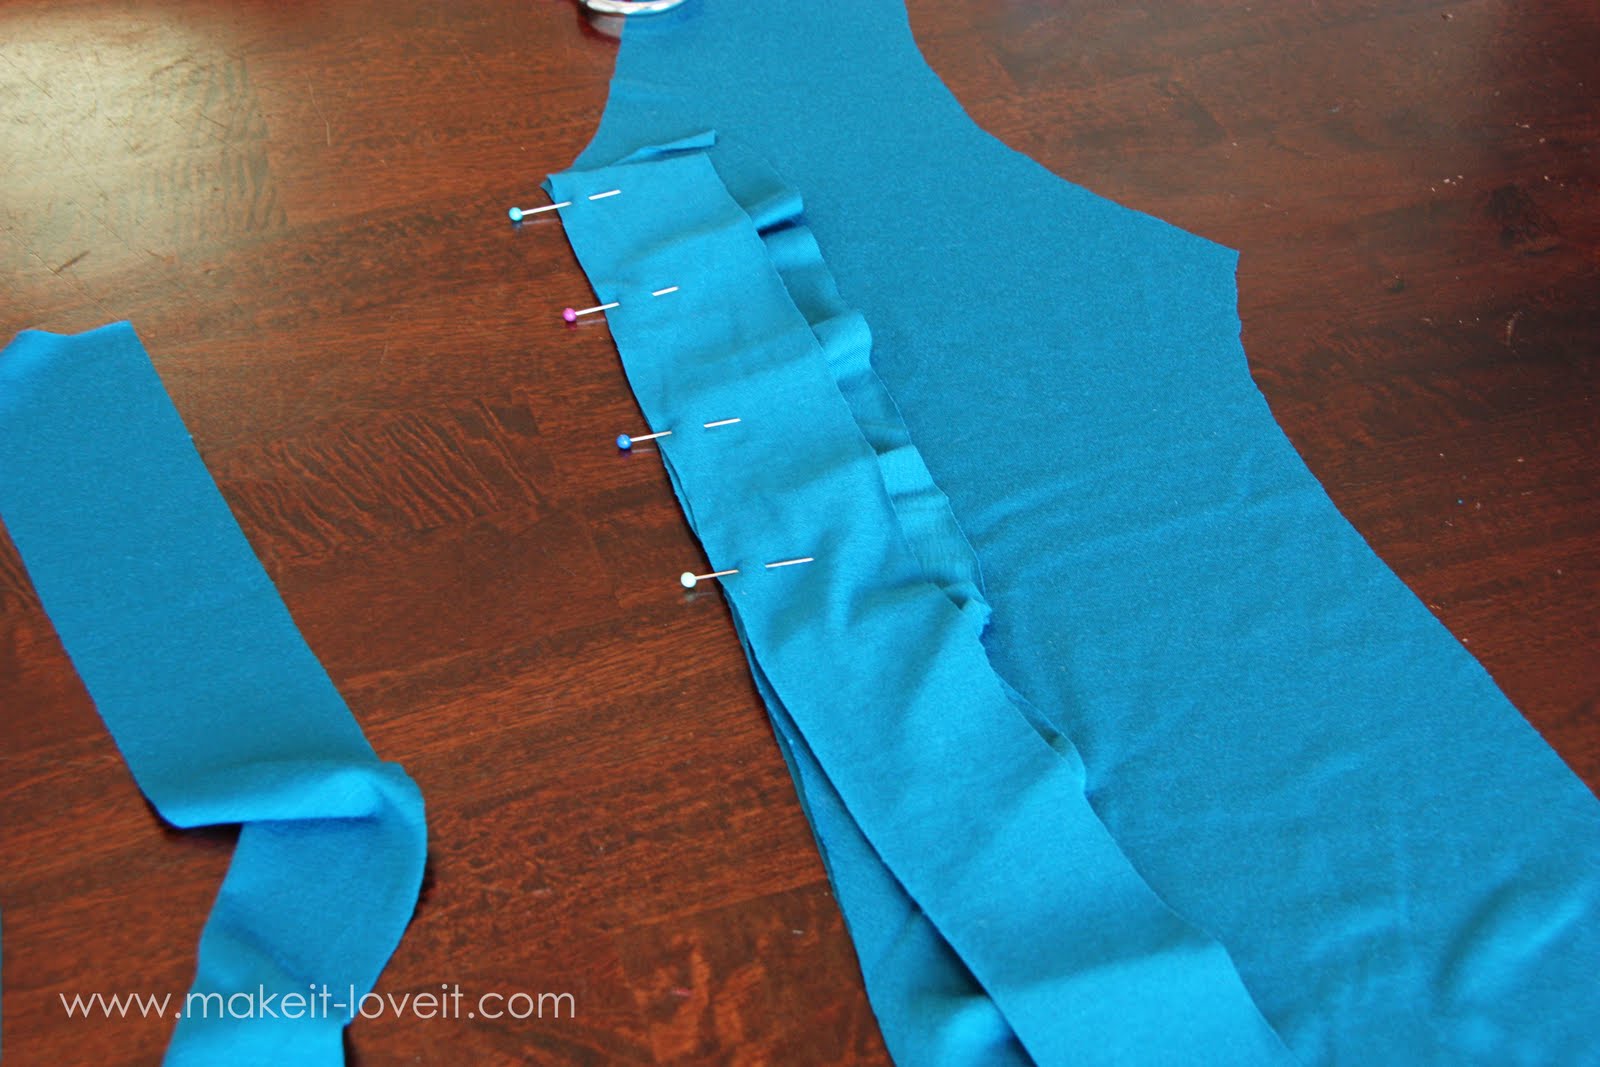
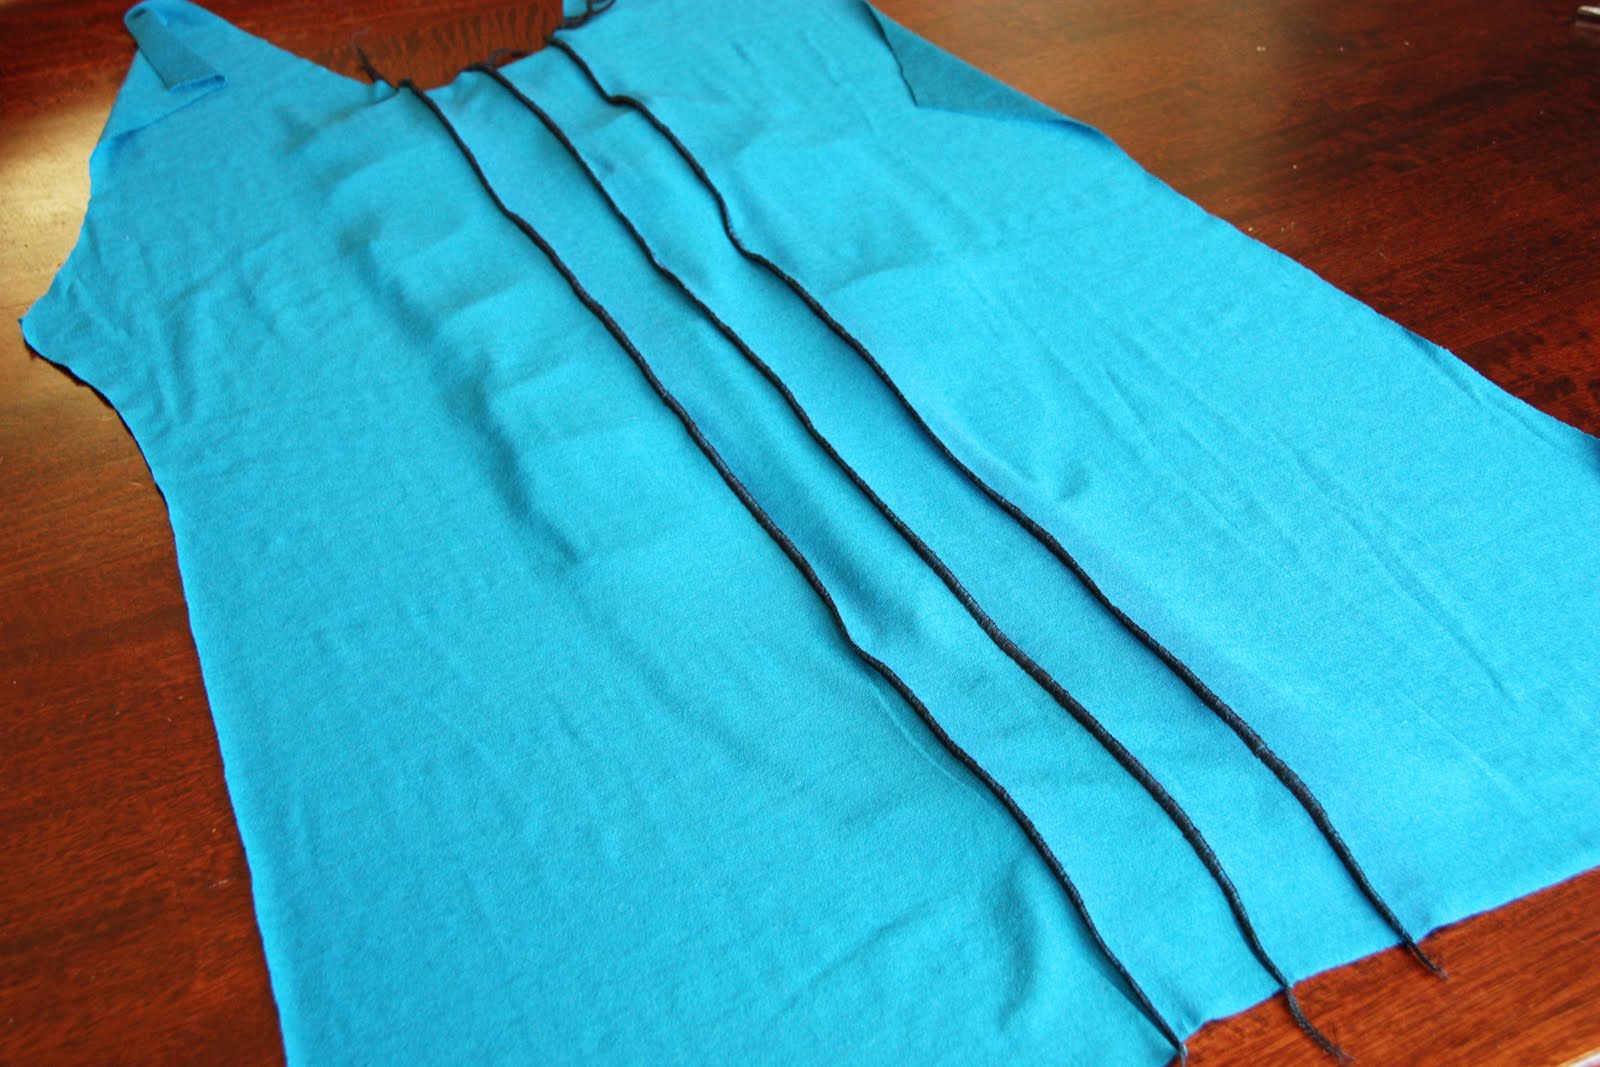
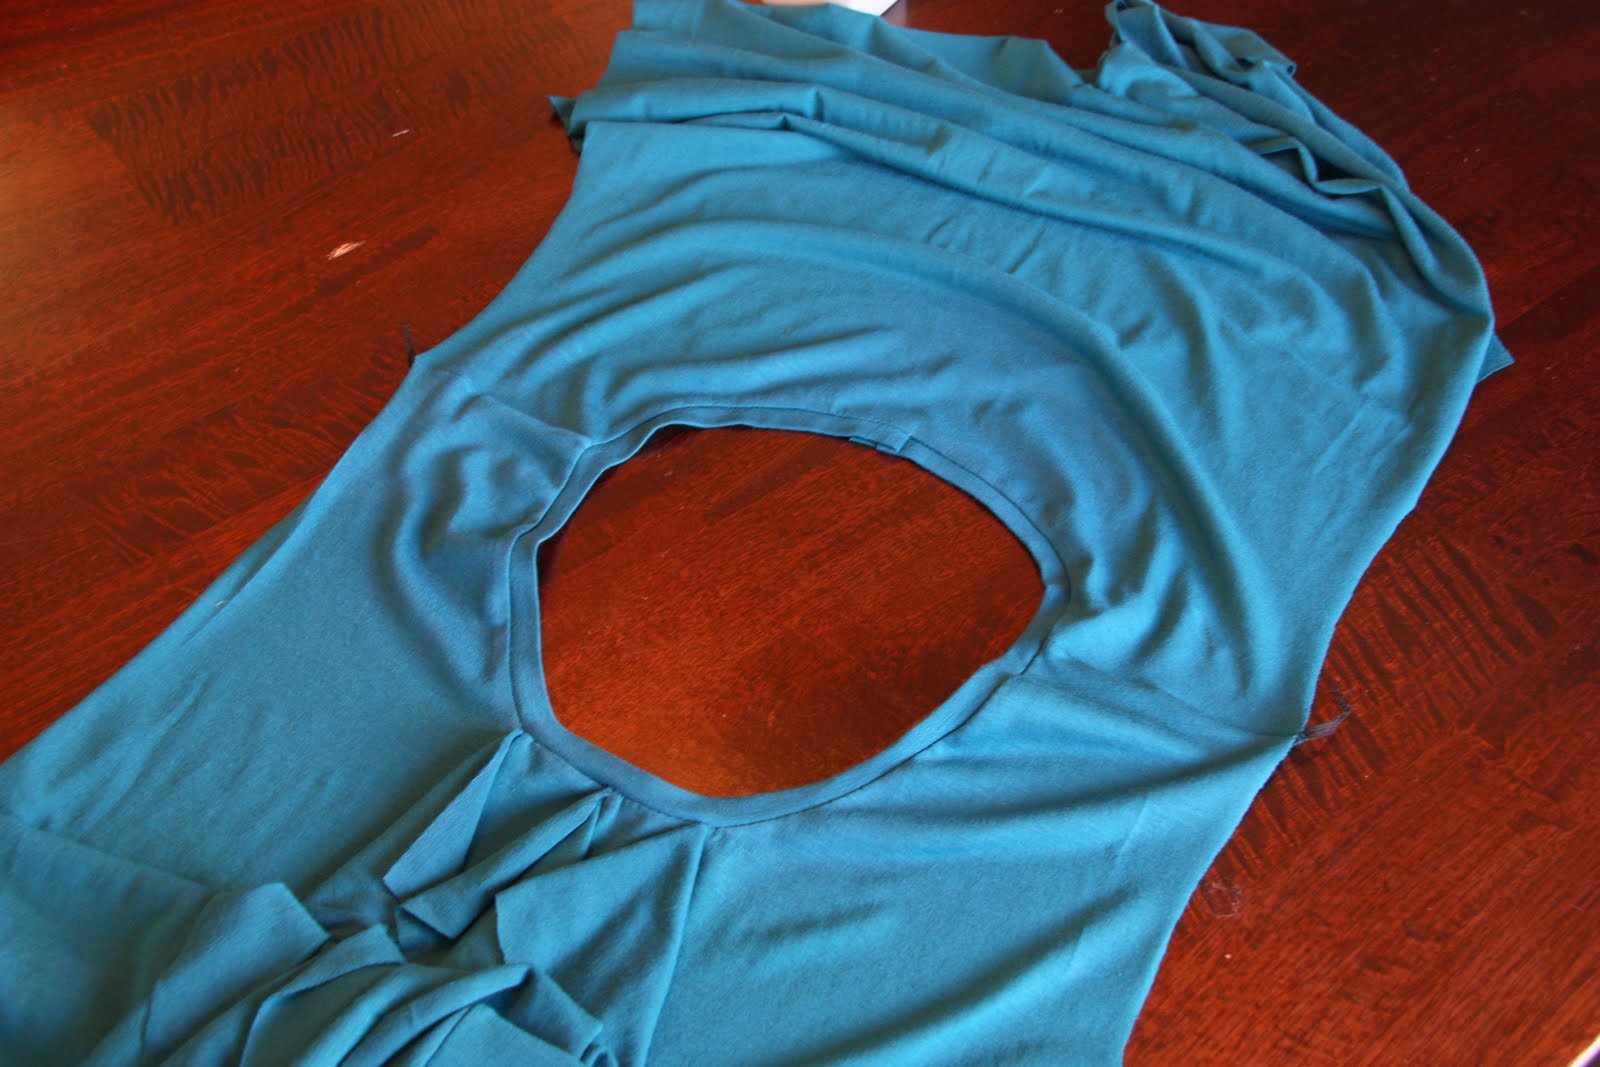
Next, cut your front shirt piece right down the middle. (Fold it in half and cut along the fold.) Then measure about 2 inches out from the center and cut another straight line.
Then cut another line on the other side of the center line, making sure that it’s 2 inches away too. The 3 gaps in the shirt is where you’ll be placing your cascading ruffles.
Grab one of your ruffle pieces and line up the inner edge of the circle with the inner edge of the shirt. This will create a sort of ruffle along the outer edge of the circle piece.
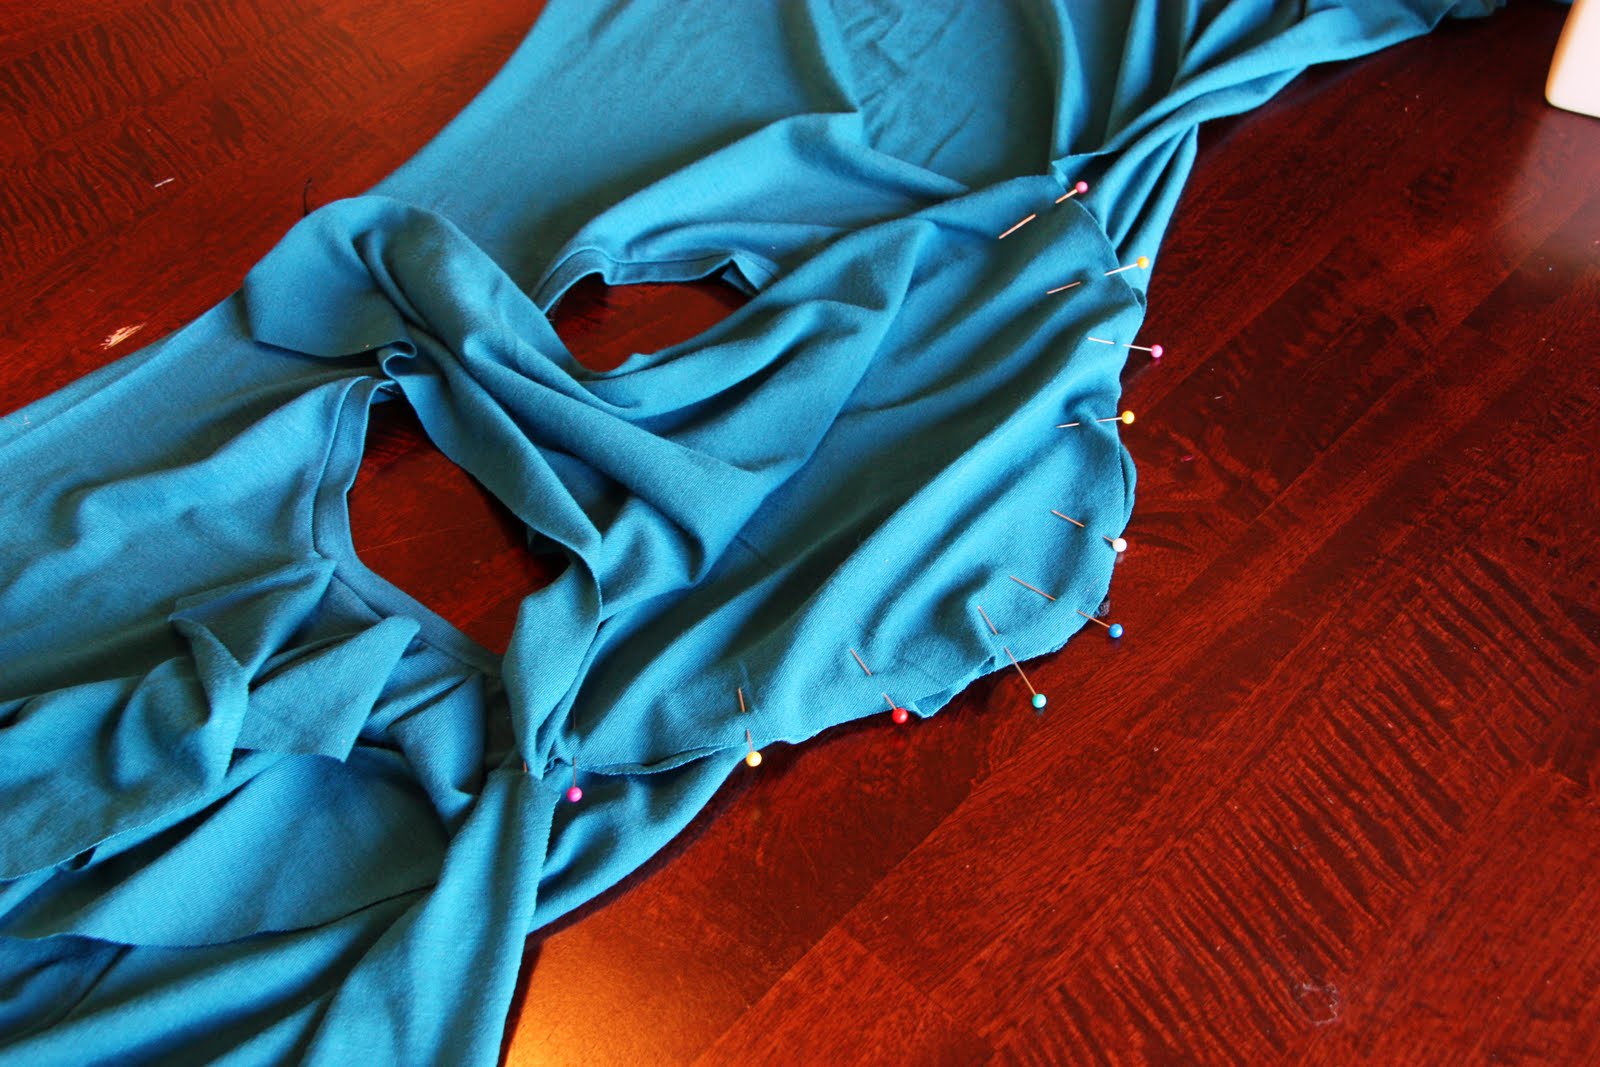
Then place the straight strip that was cut from there, right on top of the ruffle piece and pin all three pieces together. (Make sure that shirt pieces are facing each other with the right sides of the fabric. (The ruffle piece can be right or wrong side facing up…….just do the same with each ruffle.)
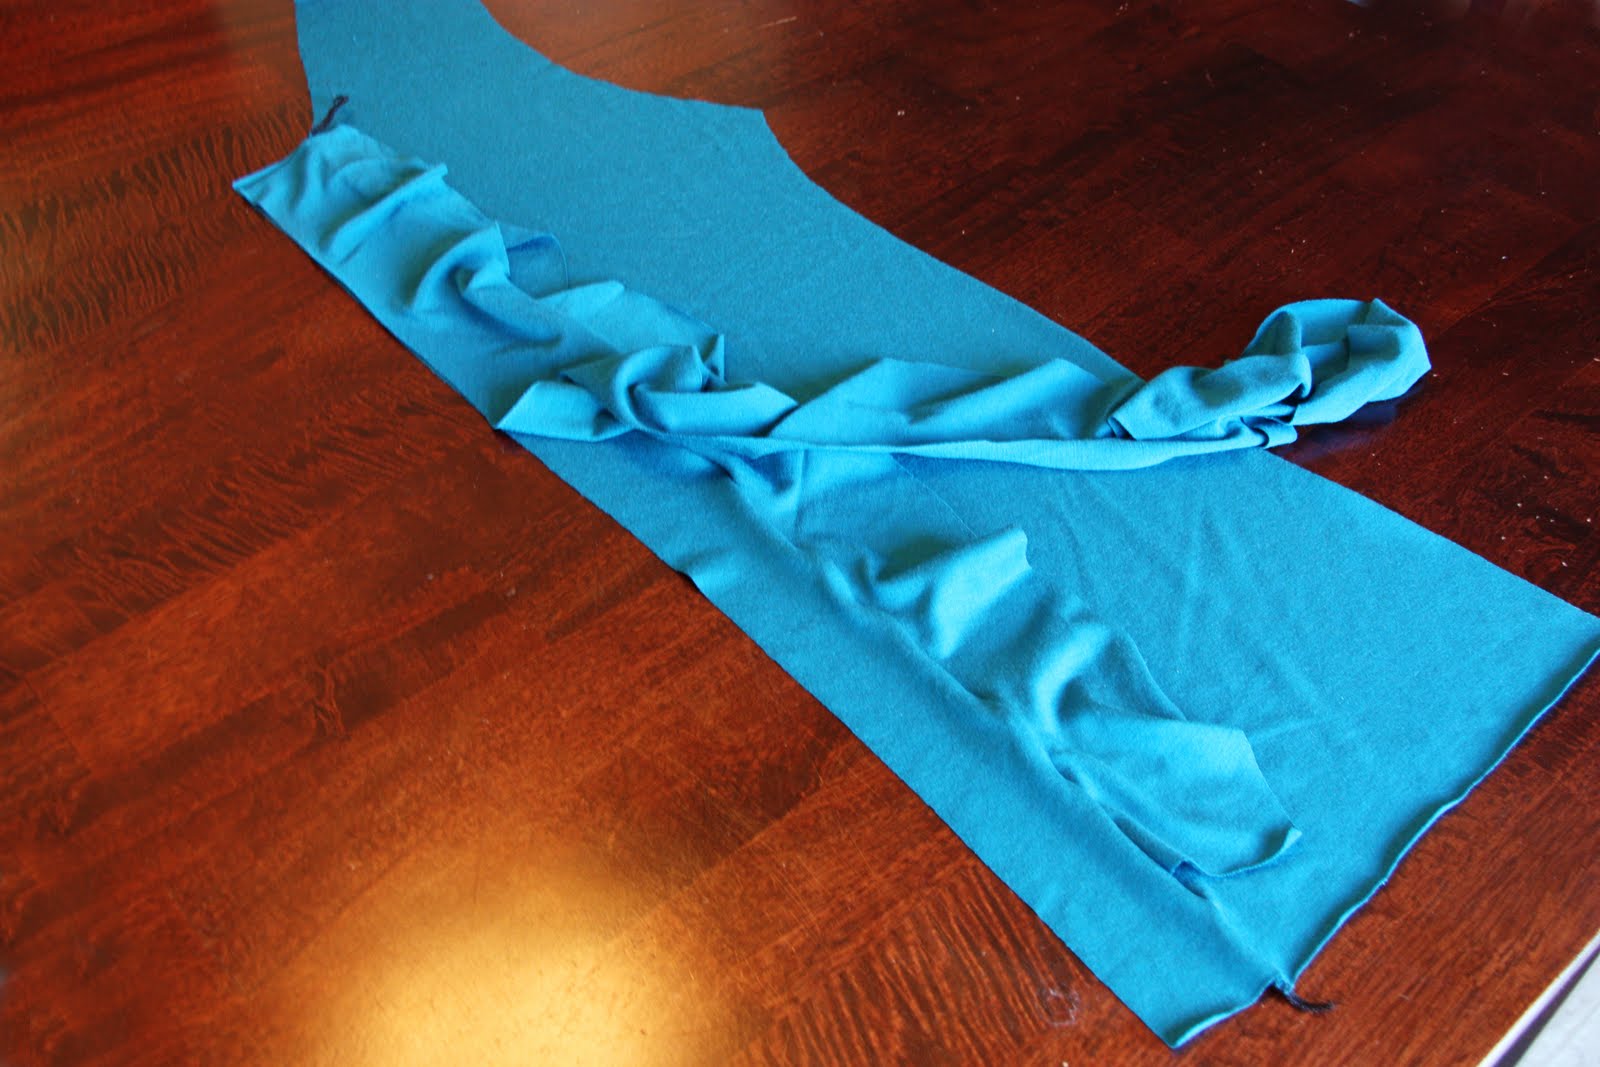
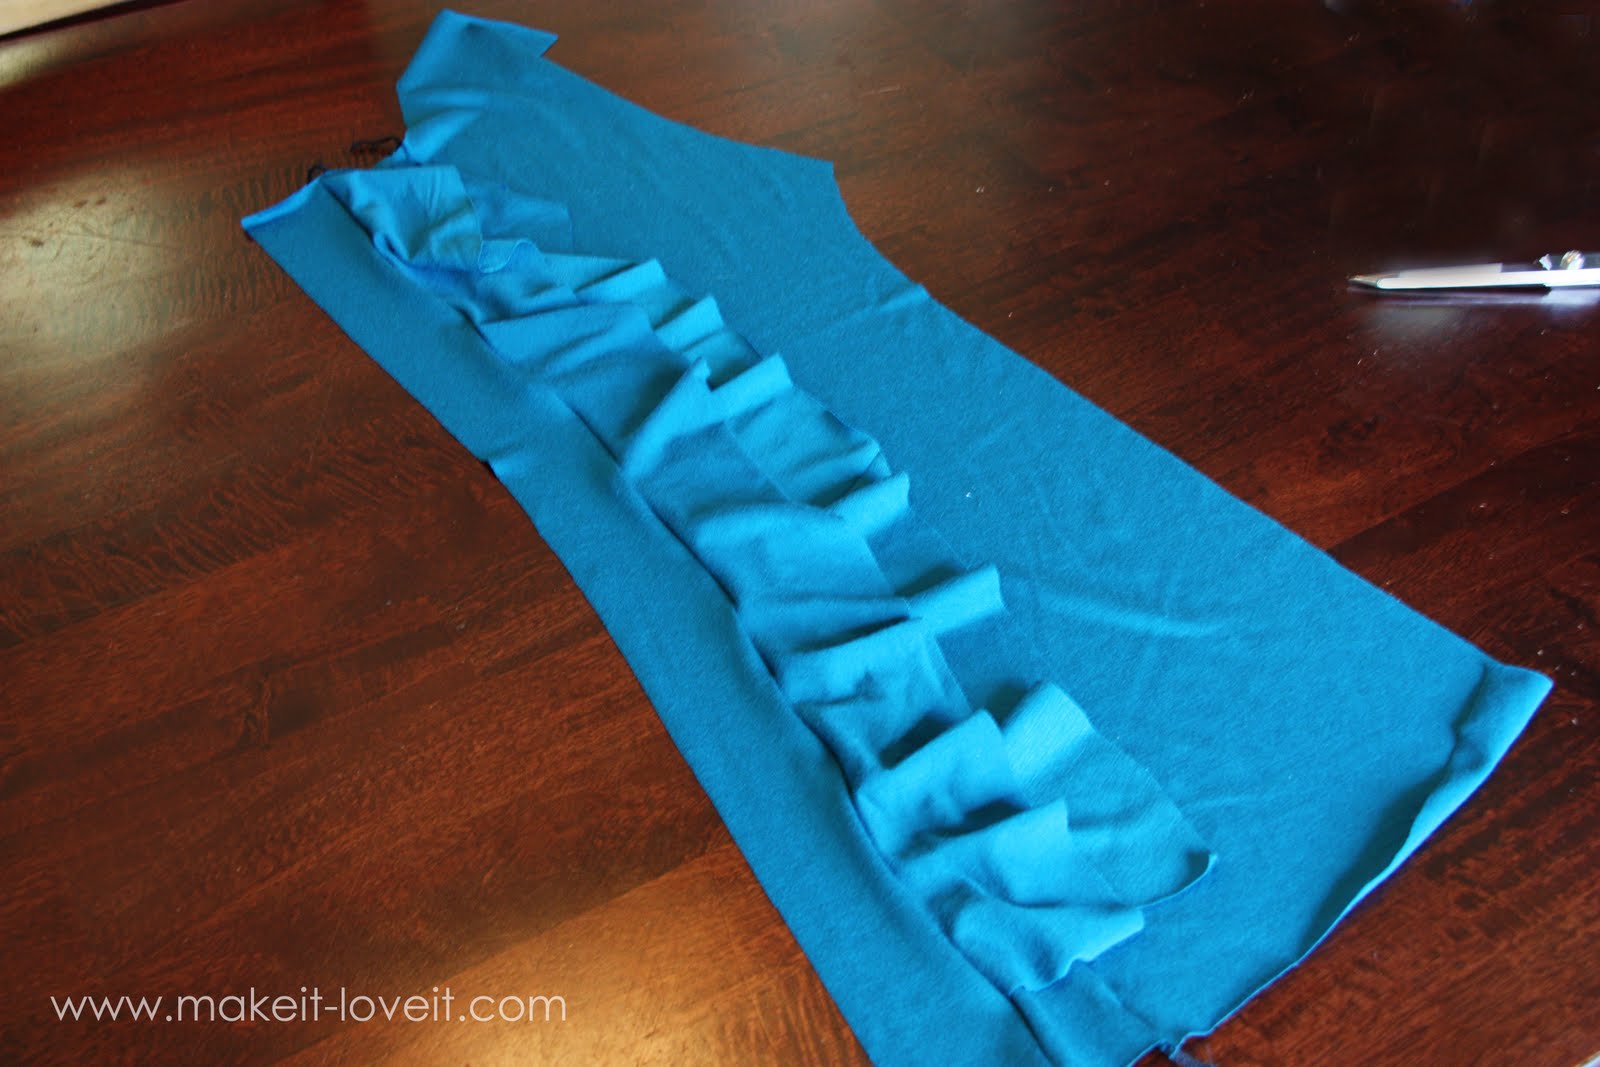
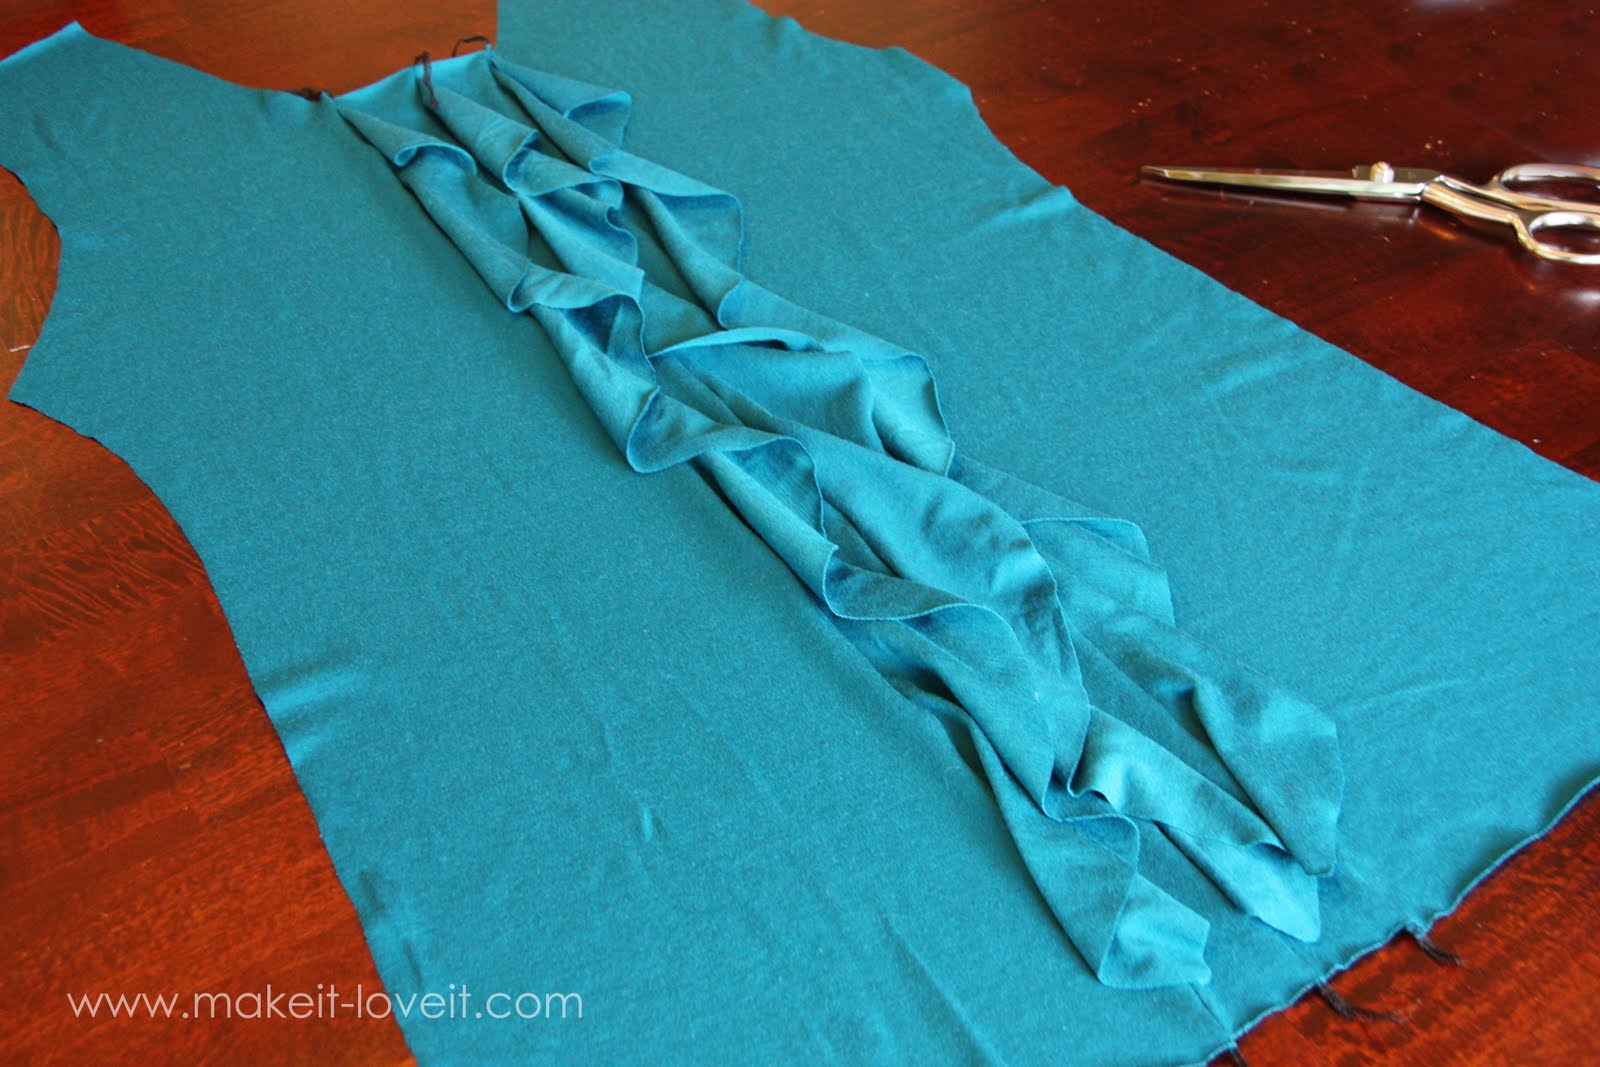
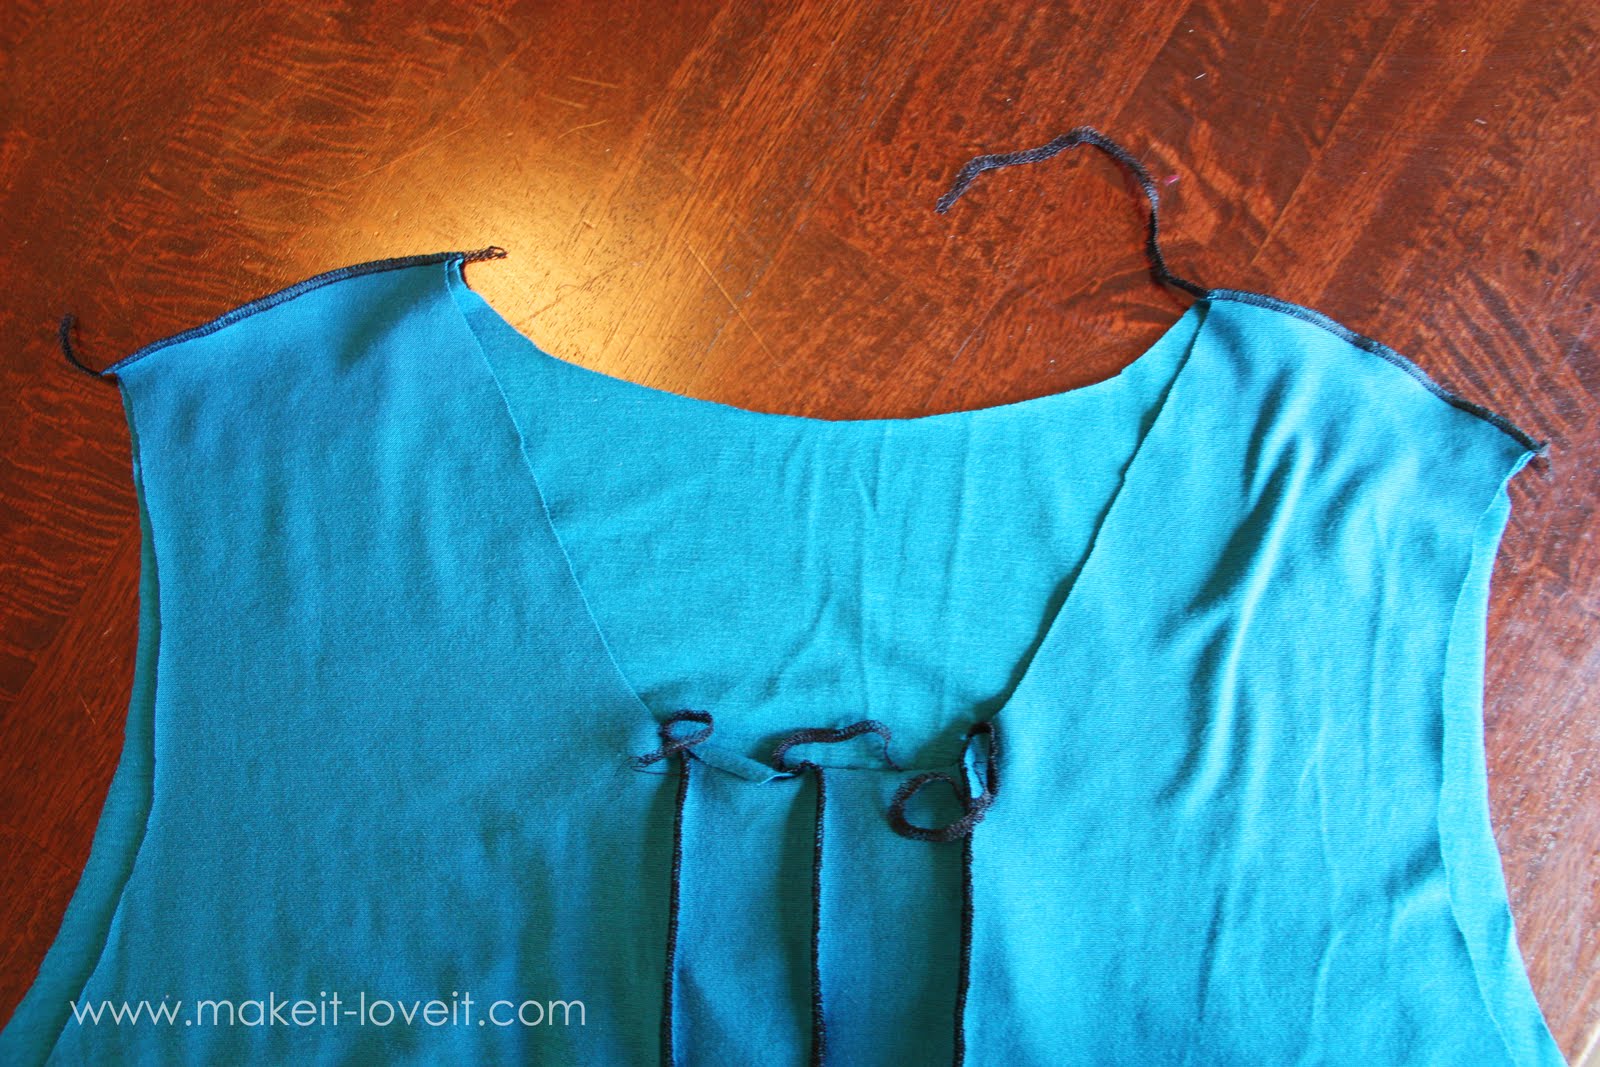
Sew in place, then open up your shirt with the right side facing up. (I used my serger for most of my seams on this shirt. This can still be done with a regular sewing machine. Just use a zig-zag stitch or other stitch that works with knits. Make sure to increase your stitch length if your fabric is pulling or stretching while sewing.) Lay your next ruffle on top of the skinny strip, matching the inner curved edge of the circular strip with the straight edge of the strip that was just attached to the shirt in the previous step.
Lay the next strip on top with the right side face down. Then pin in place and then sew these 3 layers together. Open up.
Then attach the 3rd ruffle the same way, attaching the other side of the shirt to this 3rd ruffle.
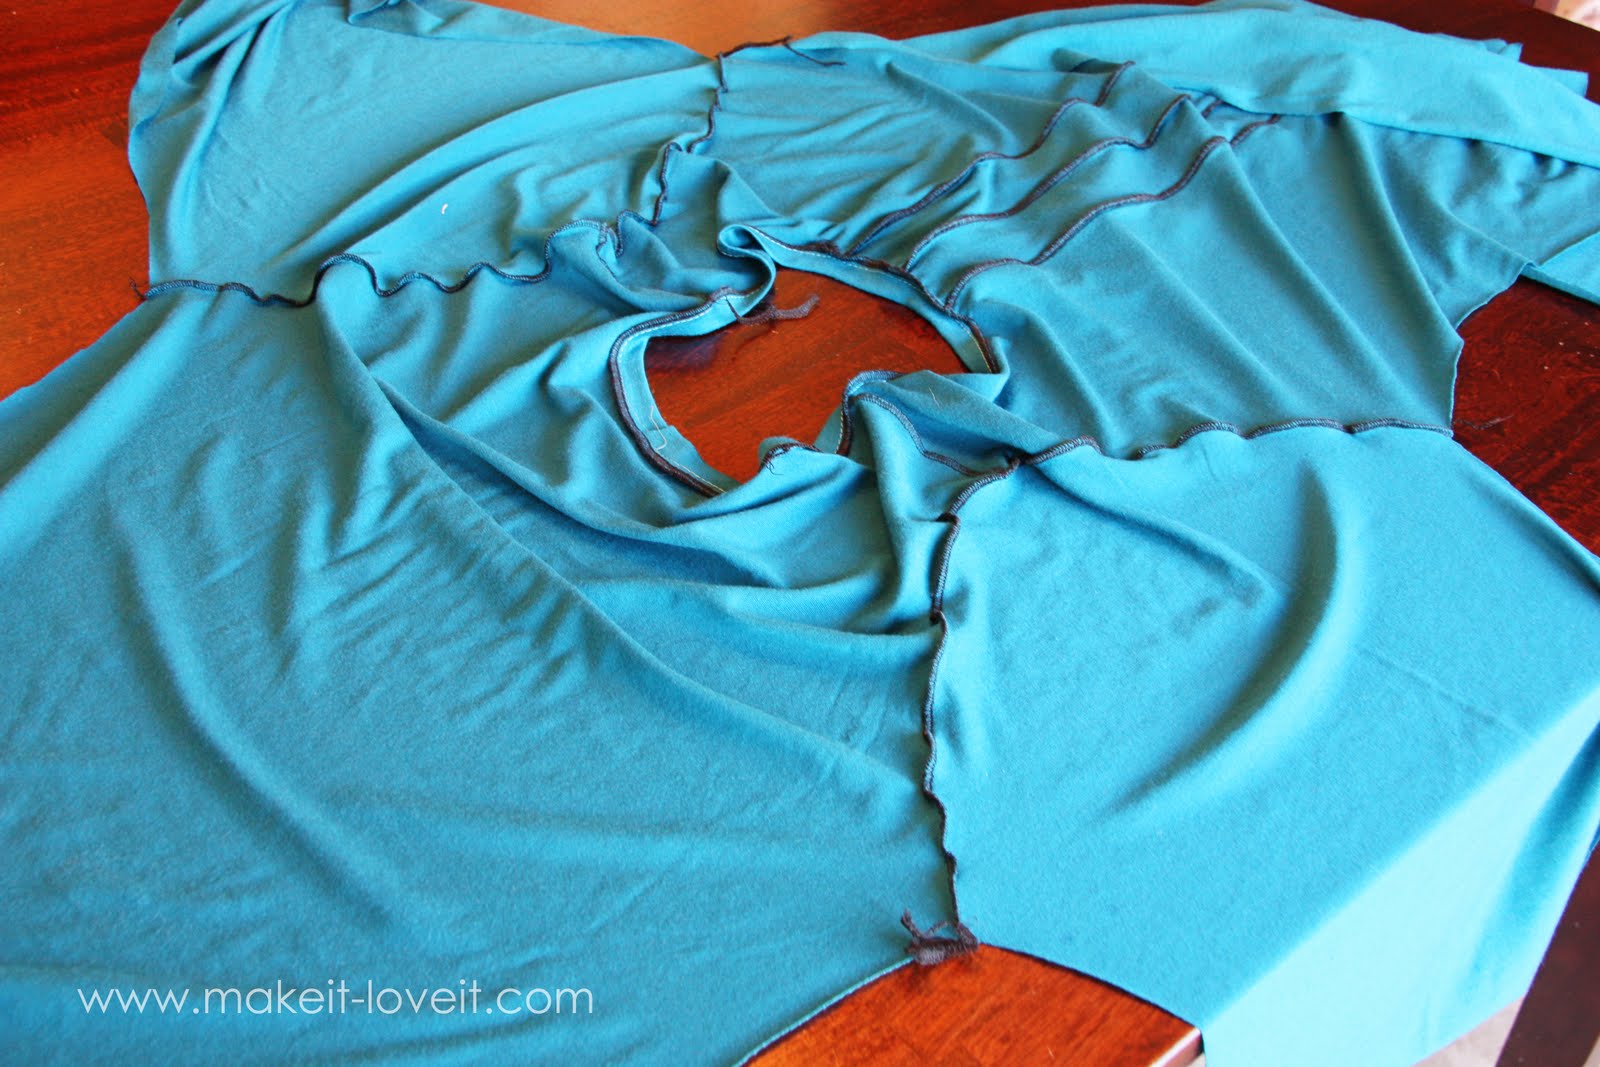
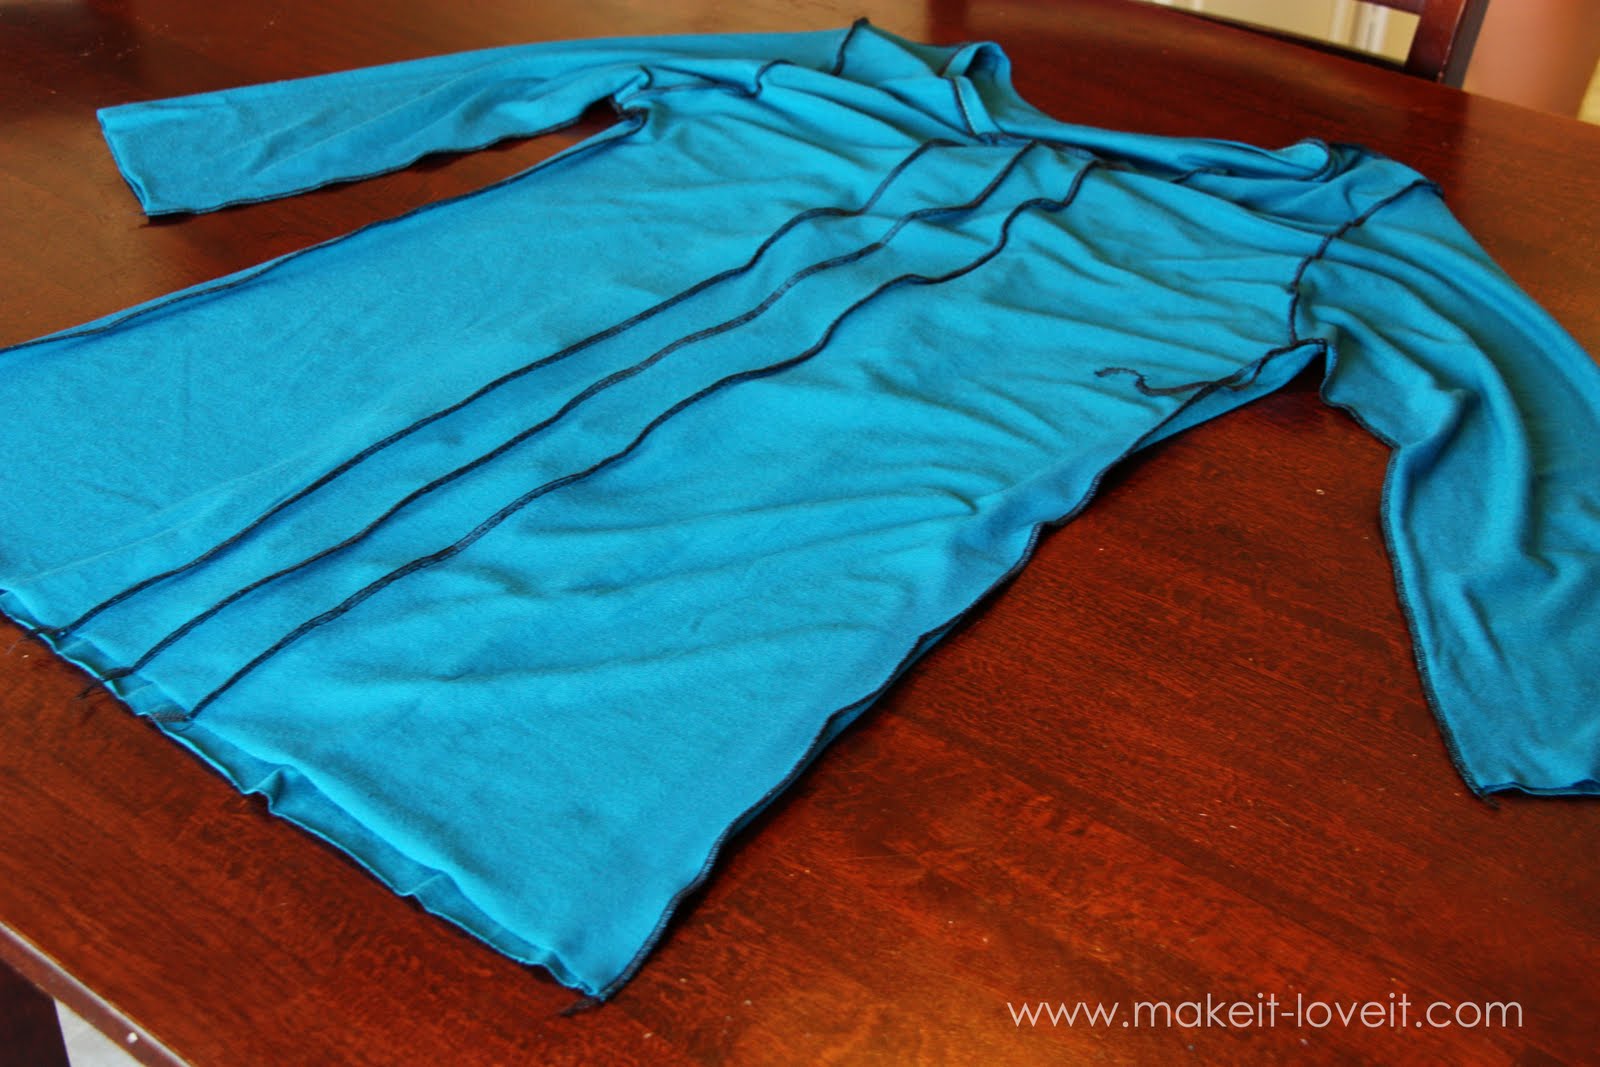
From the back, you’ll have 3 seams down the center of the shirt. (Mine are serged but remember you can use a zig-zag or other knit friendly stitch on your sewing machine.) I also used my iron/steam to flatten out any stretched out fabric. Using the steam really shrinks the knit back in.
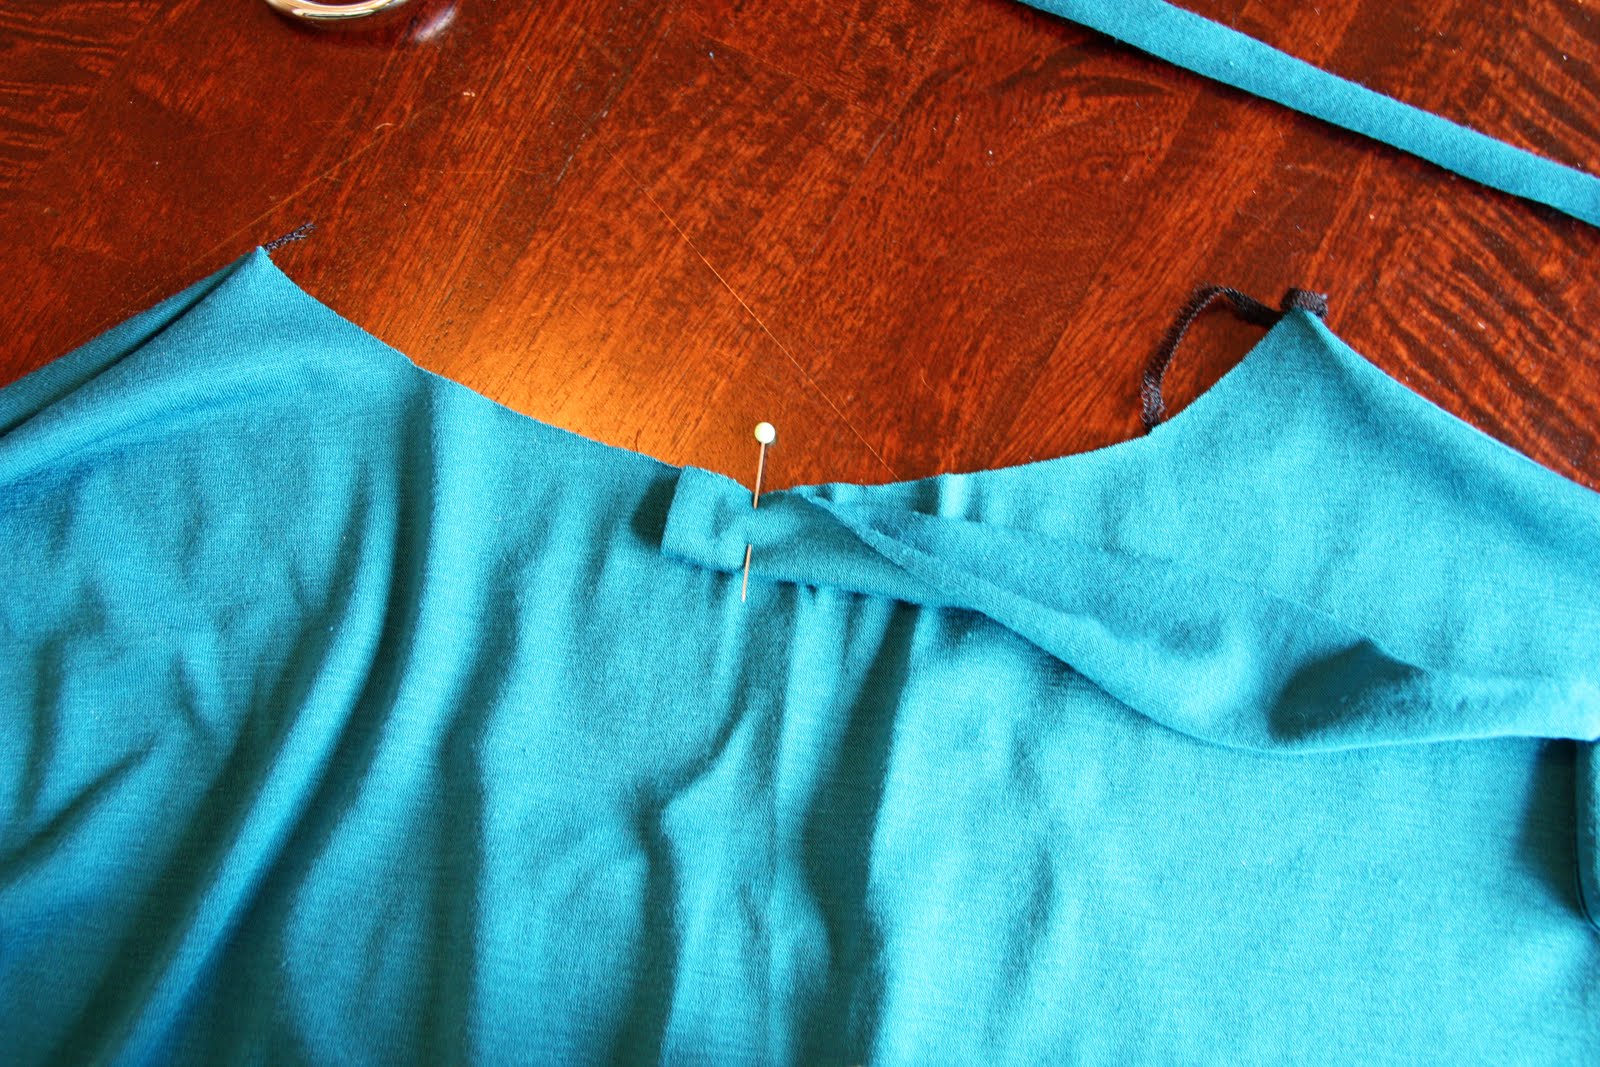
Then place your shirt front and shirt back pieces together, with right sides together. and then sew them together at the shoulders.
Then cut a long strip of fabric that is long enough (and 1 inch wide) to go all the way around the neck opening. Fold the strip in half lengthwise, with the right side of the fabric facing out and pin one end to the back of the shirt, lining up the raw edges of the folded strip with the raw edge of the neck opening. You’ll be sewing to the right side of the fabric. (I finished off the neck just like I did with this shirt
here.)
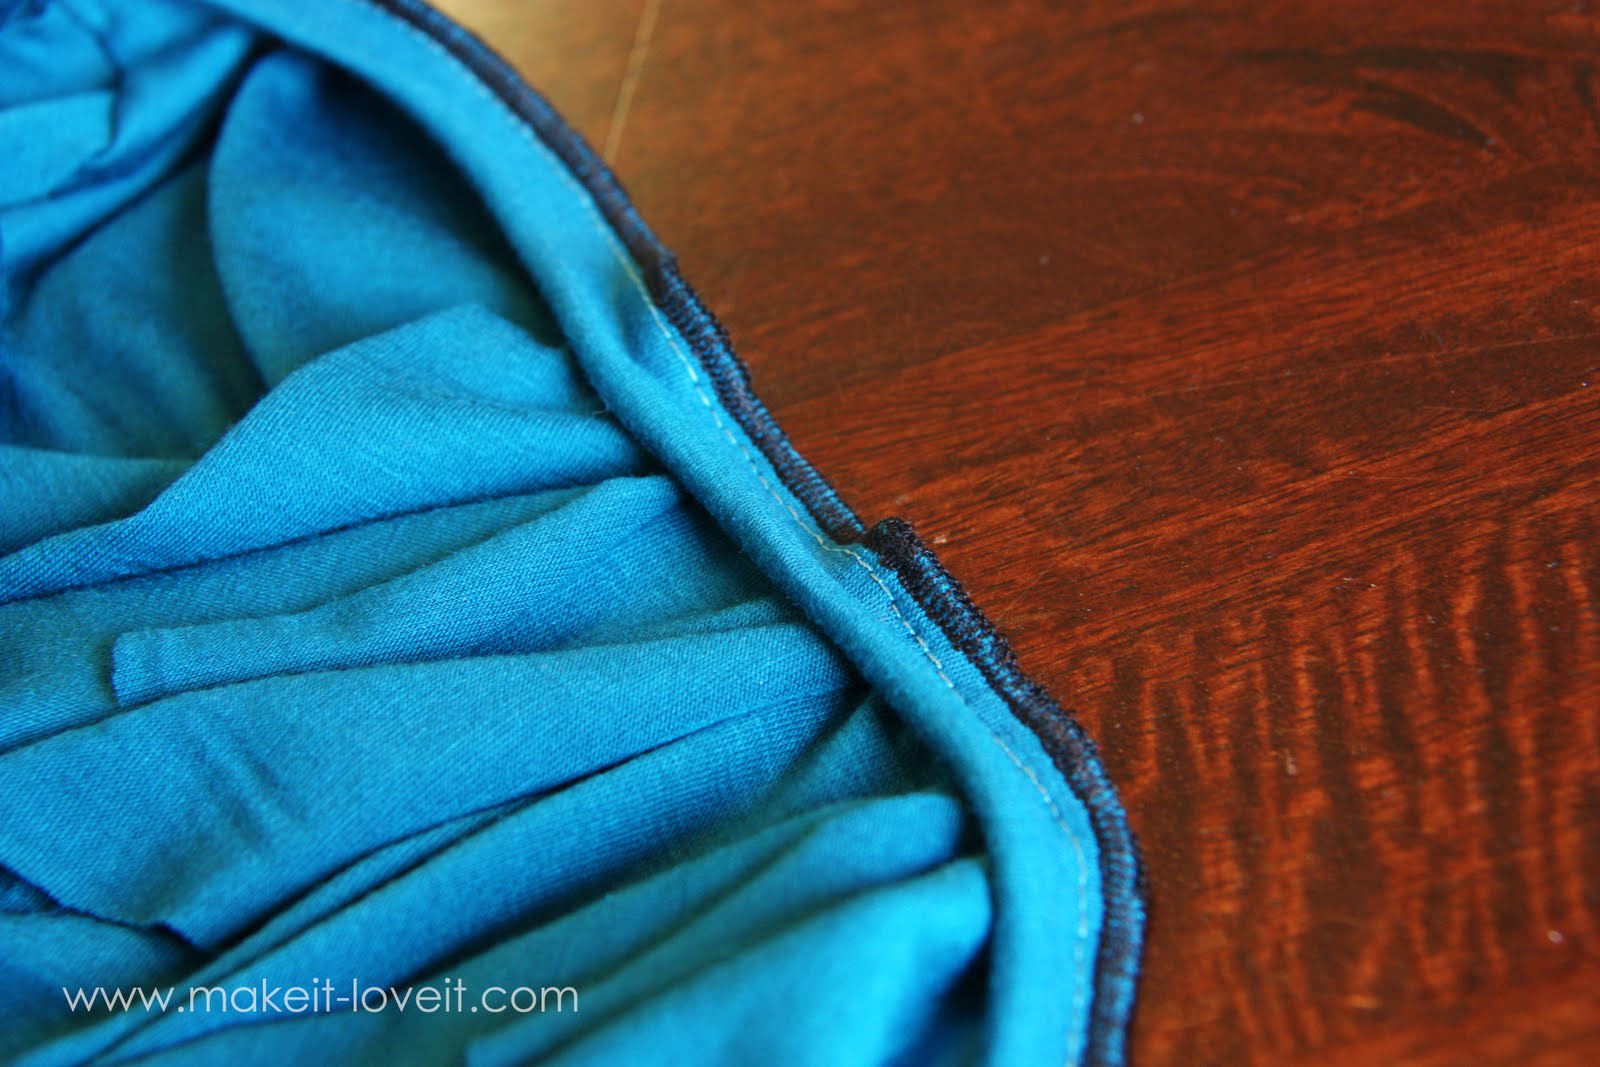
Then, I sewed the folded over strip to the right side of the neck opening all the way around. As I was sewing, I pulled the strip just a little bit as I was going along. That way, after letting go, it would pull in…..giving the neck line a nice shape, rather than being all stretched out. I first sewed all the way around with my regular sewing machine and then went back with the serger to clean up the edges.
When I sewed all the way around and reached the back again, I folded under the end and then sewed over it. And because I didn’t have exact matching thread, I went back later and hand stitched that little bit of the neckline that remained open a little bit.
Then I opened up one of my sleeve pieces and pinned the curve of the sleeve to the arm hold opening of the shirt. Make sure you have pinned the right sides of the fabric together
Do the same with the other sleeve and then sew in place. It should look like this from the back side of the fabric.
Then, with your shirt inside out, sew the shirt together at the sides and up the sides of the sleeves. Iron/steam all of your seams to help shrink them back in a bit. Never forget to do that……it will help your sewing with knits look so much better.
Then turn right side out and hem under your sleeves and the bottom of the shirt.
(I actually serged it and was going to hem it but I didn’t have the right color thread…..but then I ended up liking the serged edge just fine. Maybe I’ll change my mind and hem it another day.)
And you’re done.