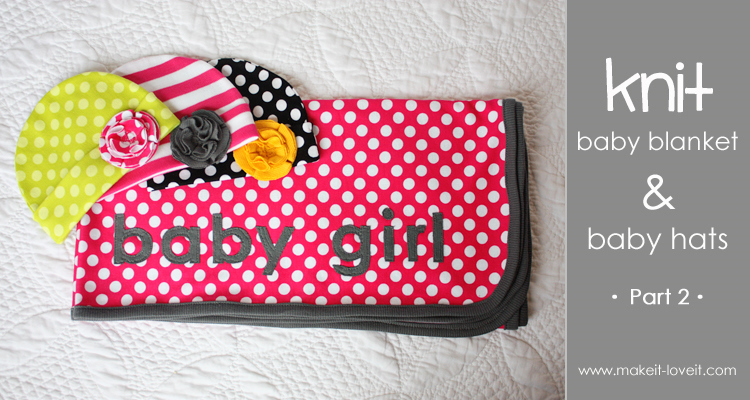
Knit Receiving Blanket/Knit Baby Hats COMBO: Part 2
Okay, part 2 is here.
Did you see the
knit baby blanket tutorial yesterday (found
here)?
Well, here is a great way to complete a little baby set…….by adding a simple,
yet cozy, knit baby hat. Or, hmmmm, maybe 3!
The hats are made from cotton interlock knit…..so they are perfectly stretchy and comfy.
And while making one,why not make a couple more?
And don’t forget the fluffy little knit flowers. Yummy, right?
If you’re making these for boys, you could applique a shape or a name right there on the front too. Just as cute.
But those girls, they need some flowers!
Did you make the
blanket from yesterday already?
Or at least buy/order some knit?
If not, hurry it up………you’ll love how both of these projects turn out.
.
Ready to make some little knit hats?
.
Before getting started, keep in mind……that the shape of these hats are one dimensional. But because they are knit, they will stretch and the proper hat shape will form as you slide them over those little baby heads. So while making your own size, remember to make them smaller than the actual head so that they will stretch and the side seam won’t look like a side seam across the top of their head. Make sense?
. . . . .
As mentioned in the baby blanket tutorial from yesterday, I found my knit here. But the colors I selected are gone. (So in case you want to search for it elsewhere, the fabric is Michael Miller Interlock Knit. Designer: Patty Young.)
First, I pre-washed my knit.
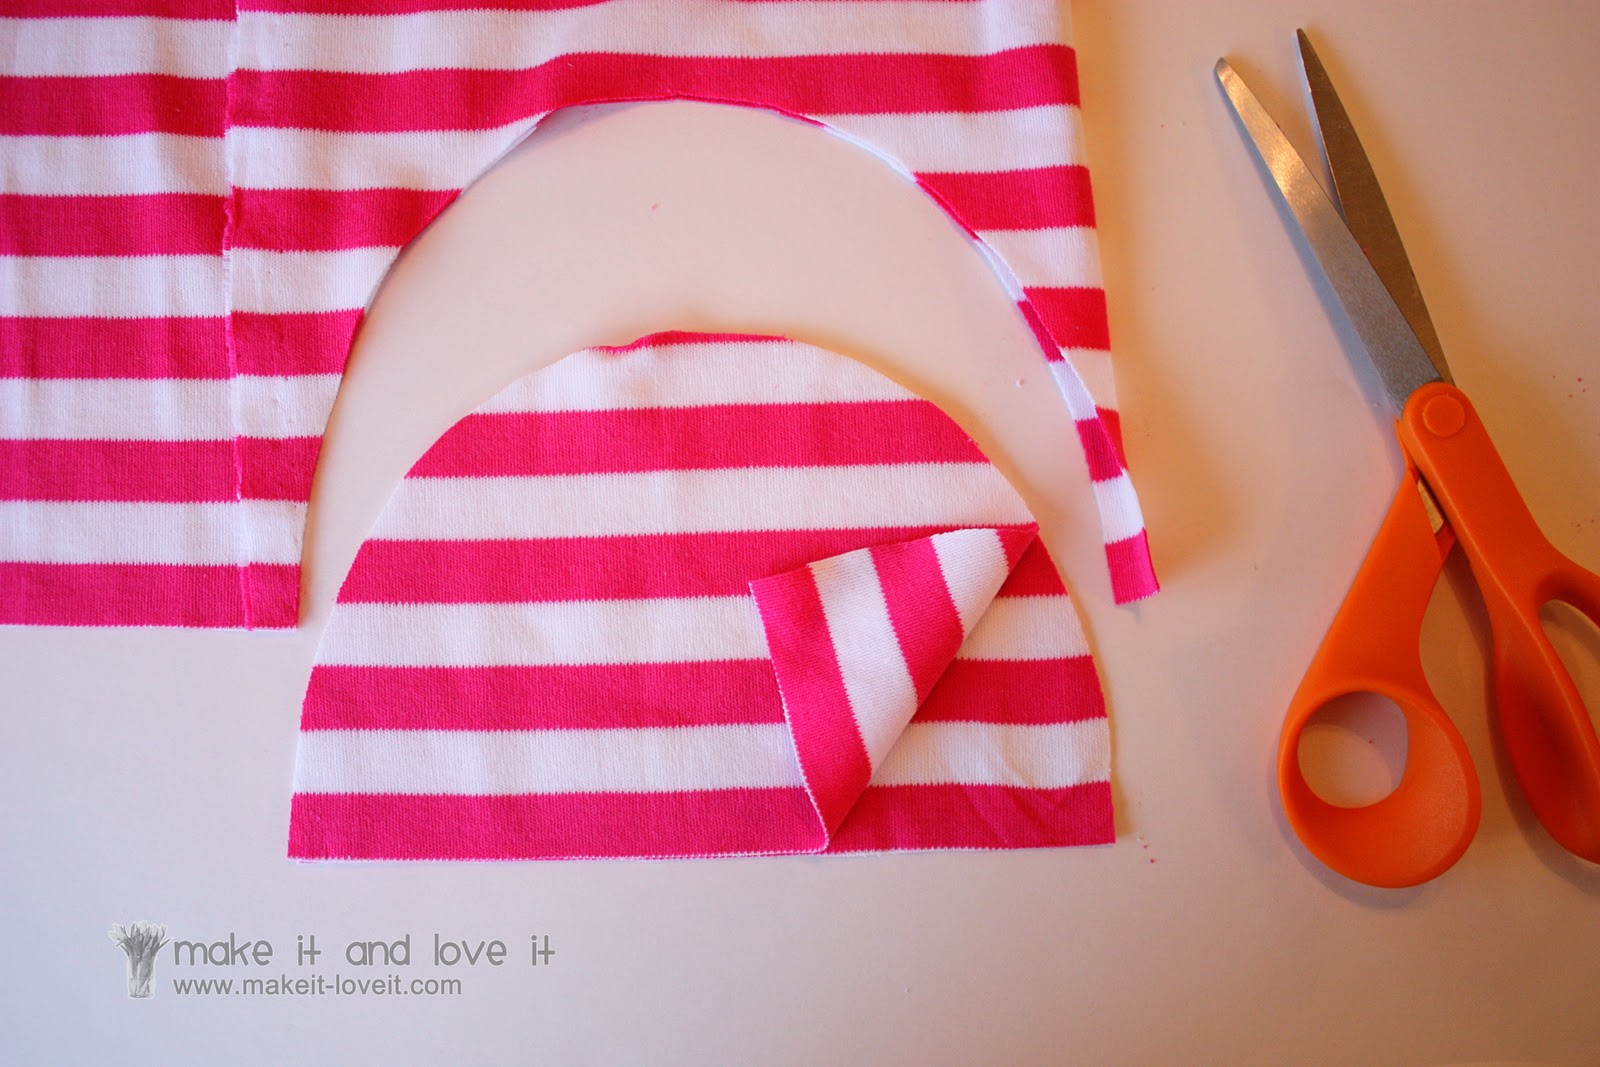
(Why prewash? Read this post.) Then, I used an old knit hat from when my little girl was a tiny baby, as a pattern. I placed the hat on top of 2 layers of the knit and cut around it, adding a 1/4 inch on all sides. (But the height from top to bottom isn’t as tall as this entire hat. If you look at a knit hat like this from the inside, the main hat section doesn’t go all the way down to the bottom. The fold creates some of the height. The finished hat is about 5 inches tall…….but the main hat section is only about 4 of those 5 inches. You’ll understand what I’m talking about later on in this tutorial.)
I made my hats a size 0-3…….and are assuming they’ll fit just fine. I patterned them after the light pink hat shown above, which is a Carters hat, size 0-3 months. So hopefully they will fit just fine a few weeks after she’s born……and will still fit for a few months. The knit will allow for some great stretch, so I’m not too worried.
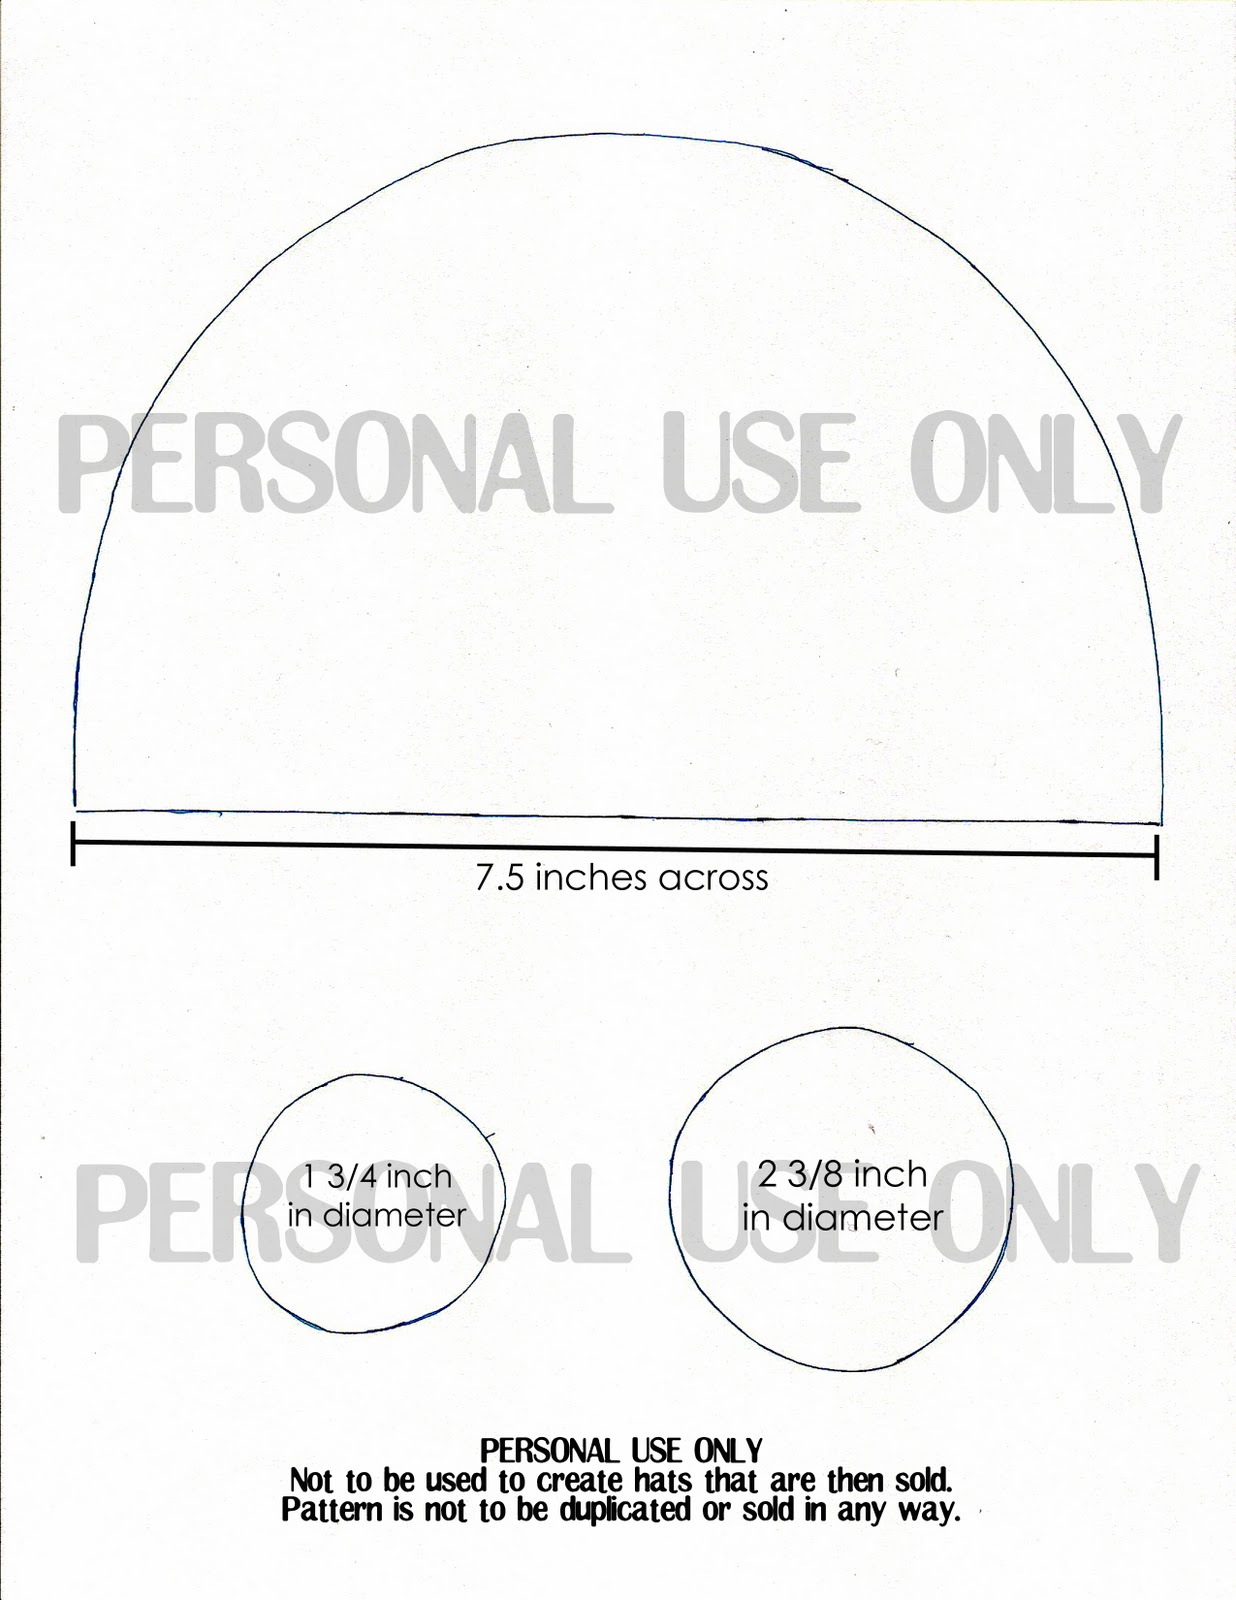
**If any of you are interested in the size 0-3 months, here is a sketch of the pattern I used. I didn’t include the outline of the bottom fold of the hat because it’s just a rectangle. And the circles are for the flowers later on. But click on the image below, save it to your computer, copy and paste it to a document with the margins set to zero, and print it out. I shared the dimensions below, so that you can verify if your printer is printing it out at the right size. But keep in mind, this was a quick sketch, and is imperfect. I just thought it would help to use as a guide. (You’ll have to adjust for making smaller or bigger hats.) And please don’t use this to sell hats or the pattern. This is for personal use only. Thanks!
So next, I cut out 2 of the main hat pieces and then cut a rectangle piece that was 5 1/2 inches x 14 1/2 inches.
**Make sure that the stretch of the knit is going left to right……so if you hold the pieces below on the left side and right side and pull apart, the pieces will stretch. It doesn’t need to stretch top to bottom. This will give the hat the proper fit on the head.**
Next, place the 2 hat pieces right sides together, and sew along the top curved edge, using a 1/4 inch seam allowance. Then fold the rectangle in half with right sides together and sew the two 5 1/2 inch ends together.
**I used a serger but you can still do this project with a regular sewing machine. Try using a zig-zag stitch (or check out this stitch
here) and make sure to always lift and adjust your presser foot, to make sure you are not pulling or stretching your fabric too much. Then iron/steam your seams to shrink the knit back up.
Then, fold the tube in half down inside itself, creating a more narrow tube, with the right side of the fabric facing out.
Then slide the tube down inside of the main hat piece (which is still inside out), with the raw edges lined up with the raw edges of the hat.
Pin the 3 raw edges together, all the way around the bottom of the hat.
Then zig-zag or serge in place.
Next, turn the hat right side out, and slide your iron inside of the hat the iron that seam upwards, along with pressing that bottom fold flat. Then rotate the hat and continue pressing that seam upwards and the fold flat.
And since we’re talking about ironing/steaming, I always, always, always steam/iron my knit……..which kind of shrinks the knit back into place after sewing. Even after a plain old seam like the ones above. (Keep in mind, you don’t want to iron like you do with a wrinkly cotton and pull your hot iron across your fabric. You just want to place the iron down and let the steam shrink it up. Then move the iron and repeat.)
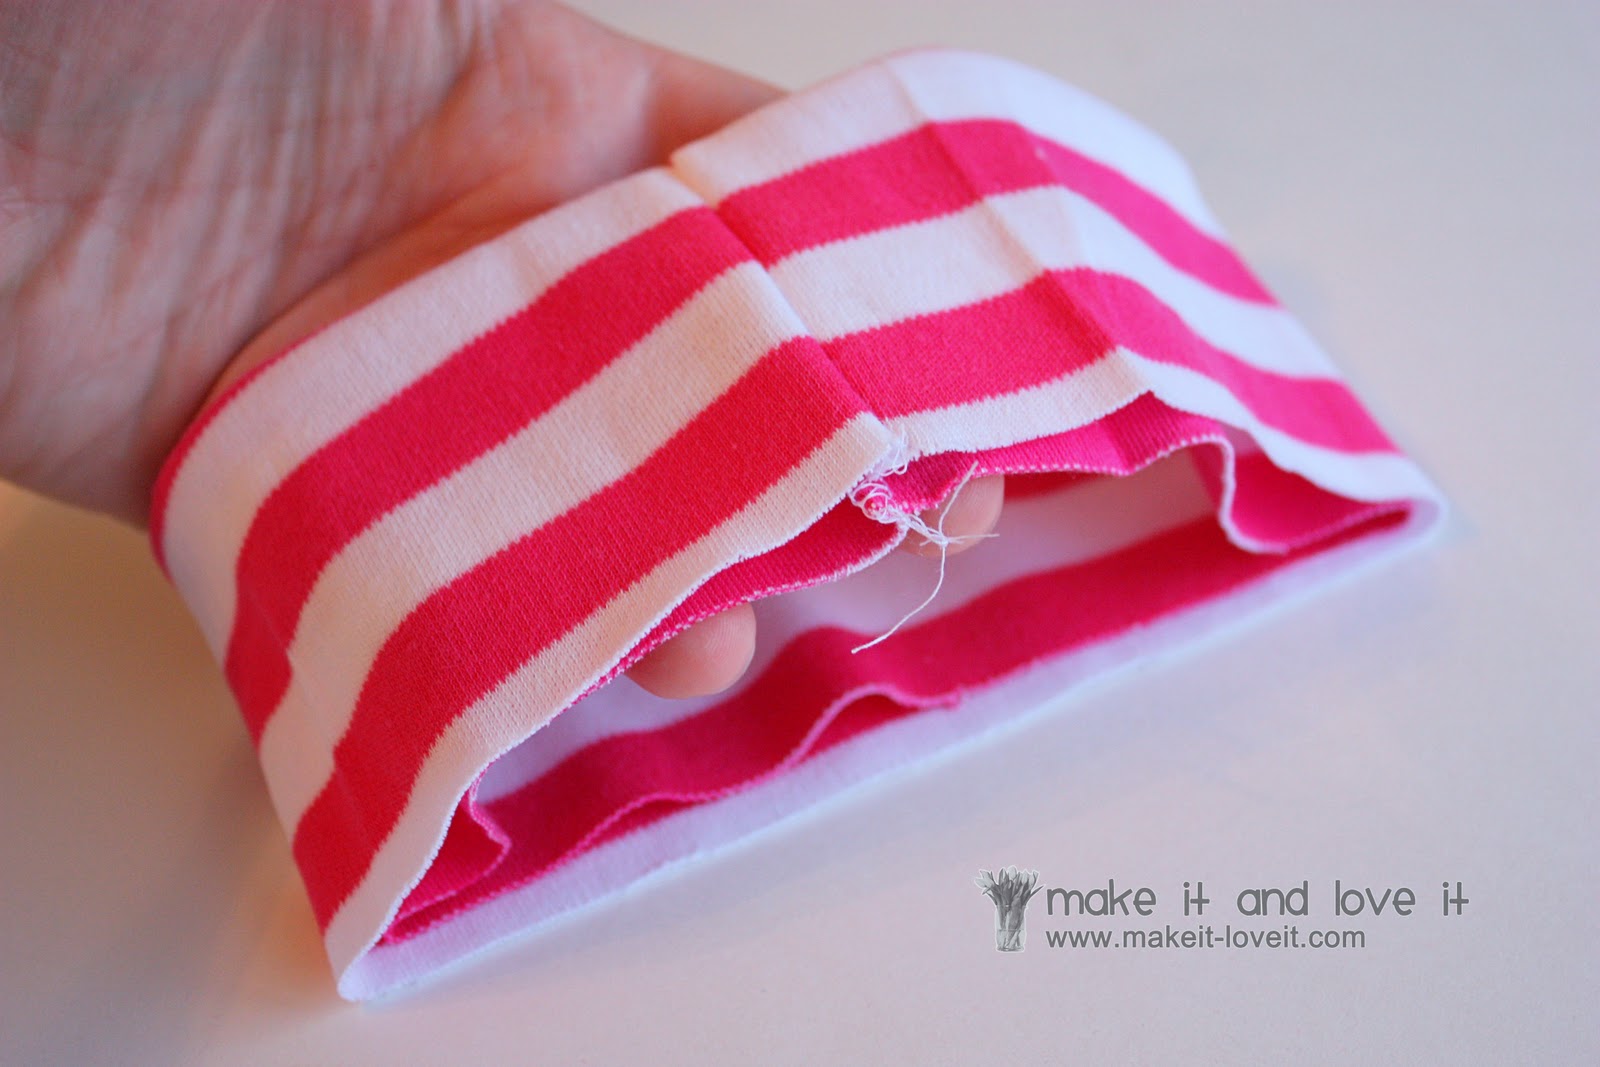
Next, fold up the bottom of the hat about 1 1/2 inches (maybe a tad more) and iron the fold in place.
Then I used a needle in thread to tack the fold in place, along both side seams of the hat. (Need help with hand-stitching? Click
here.)
Onto the flowers.
If you’re using the pattern pieces from above, cut out 5 knit flowers from the larger circle and 4 knit circles from the smaller circle.
Start with your bigger circles and fold them in half, and then in half again.
Arragen 4 of them on top of the fifth circle, creating one full circle of folded circles.
Now, either hand stitch those little corners in the center to the base piece, or use your sewing machine. Be careful if using your sewing machine, to not pull the fabric too much. You want to keep the pieces in a circle shape.
Then fold your 4 smaller circles the same way and place them on top of the larger circles. But offset them a bit, so the folds aren’t lined up exactly.
Stitch the centers in place the same way as you did above, but sew a little further out this time……to help keep the petals down a bit. (Sew through all of the layers while attaching these top circles.)
Then attach the flower right to the brim of the hat with a needle and thread, making sure to make several stitches to secure the flower to the hat.
And that’s it.
Now make a few more. Keep some. Gift some. Enjoy them all.
Related posts:
Thanks for posting – these are ADORABLE!!!
Those hats are absolutely adorable! I wish I had another little one to put them on!
Looks like a fast project and I'm in need of a baby gift! Thank you! :)
Thank you for posting both of these. They are adorable! I can't wait to make some baby shower gifts. I was wondering about washing the blanket. Do you need to steam/iron after each wash, or does the dryer take care of shrinking the fabric back up?
Thank you so much for your share …looks like so easy to do ;)
I just LOVE the colors! I can't wait to make a few!
very cute! I will be making these for all the babies in my life!
i love the prints and colors! you are so talented and creative!! good job ashley:D
These hats are great. I am going to have to draft some of my own, my little girl does not have a little head (got it from her father I swear!)
Love the flower on them. Your daughter is going to be so stylish.
Those hats are adorable! I have a baby girl, and those would look so cute on her little head =] Now…I need to learn to sew lol =]
I love all of your tutorials! I am expecting in August and this will be the best thing to bring to the hospital. We are not going to find out the sex and I am wondering if you have any ideas for an embellishment for a little boy's hat?
These are SO cute! Something I will definitely have to attempt!
My aunt and uncle are having a baby girl – my mom and I are excited to make these for her!
Love it! I'm going to make one for a little boy and am gonna try the name like you suggested. Hope it comes out as good as yours!
Adorable! Thank you for the tutorial. I'm thinking of making some for my boy (due in June) and putting "BOY" across the hat so people know he's a boy. :) I got a lot of "such an adorable boy" with my girl… even when she was wearing pink!
Sooooo cute I think I need to make a few of these for my little sisters!!!
♥Michelle
Malory – No, you don't have to iron it again. You just steam/iron it after sewing because it tends to stretch a bit but you won't have to deal with that anymore because the sewing is done. Good question though, glad you asked!
Cassy – my best tip for stretching is to use a bigger/longer stitch length. That always seems to help a bit. Also, lifting you foot and re-adjusting every so often helps to eliminate some of that stretch.
Hope that helps!
Ashley
Thanks for the tutorial! I love the fabrics you used…where did you find them?
So cute! I'll definitely have to make some hats and the blanket.
These are beautiful and SO easy! Now I just need a sweet baby girl to stitch some up for… :)
These are so, so cute! I might have to whip some up before my little one arrives in a few weeks!
Adorable!
P.S. I am in love with your blog…
:)
Making some for a baby shower next weekend. Where did you buy the ribbed knit? I can't find it anywhere!
I am smitten! These are so, so cute!
Googling a pattern for a knit hat for my soon to be here little guy was on my to do list- thanks for taking care of that for me! The knit hats in the store for little boys are so cheesy!
To say that I love your site is an understatement! I I just discovered it and have already made three things. Thank you so much for sharing all of your great ideas with everyone. This little hat will be perfect for my little baby. We live in Utah where it is really cold. He has had three ear infections in the last week! I feel like I want to make you my new best friend and I have never even met you:) Keep all of the great ideas flowing. Thanks again!
love love the flowers! can be used on all kinds of things! my brain is cranking now… tks!
Super quick & cute! Can't wait to make some! & thanks for clearing up my fuzzy head on the blankie yesterday! ;)
I've got a little girl coming in 4 months and I've been wanting to make her some hats since they're so useful, cute and they seemed easy to make. With your tutorial the hardest part will be restraining myself from buying material in every cute knit pattern I see! Thanks for sharing!
The hats are adorable–I think your fabric choices and combinations are brilliant!
Adorable! Thanks for sharing!
absolutely the cutest hat I've seen!!! Beautiful :)
Manni
http://www.ibakecakes-manni.blogspot.com
It sometimes seems spooky that you post a tutorial of something I am either just finished, in the midst of making, or planning to make the very same week! I love the tutorial! I just embellished some crocheted hats and was moving onto some knit ones this weekend. Now I don't have to take apart the store bought ones I just got!!!!
you make it seem so easy! i think i can totally do this! thank you so much for your blog :)
I love this! Thank you so much for sharing!
Can't wait to make these for the photo shoot this weekend with my 3 month old!!! THANK YOU!!!
super nice tutorial…i will try this for my nephew…
I'm in love…With my newborn, and how awesome she is going to look in these hats. Thanks for the great and easy tutorial!!!
Would you teach us sometime how to use a serger,pls (like the basics)? I am thinking in buying one after seeing how great the seams look on your projects but I am hesitant that I won't figure out how to use it! Thank you :)
These are adorable. Thanks for sharing!
I am incredibly glad that you shared this. I'm in the market for unique hats for my 8 month old daughter who just had brain surgery to place a shunt. While this shunt will save her life, it's awkward to look at… and so rockstar hats it is!
Love all of your ideas! I gave you a Stylish Blogger Award too! http://enjoylifeandlove.blogspot.com/2011/02/stylish-blogger-award.html
Love it! Have a question for you…do you own a serger?
LOVE THIS! New to the craft blogging Thanks for your insipartion
momsofalltrades.blogspot.com
I love them!! i wish that I had a little girl to make them pink with flowers…but I guess I can make some for my little boy..! Thanks for sharing!! You always make such pretty things!!
I love this new project!!!!! I am getting so many ideas of things i can make and give as baby shower gifts from your blog. It just saves me a lot of money and i love to craft my own gifts. But you say it is for personal use… Hummm..I think the style of this hat ,without the flowers, is pretty much standard and i don't see that the pattern you created would differ that much from the ones you find at the store… Just to mention… ;)
Anonymous….using the pattern/tutorial to then gift away the projects for shower gifts is perfectly fine. In fact, I hope you all do! :) I just ask that my ideas and patterns aren't used for profitable gain. I come up with them and share them for fun……not to aid others in selling them in their own shops. Hope that makes sense. (I'm sure people still will, but I still like to remind readers what these projects are meant for.) I have a lot of fun creating items to give everyone an excuse to create……not to sell and make money off of it. And yeah, the hats look like ones in the store. And that's exactly where I got the idea……just like shown in the first step of the tutorial. I apologize if it seemed like I was territorial about the hat concept……but no, I didn't create the idea of the hat shape. I only tried to re-produce it with a little flair and then create a fun project for others to try. I only ask that my directions are not used to make money from them. I hope that makes more sense and clears up any confusion about my "personal use" statement.
Thanks and enjoy!
Ashley
I don’t have sewing machine. Will this work hand sewn and what stitch will work best?
I am SO in love with these- it actually makes me wish I had a tiny little baby right now!
These are greeeeeat! Oh, I'm so excited!! I'm expecting #2 for us, due in July, and I hope I get to make some for our little bean! I would love to see your perspective for little boys (we aren't sure what we're having yet). Maybe that would be great when Made and Made by Rae have their "Celebrate the Boy" section again! Oh…. I'm so excited! thanks for the great post!
Fun tutorial :) Thanks for sharing – can I ask what font you used for the words on the blanket?
thx :)
Thanks for showing us how to make these. They are sooooo super cute. When I get my sewing machine, some space, and some time, I'll be spending a lot of hours using all of your tutorials!
Do you recommend investing in a serger? What machine would you recommend?
Thanks for the tutorial! I made some for a baby shower that I am going to and for my baby girl!
love these!! I have a little boy…but next time a family/friend gets pregnant with a little girl I know what I'll be making/giving her :) And i love the combinations of the fabrics. Thanks for the idea!
I love these! You make it look so easy… but I guess I'll only learn by trying. If think if I start doing more that would need a serger I could maybe buy one in the future…
Your tutorial was very easy to follow and I made this hat:
http://pumpkinsboutique.com/blog/2011/02/itty-bitty-baby-hat/
Thanks so much!! BTW – I'm due in four weeks with a baby girl and sadly we have no name yet either.
These are super cute! I also make beanies as you can see in my shop http://www.babyjshop.etsy.com but that is a great way to embellish them!!
Where do you get your knit fabric? I am always looking for new knits to create new styles :)
Where did you get your fabric? i love these! So stinkin' cute! Great photos too!
SOOOOO Cute!! I got a serger for Christmas and am still learning, can't wait to try these!!!
These are so cute! Thanks for the tutorial. I too am pregnant, but I have a little further to go than you :). We're expecting a girl, so I am loving the cute little flowers on the hats.
Thanks!!
Sheena
Thanks for sharing this great idea!!
I am expecting a little girl for early May and I will make her those cute hats.
It's also perfected as birth gift.
I made these for a friend! thanks for the tutorial! http://gabrielsgoodtidings.blogspot.com/2011/02/knit-baby-hats-with-flowers.html
I recently tried made some beanies with an old one of my daughters but I found that the thread kept gathering. I adjusted my stitch, tension etc but couldn't stop it from gathering.
Have you had the same problem and if so how did you fix it?
Love this!! I will definitely be making some of these :)
You totally gave my nesting bug a huge boost! I only have two months until my little girl gets here and I have been dying to make her something. I just made one of these hats with my new serger, and I can't thank you enough! I'm obsessed and have a feeling I will be making these for all my friends that are expecting! I'm so excited! You're the BEST!
Made It and Love It.
:]
Thank you very much for sharing this tutorial.
I LOVE EVERYTHING that you create and share with us,
Thank you!
I saw this when you originally posted it and bookmarked I have just come back after whipping one up this morning. I needed an emergency baby gift. It was so quick and easy. I even did it without a overlocker. I found steaming the seams made all the difference in the finished look. Thanks heaps.
Love it! I made one last night for my baby girl on the way!! Thanks for the tutorial!
I CANNOT wait to try this. I am a beginner at sewing, but reviewing your very well detailed tutorials, I think I can enjoy making these for my soon to be and even baby shower gifts.
u r amaZing!! i sure couldnt think this up all by myself!
How Sweet. Directions are marvelous and the pictures are perfect. oh, and thanks for the pattern.
I am going to make some for my friend’s baby who will be arriving in August!
These are great. And I think they would be a great use of several t-shirts my teens have grown out of without wearing them out. What fun this will be to make! Thank you for sharing.
I love it, where did you get the fabric though?
LOVE this, I’ve been needing hats for my new princess!
Just made a hat to match a onesie that I was working on. Perfect, easy, and cute! Thanks so much!
so cute!! cant wait 2 make some (actuley ill get addicted)
LOVE LOVE LOVE the bright and bold colors.. These hats are adorable and precious!!!
Love these hats, and the simple instructions! Lucky little girls :)
ME ENCANTA LO QUE HACES…. FACIL, Y MUY BIEN EXPLICADO… GRACIAS!!!
Nice to see someone doing this again. I learned to do this about 20 years ago… in the 1960′s our family had little money and we re-purposed everything. I made my own clothes in the 70′s out of the used clothing and hand-me-downs I would get…. Oh how fun! My young cousins just had their new babies, think I am going to make some for them and ship to Tennessee…. they both had girls :) … this will surely be fun!
this is terrific…..was thinking of making this for our fourth grandchild, yahoo, finally a girl……..wish I had kinit fabric to start right now………thank you again.
Lauren
What brand or line of fabric is this that you used I have several scraps from it but don’t know the name????
hey i’m new at sewing… I was wondering if there is any tips on sewing with knit? i’ve heard tissue paper but i was wondering if there was another simple tip you could share. also i love these and i was wondering if you could use an old shirt.. i had recently baught a zebra jersey knit shirt at rue 21 and it was way to small.. (bummer) BUT i have a friend who is in love with zebra print and her baby girl is coming home in a tutu dress i made her.. i was wanting to make these to match but i cant find any jersey knit in zebra print…
I love it !!!!!!!!!!!!! , now I have to make it before my little niece is born. Thanks for sharing this tutorial.
I am very new to sewing and attempting to teach myself by doing simple baby projects. I was able to do make one of these hats very easy and relatively quickly. Believe it or not the hardest part was threading the darn needle! lol And I love the finished product! I used an old ribbed knitted tank-top and scraps from an old jersey knit cardigan thing for the flowers, turned out beautifully.
I used a small round cereal bowl and cut around it worked perfectly to make theses hats. Made a zebra one for my daughter:)
How much fabric do you need for one hat?
I can’t wait to make these for a nd friends and my daughter’s baby doll! Thank you for a great idea.
Just what I needed. Planning to make my own fabric at spoonflower to make a monogrammed knit hat for my new nephew.
I love this little hat pattern. I sew for charity for preemies and the pattern is perfect with the rest of the outfits I sewed. Thanks so much.
INGENIUS!! My husband has been nagging me to make him a cosy sleeping hat (he’s bald) and with his birthday coming up I’m going to base it on this pattern only adult size it.
I’m pregnant with our first bub too, so I might just make a matching one for baby – cute!
Thank you so much for taking the time to share this!
Anthea.
(spoonfulzine)