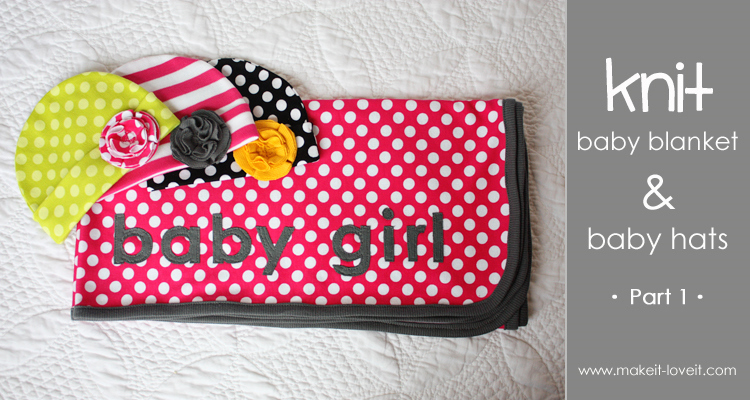
Knit Receiving Blanket/Knit Baby Hats COMBO: Part 1
.
The itch is on.
You know, to hurry up and complete every last baby project before this little one arrives in a few weeks. (And clean out that closet, scrub the baby bouncer, clean out the fridge, stock up on more baby necessities, and maybe organize the kids closet……okay and scrub the toilets. But that husband of mine is so good at that one. We’re going to have to make some deals.)
I keep thinking maybe by chance I’ll go into labor early. But I have no idea what that feels like, since I was induced with the last two. But as I was cutting up and redoing the baby car seat cover over the weekend, my heart started to panic…….”Ack, what if this baby girl arrives and her car seat is in a trillion pieces?!!” So I worked all weekend to finish it up.
Did she come?
Nope. That’s okay. The car seat is done. Phew.
(Tutorial for that coming soon…..there’s just a lot of pictures to sort through first.)
But I do have something simple and cozy to share today.
When my fresh new babies come home……I love to wrap them up as snuggly as I can. And knit seems to keep those little flailing arms/legs nice and secure inside of the blanket. The stretch of it seems to work best for me while they’re so itty bitty.
So I was excited to make a snuggly little baby blanket for this baby.
Oh, and a few hats…..because they’re so quick and simple. (
Look for the Baby Hat tutorial here.)
.
.
A great combo though, right?
Especially if you’re into making your own baby gifts.
Who wouldn’t love a sweet new hat/blanket set for their new baby?
.
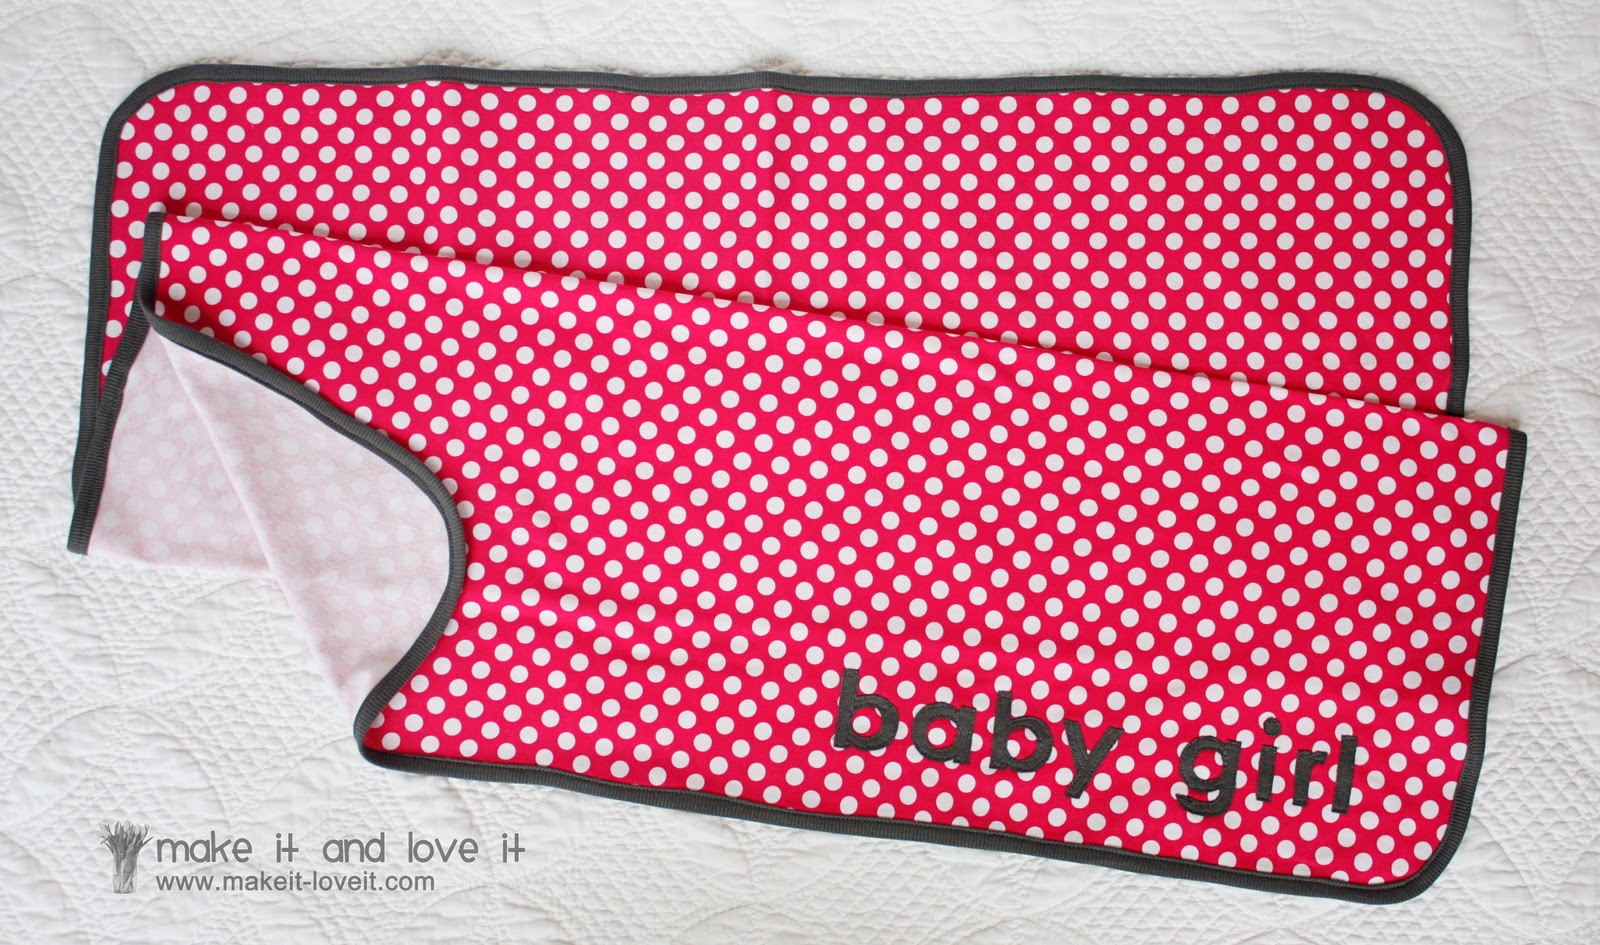
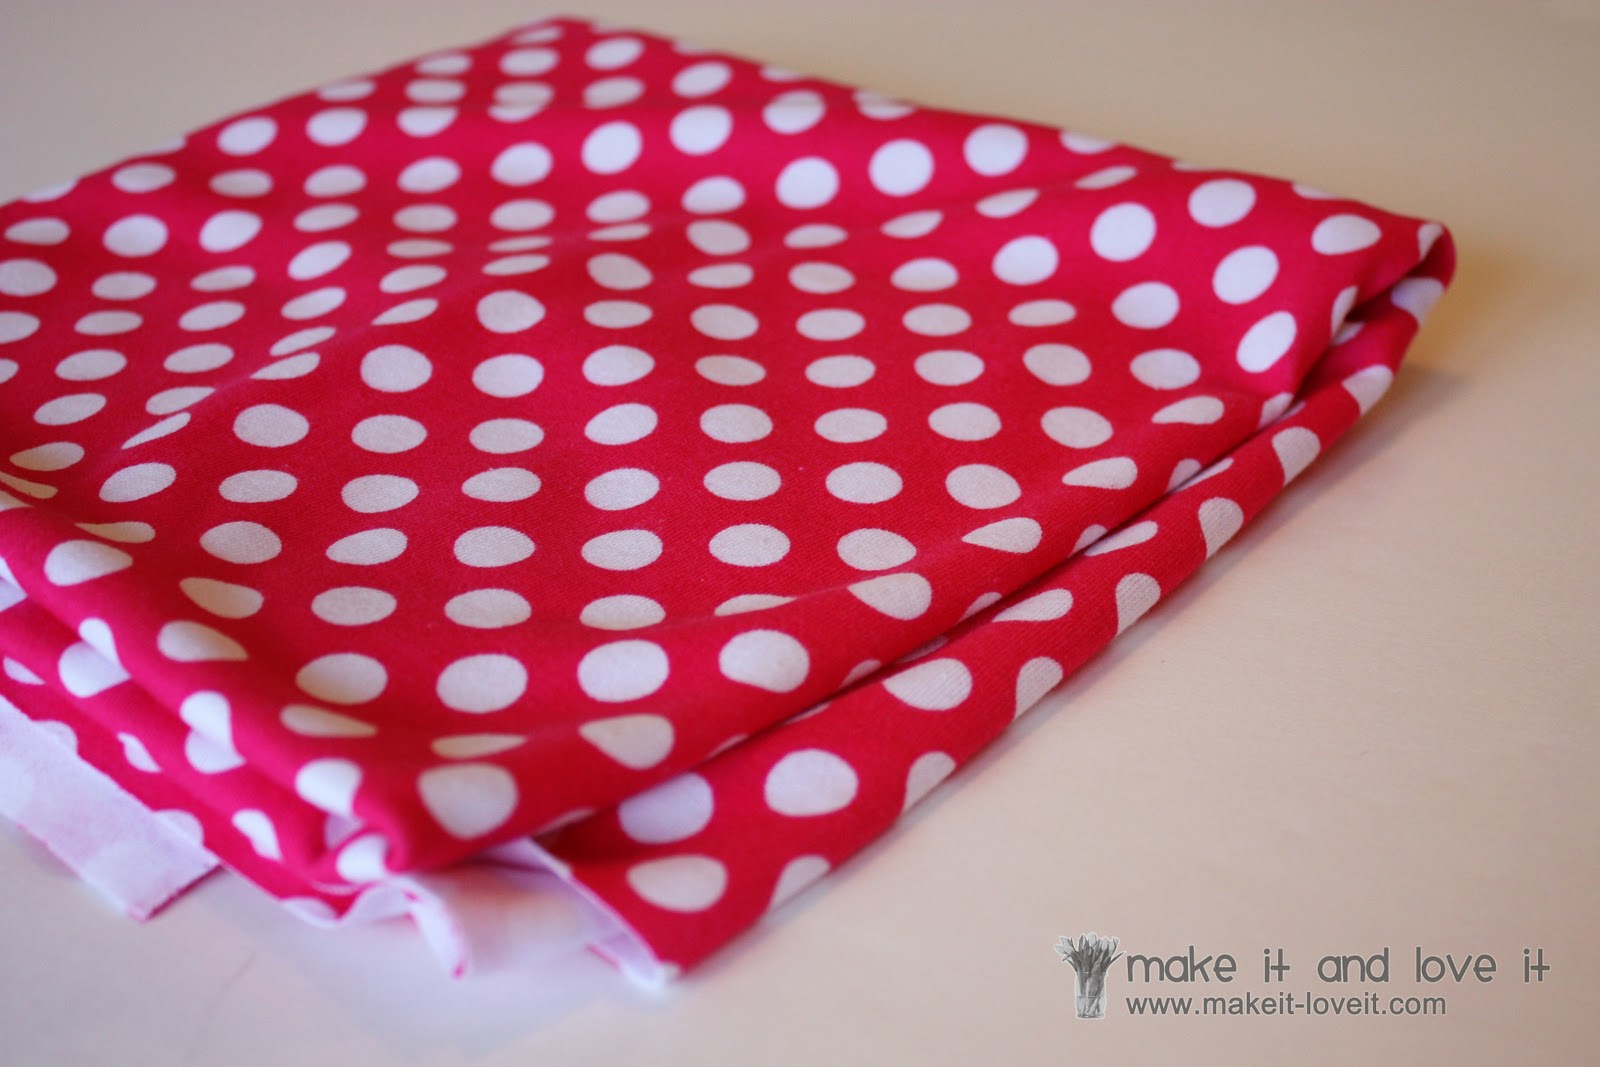
The blanket is one layer and works great as a receiving blanket.
Or swaddling blanket. Or play mat for the floor.
.
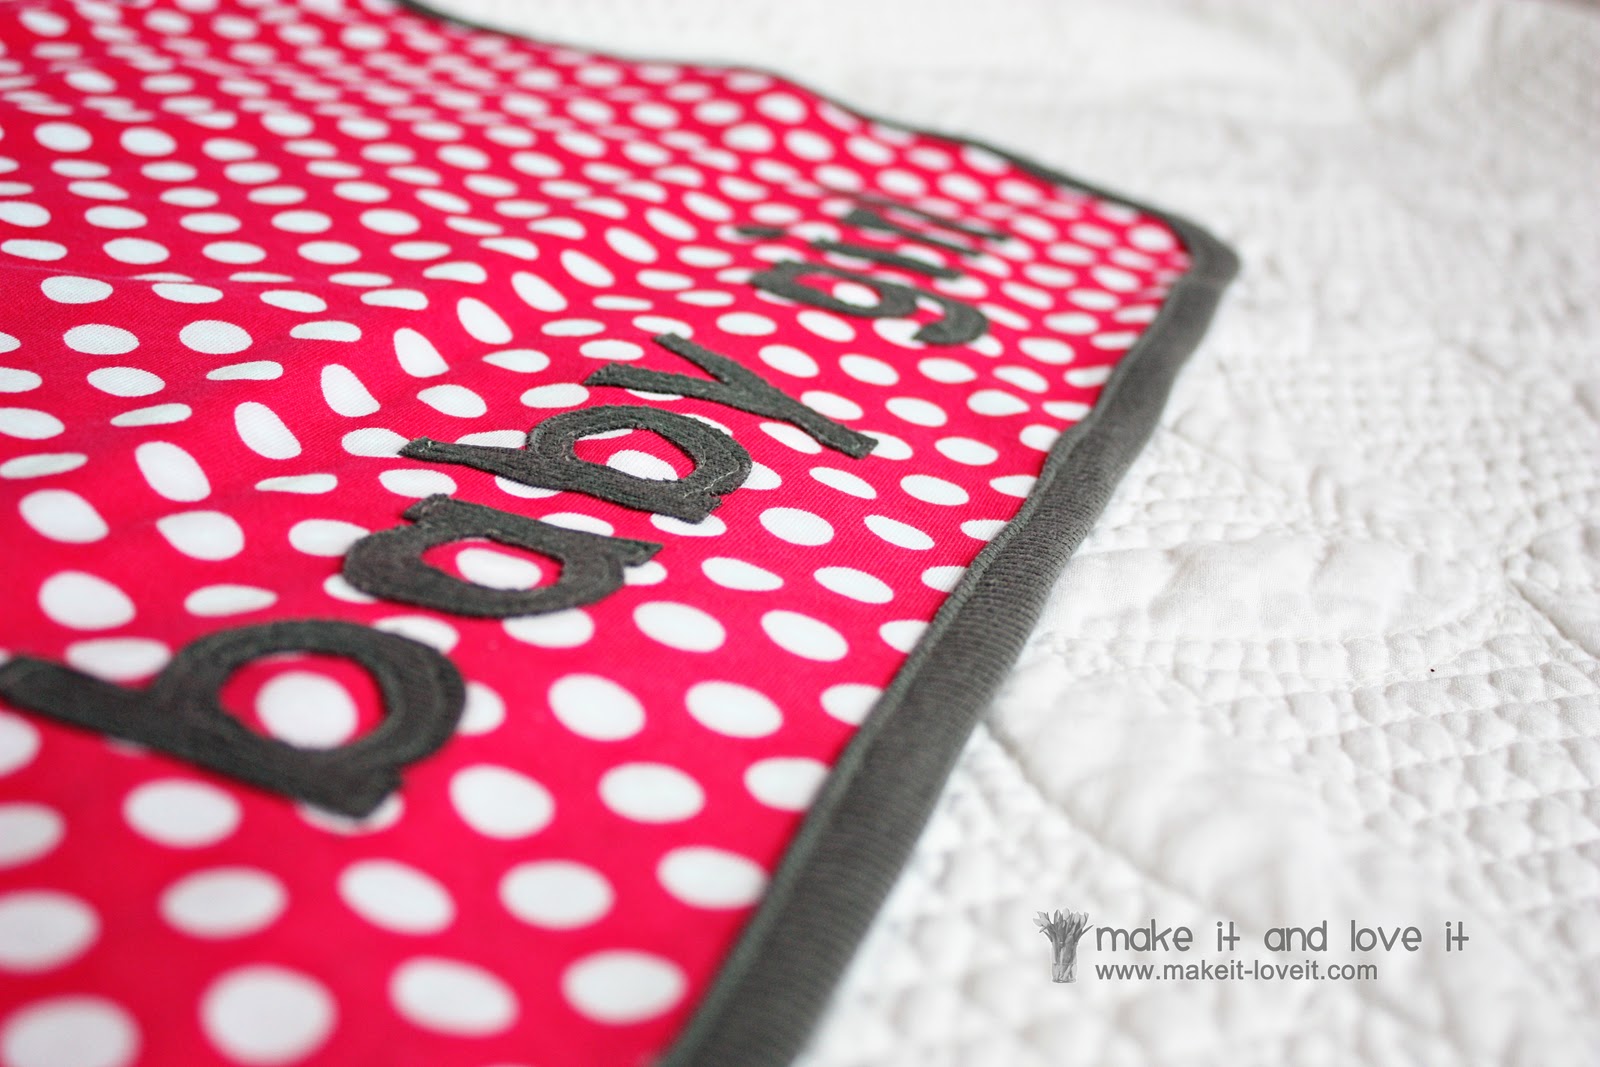
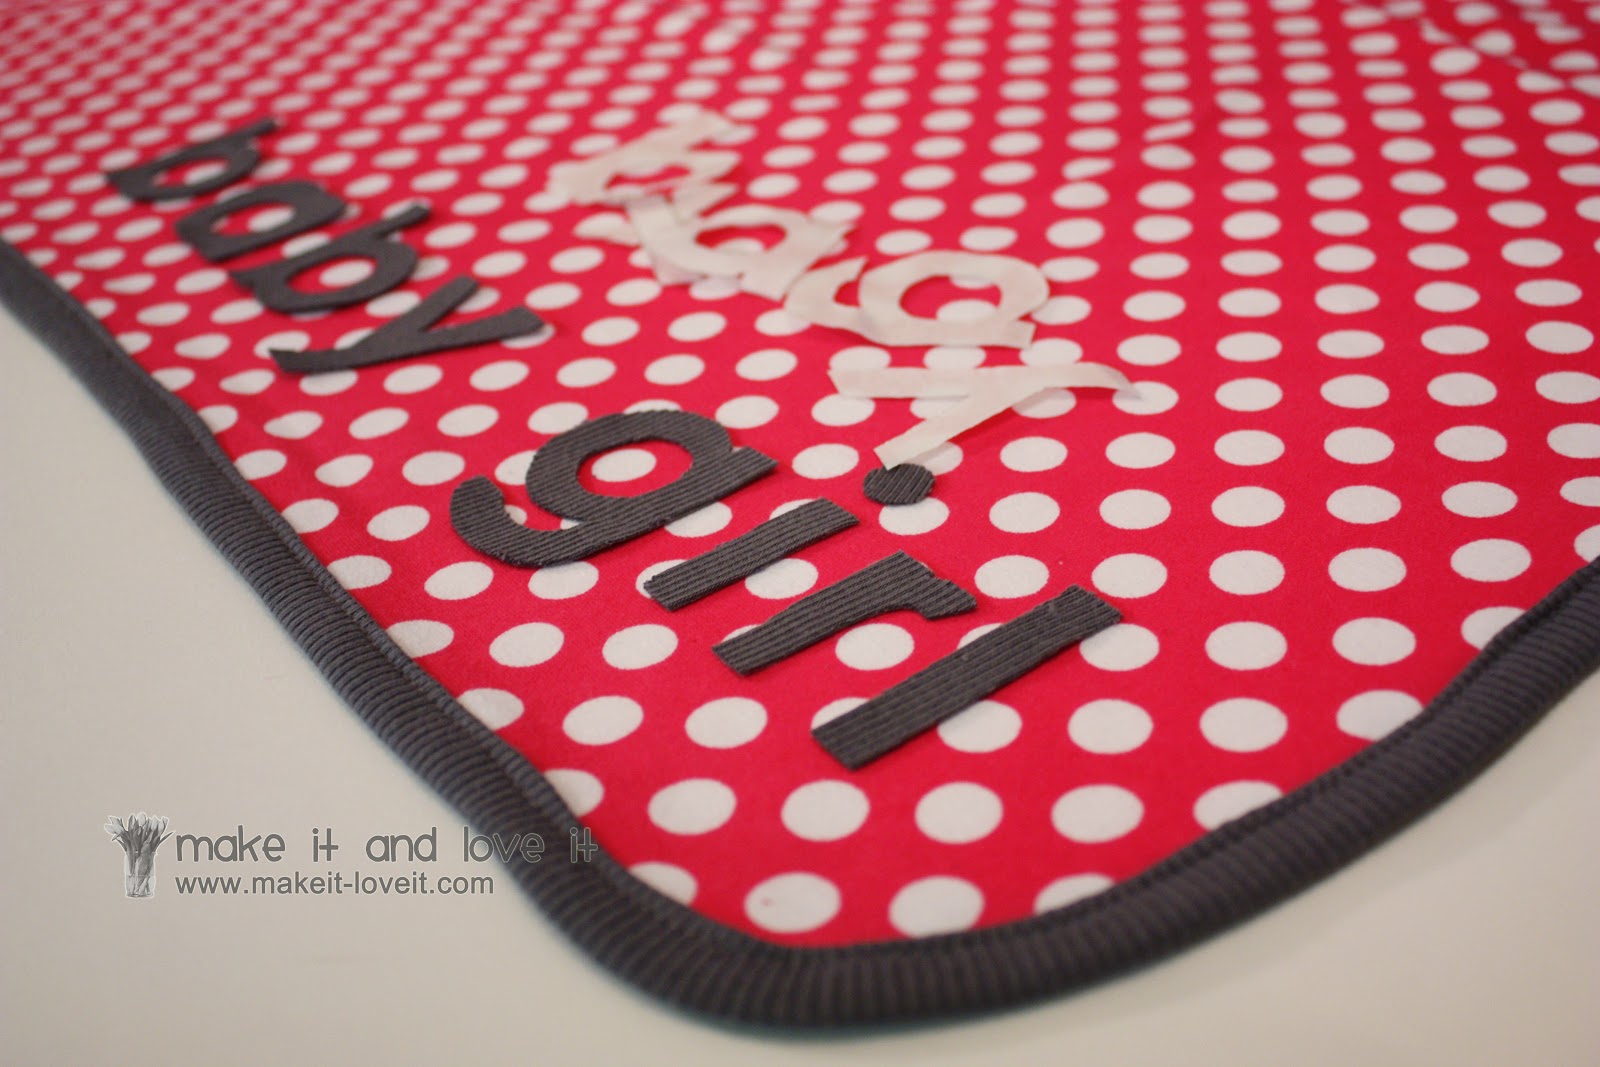
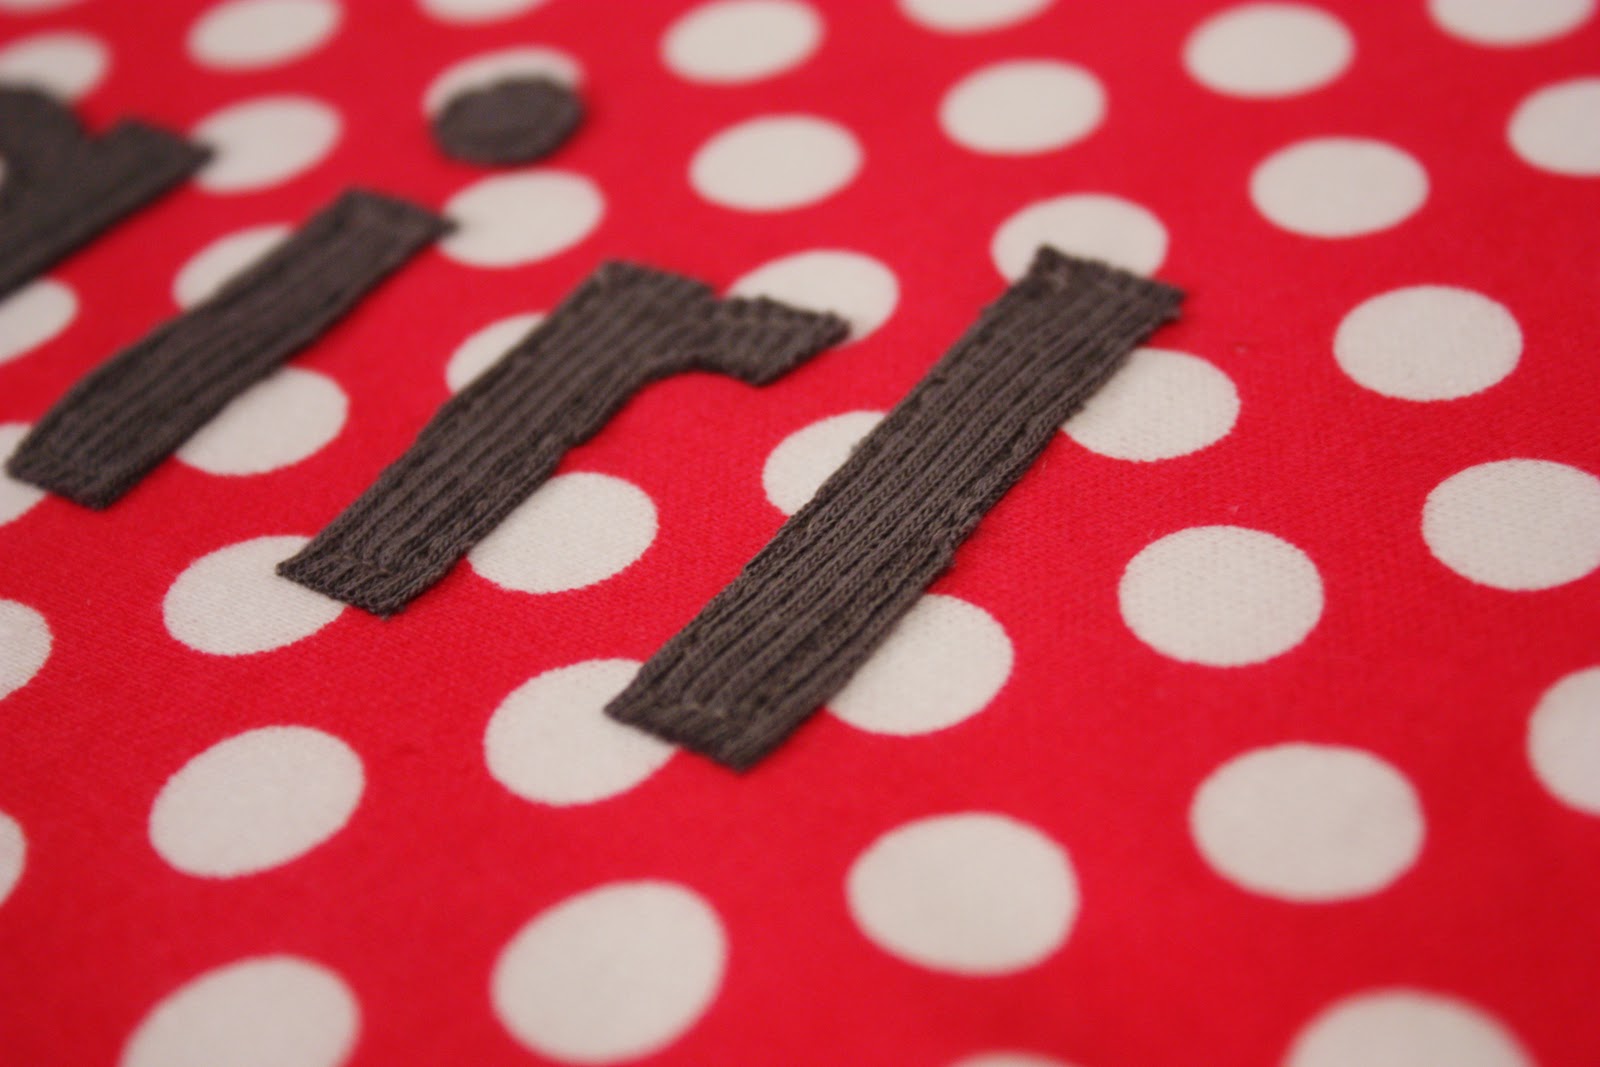
And I’m kinda crazy about the applique’d lettering along the front. You could place the baby’s name on there too…..but I didn’t because we’re still undecided. (That’s another topic… Ha!)
.
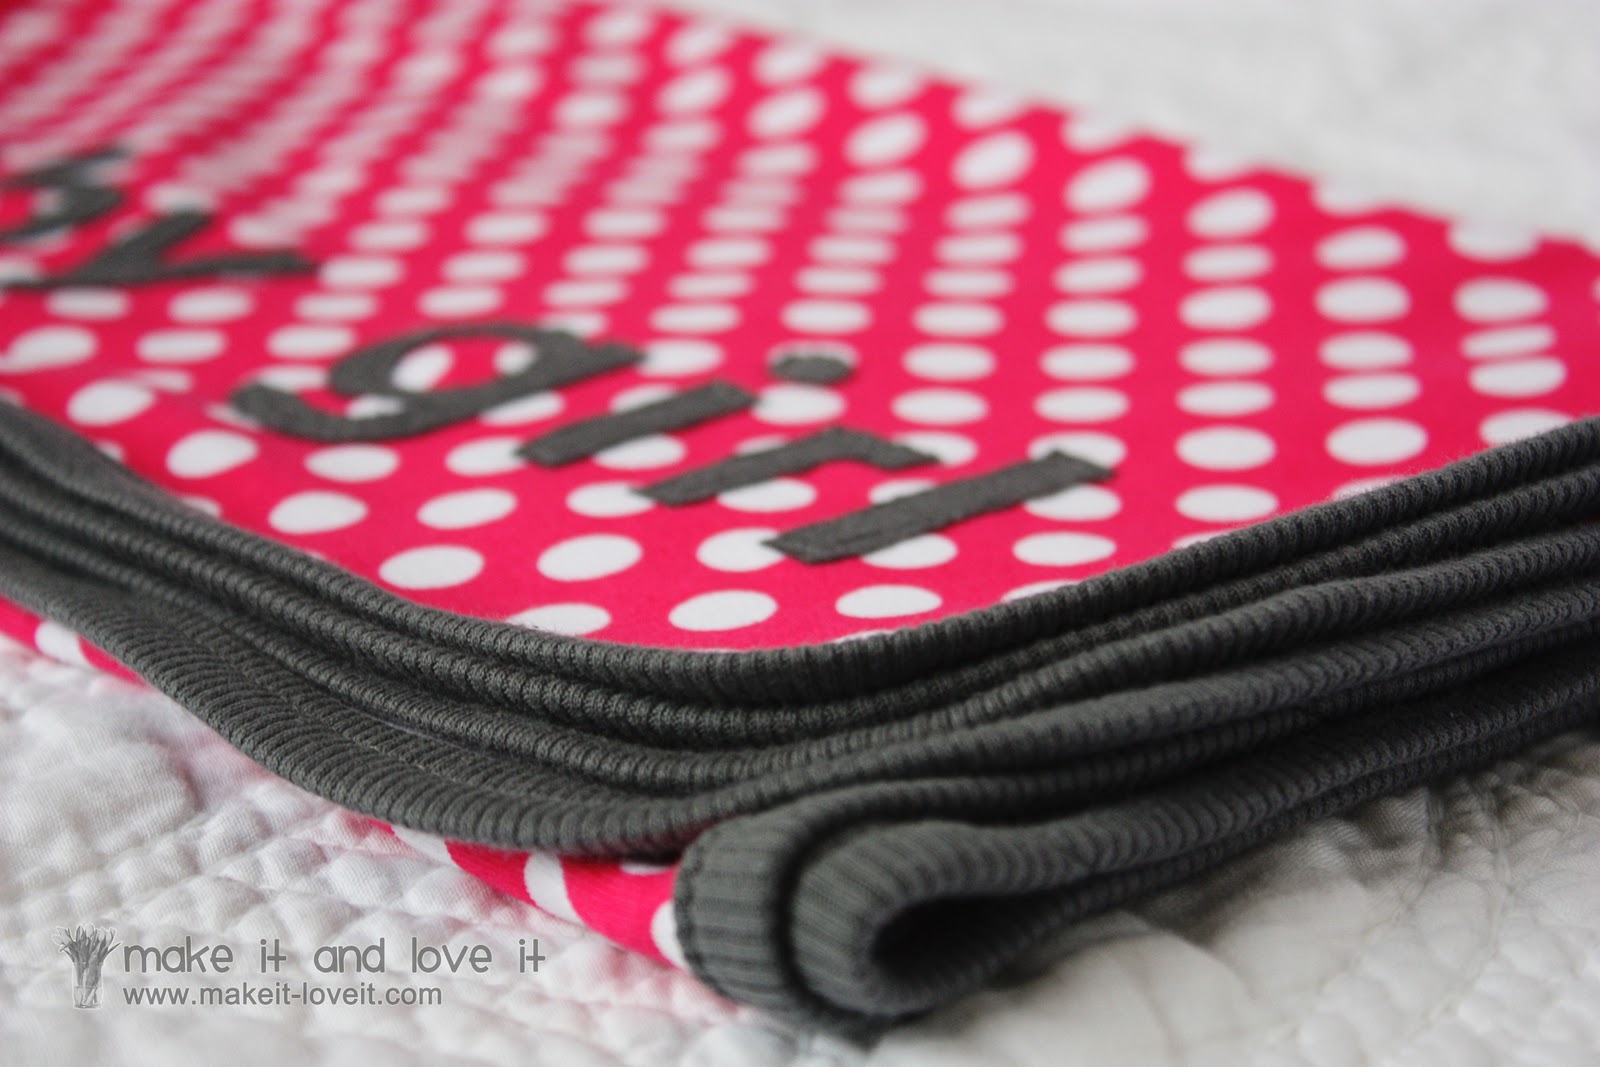
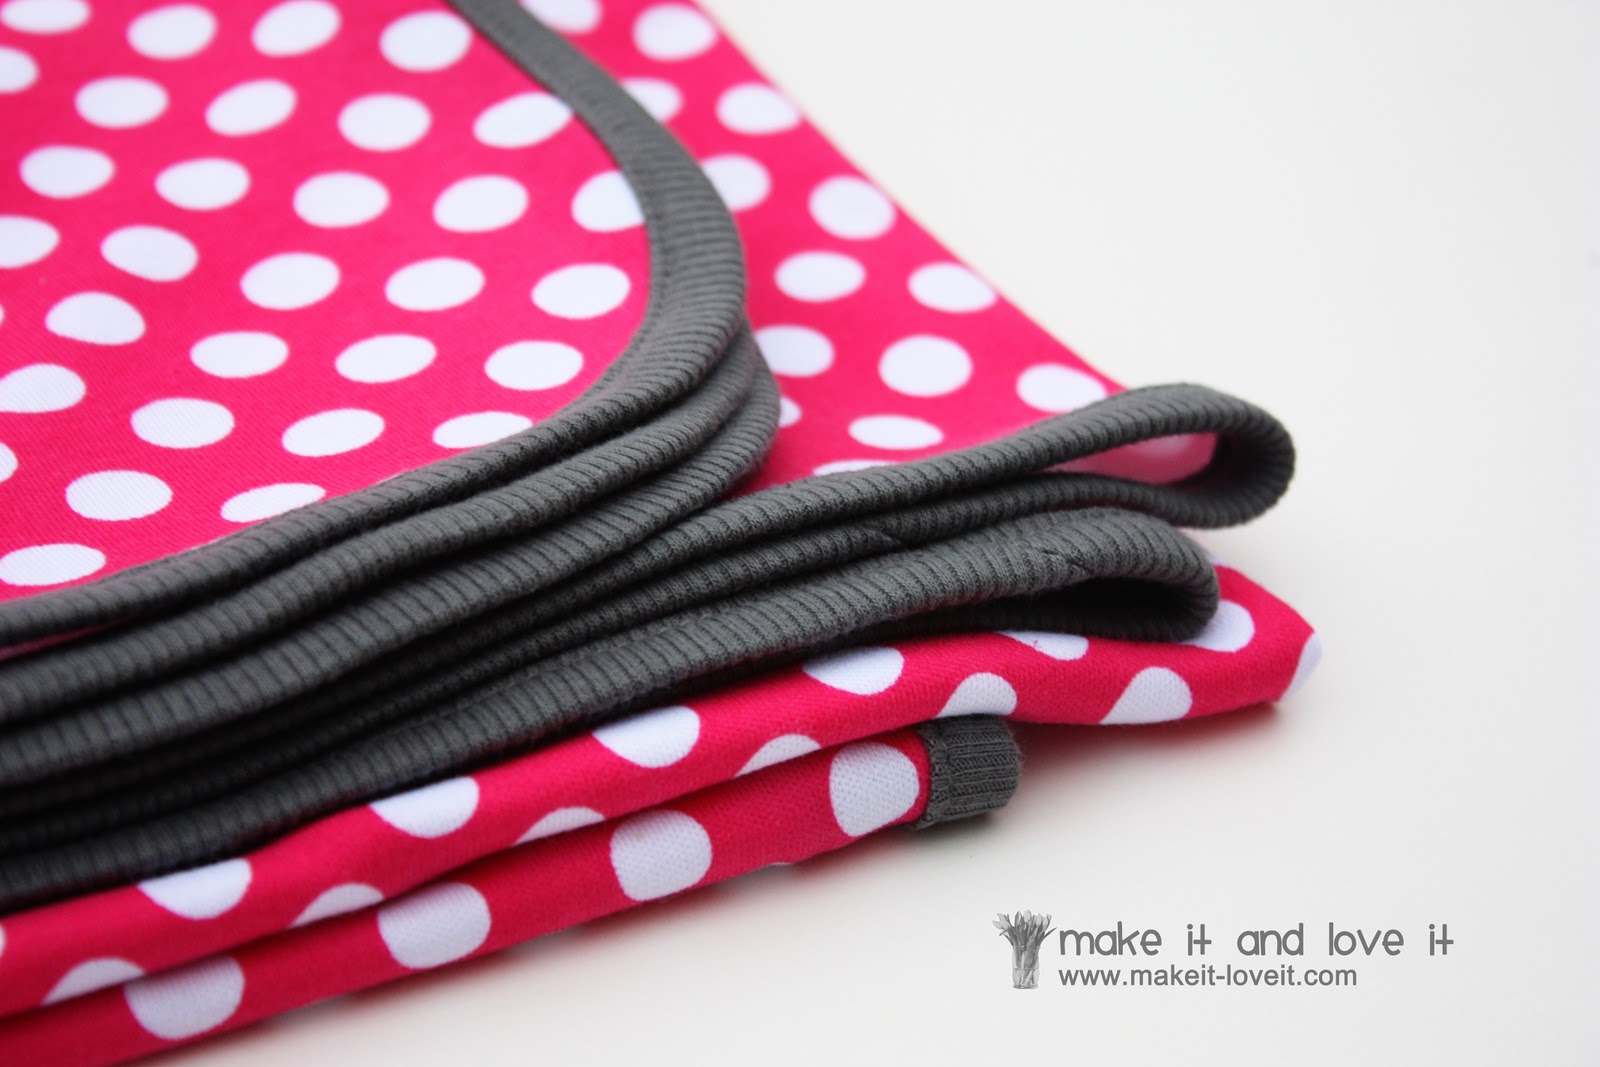
And how about that scrumptious ribbing around the edges… It adds such a great texture to the blanket.
Success. Another baby project completed.
(Remember, the baby hat tutorial can be found here.)
.
Would you like to make a knit baby blanket too?
For this project……I found some interlock knit for half off at whipstitch
here but the colors I bought are gone. But the fabric is Michael Miller Interlock Knit (Designer: Patty Young)…..in case you want to search elsewhere.
First, I pre-washed my knit
(Why prewash? Read this post.) and then cut a large square that was 36 x 36 inches. You can make your blanket any size you like….but this seemed like a good standard size for a receiving blanket.
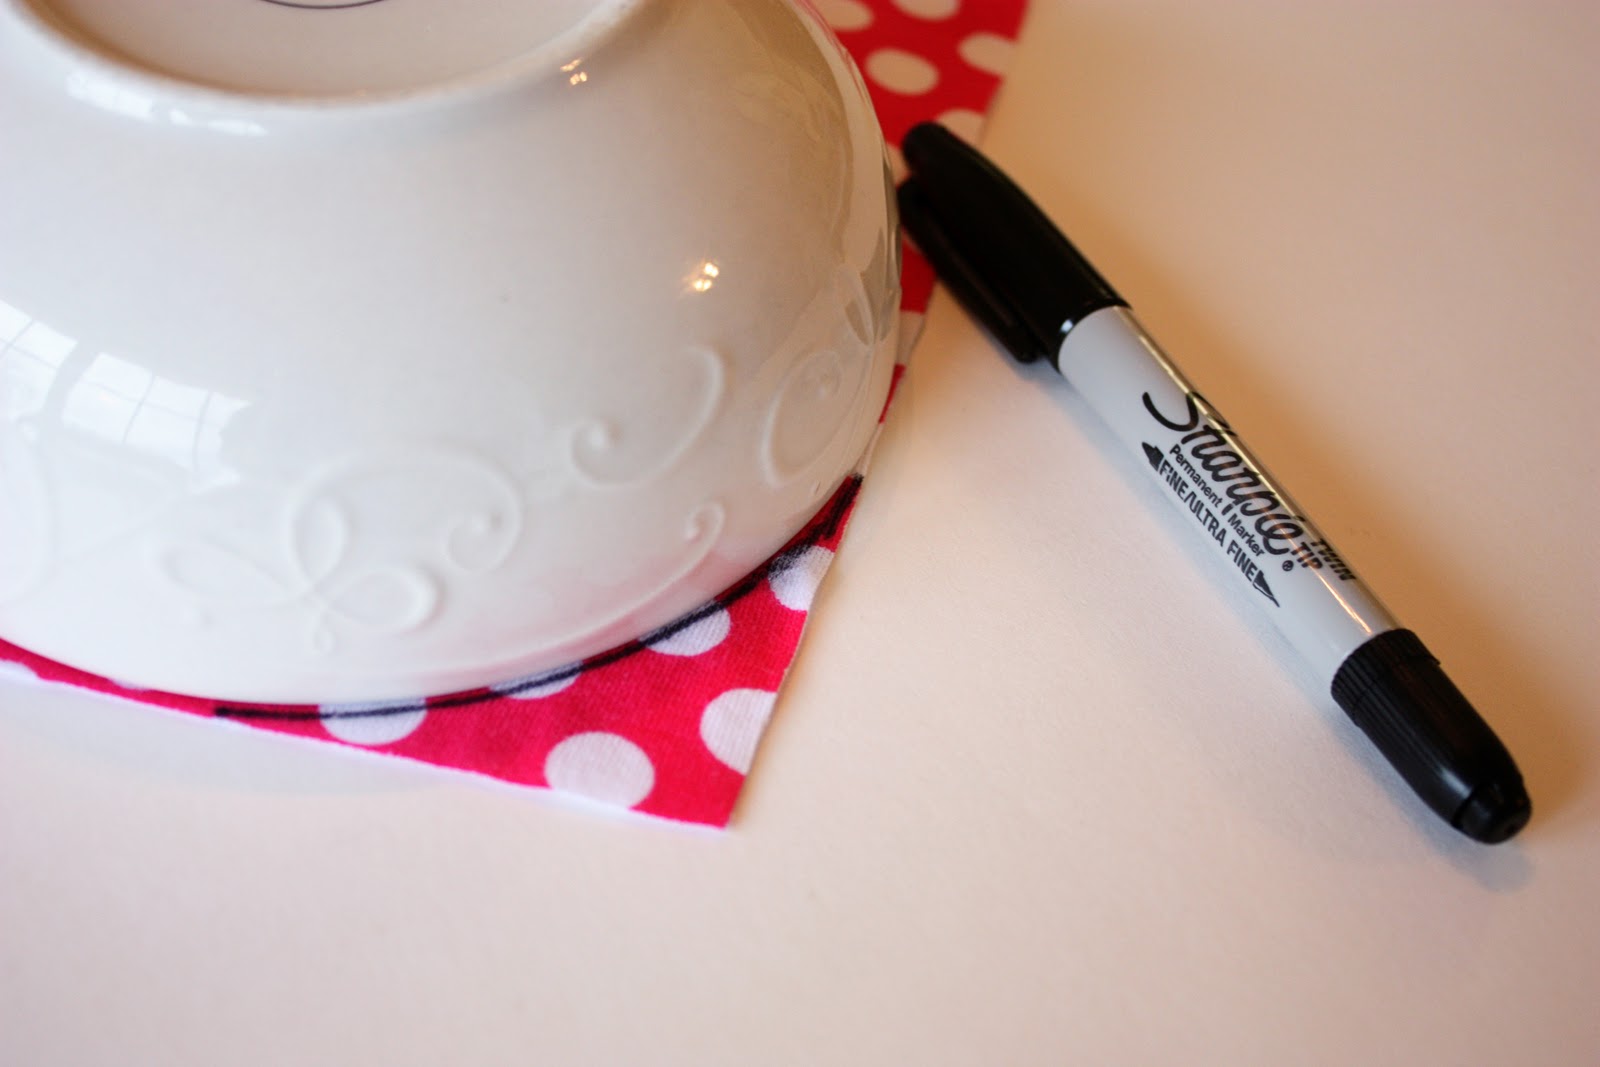
Then I rounded off each corner. The easiest way for me to do this is to trace a bowl right along the corner with a marker…
…….and then cut off the circular corners.
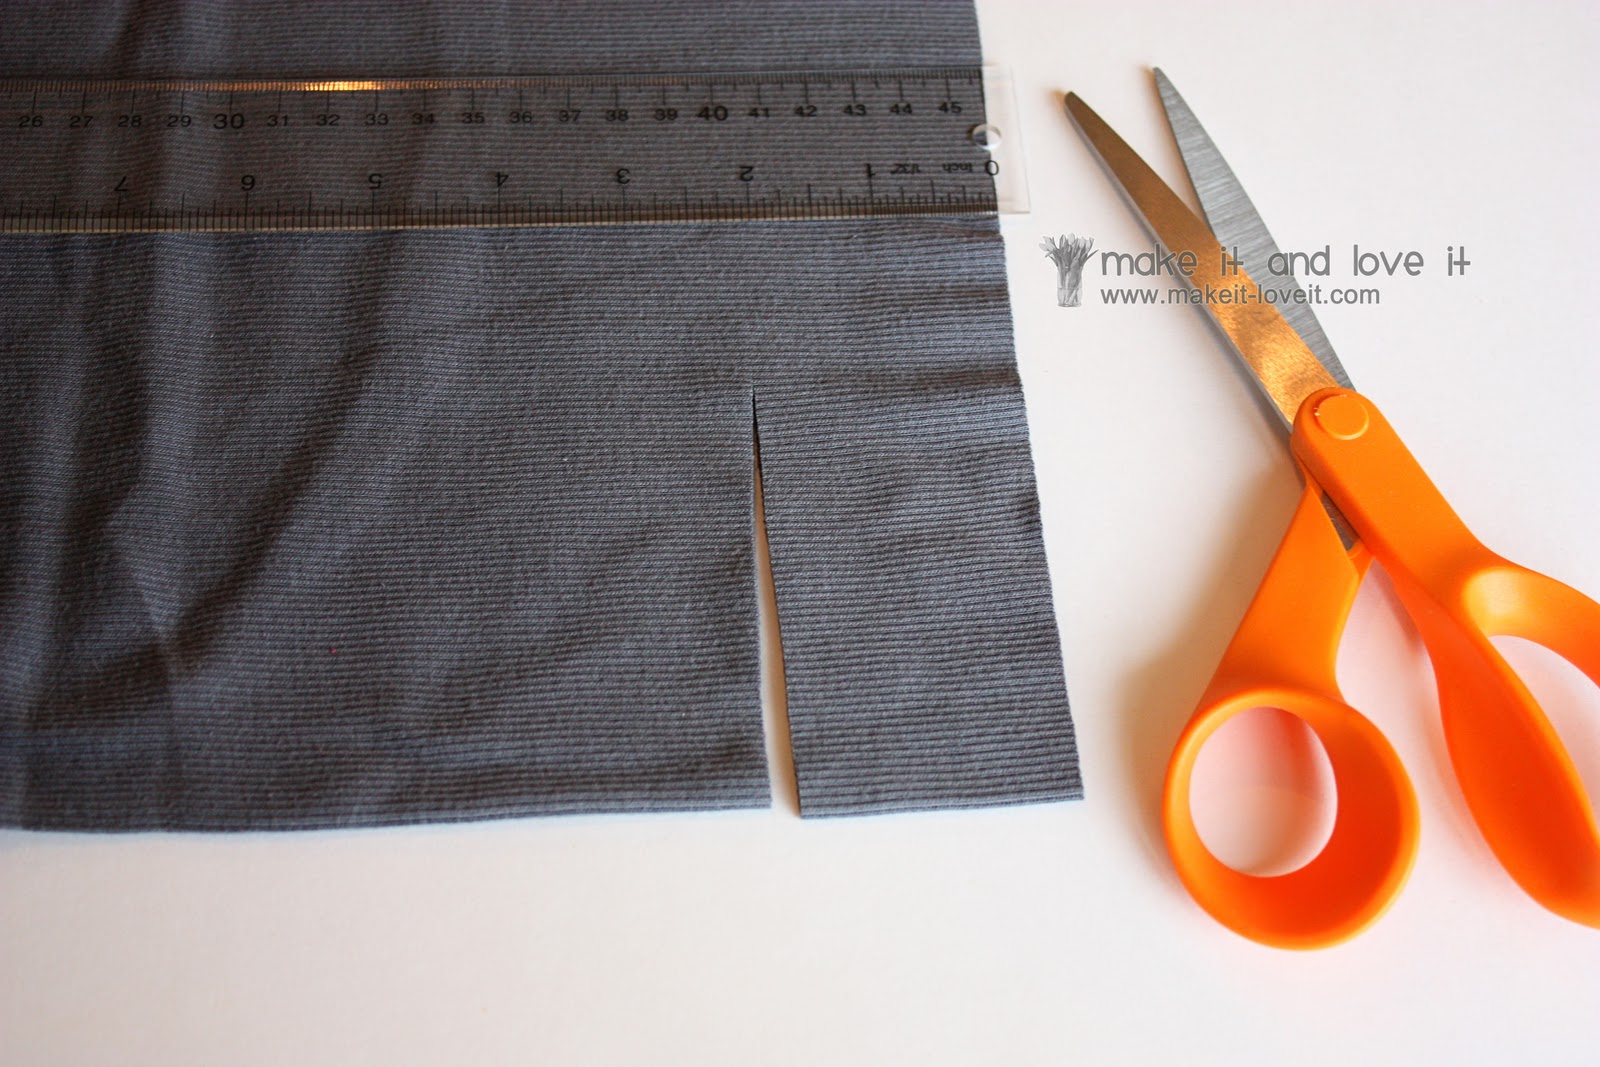
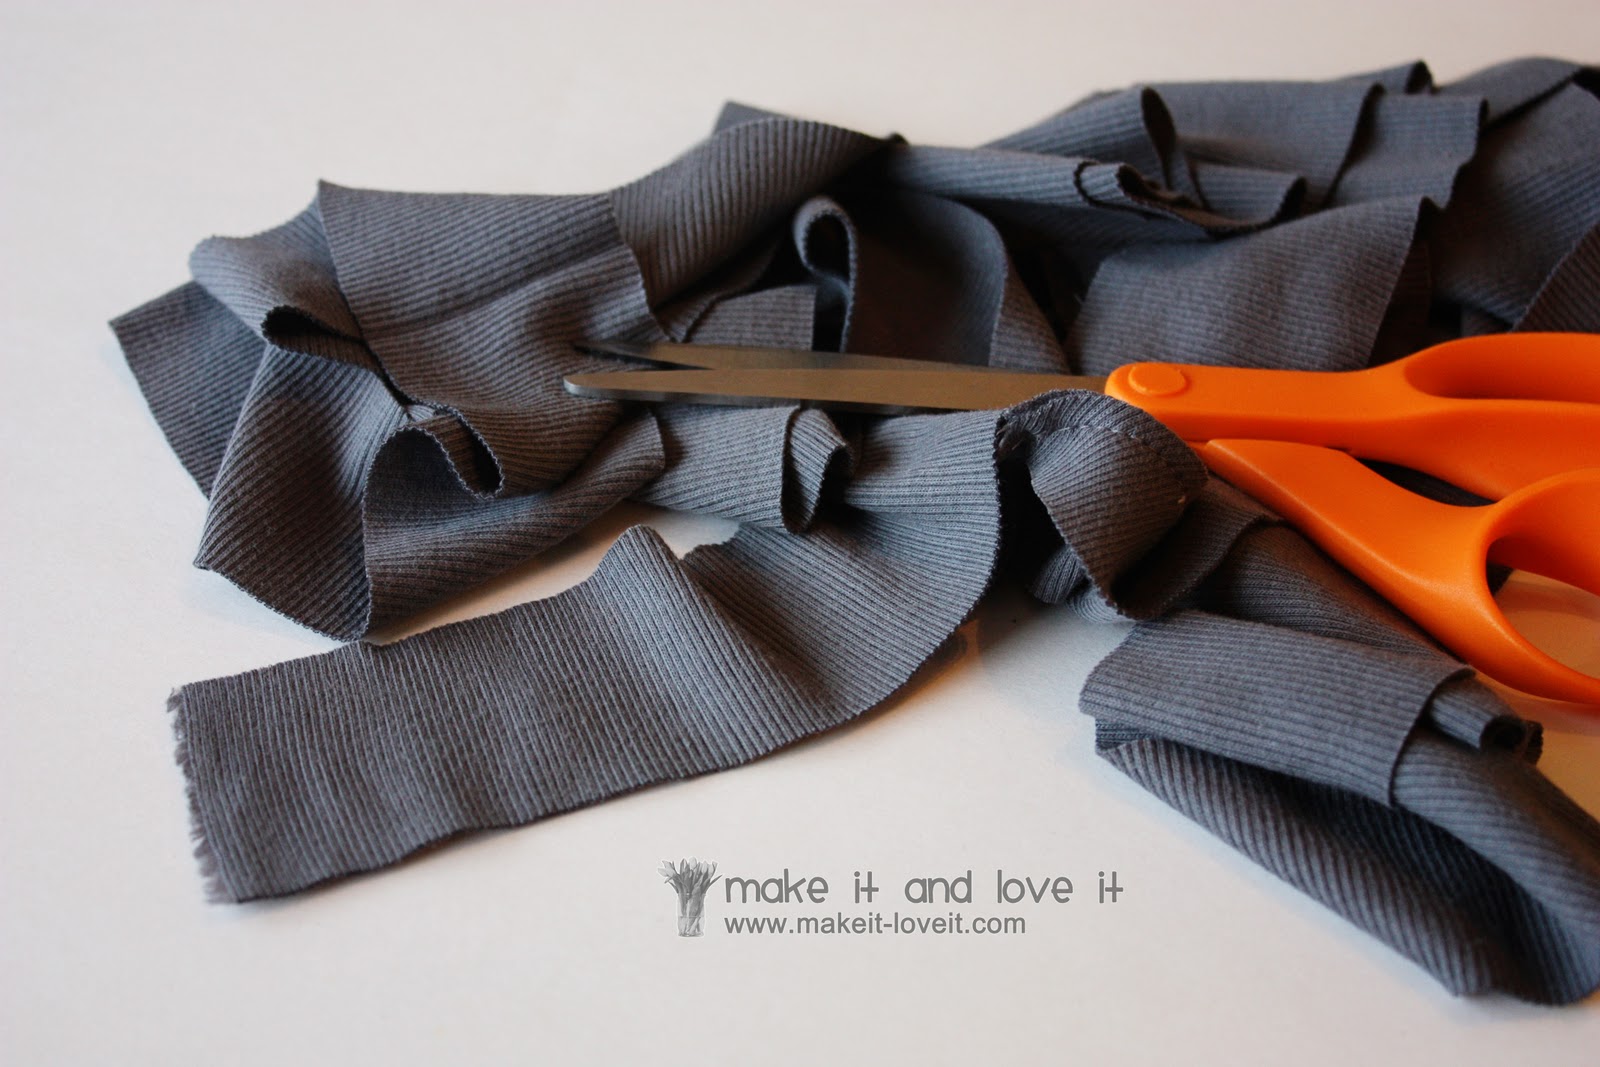
Next, cut some strips of ribbing to use around your edges, just like bias tape…..
but no need to cut on the bias if you’re using ribbing. It stretches and goes around curves really well.
If you can’t locate ribbing though, just cut some regular knit the same way…..but cut it on the bias. (What is the bias and bias tape? Click here.)
And what is ribbing? It’s a knit fabric with a distinct vertical ribbed pattern, that allows for a good amount of stretch. You’ll usually see it around tshirt collars, cuffs, or even little boy undies.
I cut long strips of ribbing that were 2 inches wide, with the ribbing lines running parallel to each 2 inch side. I sewed enough of the 2 inch strips together to create a piece of “bias tape” (but not cut on the actual bias) to go all the way around the blanket.
Then I double folded my long strip of ribbing, to create my “bias tape”.
(Need help with folding and ironing your bias tape? Click
here.)
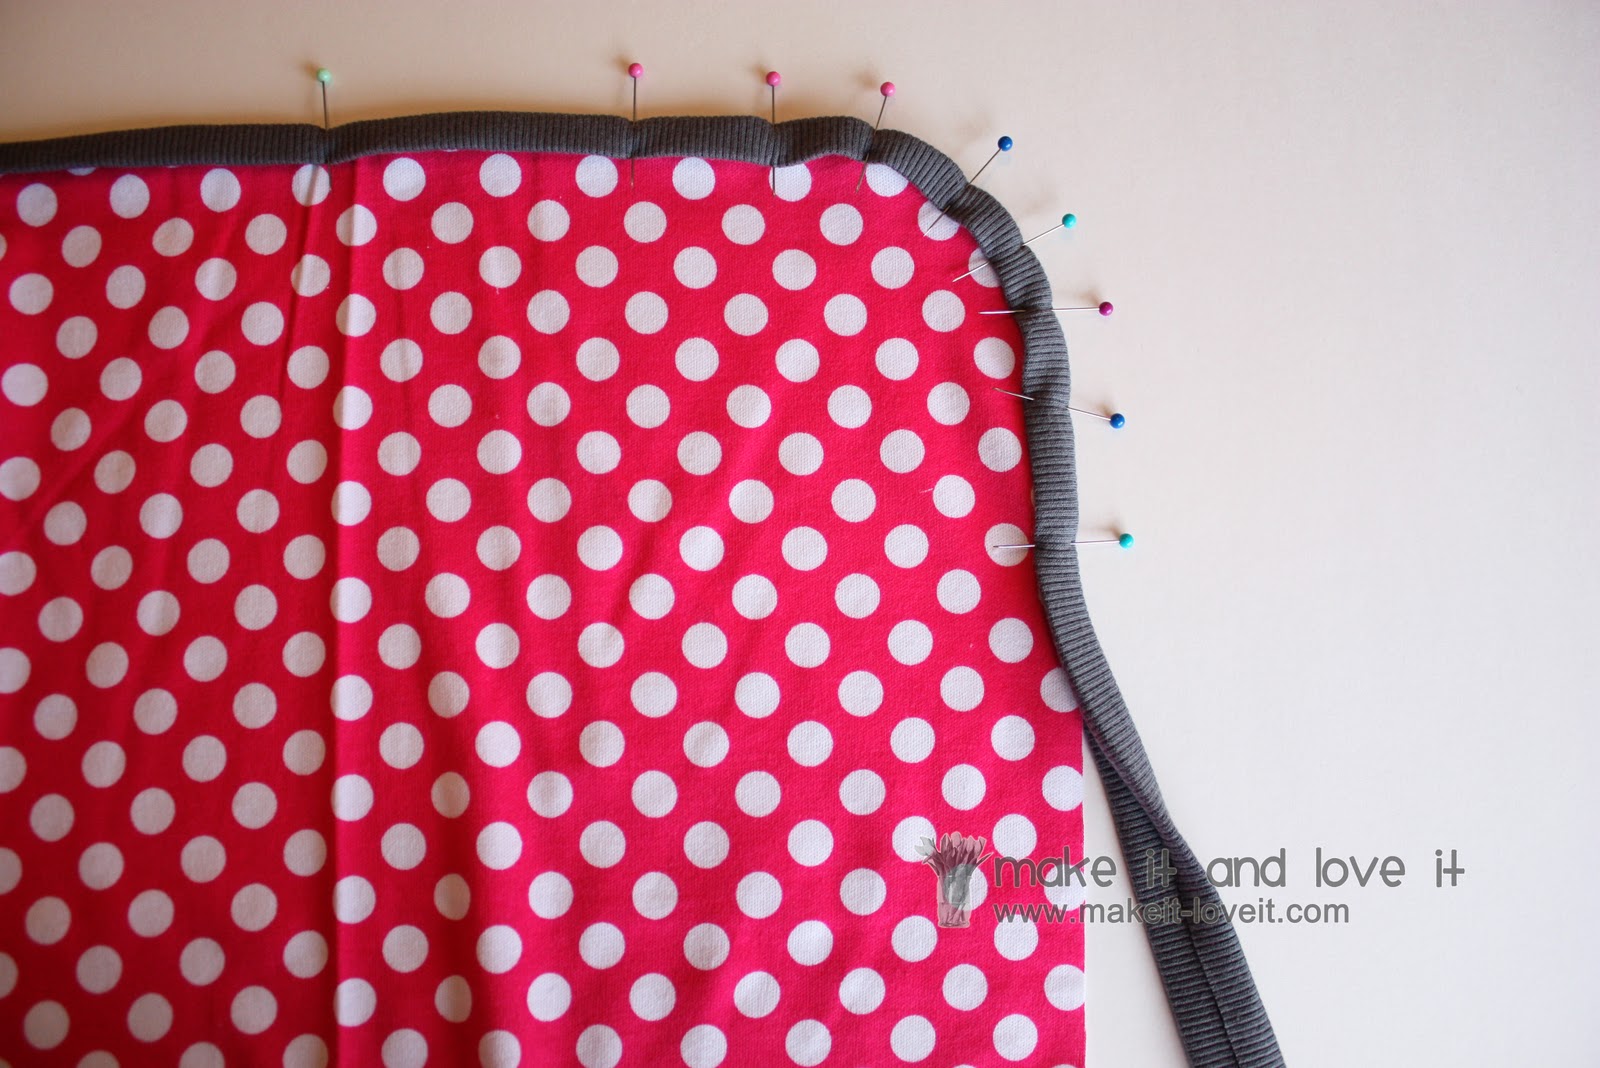
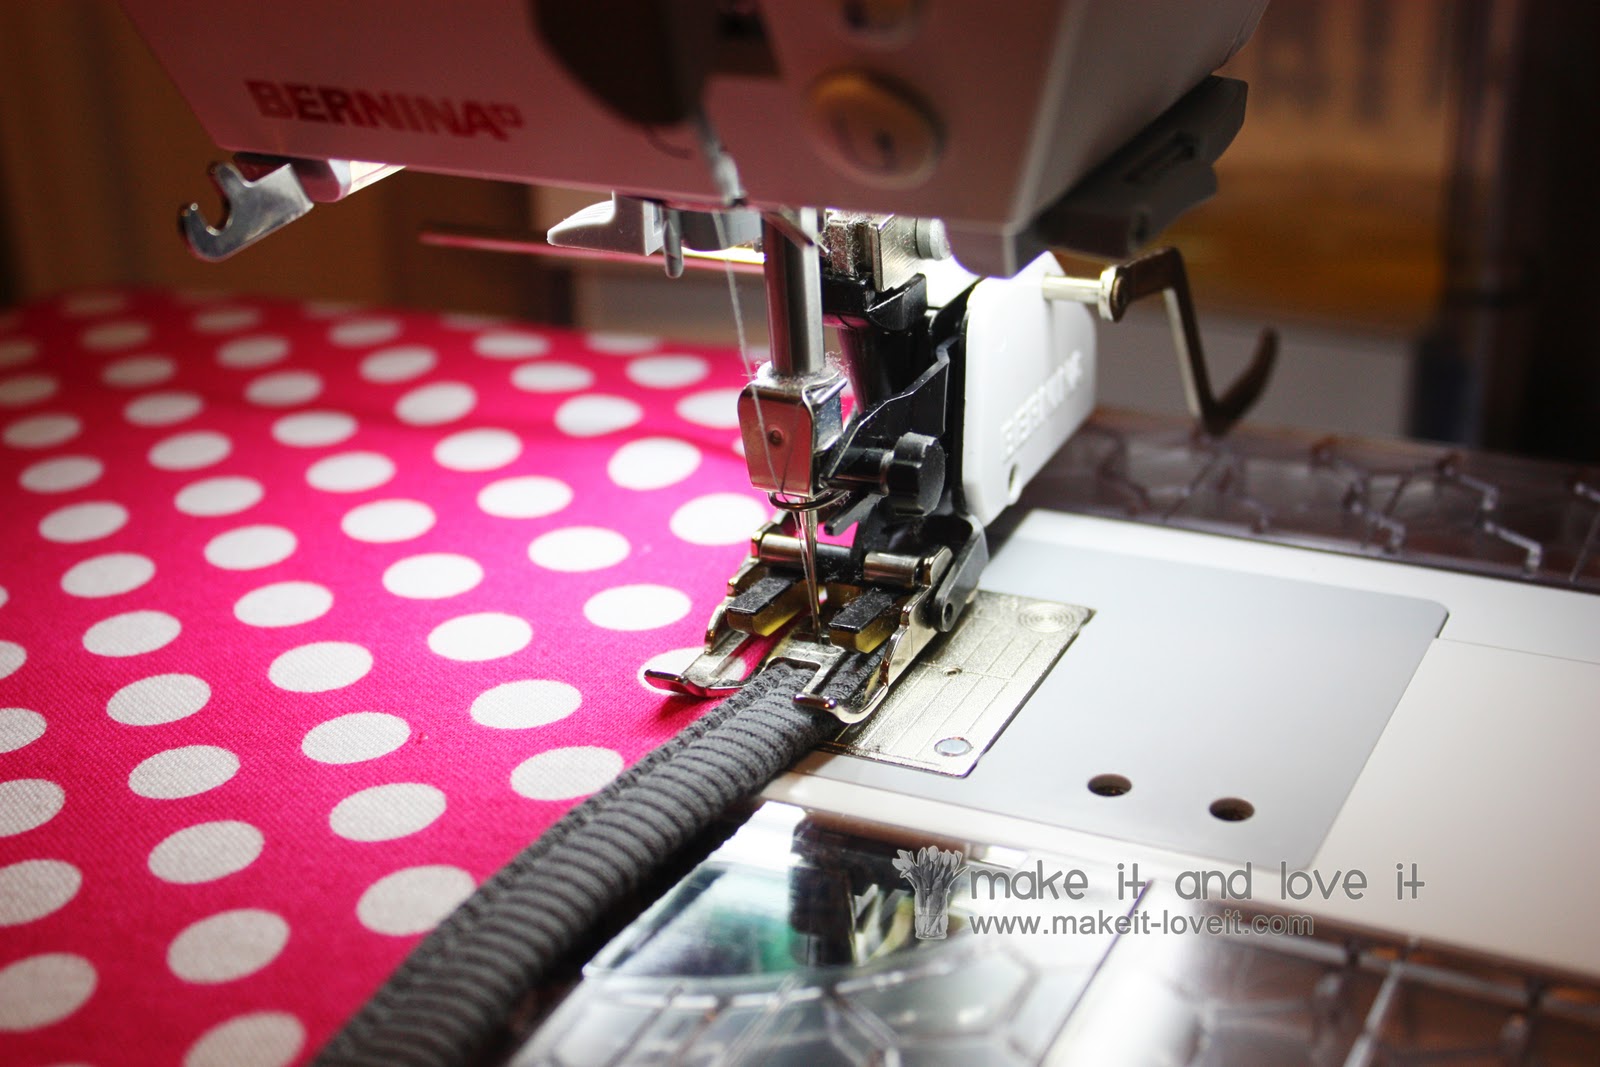
Now, begin on one long edge of the quilt and start sandwiching the bias tape ribbon around the edges and corners of the blanket. Use pins to keep the ribbing in place.
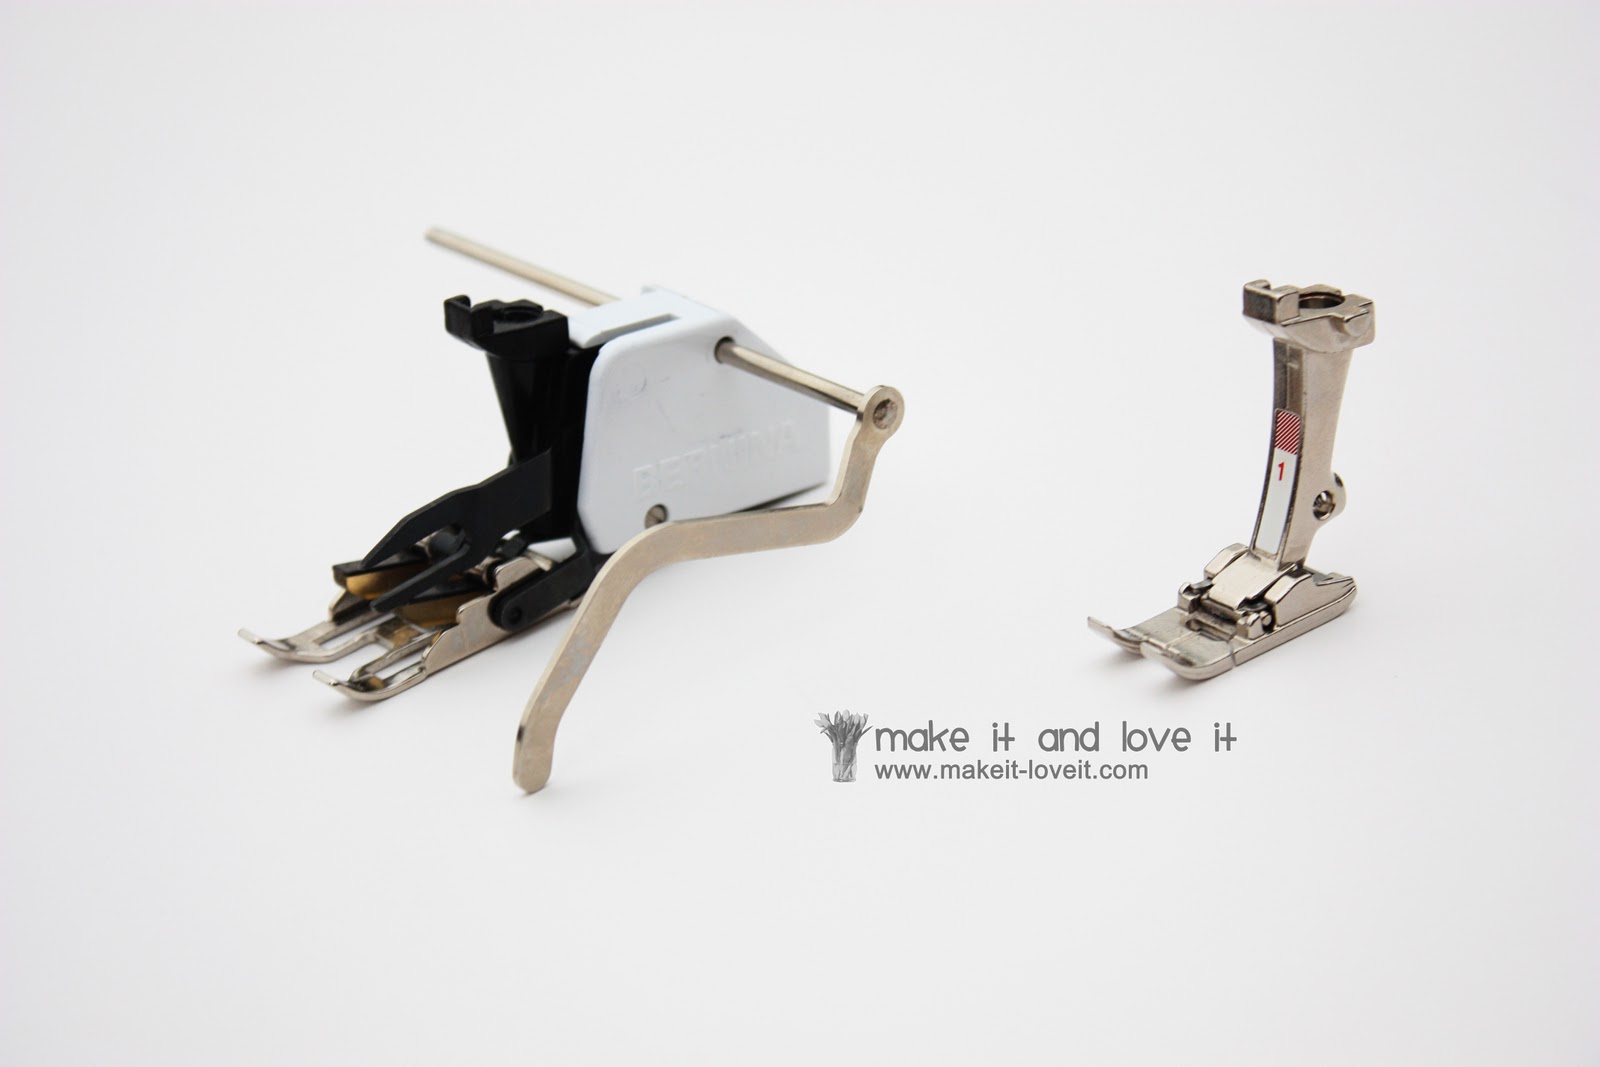
Here’s where an extra little tool may come in handy. Have you ever seen a walking foot for your sewing machine? The walking foot is on the left and the standard foot is on the right. I had never used mine before this project (and you can still do this without one) but it sure helped while sewing with knits.
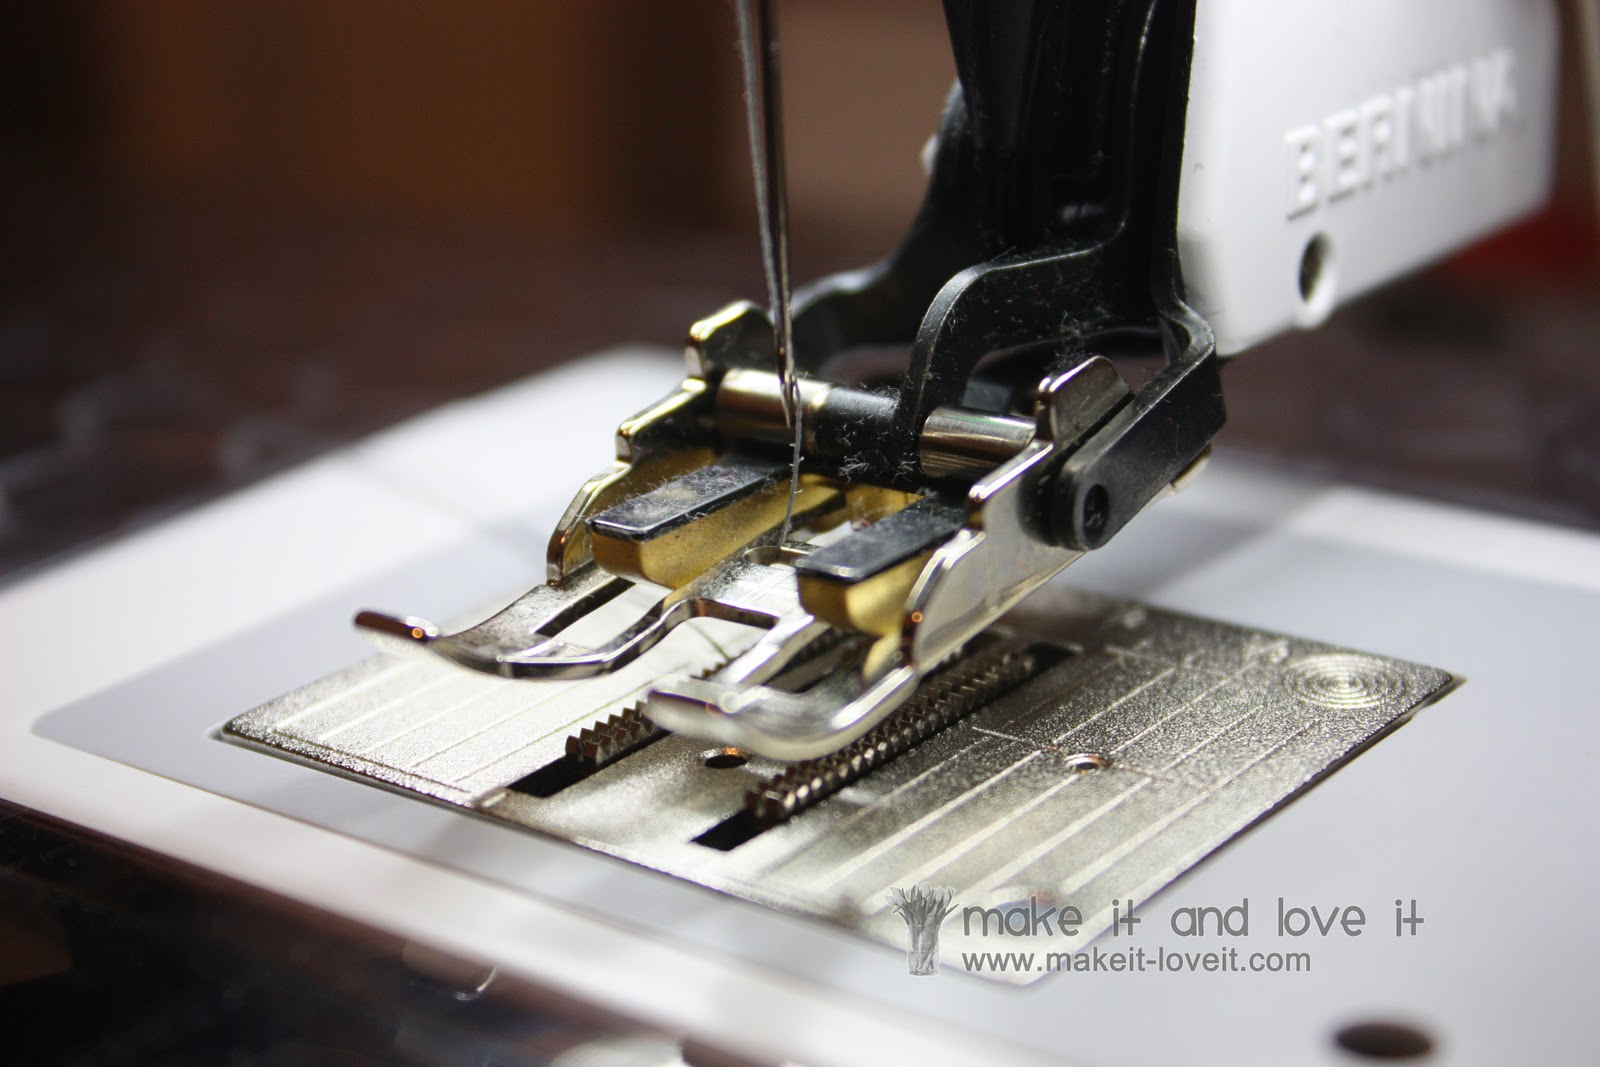
How it works is, do you see those gold bars that run from the front to the back of the foot? Each time your feed dogs move up to grab your fabric (the pokey little bars that are down below on the sewing machine base that move up and down, grabbing your fabric as you sew), those little gold bars on the walking foot move up/down at the same time. The bars and the feed dogs work together to grab your fabric and pull it along and keeps it in place as your needle makes a stitch. This is especially helpful with knit, as it helps eliminate stretch.
So, as I stitched the ribbed binding around my blanket, the walking foot really helped keep the knit from stretching so much.
(But you really can use a regular foot. I have used both. But with a regular foot, it helps to increase your stitch length and re-adjust your presser foot as you go, so you’re not pulling on the fabric too much. BUt if you have a walking foot………give it a try!!)
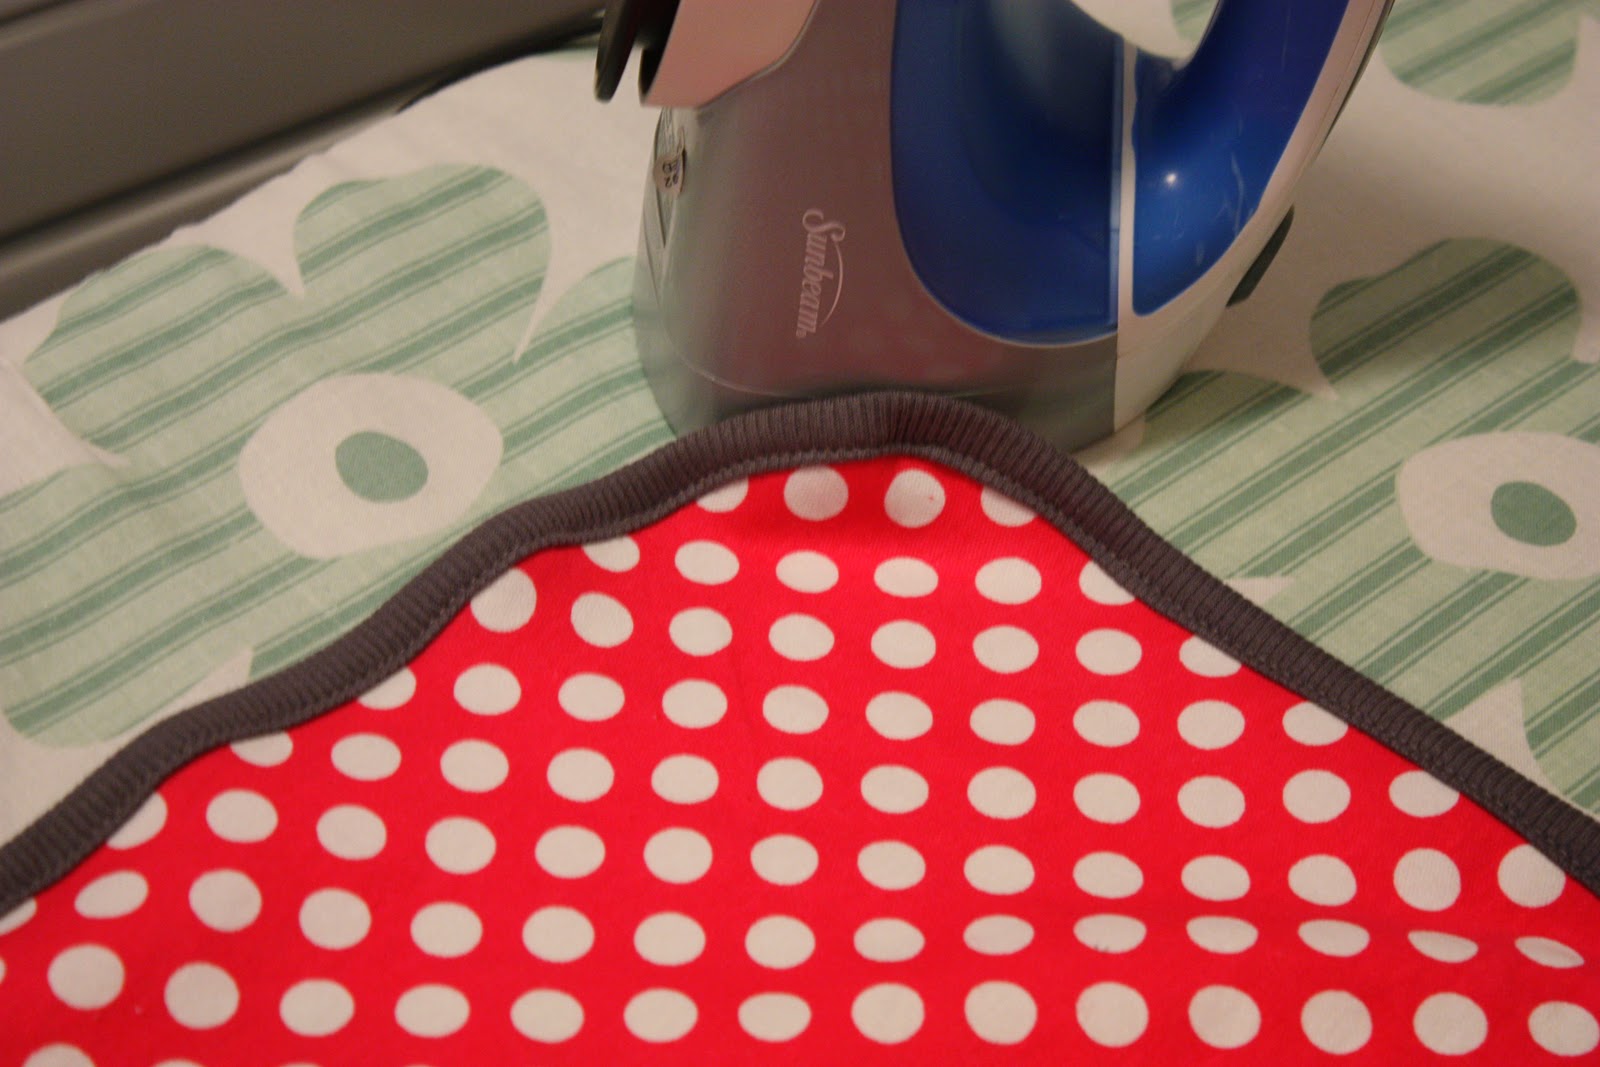
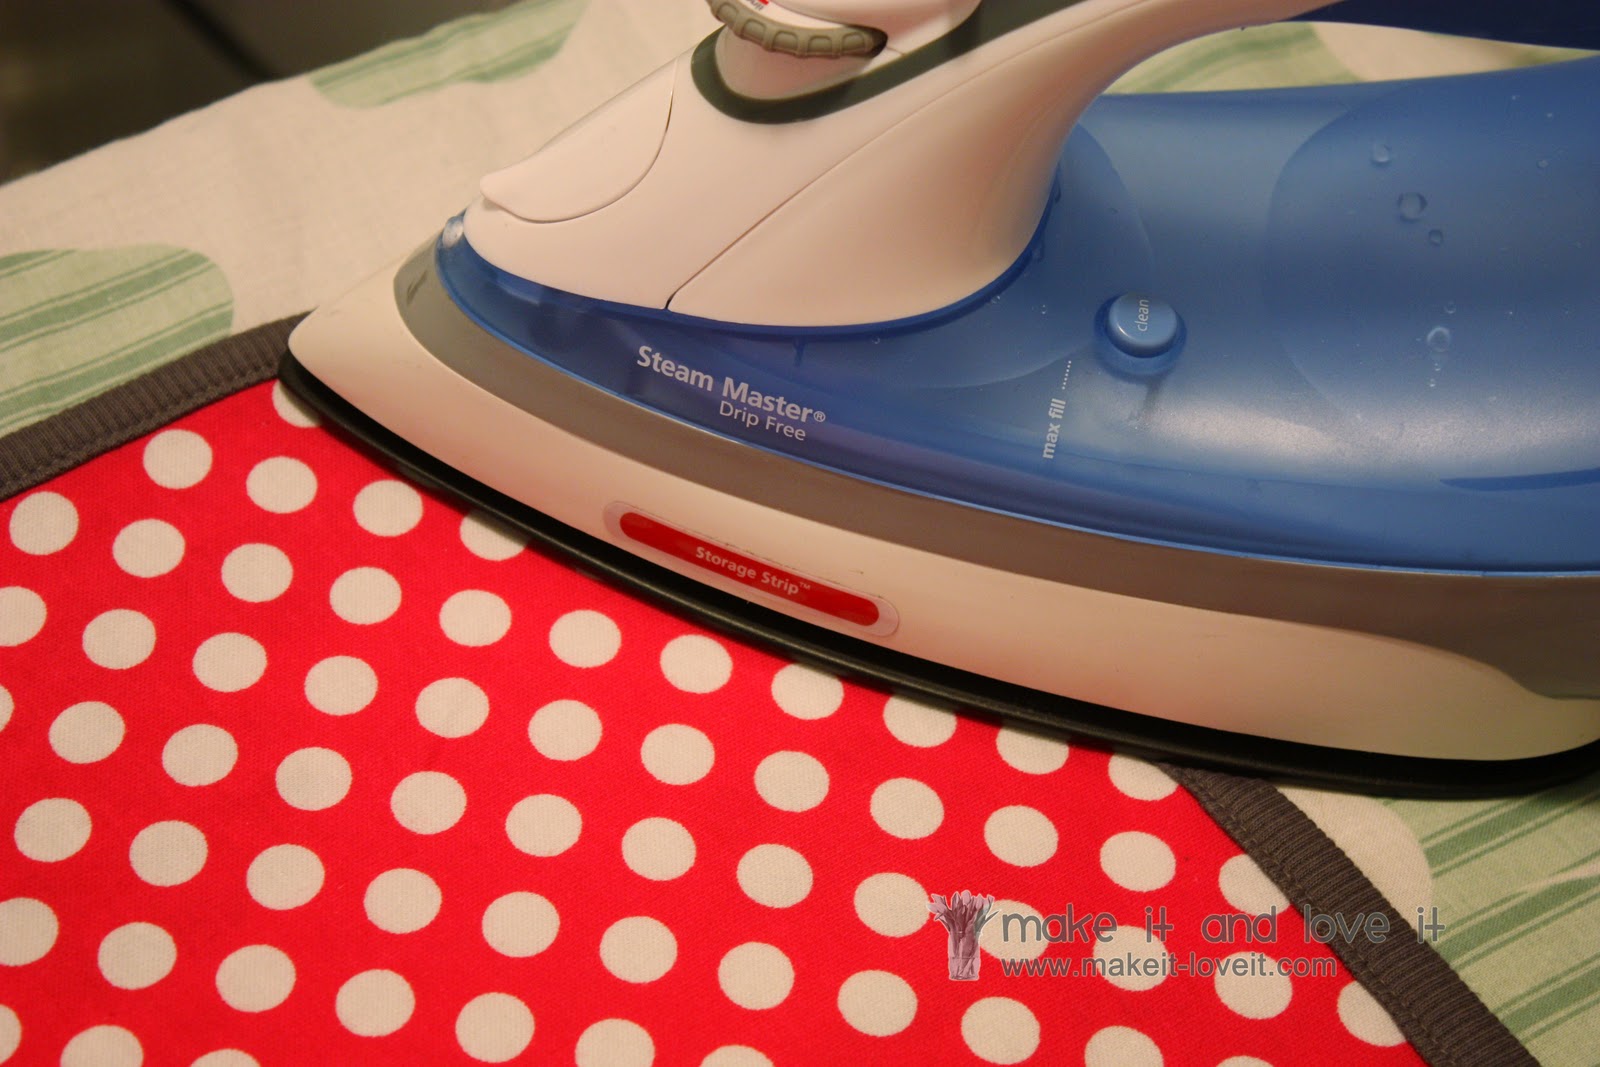
But honestly, no matter what tricks you try, there seems to always be a little waviness while sewing with knits.
So I always, always, always steam/iron my knit……..which kind of shrinks the knit back into place after sewing. (Keep in mind, you don’t want to iron like you do with a wrinkly cotton and pull your hot iron across your fabric. You just want to place the iron down and let the steam shrink it up. Then move the iron and repeat.)
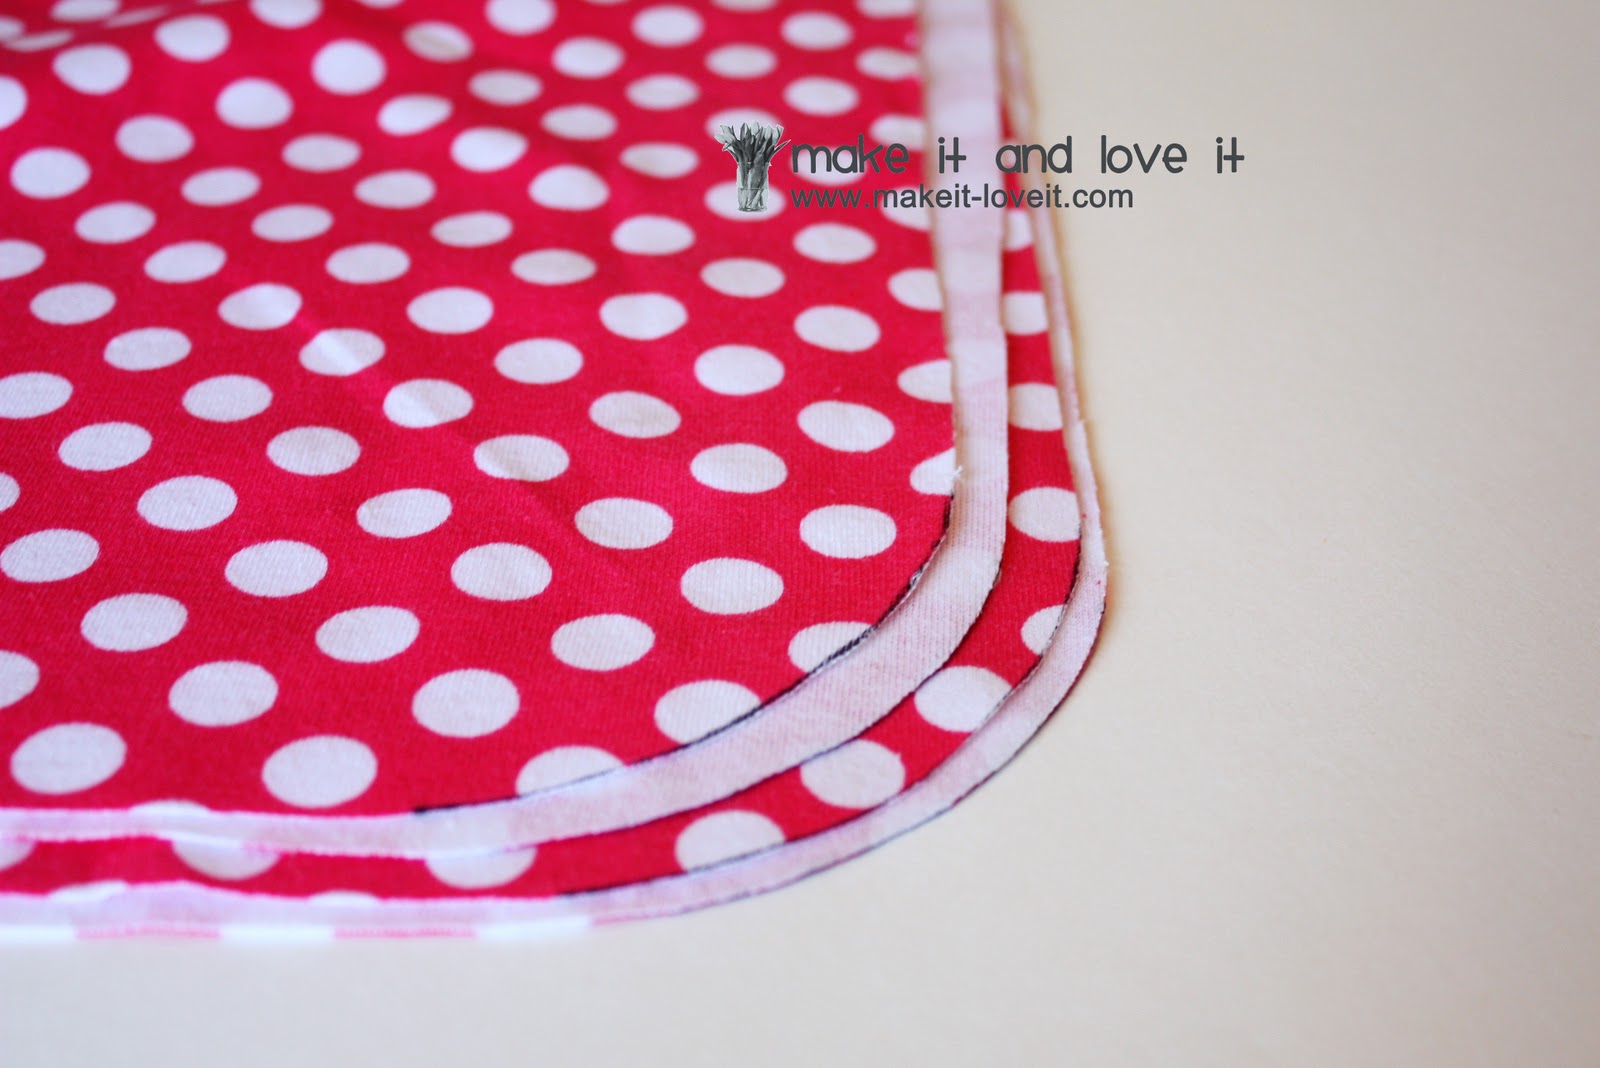
And that’s it for the main blanket.
All nice and bound.
Onto the applique…
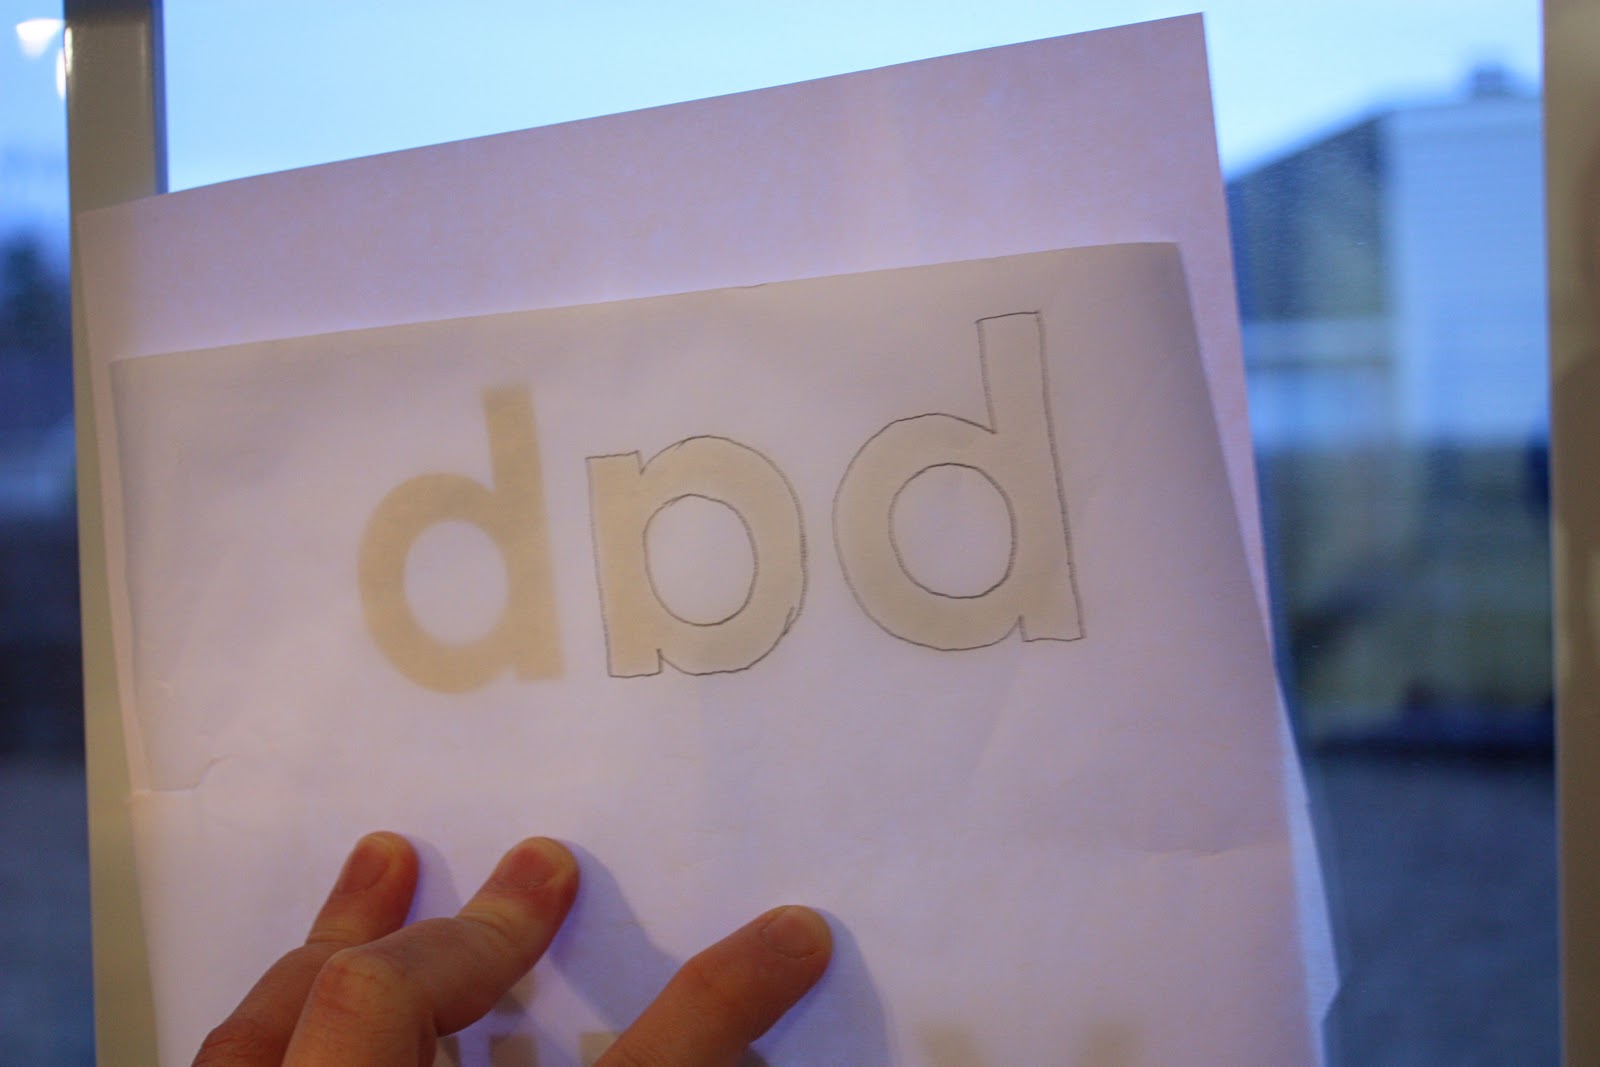
I simply printed out “baby girl” on the computer in the font and size I wanted. I should have printed mirror image….but didn’t. So I turned the paper over, held it up to the window, then placed a piece of the iron-on adhesive (paper side up) over the letters and traced around them. (I used Heat ‘n Bond adhesive……just like like
this stuff.)
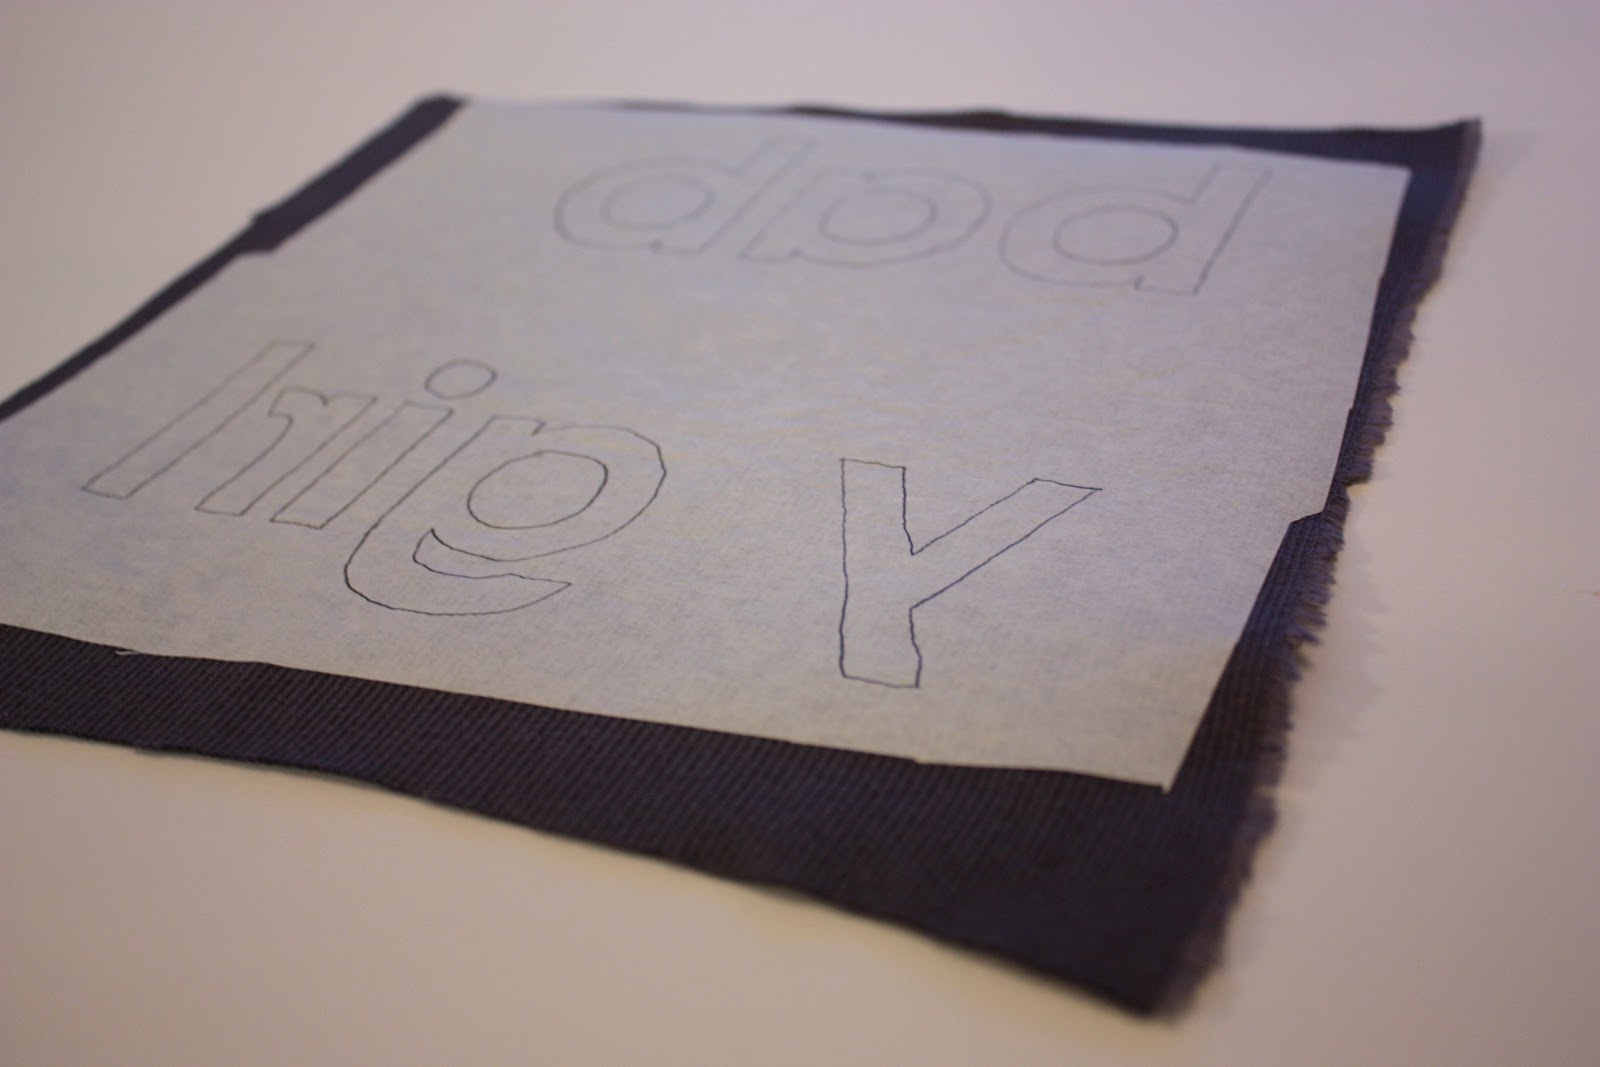
Then I placed the Heat ‘n Bond, with the traced letters, over some of the same ribbing that I used for my edging, and ironed the adhesive down. Make sure the paper side is up and the shiny adhesive side is facing down.
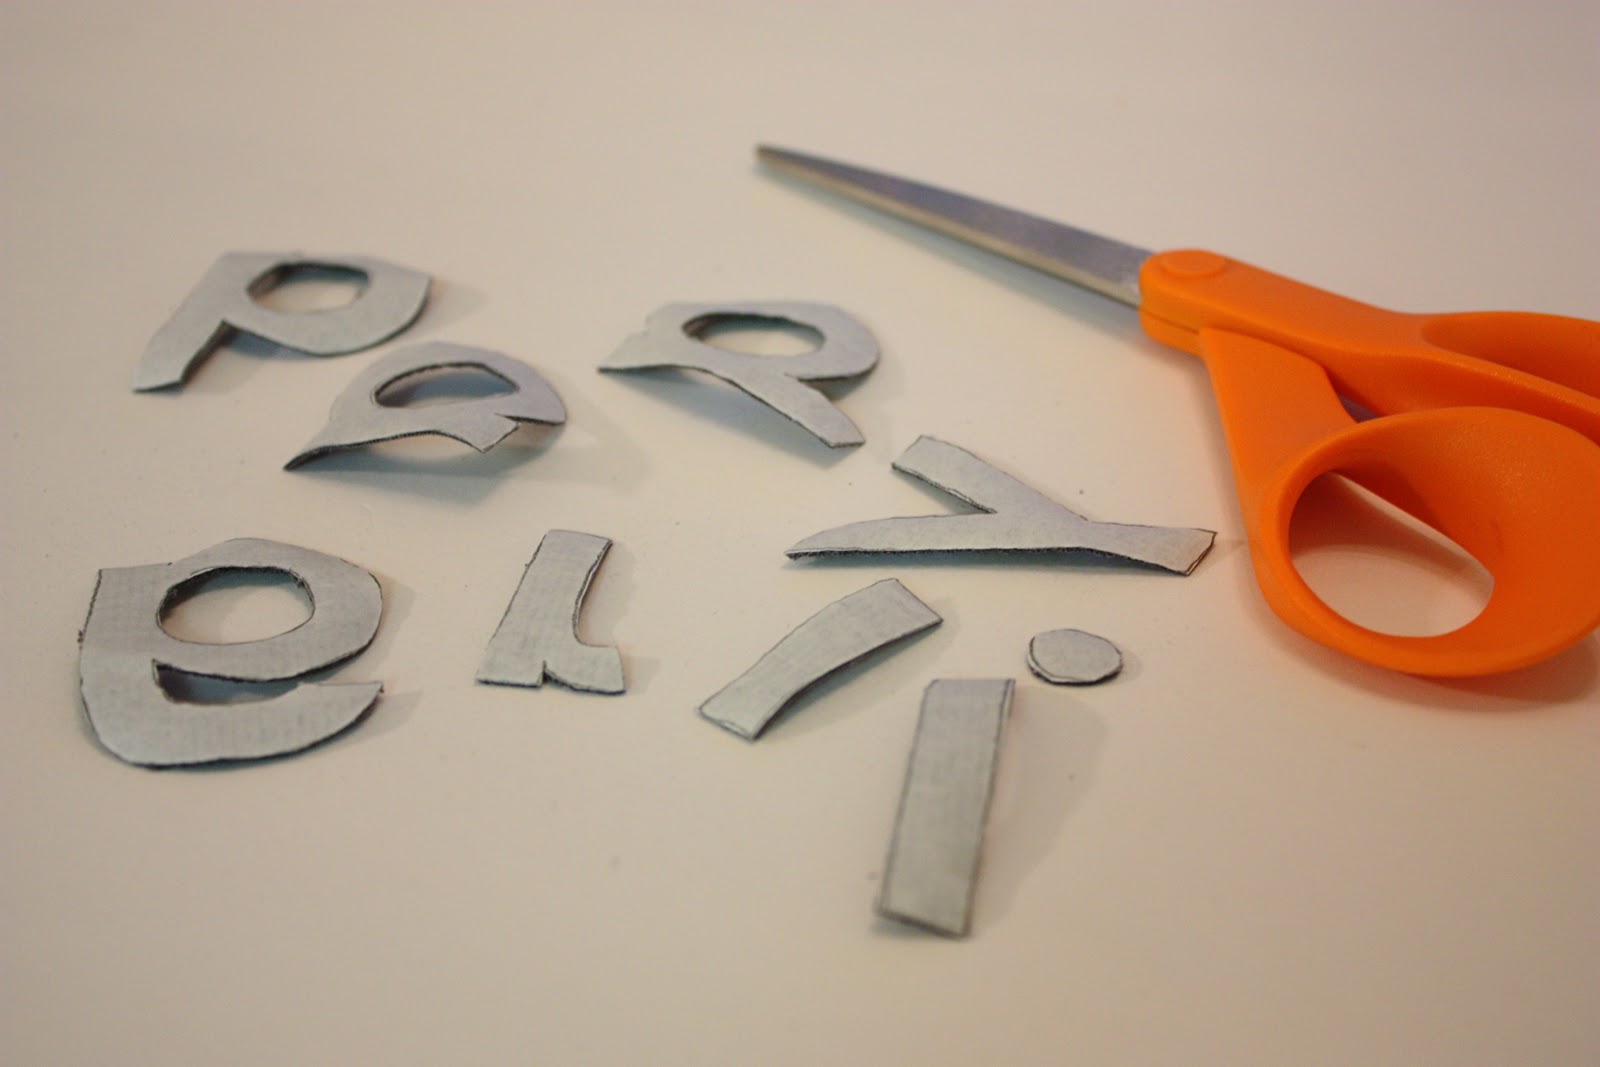
Then I cut out each letter…….
Then peeled off the paper backing, flipped over each letter that are now facing the right way…….and layed them on the blanket where I wanted them.
Then I ironed them down flat (no steam) and then stitched around each letter with a straight stitch. You could also do a zig-zag around the edges.
And that’s it.
A nice little knit blanket…..with a little personalized applique along the front.
**Remember to click here for the knit baby hat tutorial.
Related posts:
This is SO darling! Thank you for such a comprehensive tutorial! I don't know how I can NOT make this!
:D
Bias has always made me nervous, but it looks so easy when you explain it. I may make a few blankets and play with it. Somebody I know needs to have a baby soon!
Looking forward to the hat tutorial!
I love that knit fabric for the binding. Great job on the letters!
Fabulous! I can't wait for the hat tutorial tomorrow so I can make a darling set like yours. Thanks for all of the wonderful information. You have the BEST tutorials! Congrats on the new baby and good luck these next few weeks.
oh man that is cute! And so simple! Just my kind of project ;) Now, I just need a baby to make it for…
lol, you can make a similar one for my grandson. :D
This looks doable! I may try it!
Adorable! I love the colors. Thanks for another clear and helpful tutorial. I really want a walking foot someday. :) Good luck with your new baby!
Thank you for sharing all of your fabulous creations with us mere commoners. ;) I was wondering if I could put in a request for a tutorial…a baby sling, I have seen some instructions, but just love how you do your step by step pictures/instructions and would love to be able to make a sling to carry my newborn (due in May) in!!!
Very cute! Looks very "Gymboree-esque." Love it!
Love it! So cute!
Darling! And I can't wait to see the hat tutorial too! thanks!
Makes me want to have another one!
blackandwhiteapparel.com
abeautifulcottagehome.blogspot.com
ahh! so excited to go make some knit blankets for my little one. just bought a ton of knit and was wondering what to do with it. can't wait for the hat tut as well!
how darling….. thank you for the knit link too. I have Japanese underwear that I was wanting to take apart for a pattern to make more but didnt know where to buy knits to make them with.(cannot find underwear anywhere that fit daughter!!)
Adorable! I have all of those very same knits in my stash – never thought of using them for this type of project. Great idea!!
Lindsay
Thanks a lot! I love it
Oh my! I am totally in love with the entire set! I LOVE polka dots and those itty bitty flowers are adorab! Oh, how I wish I had a girl! I do know a few little baby girls that could use sweet little hat though. Oh, and a brand new nephew that could always use one more blanket made by his favorite aunt! Thanks so much!!!
Your opening paragraph completely describes my life right now :) I'm due in about 10 weeks, and you should have seen the mess as I 'cleaned' out the closet the other day. Thanks for all the tutorials, I'm always inspired when I read your posts. The project rush is on… :)
this is adorable and i love that you don't have to buy blanket binding. it's so expensive, and much more rewarding to make it yourself! i don't have any experience with knits, and my baby is too big for these anymore, but my pregnant friend might NEED one! i'm really looking forward to the hat too! i'm crocheting gifts for her but her baby will be here just before it gets too warm for crocheted hats – looks like i found my answer!
Oh my! Now I need to add this to my list of "to do before the baby comes". And I have a feeling I will be adding to it tomorrow too.
I love this combo! We are having another baby this summer and I will be making this blanket and hats for sure! Thank you for ALL your wonderful tutorial! :)
PLEASE tell me how in the world you are able to sew the bias tape onto the blanket, catching both the front and back at the same time? Every time I do it, no matter how well I pin, I always end up missing some of the bias tape, here and there, on the back side. It's so frustrating!
Why must you have adorable crafty stuff tutorials up 3 days before I go in for my c-section. Now all I want to do is go shopping for fabric and make this and the hats tomorrow. I might have to wait and do it as a gift for someone else!
Haha Lana, sorry!! :) But good luck……yay 3 days will fly by and then that sweet squishy baby will be in your arms. Congrats!
And Kristy, I know, sometimes bias tape can be tricky. If you're not catching the back, make sure that you are checking every few inches and looking at the underneath to see if the bias tape is in the right place. Also, don't sew to close to the outer edge of the bias tape. That may help a bit too. Just take it slow and re-adjust often! Good luck!!!!
And I'm glad you guys are liking this one……and just wait, the hat tutorial takes even less time and turns out so darling!
Ashley
This is so cute! I TOTALLY want to do this now! Online looking at fabric as we speak!
These are so cute! I was wondering, would it work doing two layers or would it just become a slipper, jumbly mess? Thank you! Good luck with you sweet girl! Can't wait to hear the name!
So cute! I feel you right now…our baby girl (nameless, as yet) is due in about 2 weeks and I'm working furiously to finish the bassinett re-do, and baby blankets, and cleaning, and maybe even making some freezer meals…Thanks for giving me more cute projects to do :)
Good luck with your L&D!
Where did you find all your cute knits? I have a hard time finding knits with such cute prints on them!
So my boys totally latched on to the knit blankets and I am so mad that I am DONE having babes…these are so cute and those hats…don't even get me started!
I'm confused! You said you cut on the bias of the ribbed knit? Would the "ribs" not be running diagonal if you cut on the bias? This doesn't appear to be the case. Call me silly, but i'm not understanding. Also, were you able to "catch" the ribbed knit on the underside of the blanket! I have just found this difficult in the past, so any pointers would be greatly appreciated! Thanks!
I love it!
It's so perfect how the three different hats coordinate so adorably with this little blanket. Just precious!
Thanks for the tip about ironing the knit to get it back in shape. The difficulty of working with knit has always daunted me…haven't touched the stuff.
Now I'm feeling brave!
Blessings on your last few weeks!
♥ Bethany
http://www.happyhomemaker.me
Brooke –
Sorry to confuse you. I mentioned making "bias tape" out of the ribbing but not actually cutting it on the bias. And then I said if you couldn't find ribbing, you could cut some regular knit on the bias, to be sure and give it that nice curve and contour as it goes around the edges. (But the ribbed fabric doesn't actually need to be cut on the bias. It has a great stretch to it that works great for the binding on the blanket.) I went in and edited that part of the instructions though, and added more detail, to be sure I didn't confuse anyone else. Thanks for letting me know it was a bit confusing! :)
Ashley
Aw! You make me want to have another baby! =D
Oooh, I absolutely must make one of those little hats. Our daughter is due March 18 so I too am in a last minute rush to finish projects, clean, organize, etc. And I too have a carseat to recover so please, please, please post a tutorial soon! (That didn't sound too much like begging did it?) I am worried the baby might be early since my last two were as well. Congratulations to you and good luck on finishing your to-do list!
That is so cute! I hope to have that much talent.
i LOVE it!!! i cannot wait for the hat tutorial tomorrow!!! so many baby showers coming up and so many great presents to be made :)
I love this! I have to give it a try. I never thought about using my walking foot on knits. I've just avoided knits like the plague. =)
Great instructions and a beautiful project!
beautiful! i am so making this for my sister (who is expecting in june!). thanks so much for sharing the tutorial.
Oh my goodness, these are adorable! When I first found out I was pregnant, I started crocheting a blanket for my sweet baby girl. It took me 7 FREAKING MONTHS TO FINISH IT and killed my love of crochet. Next time I need a baby project I'll have to try out your tutorial, this looks so much easier!
So timely- so perfect! I just got a twin boy baby shower invitation yesterday! Thank you as always Ashley!
Soooo cute!!!! As if I don't want a little baby girl enough as it is! Looking at the precious hats and blankets sure sealed the deal!!!!
This is so cute! You make everything look so easy! Thanks for the great tutorial! You always have such awesome ideas! Good job!
http://www.alove2create.blogspot.com
So wish you were due 3months ago when I had mine…the hats are so cute and i love the blanket…we're hoping to do a photo shoot this weekend…can't wait for the hat tutorial!!
Adorable! I can't wait to make some!!
oh I love them, thanks for sharing your amazing work….I will have to make some for my grandchildren now…plus love the colour scheme….you are amazing
Great tutorial. I was only thinking the other day about knit bias. Really great tutorial. Very detailed. Really looking forward to tomorrow's hat tutorial. thank you so much.
Doe you have any troubleshooting ideas for a walking foot that still stretches knit? It seems to be more than a little wave. My stitches pucker still. it seems to only do it one way on the knit (the more stretchy side). tia!
The blanket and hats are so darling; I love them. Thanks for the tutorial, Ashley! Where did you find this great fabric?
Why do store receiving blankets come in flannels? DOn't they know babies liked to be held tight?? Knits are soooo much better :) Great blanket, I love the ribbed edges.
if I could just get the straight line down… I'd open up a store and sell only this! No really, adorable! Love the fabric patterns.
I'm expecting my first baby in August which gives me plenty of time to make this little set! Thanks so much for a fun baby project to fill my time with!
Does anyone have any suggestions on what needle to use for the applique? My usual ball-point needs for knits keeps jamming the applique down into the machine!!! Thanks!
I seem to have problems with the bias strips. Is there some trick to making sure the stitch looks nice and straight and even on the back like it does in the front? Usually my front looks great, and the back is kind of hit and miss :(
LOVE this! Where did you find that fun knit fabric??
Where did you find cute knit fabrics? I went to Joann Fabric today and was very disappointed in the selection.
These hats are so adorable! Love them!
This is gorgeous. I think I need to make a few to keep as baby gifts.
I made this following your tutorial!
http://beebeebellies.blogspot.com/2011/02/made-it-and-love-it.html
And I linked you back!
I came here from the FB Knitting Club. Can you explain how the word 'knit' got involved with this fabric project please. Thanks
Sorry for the confusion Nigel, but this is a cotton knit fabric that was used on this project. Knit is a more finicky fabric to sew with……but very comfortable. Hope that helps clarify.
Ashley
love this! i found where you got your fabric. thanks for posting this! awesome!
The hats and blanket are adorable! Thank you for a great tute.
This may be very obvious to others who read your blog, but I am new to sewing and just want to get it right!…How much fabric/knit do you start with? Especially if I wanted to make a coordinating hat out of the same fabric? I love your site and all your ideas! I just can't wait to get out to the store and buy some fabric!
Ashley – the heat 'n bond I bought says not to sew it. It says it may not hold up to stitching so now I'm curious… are their different kinds? This stuff is supposed to be ultra-hold. I've never used it before and I don't want my letters to fall off!
Laura – I used about a yard for the blanket and then you'll need about 1/4 yard for the hat. But that will make more than one hat.
Mrs. P – Sorry about the confusion….but you'll need the heat 'n bond LITE. This is the variety that is sewable. You may have just as much luck with the non-sew kind because it's probably a stronger adhesive. I just like to do both. But if you'll click on the link in the tutorial, it'll link you over to the exact LITE variety that I use.
Good luck!
Ashley
Gotcha… I hope this works. I'm still pretty new at this sewing business so I'm not sure how great I'd be at sewing the letters! lol
One more question… could I use ribbon to do the ribbing like you did?
thanks for the steam iron tip for shrinking knits, never knew. Now i have a cure for my curly knits!
thanks xx
Can you tell me where you found the gray ribbing? I was really hoping I could just buy bias tape to use for this project, but can't find any that's knit ;(
Oh my goodness, I have no idea how I found your blog but I'm so glad I did. I just started sewing a couple months ago. And I have so many pregnant friends I have been obsessed with baby stuff. This is such a great tutorial, I may just have to give it a try. Thanks so much!
bettijo – I found that grey ribbing at Hancock fabric. It was just back in the sale fabrics so I'm not sure where it will be available. But Hancock tends to always have some sort of ribbing back there when I visit mine. So give it a try.
Good luck!
Ashley
Ashley,
What will happen if I use regular bias tape around the edges instead of knit??
Thanks
Hey Ashley-
I am just a beginner, so this may seem like a silly question…but how do you finish off the two ends of the binding? I'm guessing you just fold one end inside of the other? I've never done this before, so any help would be great! Thanks for a great tutorial!
j – you can use regular bias tape around the knit blanket…..it will work just fine. Good luck!
LLH – Yes, you can do it that way, or sew the ends together before attaching the last bit to the blanket, like shown in this tutorial here: http://www.makeit-loveit.com/2010/07/piecing-and-binding-quilt.html
Hope that helps!
Ashley
I had a question about the applique. Since it is only one layer, do you see the applique on the back or did you use a white thread in your bobbin to make it less obvious?
Oh my! I'm sooo excited! I actually JUST bought fabric to re-cover my infant car seat for my 3rd little boy (since somehow my first two boys managed to destroy the existing fabric. Boys really are just born destructive! And fun, of course). :) Anyways I have NO clue what I'm doing and I was just going to try my best. Then I saw that you re-covered your seat, AND (drumroll) intend to post a TUTORIAL! Truly, right now, life is sweet. Any chance your car seat tutorial will be up any time soon?
R.B. – The car seat tutorial can be found here: http://www.makeit-loveit.com/2011/02/recovering-baby-car-seat.html
Good luck!! :)
this is adorable!
I am soooooo inspired!!! I want to run out to the local fabric store right now!!!!!!!!!!!! Too bad my toddler is napping (actually it’s a wonderful thing!) Thanks for sharing!!
I love this! I was wondering what size and type of font did you use?
I can’t remember the exact size but the font is century gothic. Try printing out the size you think would work well, hold it up to the blanket, and then adjust the font bigger or smaller until it looks right. Good luck!
Ashley
Ashley,
Do you have any tips for cutting out fabric letters? I tried this before and gave up quickly because I couldn’t cut out the holes in letters like “e”, “a”, or “b”. I was starting to think it wasn’t possible without a cricut but yours look great. Did you use regular scissors the whole time? I felt like I needed a super sharp exacto knife or some tiny little scissors.
Thanks for your advice in advance. I love your site and all your tutorials!
Hey,
Just wondering if you did the Baby boy/baby girl after you sewed the blanket up? If so you just have the outline of the words on the opposite side?
It looks like it is not a double sided blanket so the outline of the letters will be on the opposite side. I had the same thought!
Hi! I love your blog and your tutorials are SO easy to follow! Thanks!! This is next on my list (with the hats!) for our first little one expected in February! And just wanted to share that if anyone is interested in the knit fabric you used, I found it on ebay for less than $10 per yard plus shipping. :)
I sew custom baby/kids clothing and accessories, and I absolutely LOVE your blog. I randomly stumbled upon it, and I have already got some awesome things that I am going to make. Not to mention the clothing labels that I have wanted to order with my company name ” Kre8ive Kidz Designz”. Thank you for doing what you do!!!
Where did you find your dark gray ribbing fabric? It is perfect for a blanket I am making and can’t find it anywhere. Thanks.
I just have to say…..I don’t know how you find the time to make that beautiful blanket, let alone find the time to take all the pics and post a tutorial for it. Bravo!!! My daughter and I are beginner sewers, and your tutorials alone are keeping us inspired. Keep up the good work….we love it!
Thank you so much for such a clear and helpful tute. Exactly what I’ve been looking for for days!! And your sewing looks so nice and neat. Must be your Bernina :) Now I know what a walking foot looks like for my machine. I have a Bernina as well. Now I just need to find some cute knits in baby pastels.
Ashley…. I had a baby just after you had Chloe and saw this post. I have been following you for a few years now. I’m finally trying to make this for a friend who is due any day and it is DRIVING ME MAD!!! Your tutorial is great but I must have picked a super annoyingly thin type of jersey/knit that is impossible to work with. The ends just keep curling and cutting it out alone has been a headache. Any suggestions? I read in someones comment that you used a cotton knit and yours seems to lay flat rather nicely. I’m ready to give up but need to use this material. I hope you can still catch these comments.
My baby is two next week! They grow up so fast :)