Home » DIY Tutorials » DIY Sewing » Sewing: Clothing » Accessories » Re-Purposing: Sweater into Sling Purse
Re-Purposing: Sweater into Sling Purse
November 9, 2010 - By Ashley Johnston 59 Comments
. Have you noticed my newest sponsor
Shoot In Style, found
here?
All you photographers (beginners and expert) will absolutely adore the great selection and quality of these great camera straps. Each strap is stylish yet perfectly comfortable and have quick release buckles attached to each end……making strap switching a breeze. They really are the perfect splash of color while shooting your camera.
.Looking for the Much Ado About You giveaway? Scroll down or click here. (Also, the 10% discount off all orders is valid until Nov. 12th.). . . . . . . . . . . . . . . . . . . . .
.
Fall is the time that I start looking through the piles of old sweaters.
Do you have a big stash like I do? Even if they are outdated, stretched out, shrunk in the wash, etc.?
It’s time to give those old sweaters a new life. And turn them into something new.
(Haha, whew, I didn’t realize how many there were until I started attaching the links. Wow. But 3 are from sweaters and 4 of those are from scarves.)
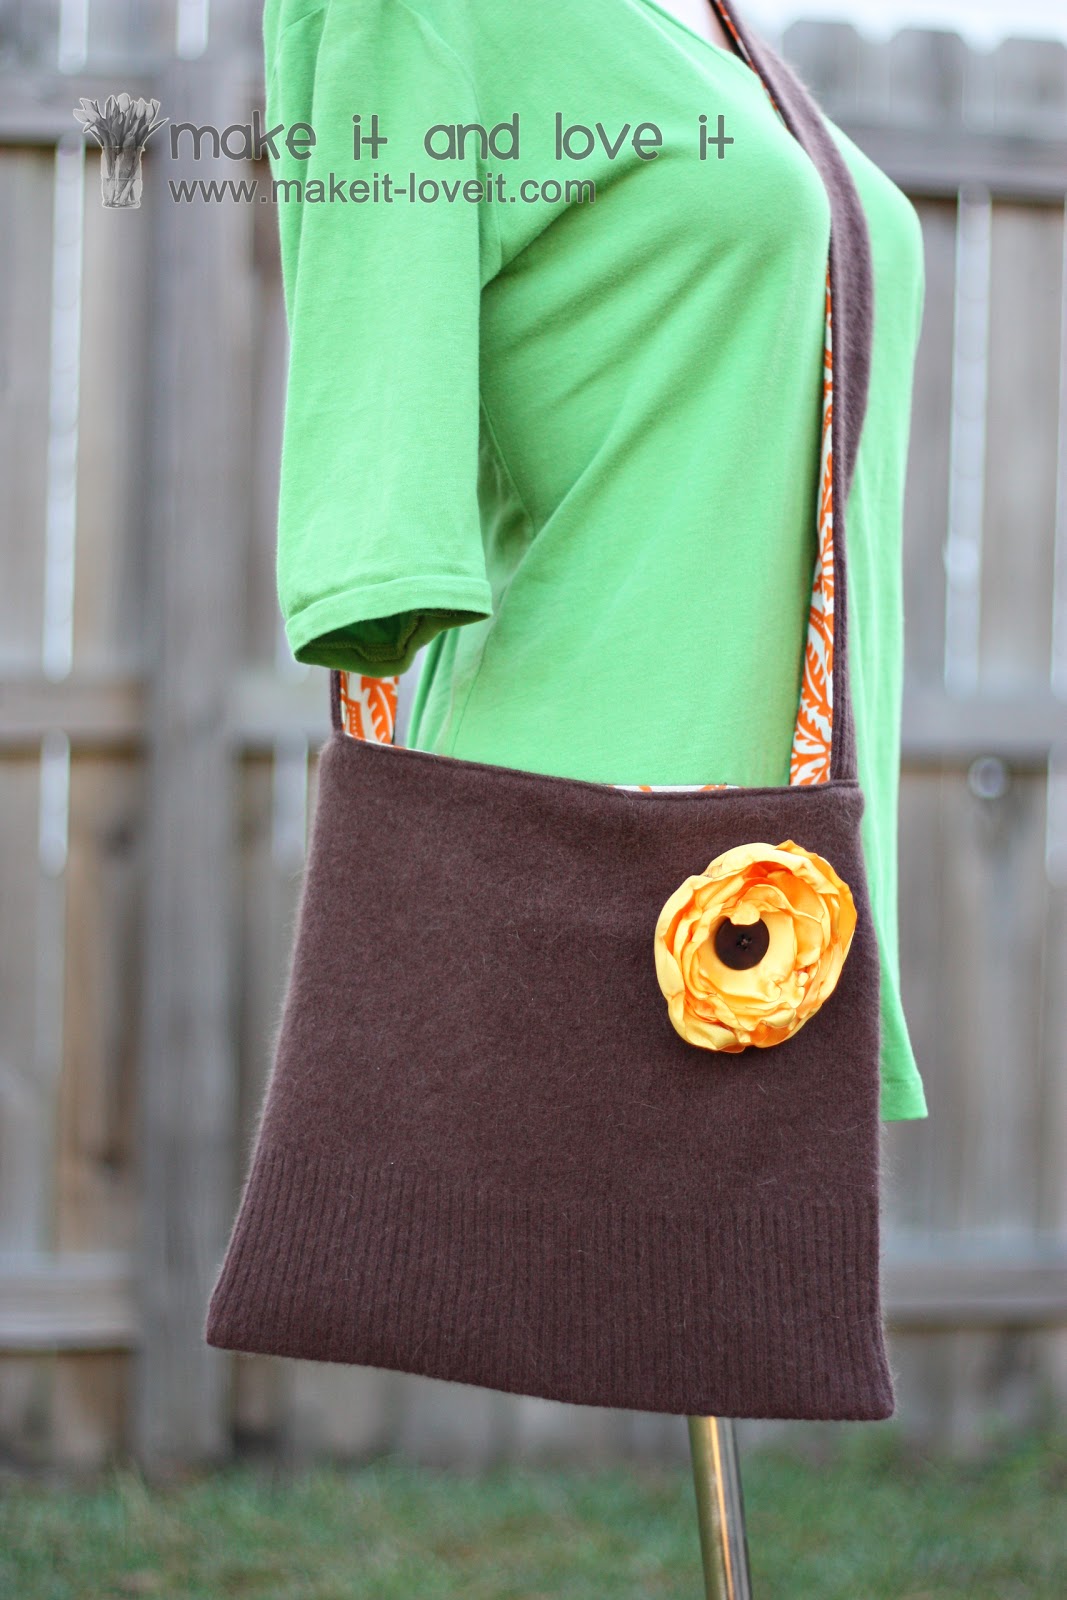
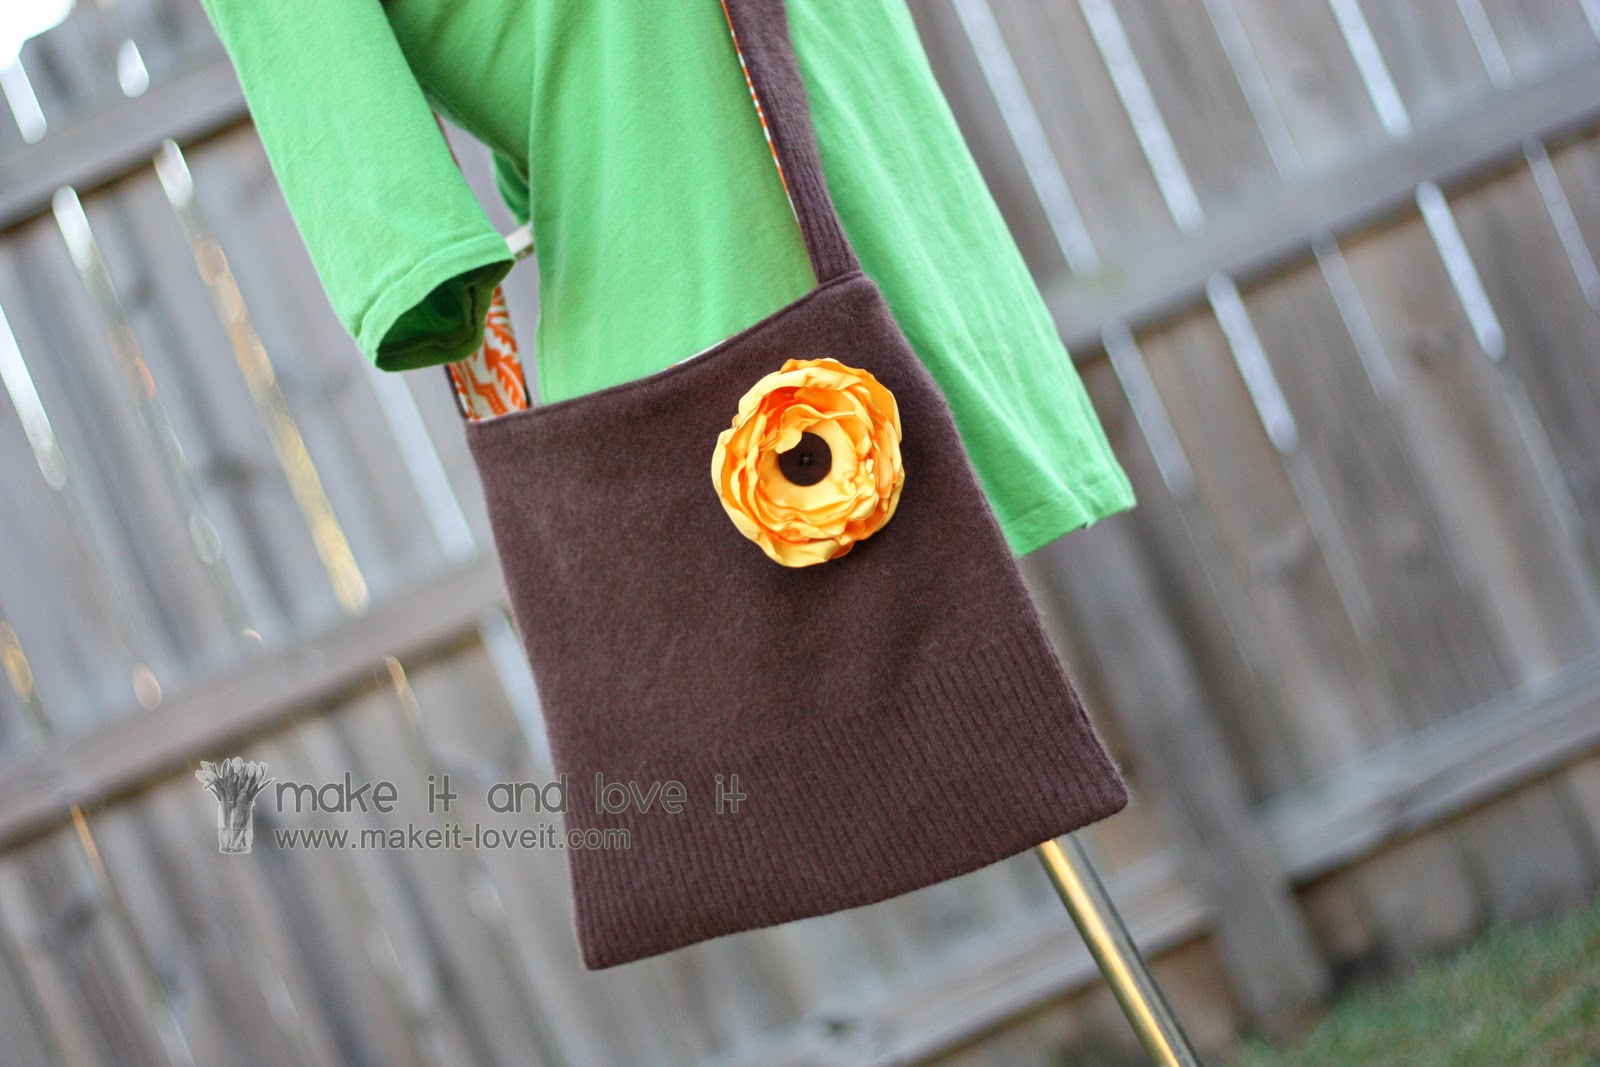
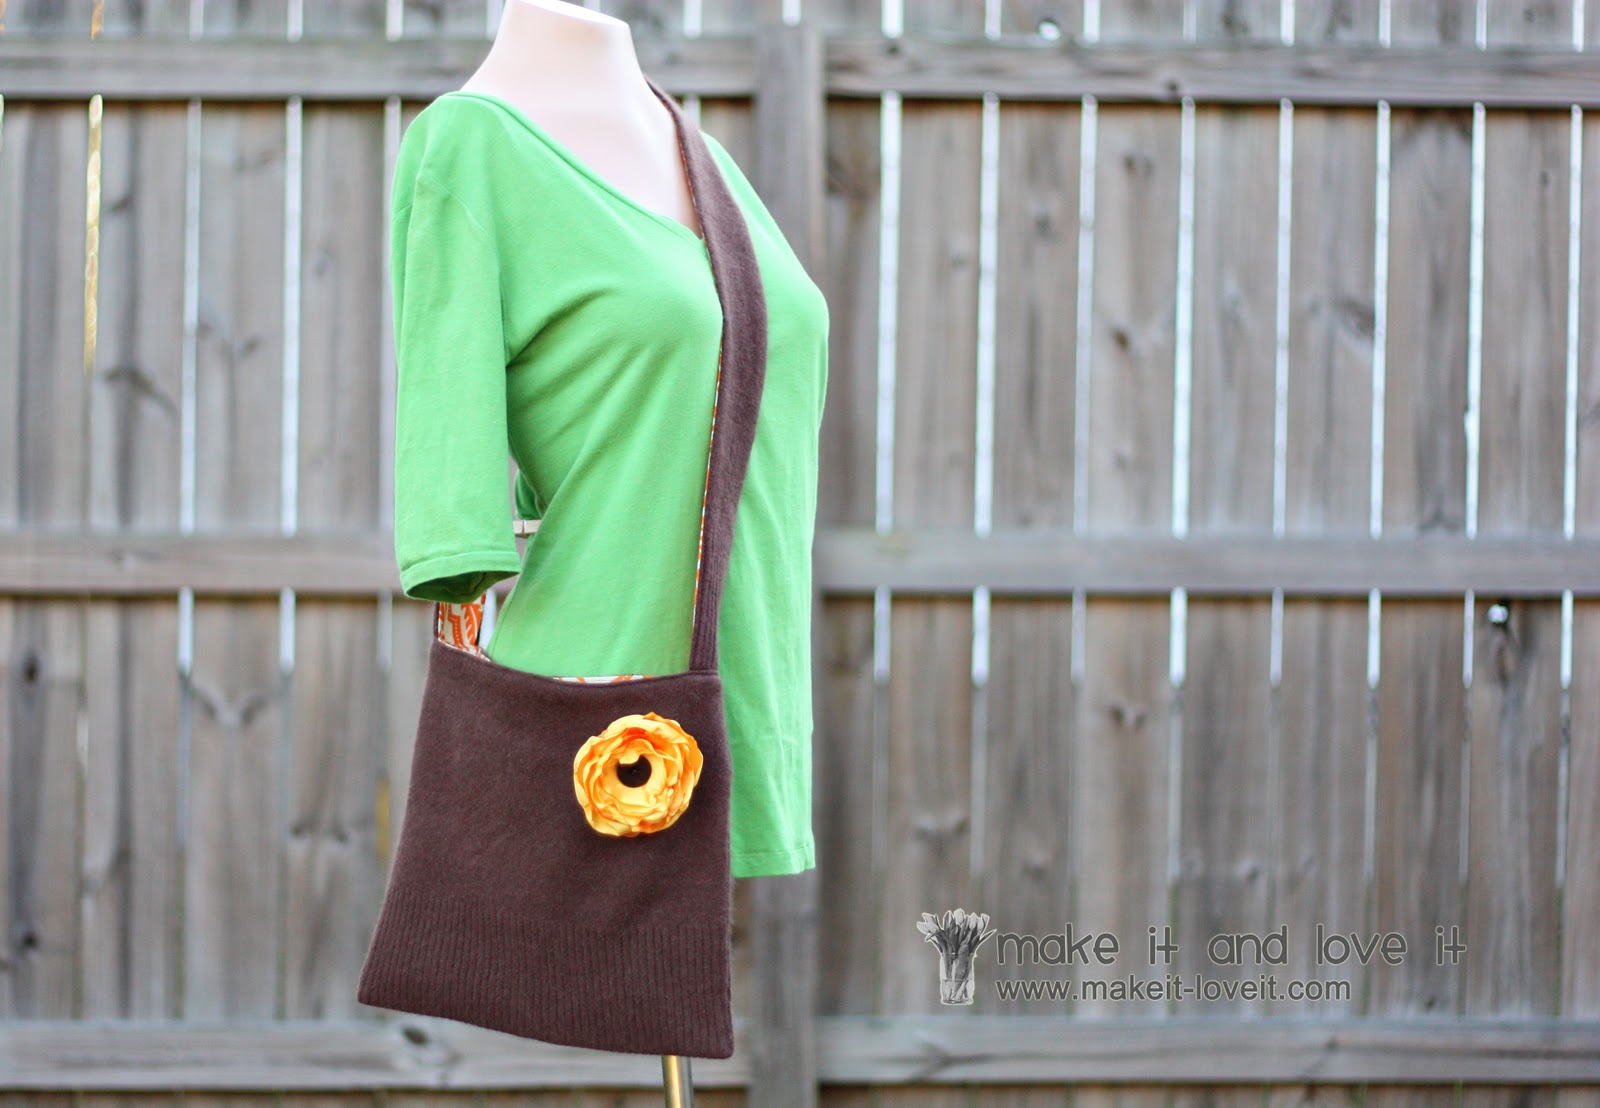
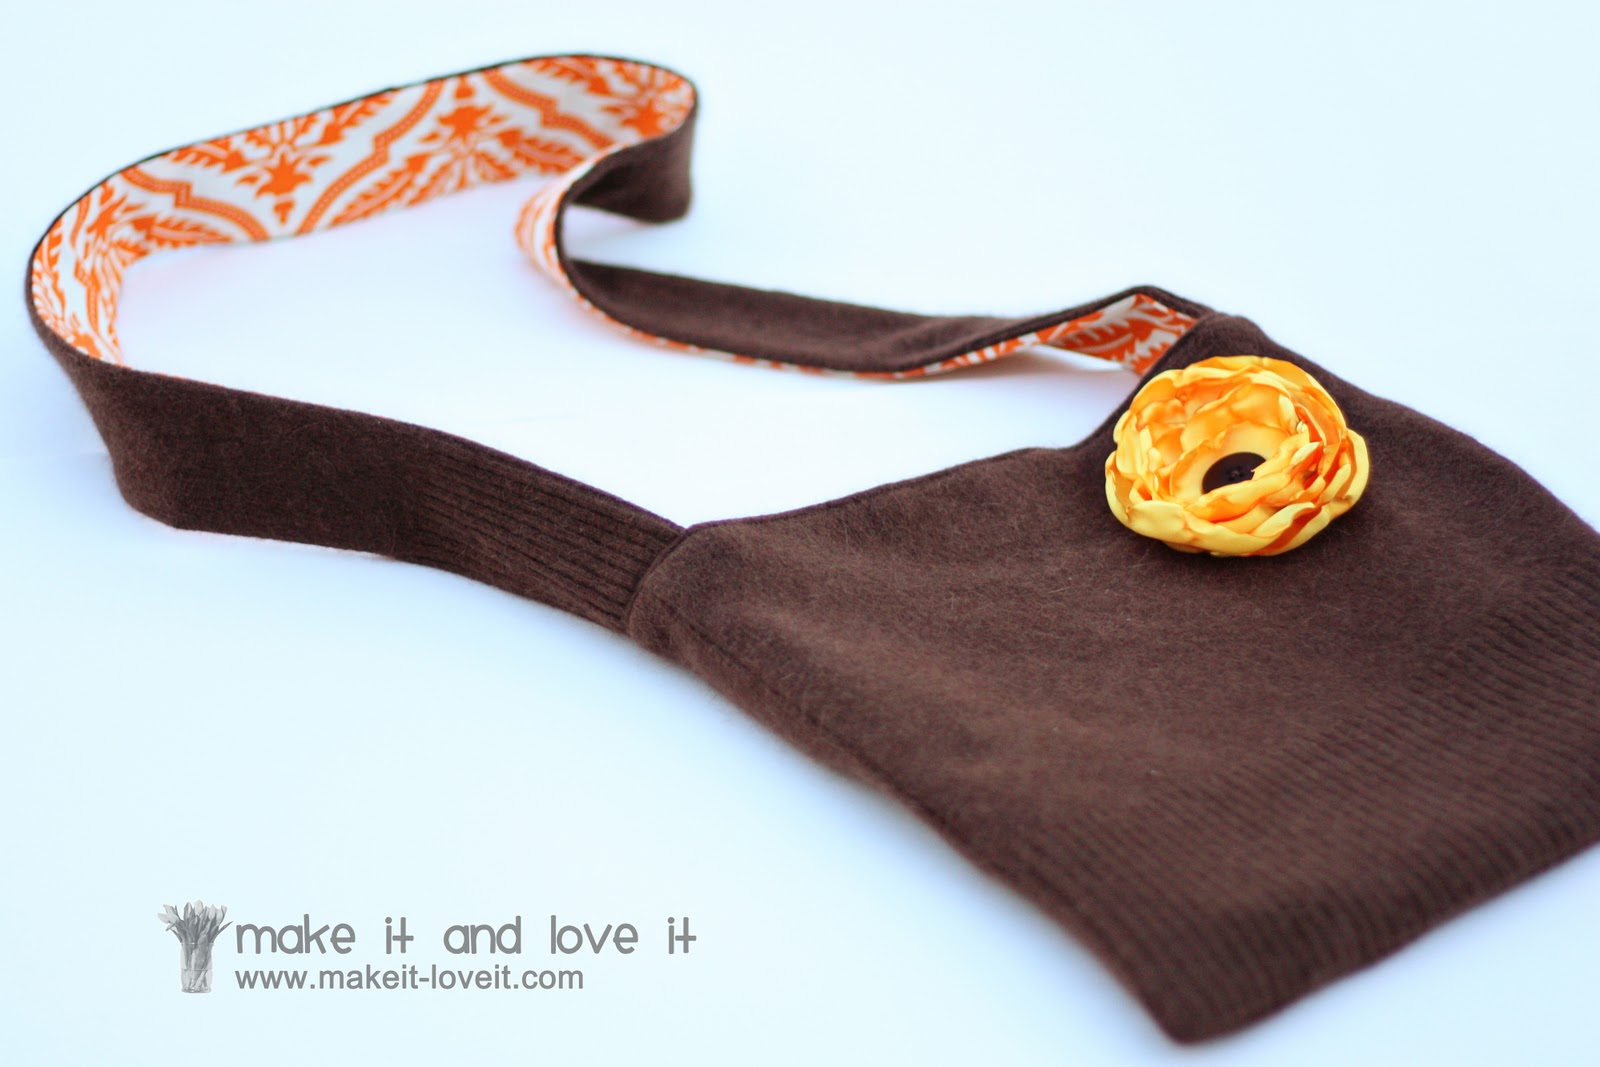
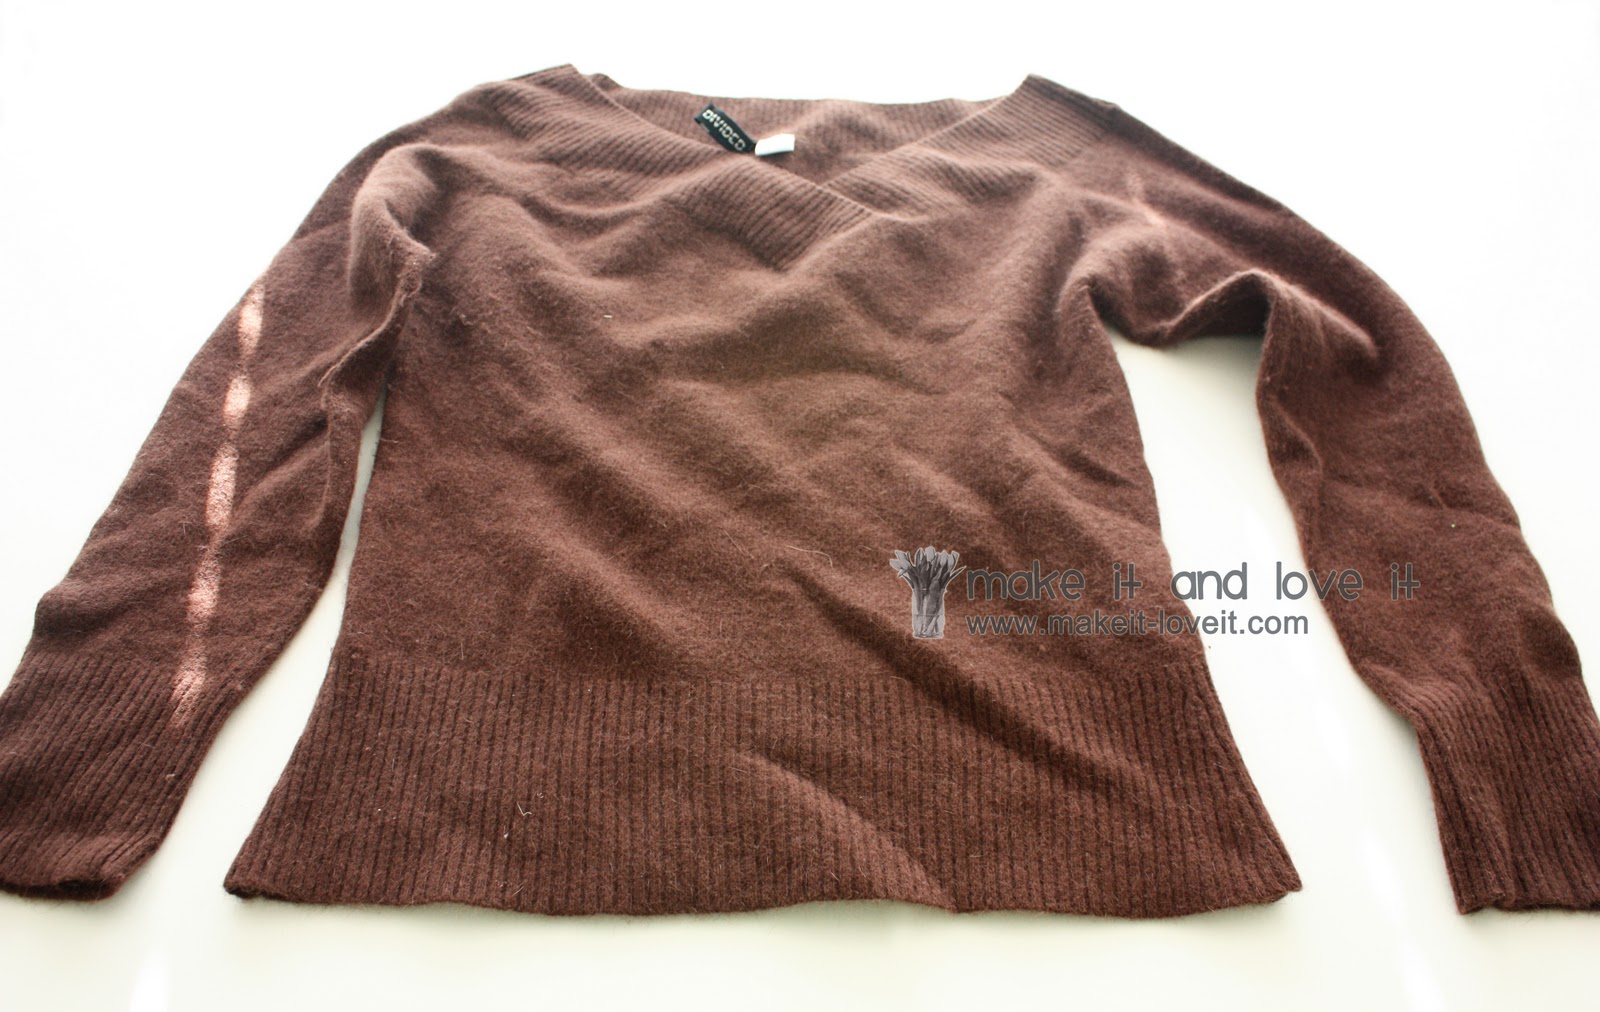
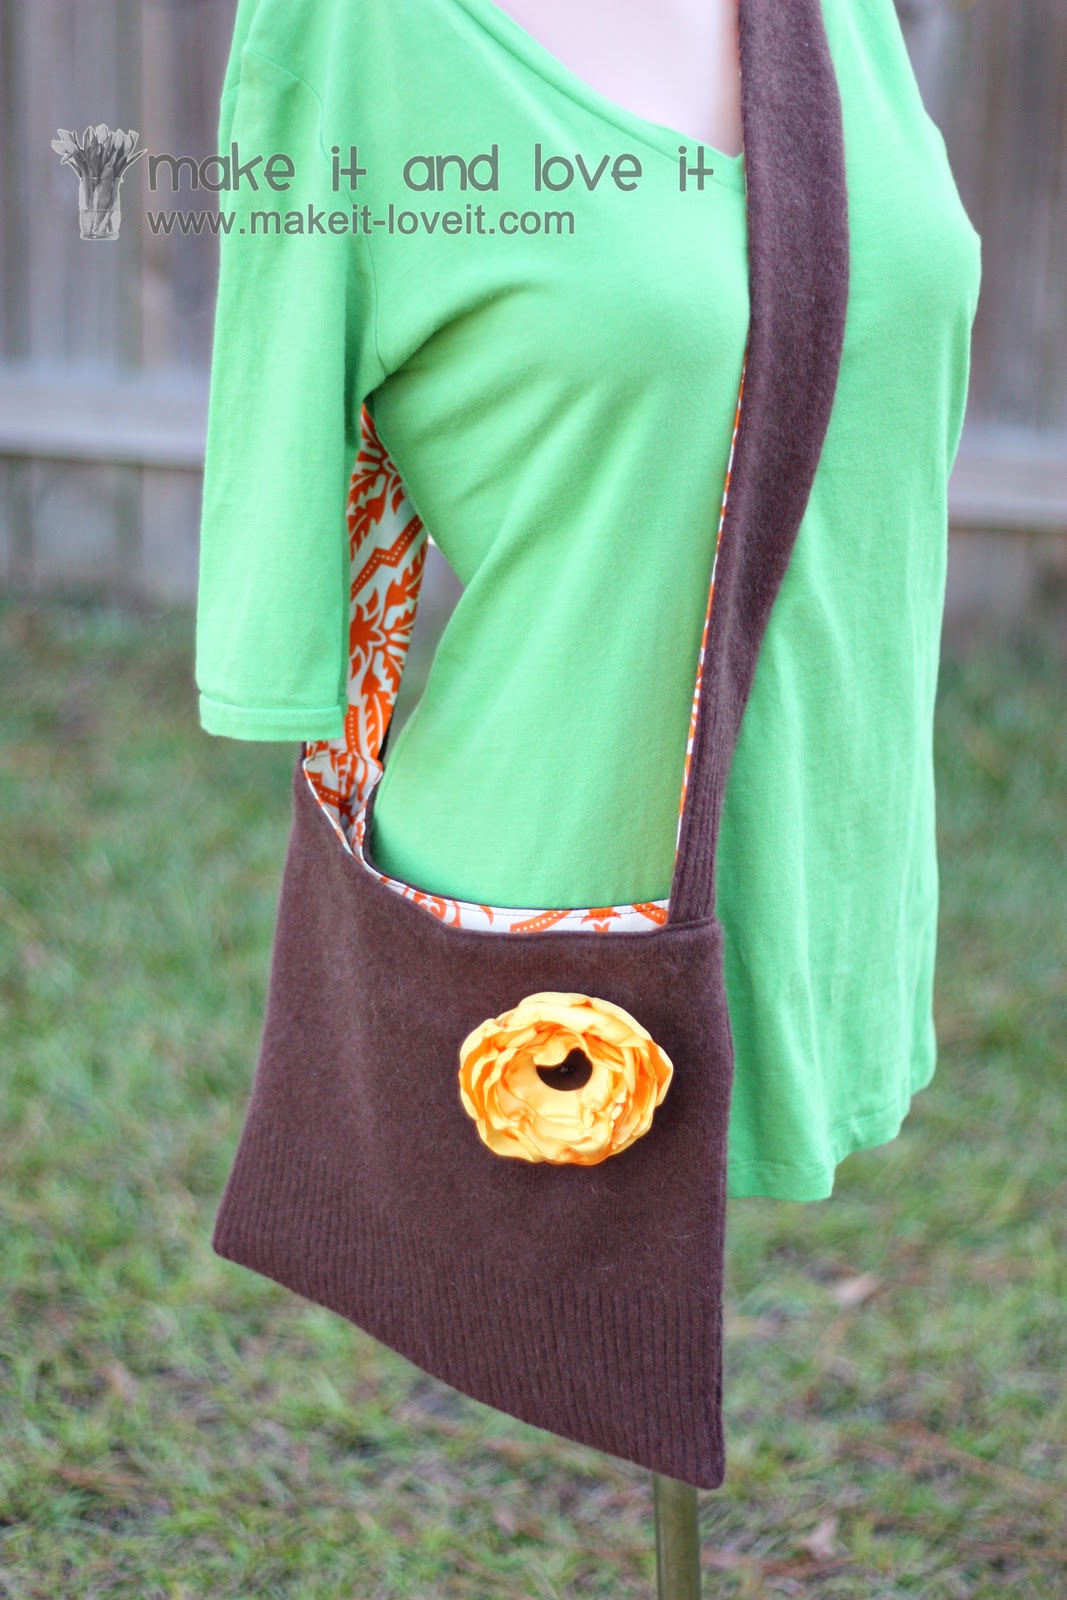
But today, the old (too short) angora wool sweater becomes a sling purse.
.
And I think that this sweater is much happier out in the cool fall air, rather than in my stuffy dark closet.
Don’t you agree?
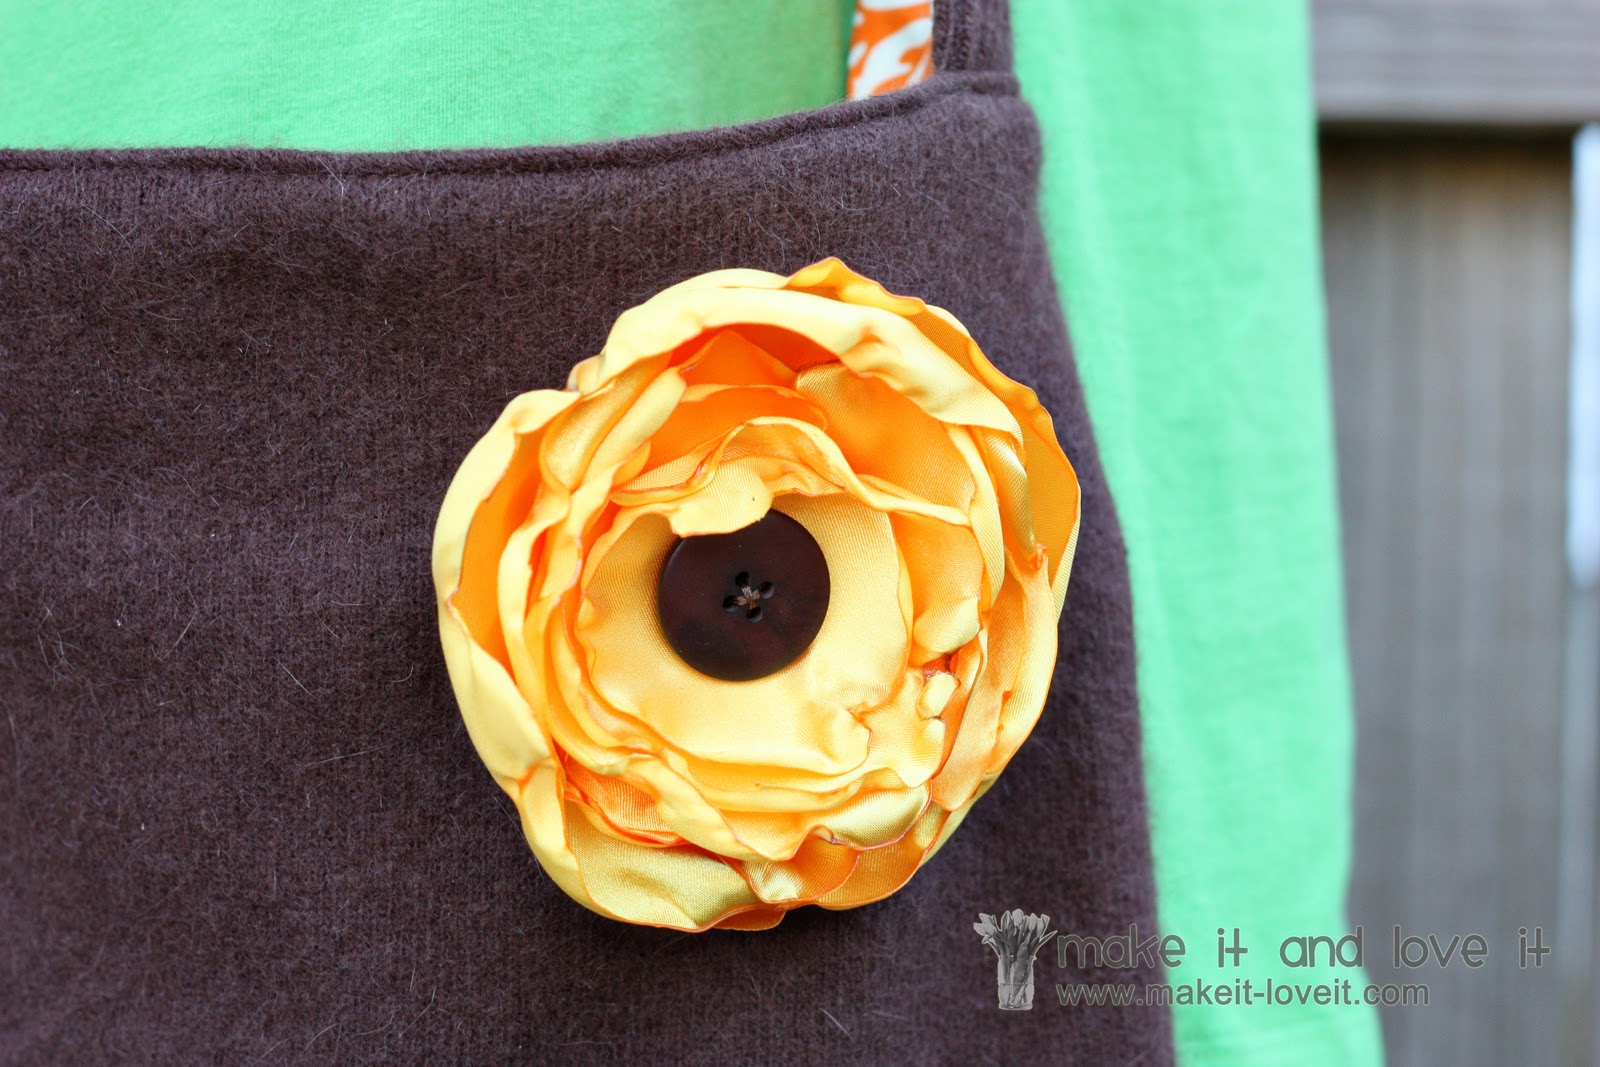
It really is a great cozy little companion for any sort of outing.
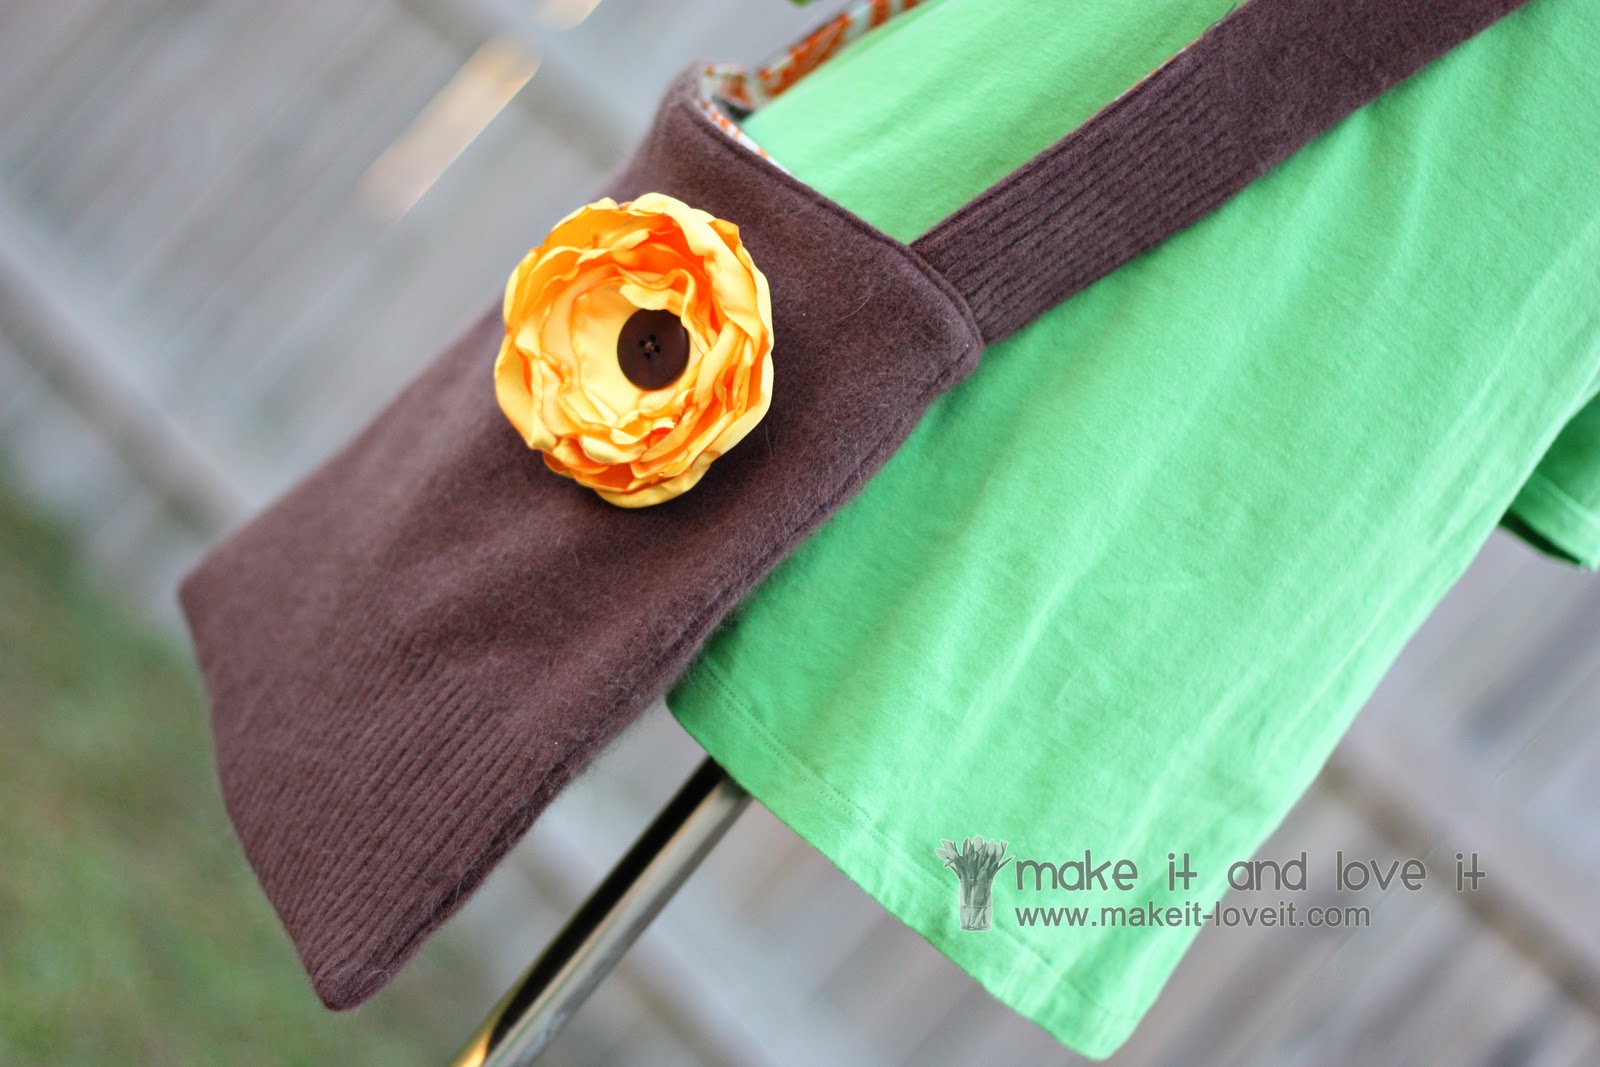
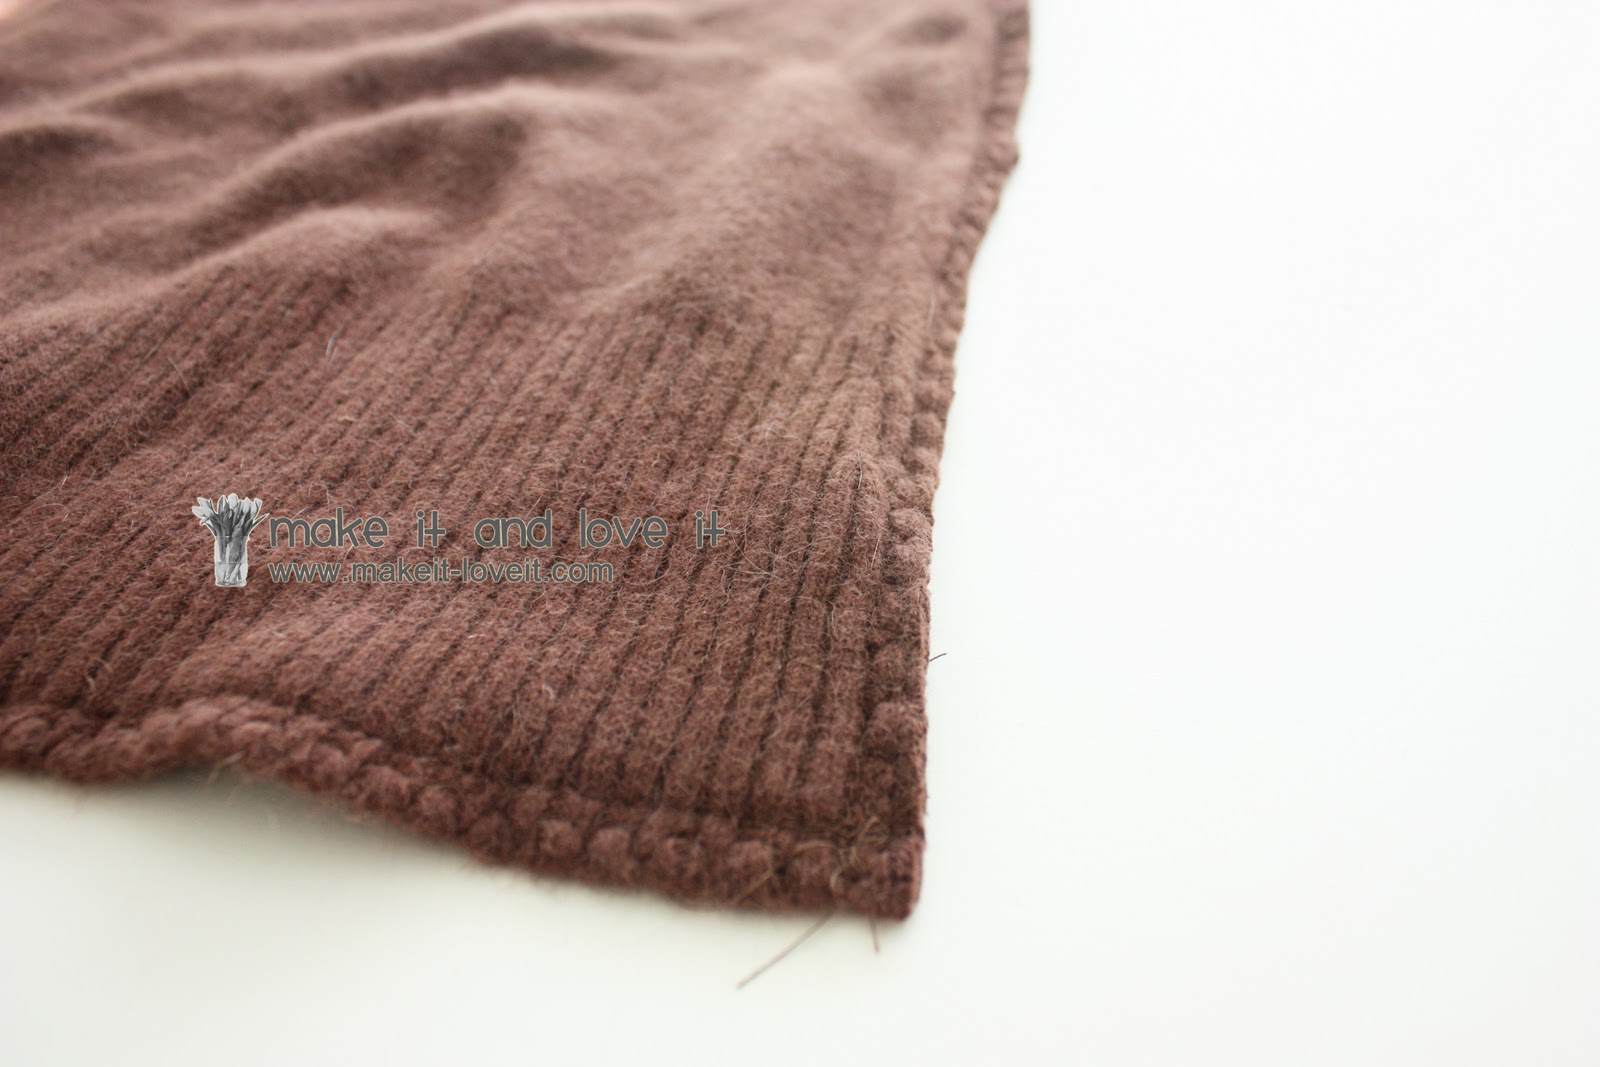
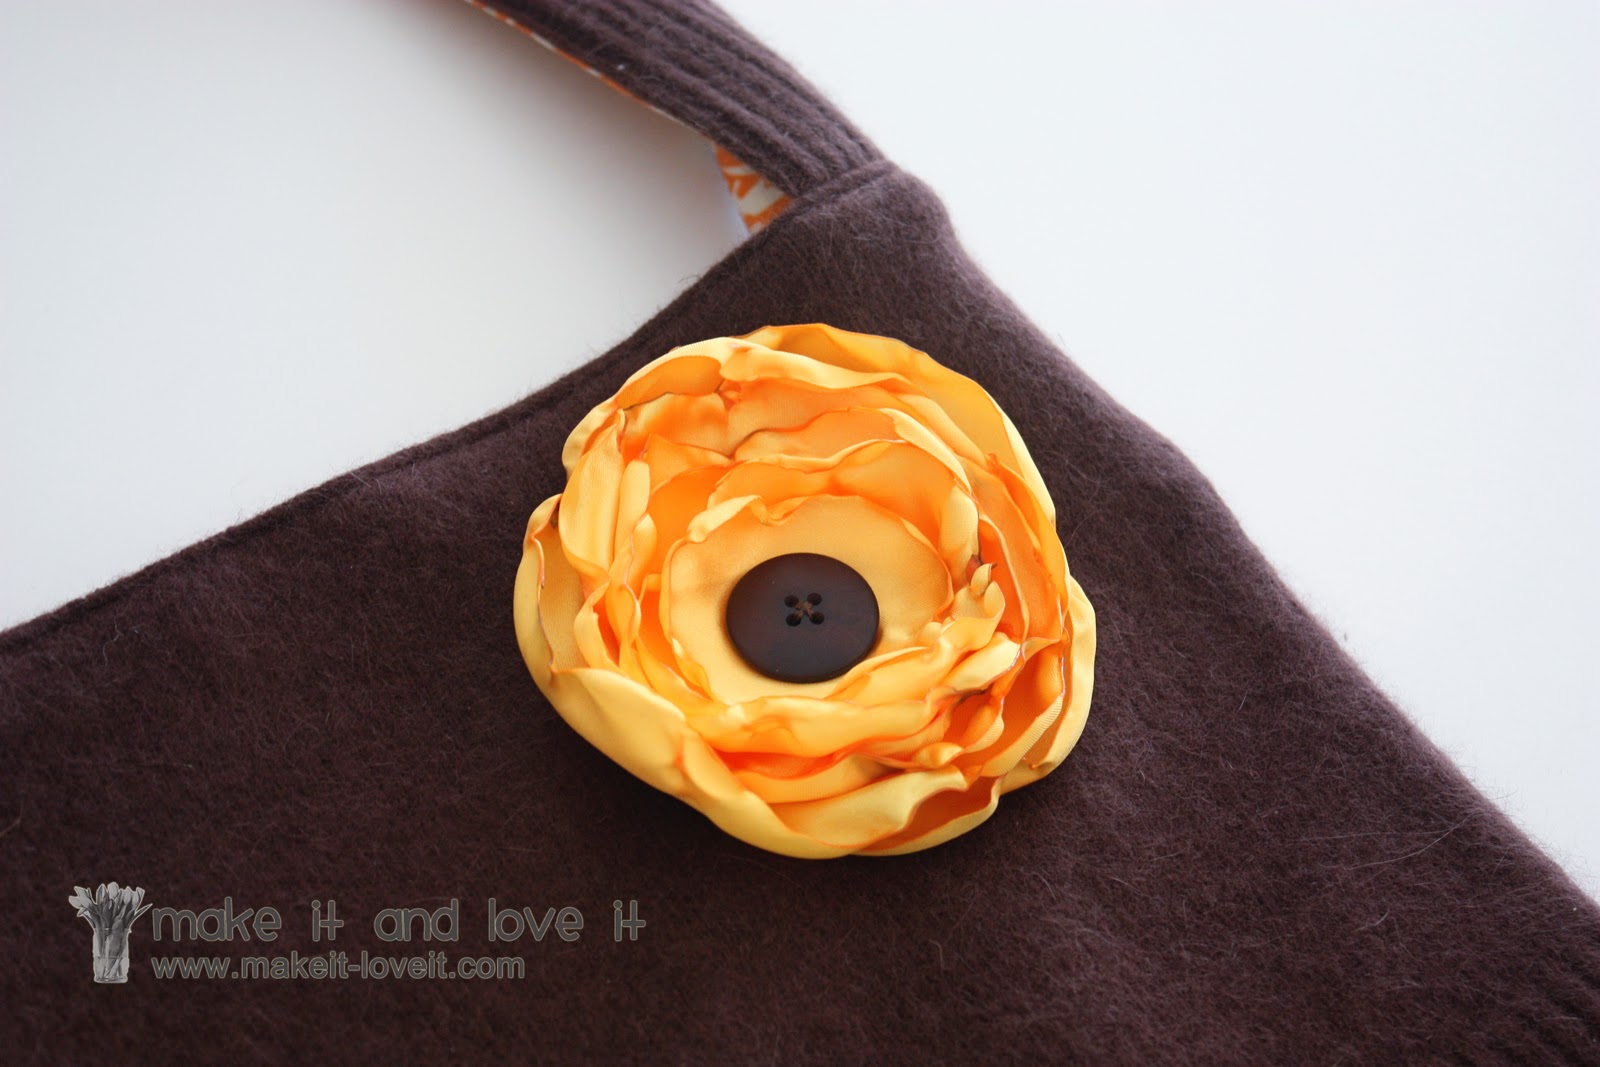
The bottom of the purse adorns the ribbing from the bottom of the sweater……as well as each side of the strap. Adds great texture.
.
And come on, who doesn’t love a big homemade flouncy satin flower……tacked right on with a large button?
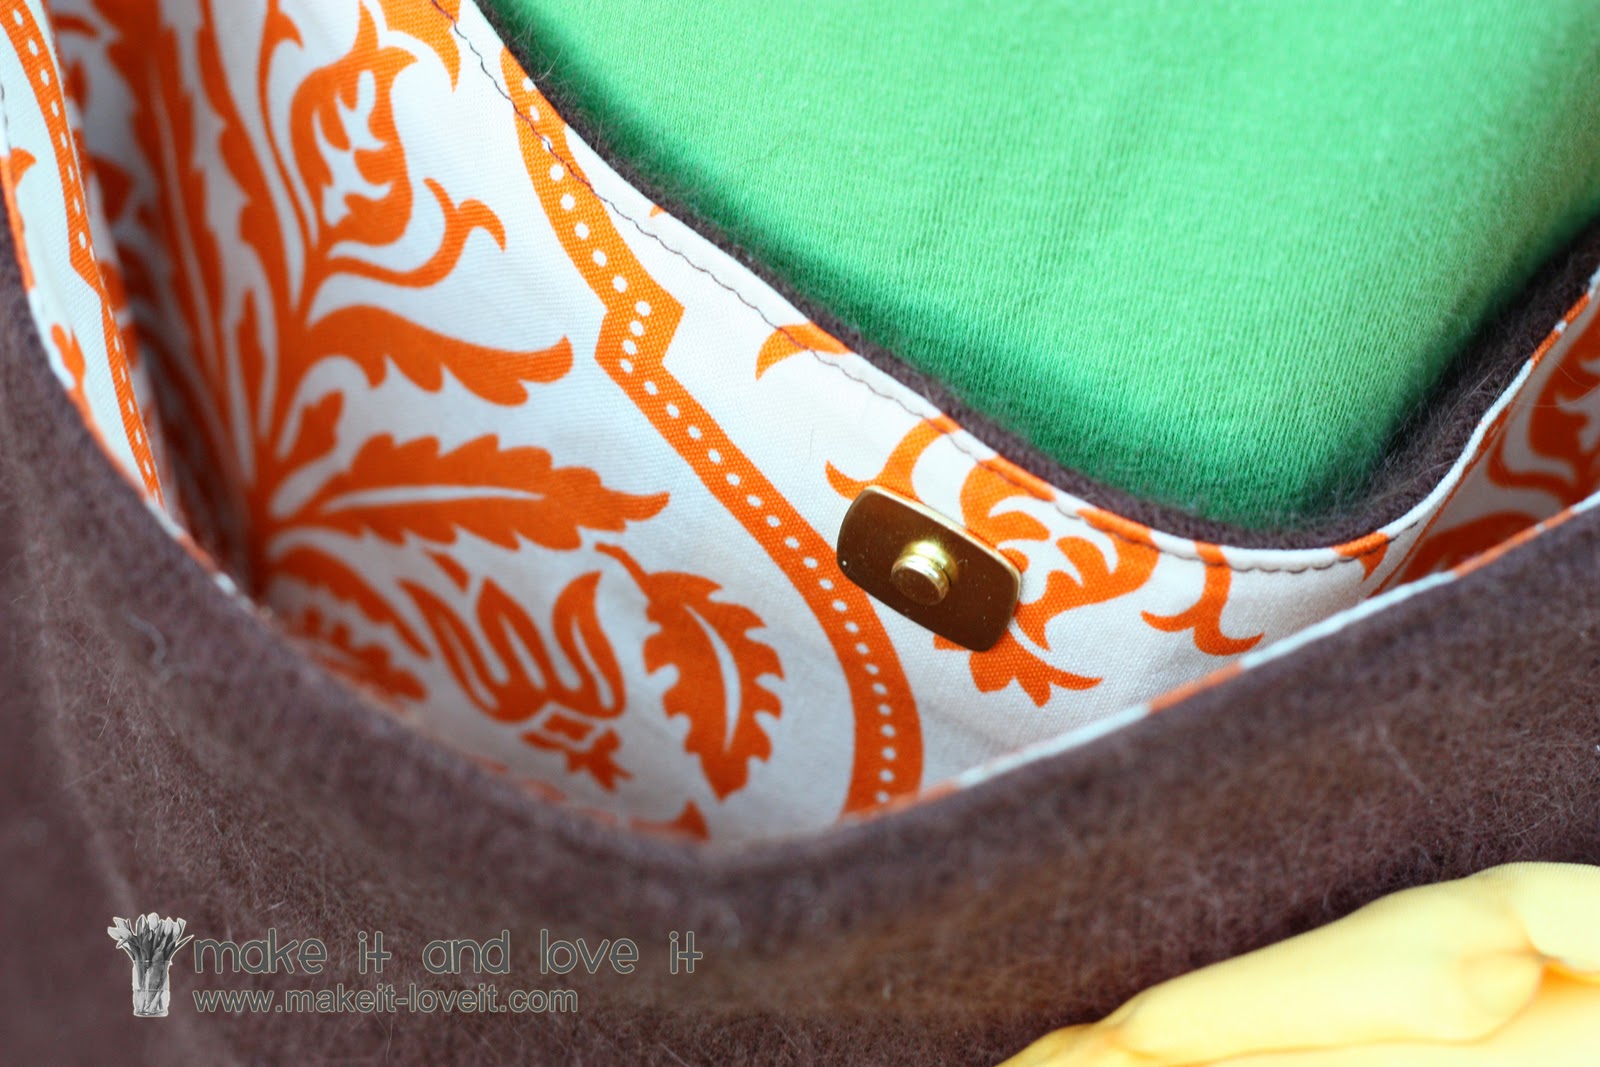
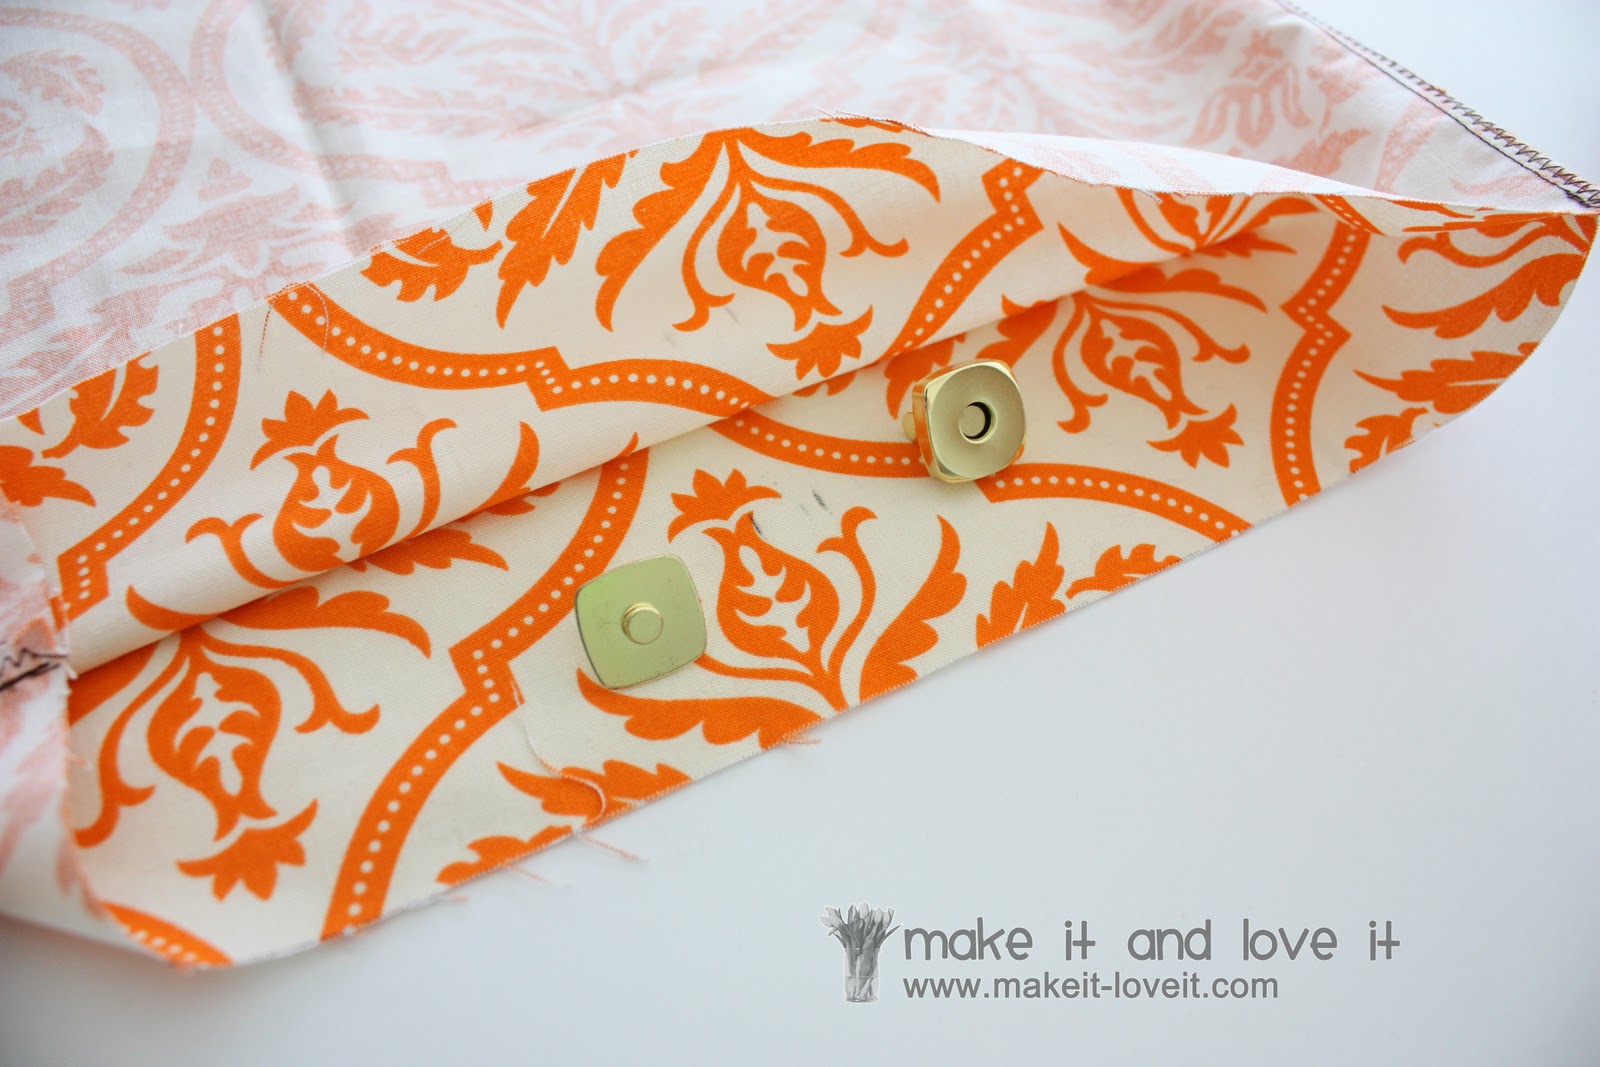
And the inside is fully lined (helps the purse keep its shape) with a magnetic closure.
A quick project for those lonely sweaters.
(And maybe a great gift idea for you gift-givers!)
Want to make your own?
Come on, let that favorite (no longer fitting) sweater go. She will be loved in a different way.
Or wait, don’t have a sweater?
Check out the thrift store…..you’ll surely find some great options there.
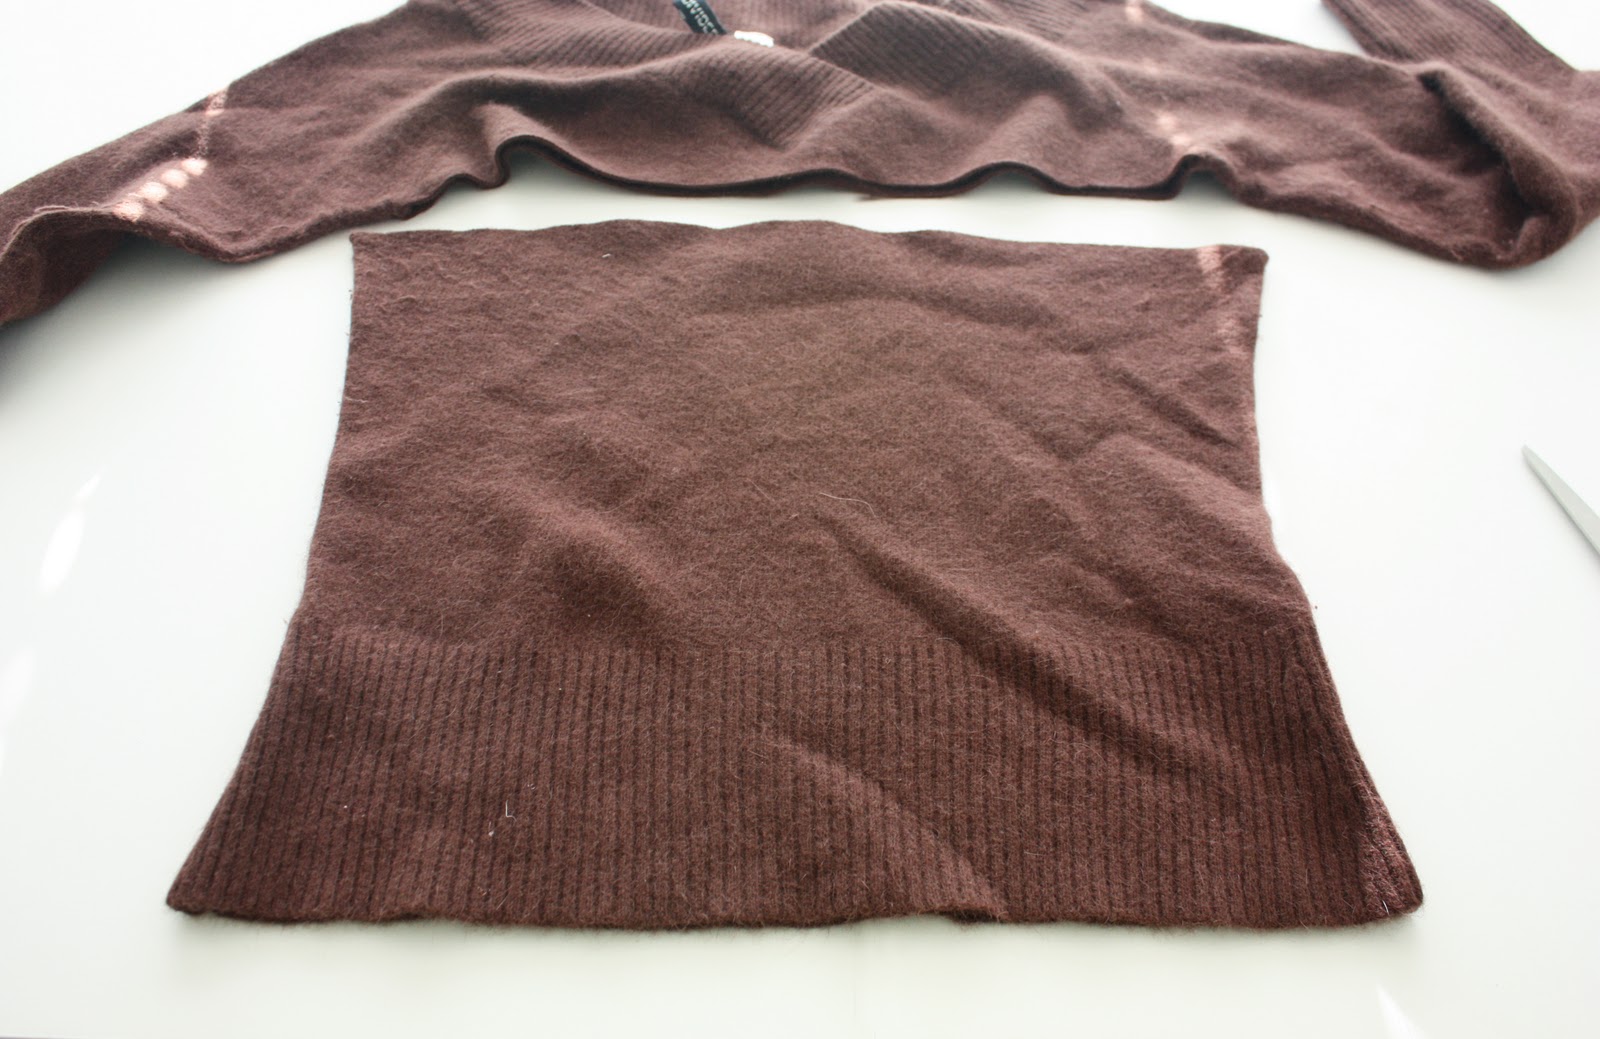
Here’s the pre-sweater.
First, you need to cut off the bottom of the sweater, underneath the armholes, creating a square shape.
If your sweater has any contour to the sides, trim them off to make the sides straight.
(And I actually trimmed my sweater front and back pieces down to be 13 inches wide by 12 inches tall.)
Place the two pieces together with right sides together and sew along the sides and bottom. Then zig-zag or overlock stitch….securing the raw edges.
(If you’re having a problem with the sweater stretching badly as you sew, lengthen you stitch length. Also, do another straight stitch instead of a zig-zag if that’s causing the pulling.)
Trim the two bottom corners and then turn right side out and iron flat. (Use caution while ironing…..you don’t want to melt/burn the sweater, depending on what it’s made from.)
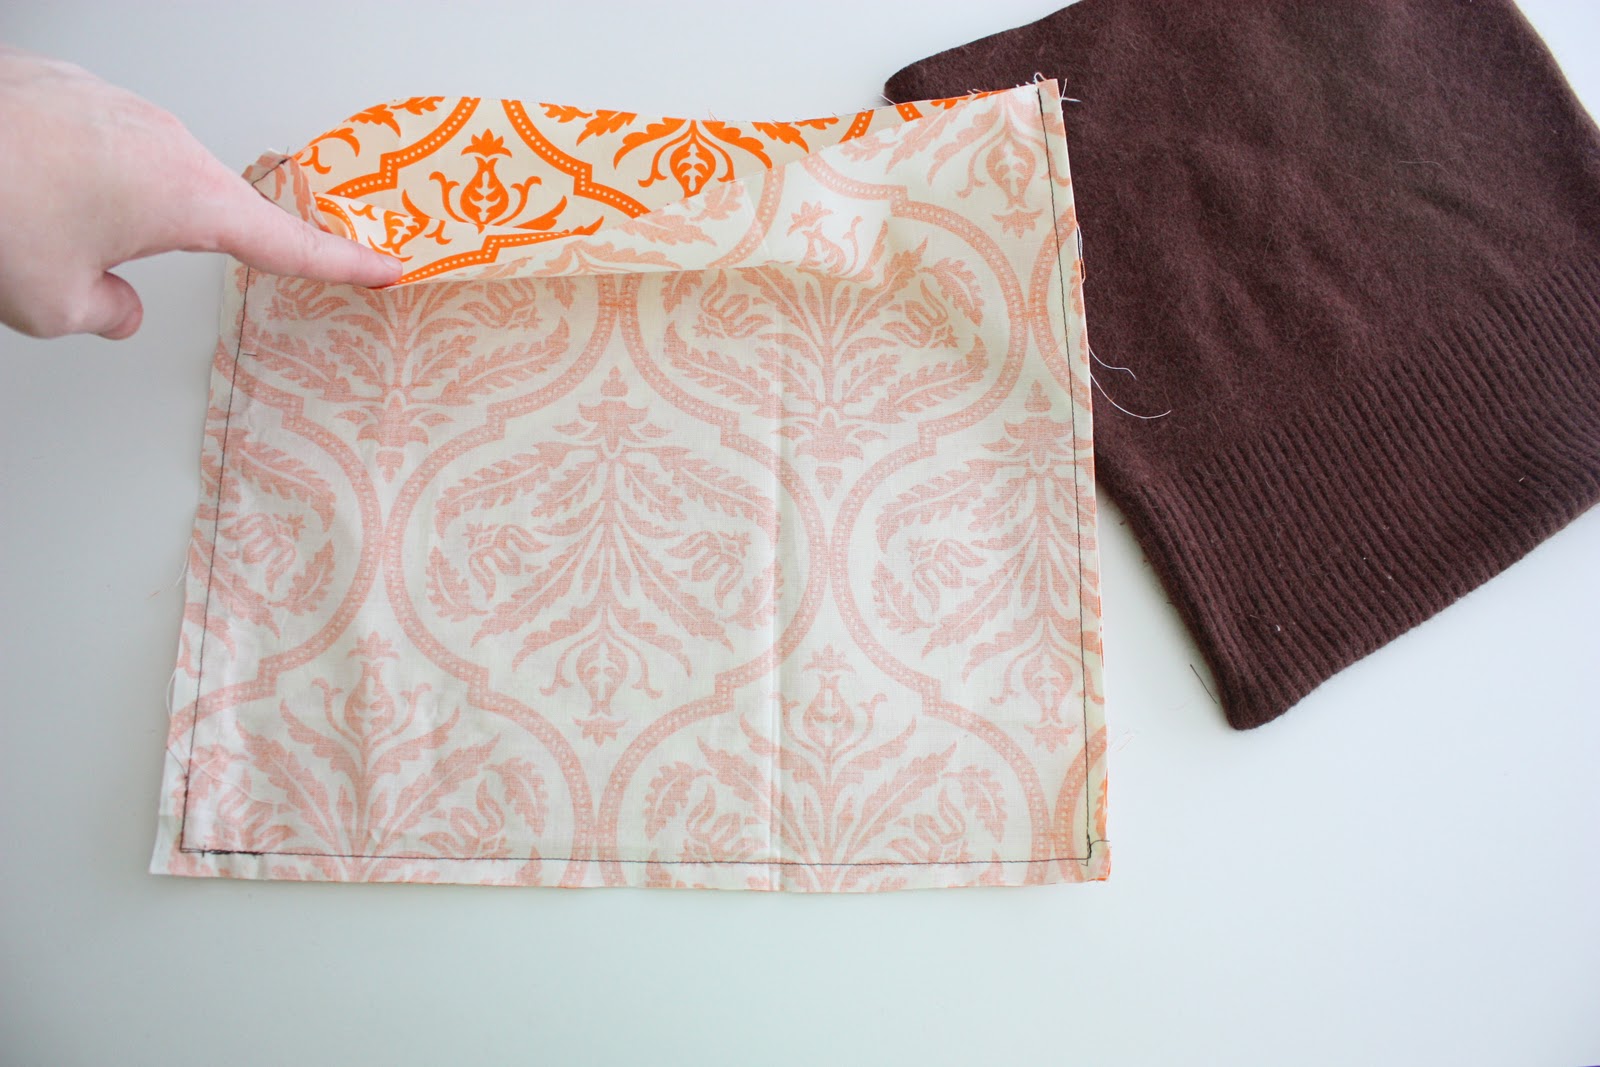
For the purse lining, I used sturdy cotton. I cut out two pieces that were the same size as the sweater pieces and sewed them together the same way.
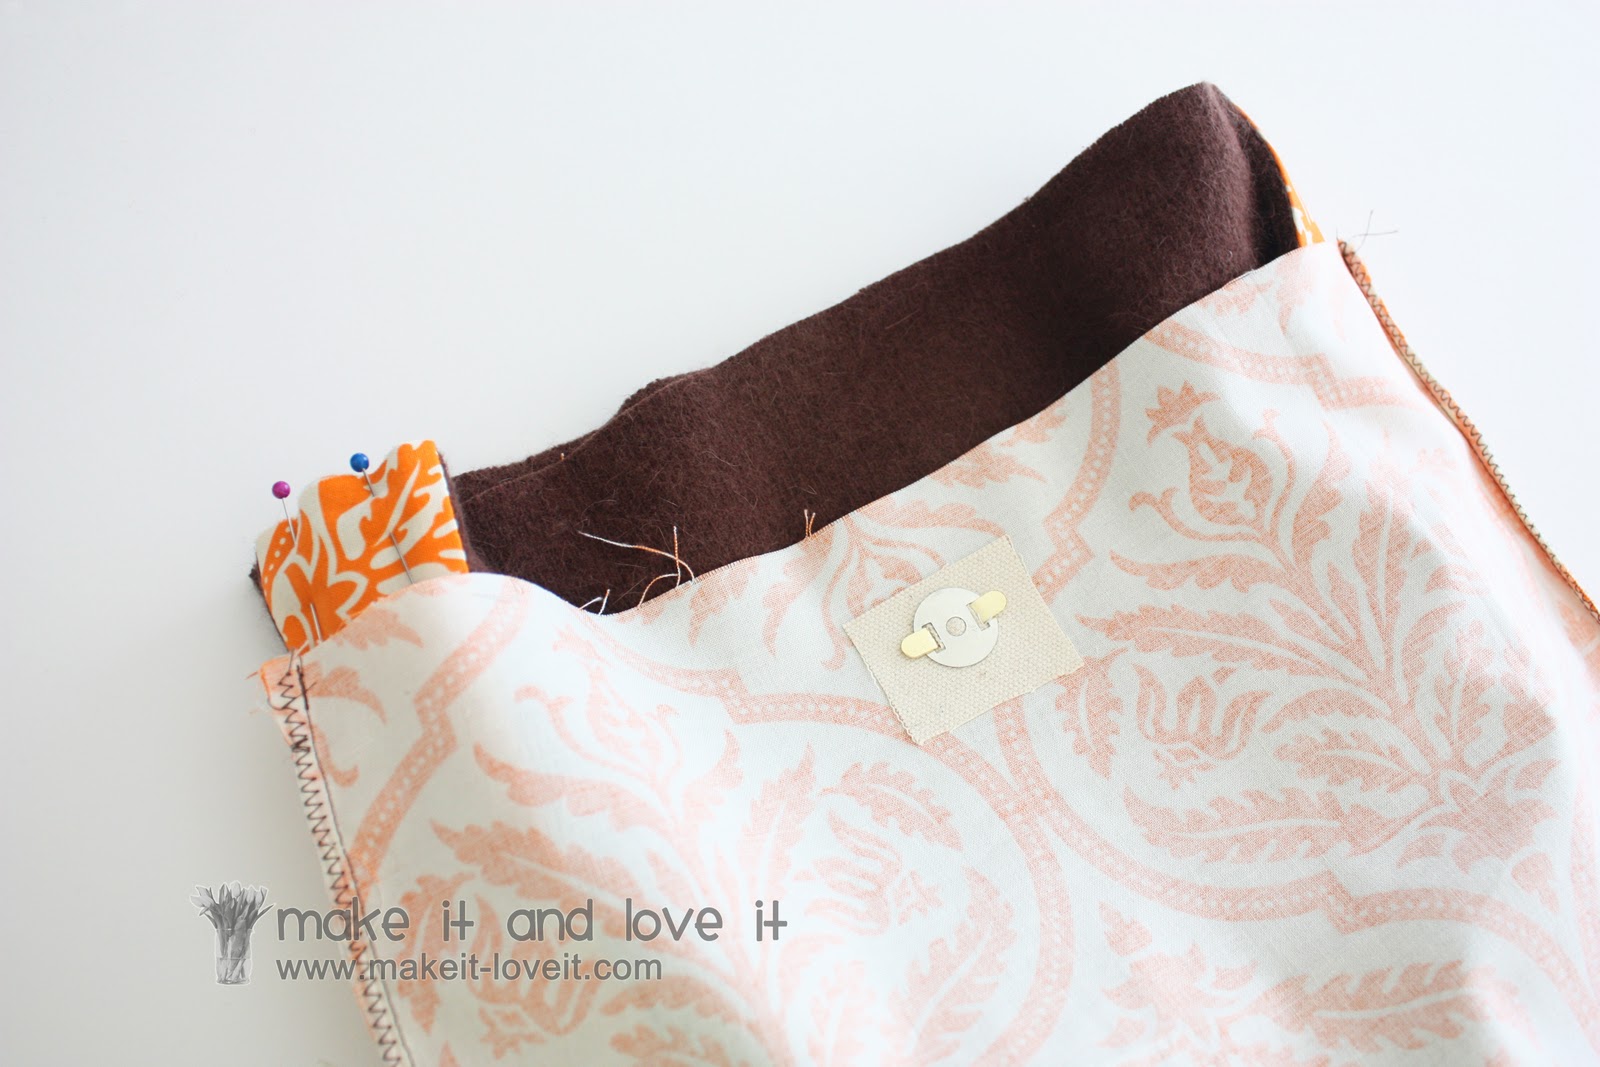
Then, I marked on my fabric where my magnetic purse closure would go. Be sure to center each piece and also measure down enough from the top, to allow for a seam allowance…..plus a little extra space. I knew I would be using a 1/2 inch seam allowance later on, so I measured 1 inch from the top.
Next, I attached some squares of white denim fabric (with double sided fusible web) to the wrong side of the lining fabric, right where the closures would poke through…..giving it some reinforcement. If you don’t have denim, use some sort of sturdy fabric. Then set aside.
Onto the purse strap.
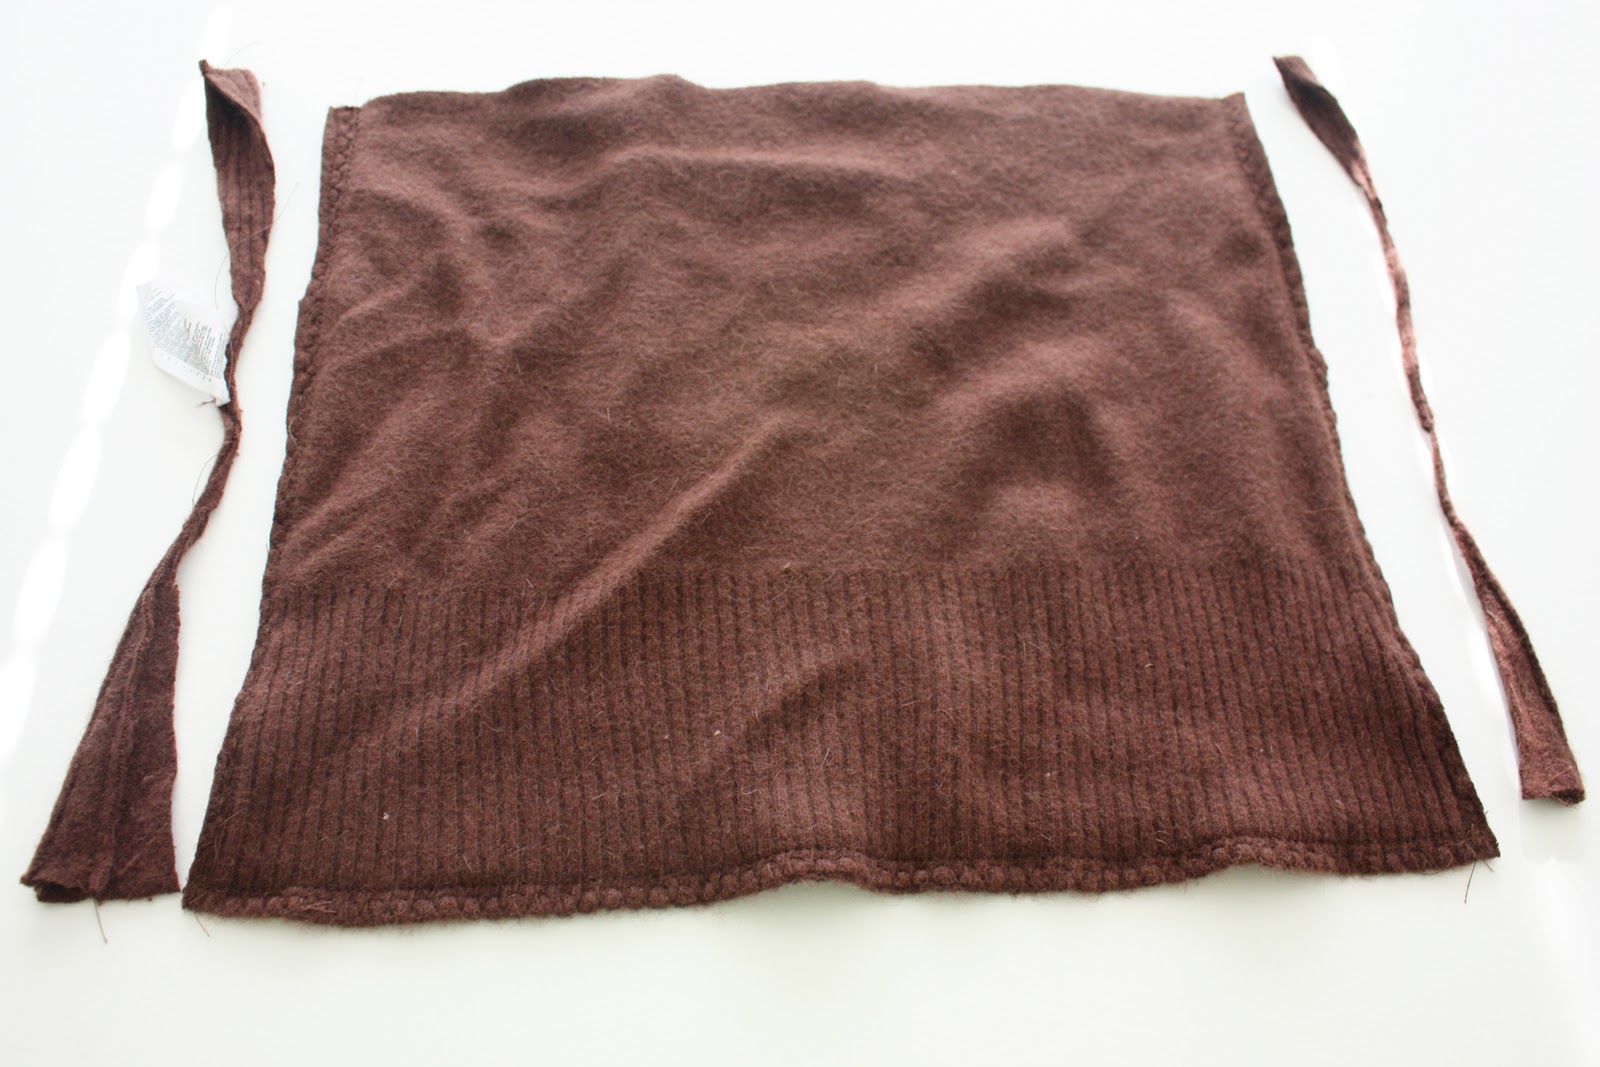
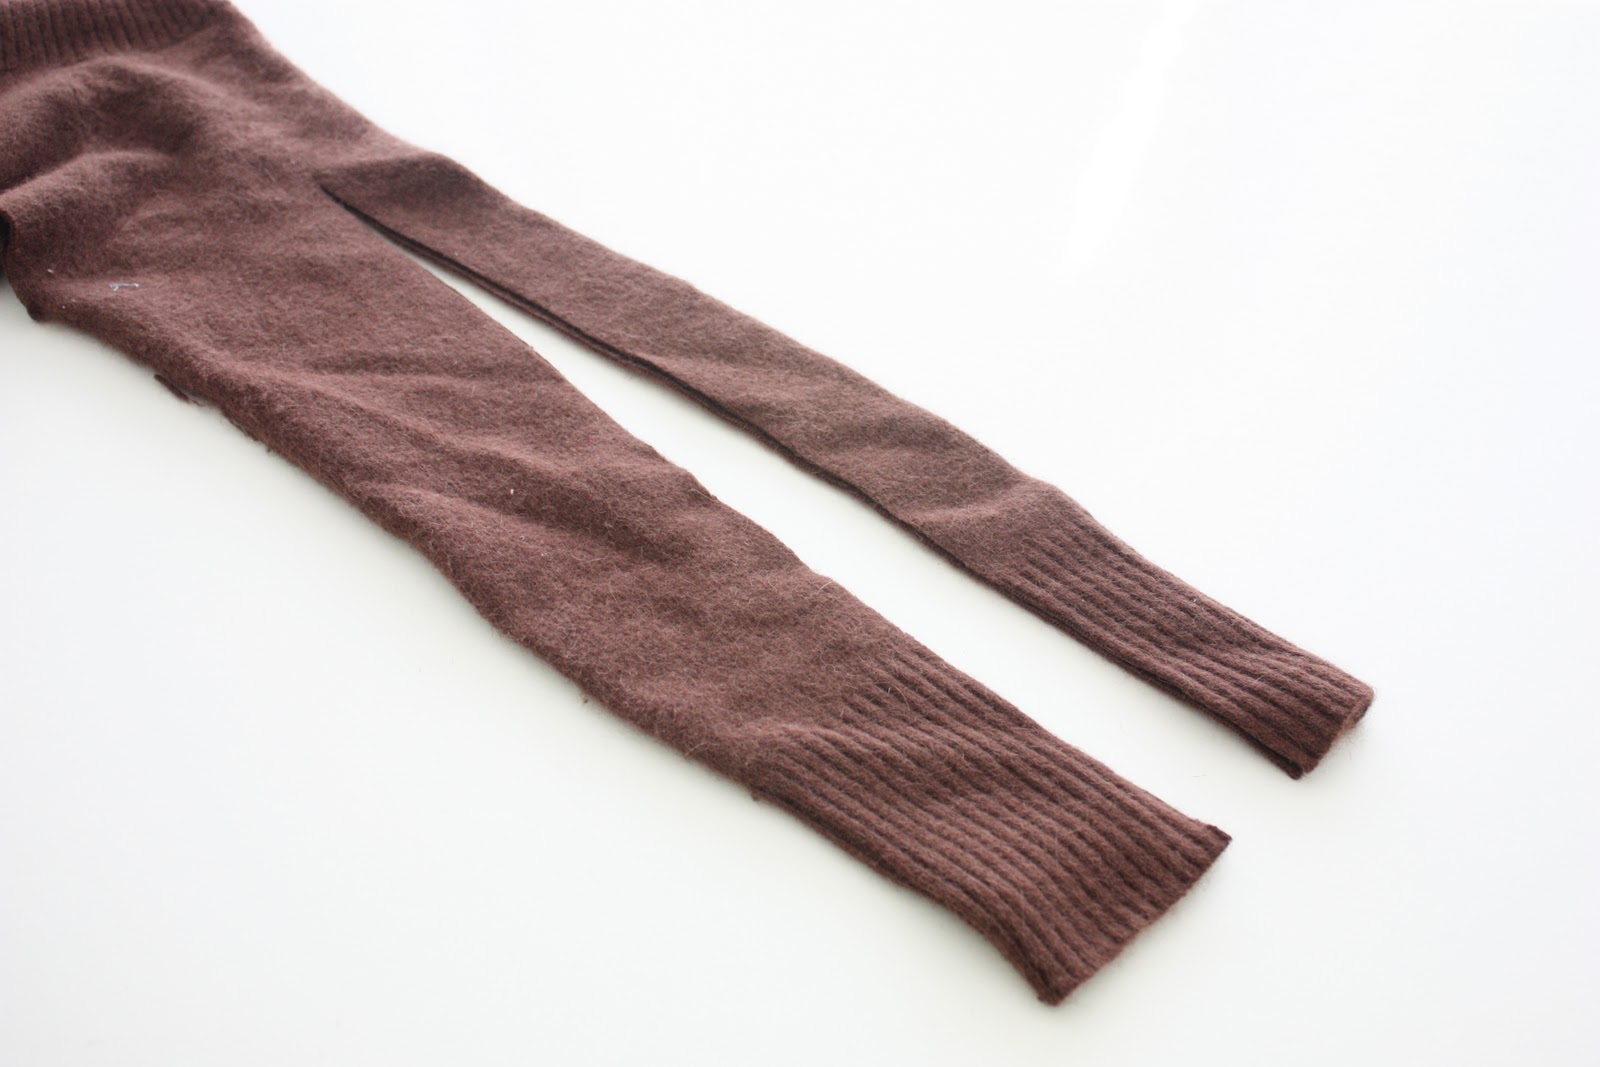
Cut long strips from the sleeves. From each sleeve, I cut a strip that was 3 x 22 inches.
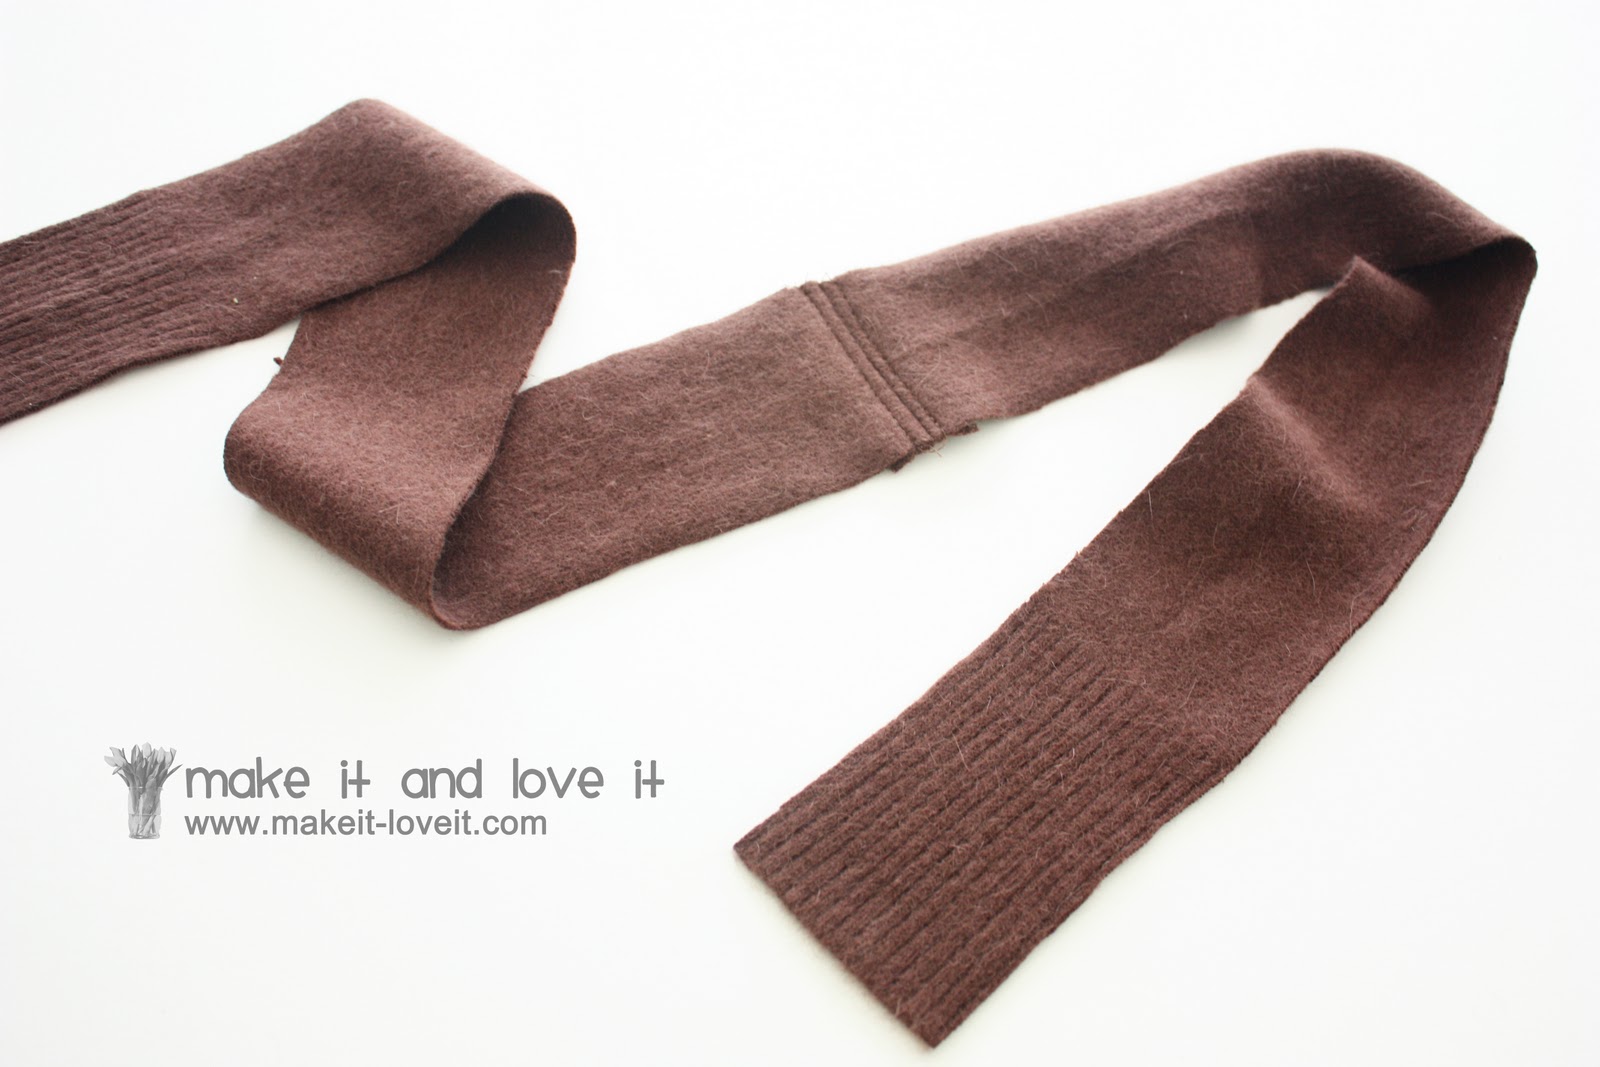
Then I connected the two strips together to create one long strip that was about 3 x 44 inches.
Right at the seam where I attached the two pieces together, I top-stitched on either side of the conjoining seam.
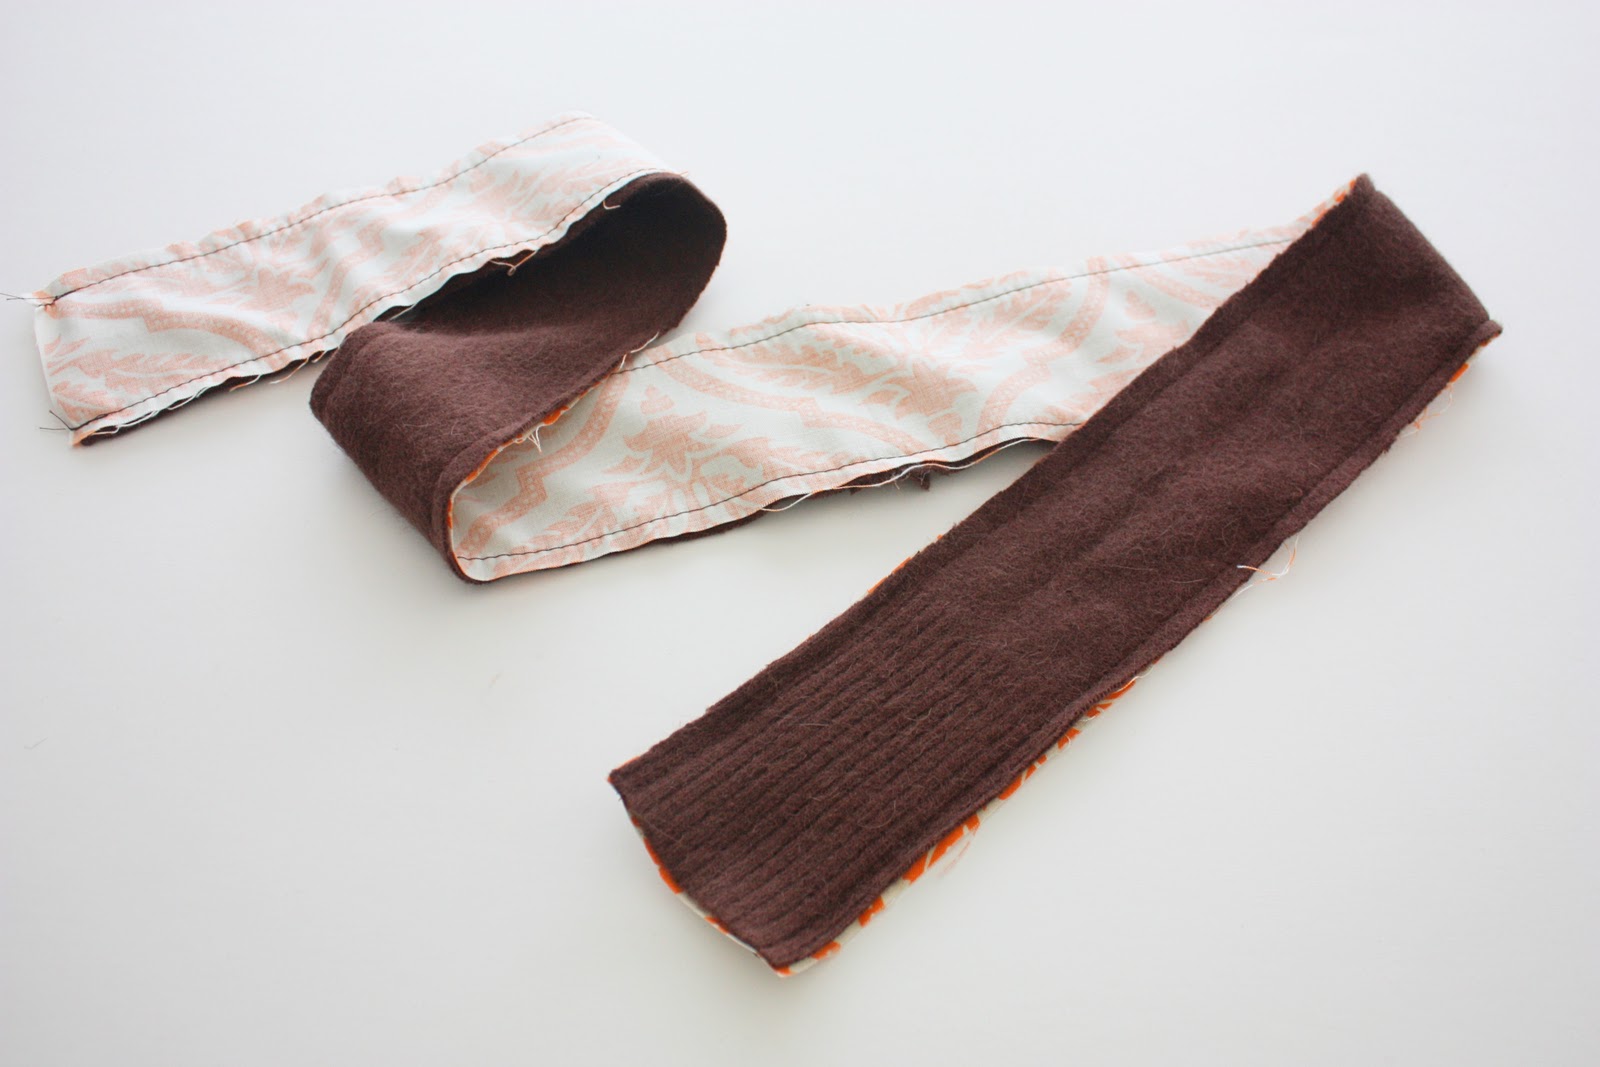
Then I cut a piece of the lining fabric that was the same size and sewed the 2 pieces together with right sides together……only along the two long sides.
Then I turned the strap right side out and ironed it flat.
(If your strap isn’t laying flat, top stitch along both edges of the strap…..that will help. Or do it anyway if you like the look. I didn’t end up doing it on mine though.)
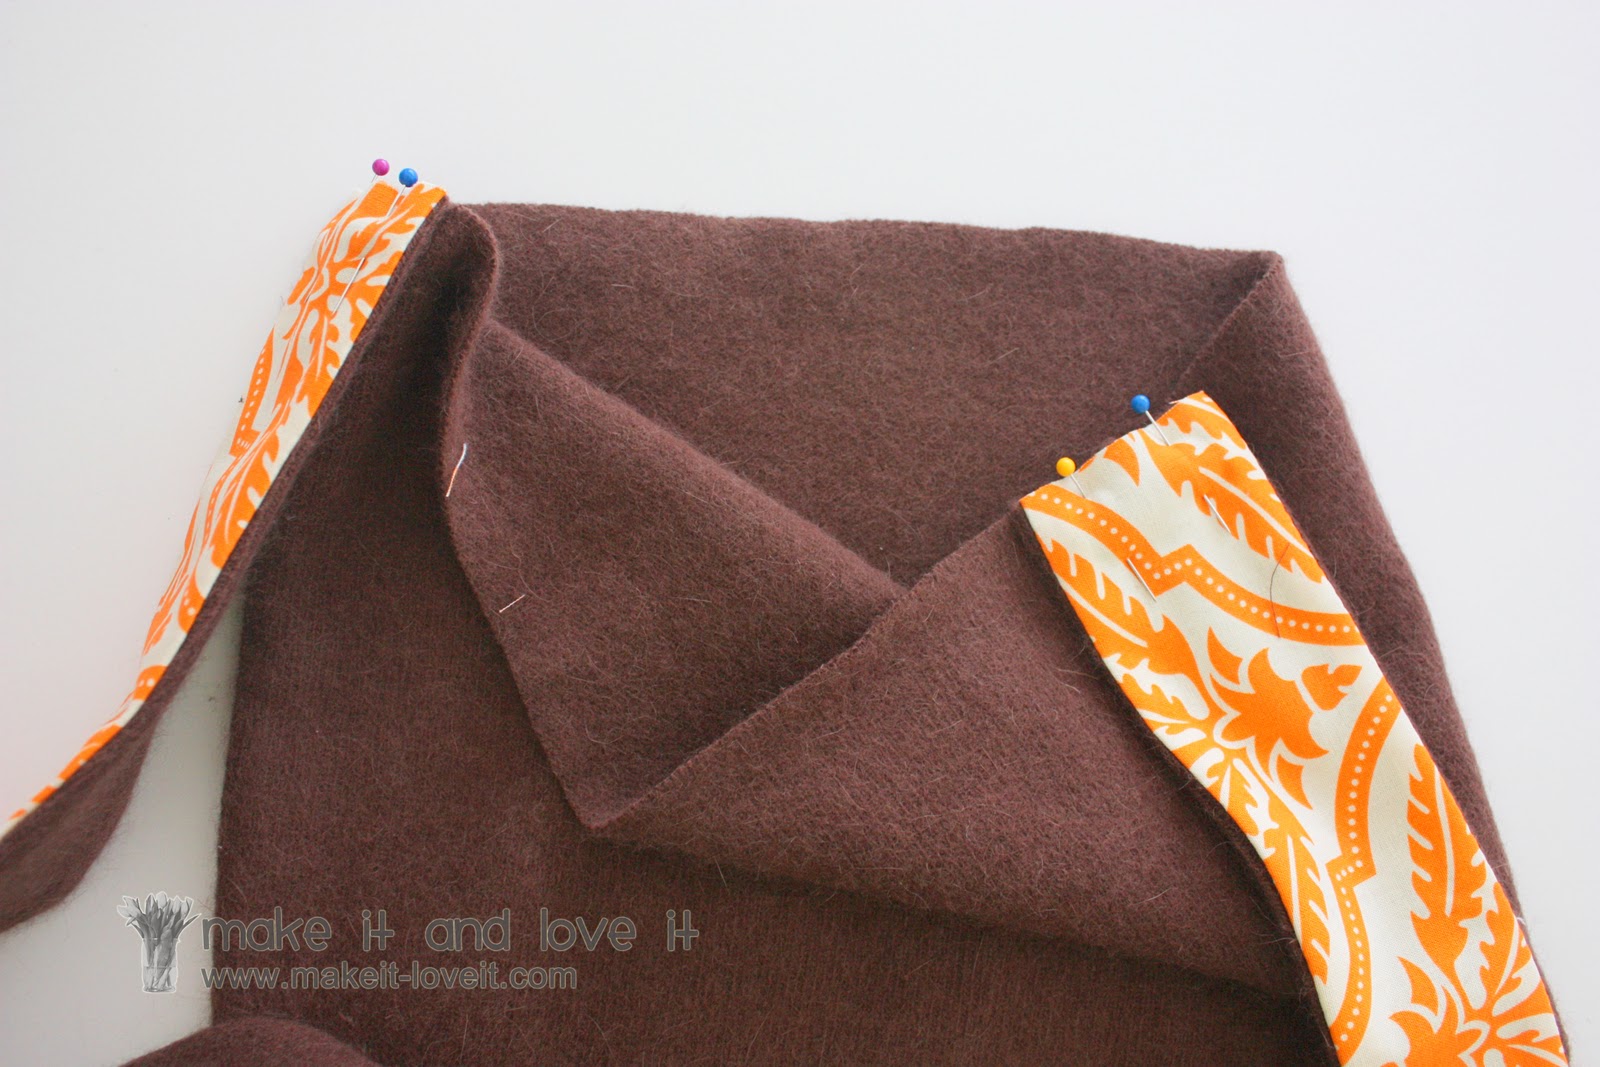
Then I pinned the strap to the outside of the sweater part of the purse (right sides together), making sure to center each strap end to the side seams of the purse. Make sure to match up the raw edges of the strap and purse as well.
Then slide the purse (and attached strap) into the inside-out lining.
Pin all along the purse opening, attaching the sweater to the lining.
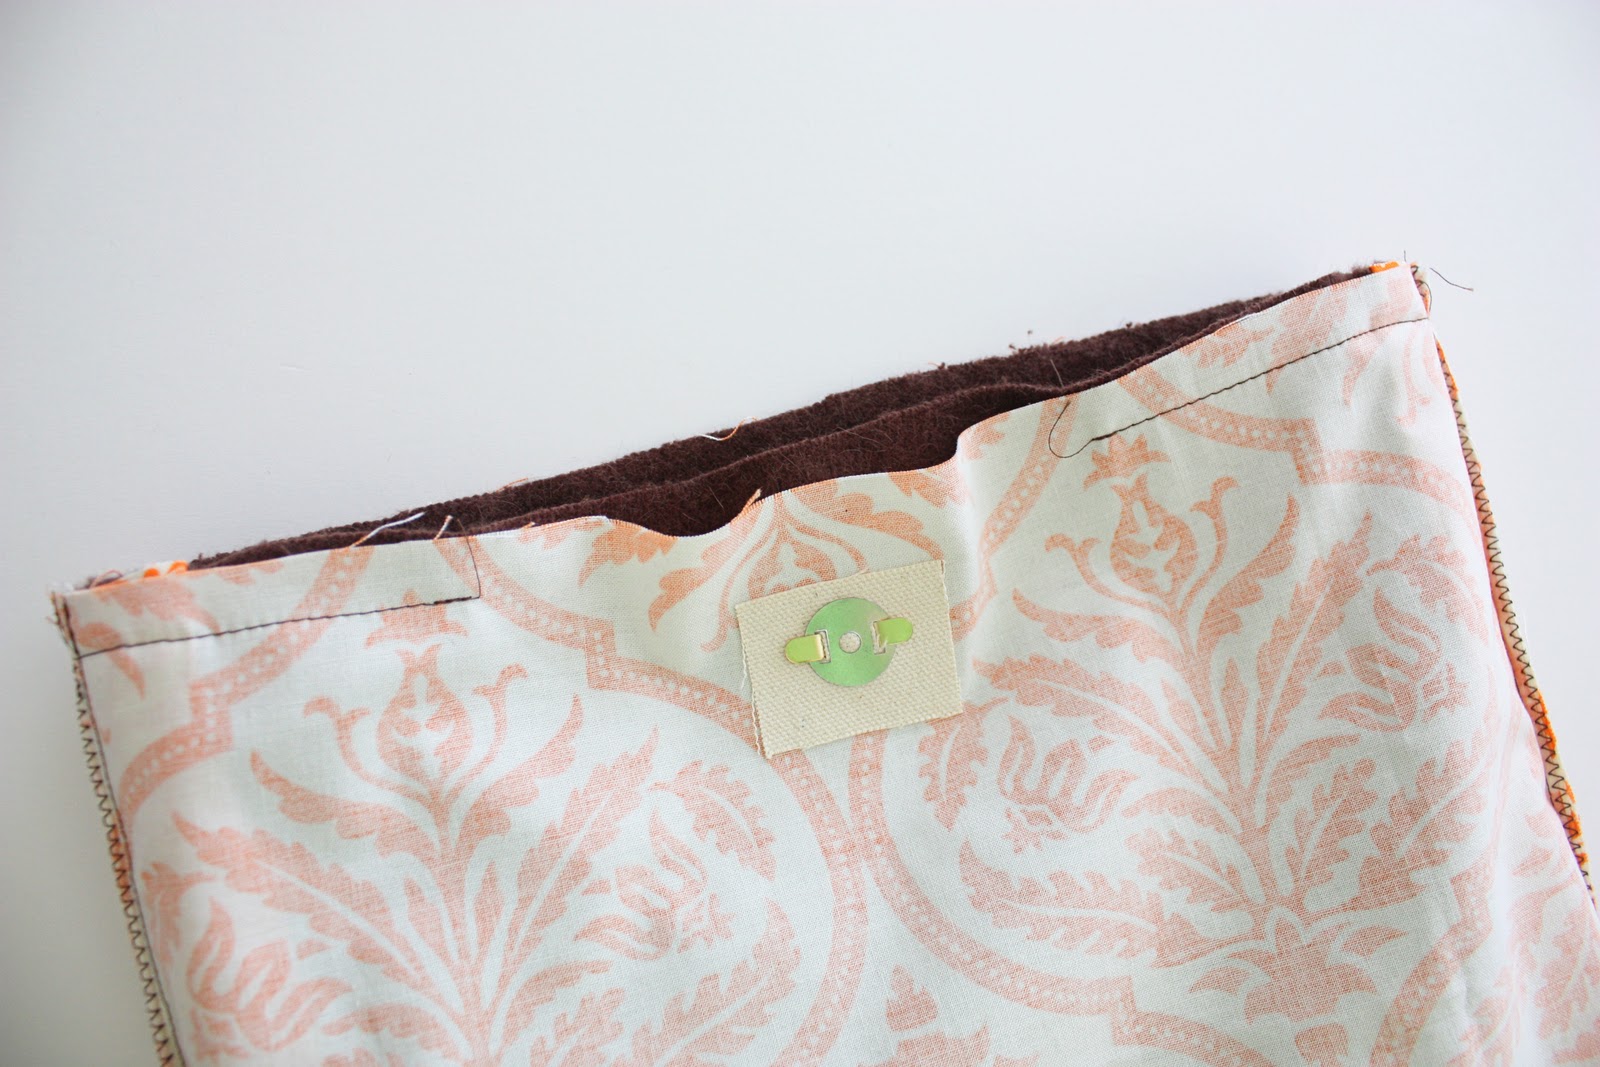
Sew all the way around with a 1/2 inch seam allowance, leaving about a 5 inch opening along one side.
Then turn the purse right side out through that opening, iron flat, then stitch all the way around the top…..being sure to seal off the 5 inch opening.
You can either stop here or add some detail to the purse.
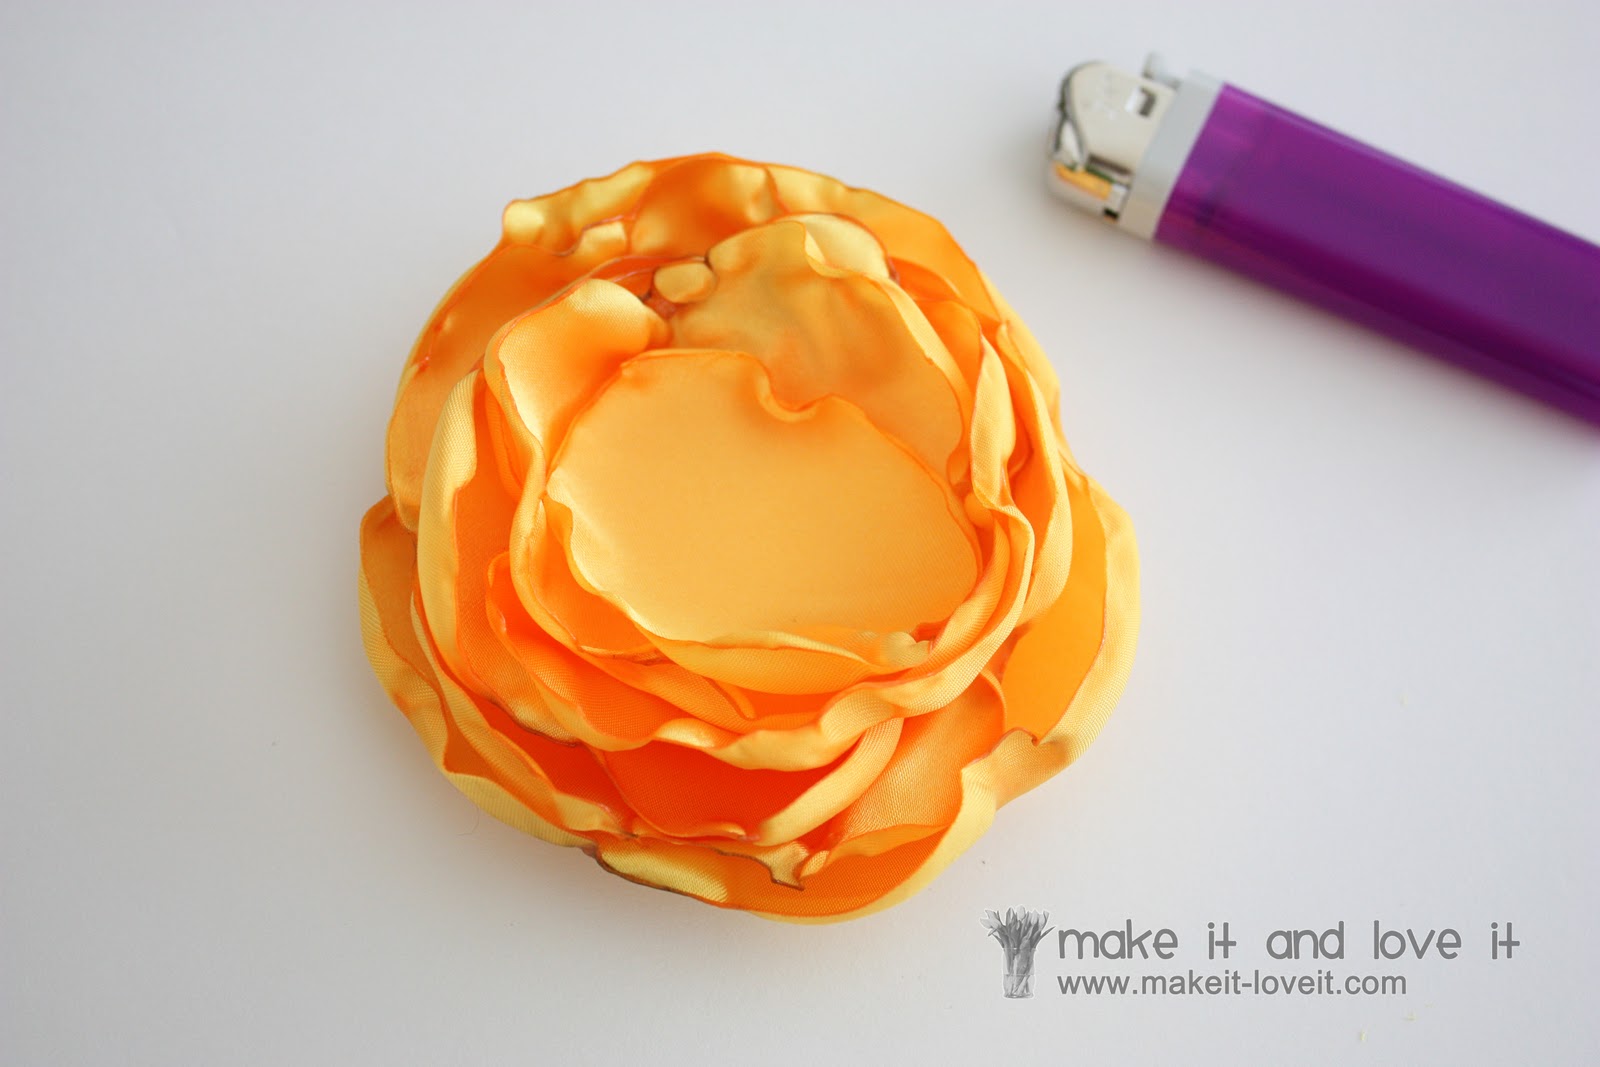
I added a big satin flower to the front, like the ones I made
here.
The only difference is that I used the lighter a lot more to really ruffle up and curl the edges of the flower a lot more. I also wanted more imperfect pieces to really give the flower some dimension…….so if you’re trying to do the same thing, just keep melting it with that lighter. (But be careful to not burn or smoke the fabric. Just do a little bit at a time.)
Then I placed a button on top and stitched it right to the purse. (If you have a larger flower, you may want to add more stitches to the back of the flower in a bigger circumference than just the very center of the flower. This will help it from flopping down.)
And that’s it.
A brand new Sling Purse from that old sweater.