Home » DIY Tutorials » DIY Sewing » Sewing: Clothing » Baby Clothing » Re-purposing: Long Sleeved Tee into Ruffled Dress
Re-purposing: Long Sleeved Tee into Ruffled Dress
November 15, 2010 - By Ashley Johnston 91 Comments
.
I bought my little girl several long sleeved Tees at Children’s Place a while ago. But when I pulled them out of her drawer to put them on her, they looked so boring. I know, I know…….just leave things alone Ashley. I just can’t help myself. I should just leave some things be, but I tend to want to add a little more color, a little more texture, a little more frill.
It’s not my fault.
It’s the shirt’s fault. You know, for being so boring.
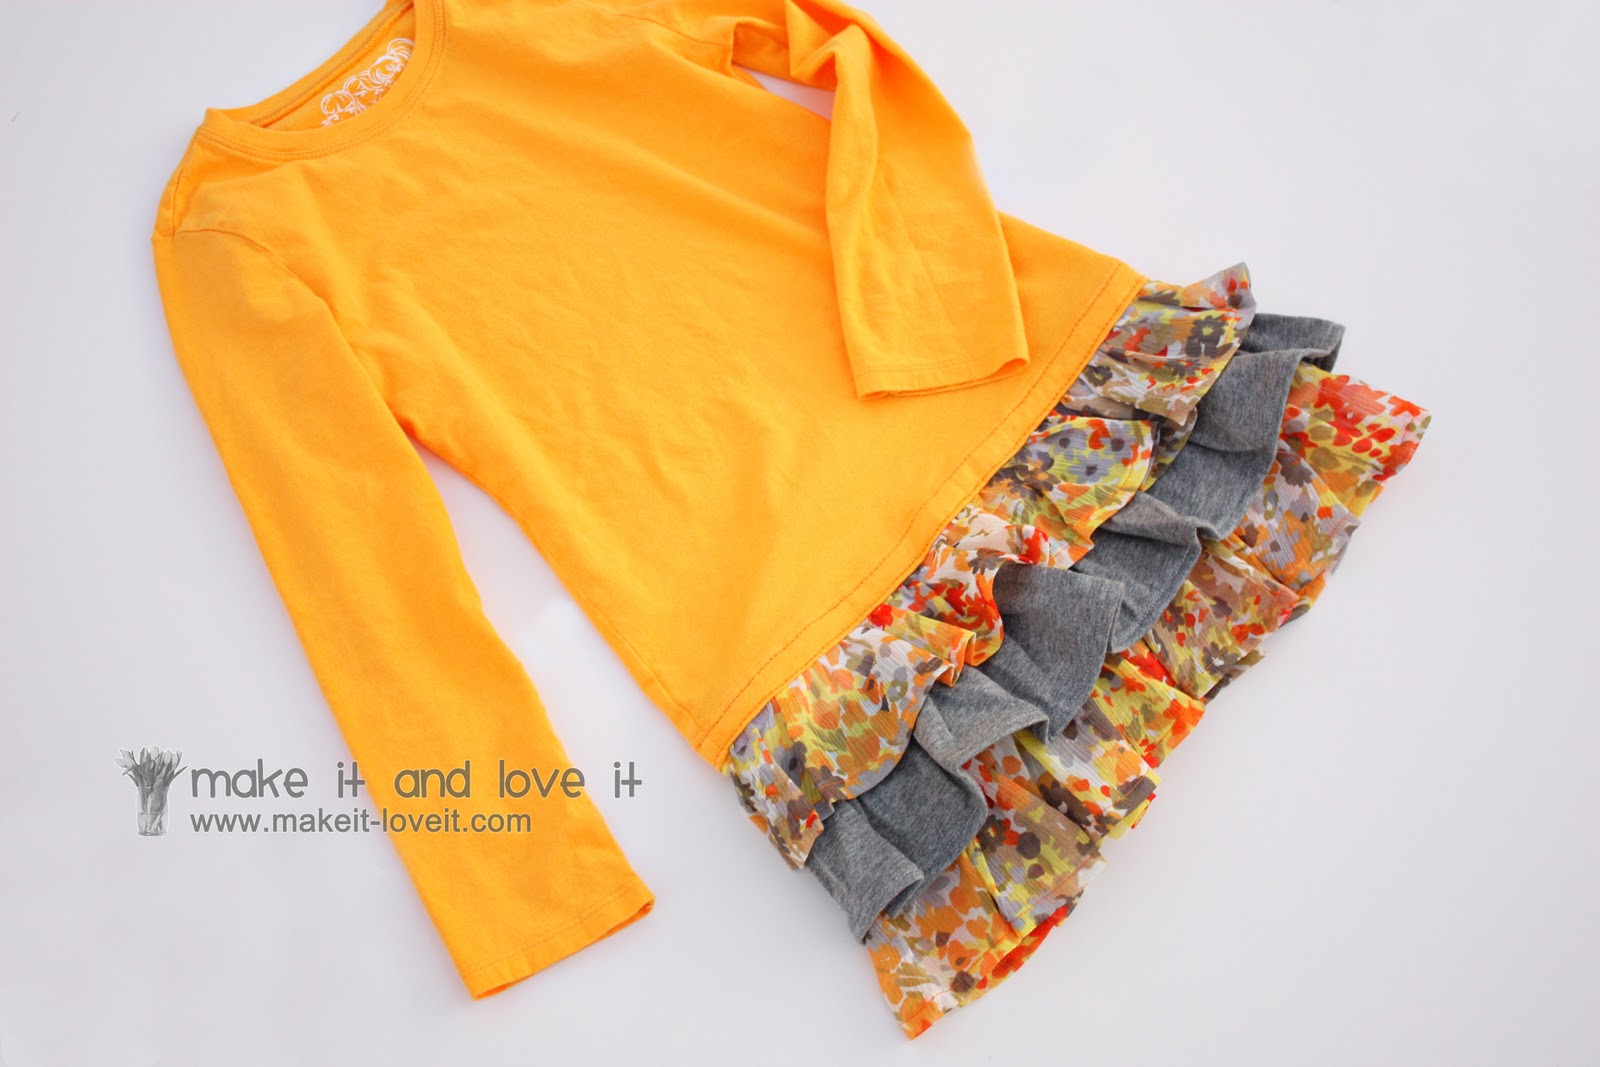
So this great yellow Tee, is no longer a yellow Tee.
It’s now a little ruffled bottom dress.
Transforming a t-shirt into a dress by adding a few ruffles, sure makes a girl happy herself right up.
And of course, the dress still allows hopping, jumping, and all sorts of kid friendly energy.
But this project really scratched that itch of wanting to change up that plain yellow tshirt. Done.
Would you like to make your own?
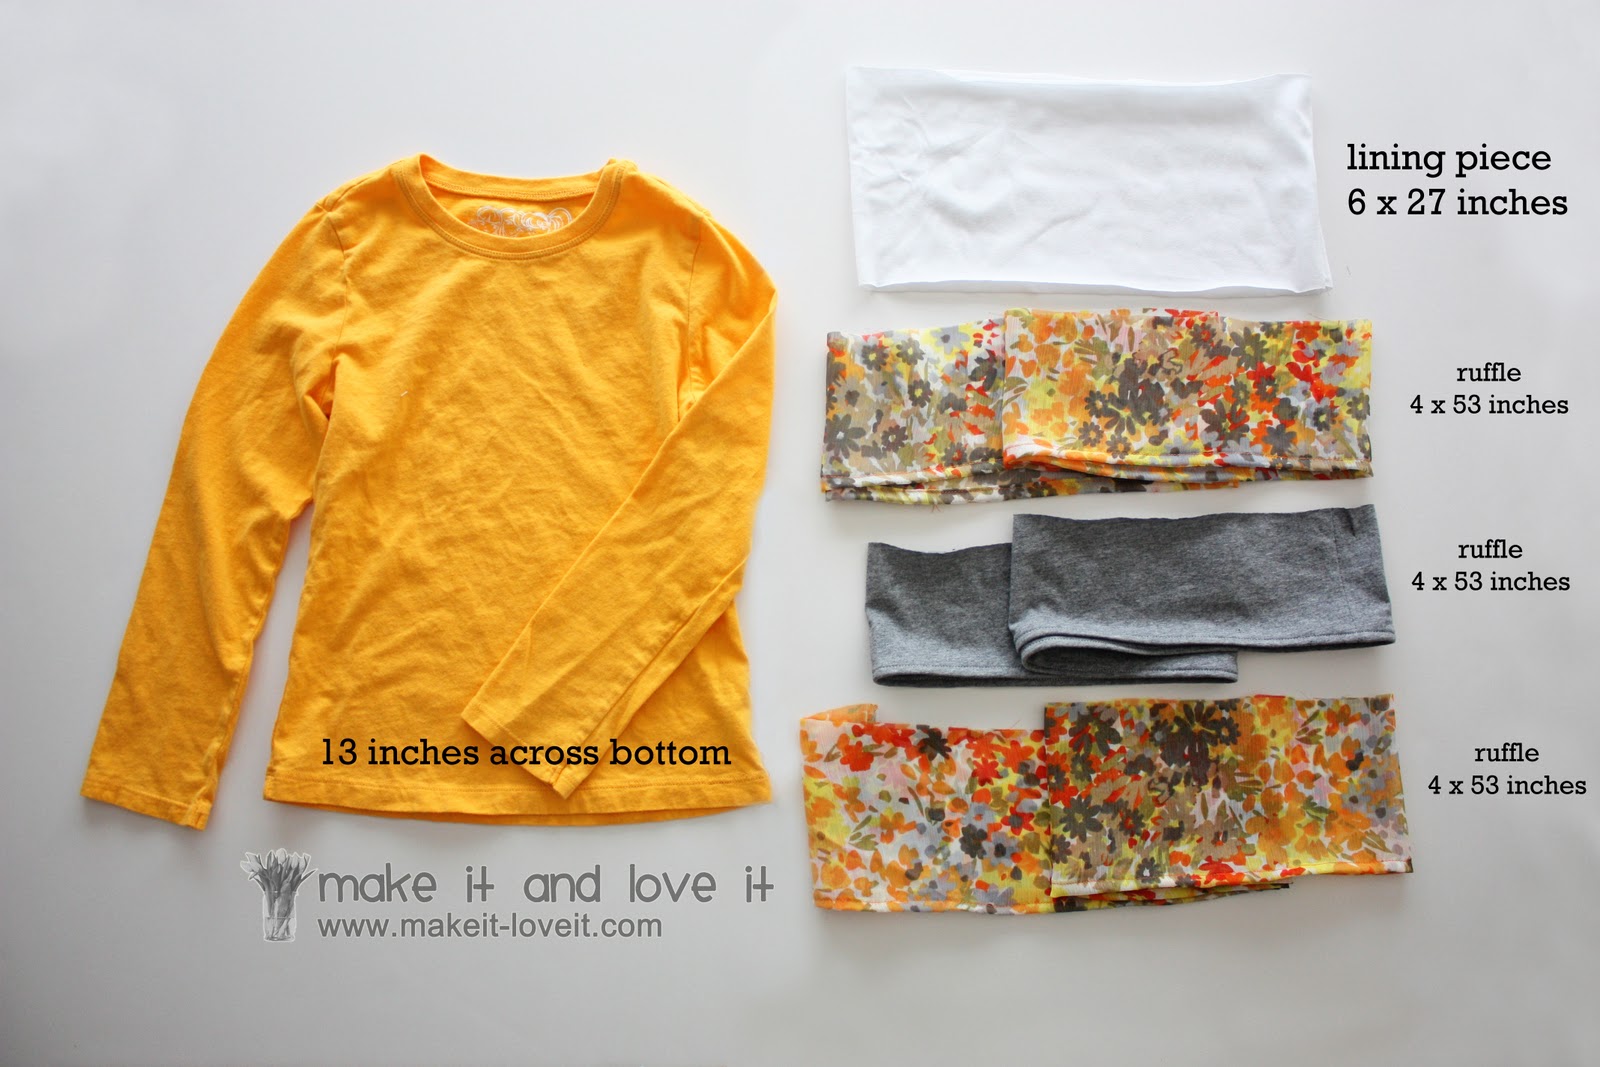
This t-shirt is a 4T and here are the measurements that I used to make mine.
(But depending on the shirt you start out with, all measurements will vary.)
The yellow shirt was 13 inches across the bottom, so 26 inches all the way around. I tried the shirt on my little girl and decided that I wanted the shirt to extend 6 more inches, to just about reach her knees.
So I first needed a lining piece (I used that white jersey knit) where I would attach all of the layers of ruffles…..and then attach the whole thing to the bottom of the shirt. So I made it the same width of the shirt with an extra inch for a seam allowance and then made it 6 inches tall, though after sewing it to the shirt it wouldn’t actually extend the full 6 inches below the shirt. But that’s okay, the ruffles will.
Then, I knew that I needed each ruffle to poke out 2 inches, to give that 6 inches of combined length to the shirt. So I cut each of the 3 strips, 4 x 53 inches and hemmed under the bottom by folding the bottom edge under a 1/4 inch, another 1/4 inch, then sewing it into place. (I got 53 inches by doubling the length of the bottom of the shirt and adding an inch for a seam allowance.) So now each ruffle is 3.5 inches tall, allowing 2 inches to be shown and 1.5 inches for overlap beneath the layer above it. (You can zig-zag the top raw edge of each strip or leave it alone if it’s knit because that won’t fray.)
(And the floral layers of mine are actually some sort of sheer rayon. I’m not really sure what it is. But it’s really flow-y and sheer…..and was some sale remnant I bought. So you can experiment with different types of fabrics…….this isn’t just for knits.)
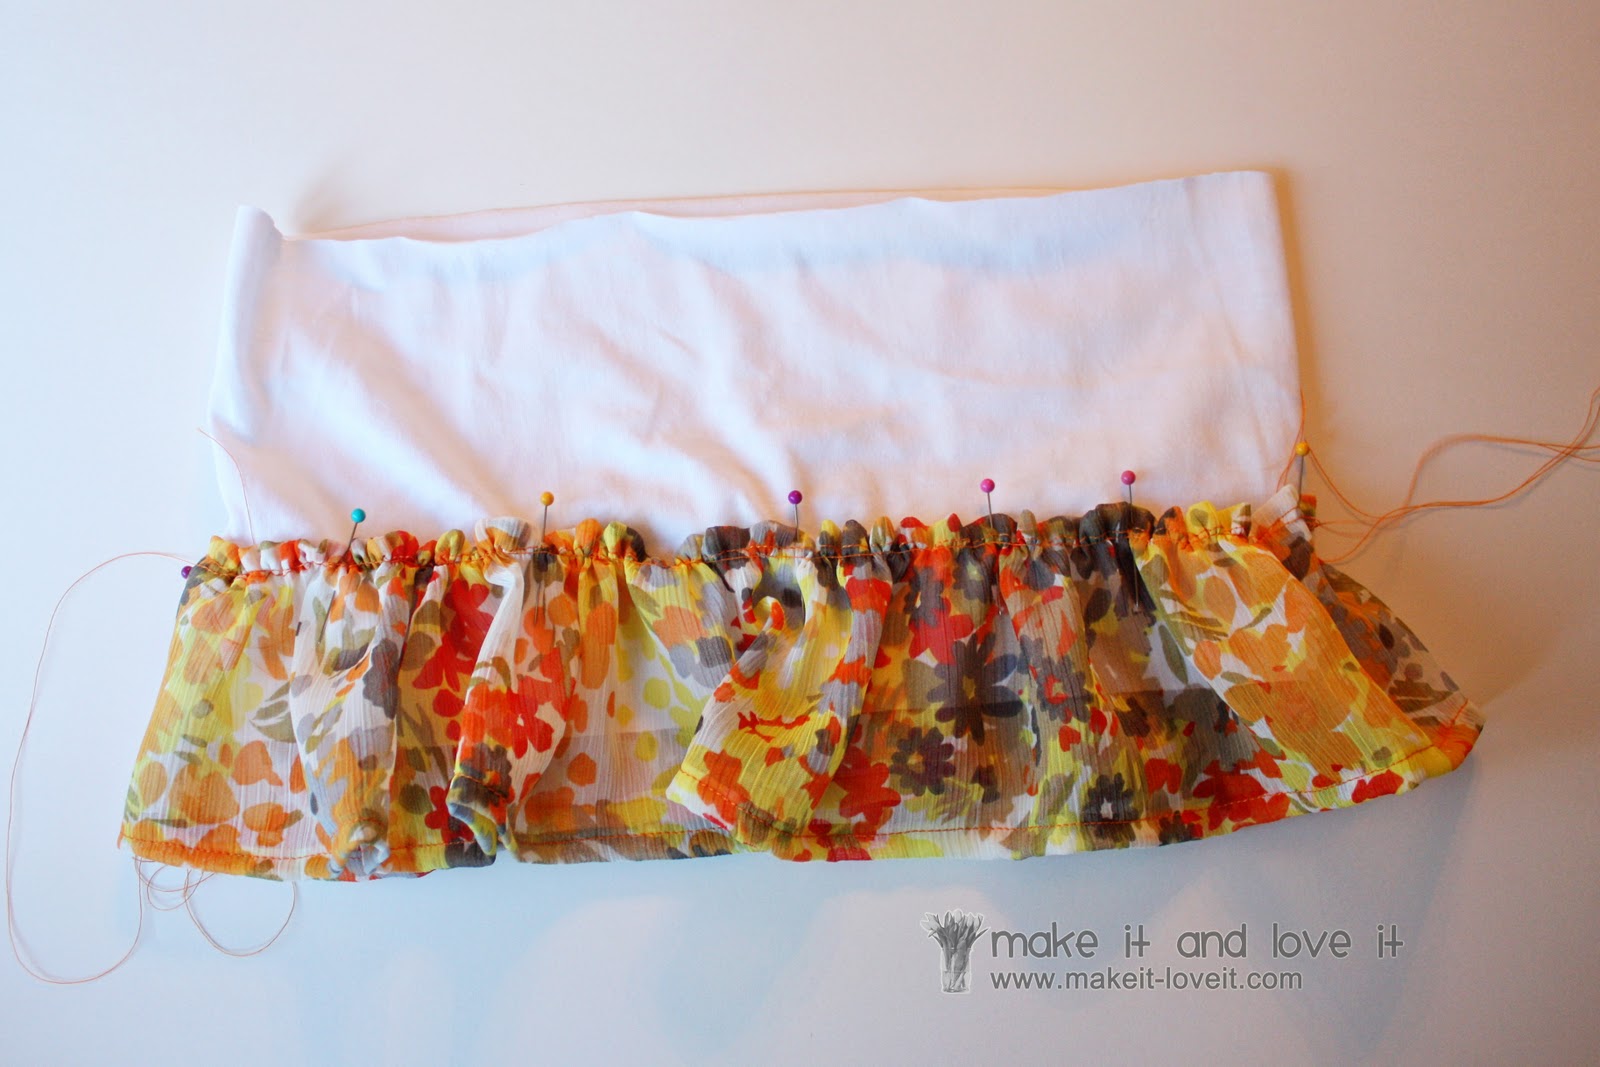
Next, sew each strip into a large circle by sewing the ends together, with right sides together, with a 1/2 inch seam allowance.
Then, make a basting stitch along the top of each strip, a 1/4 inch from the top. (Need help with gathering? Click
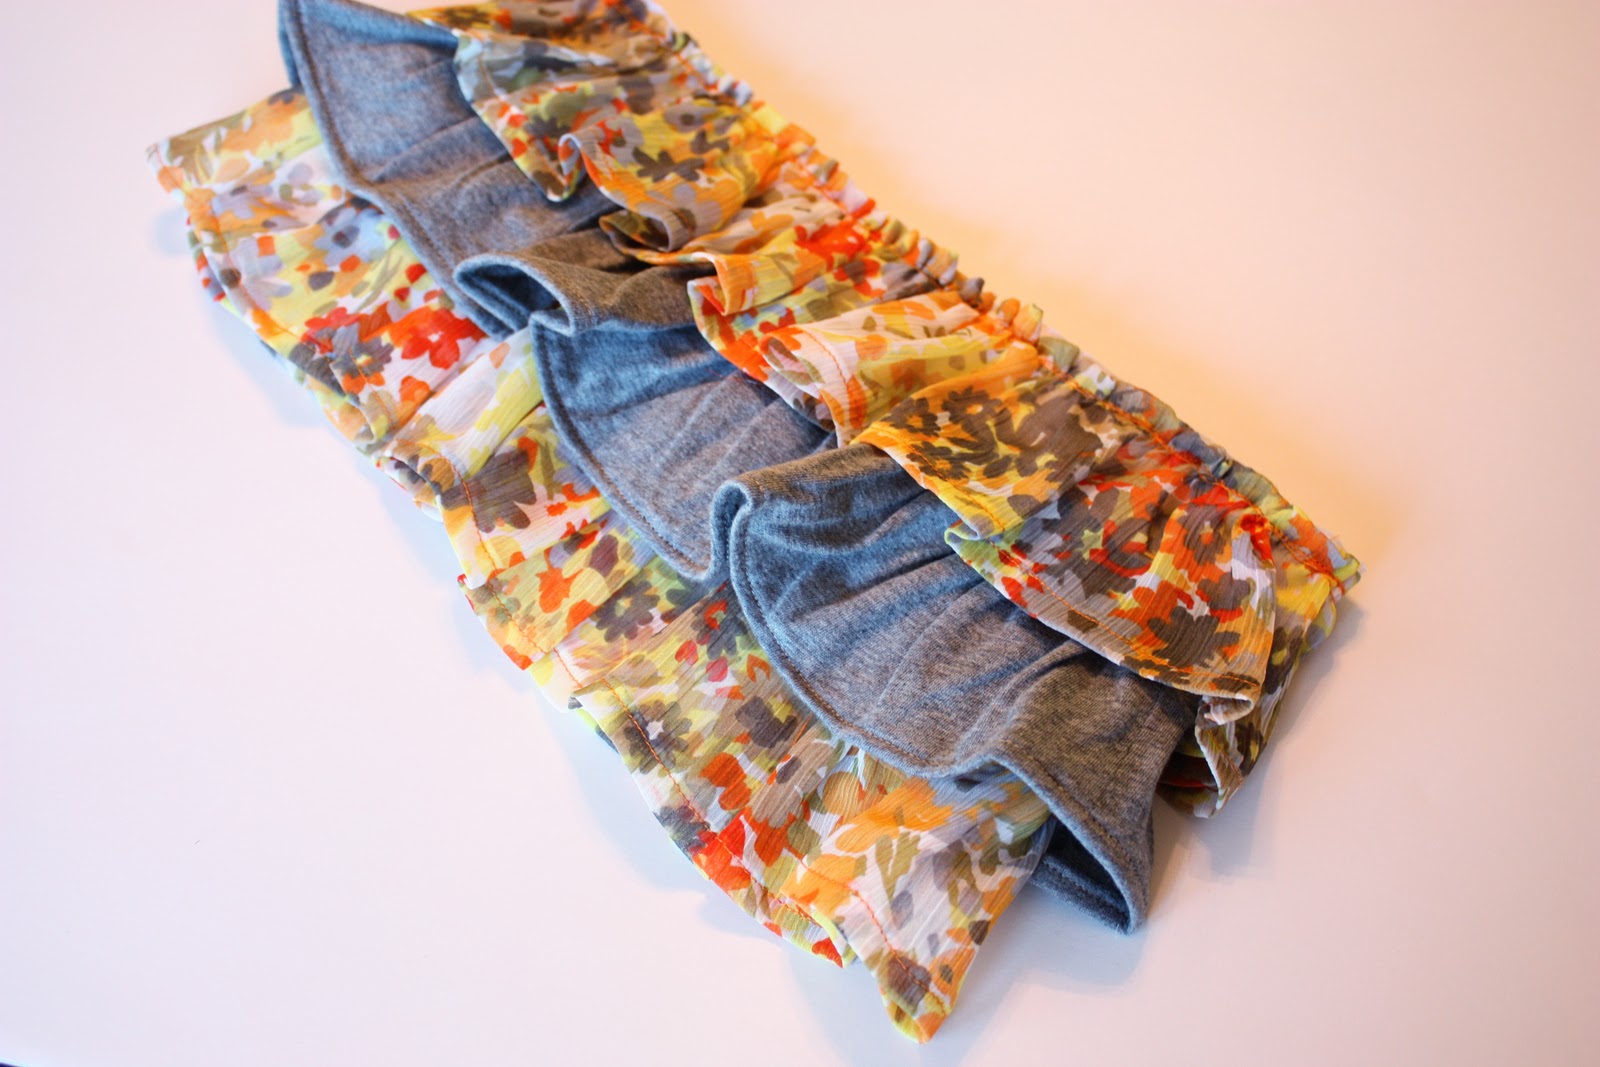
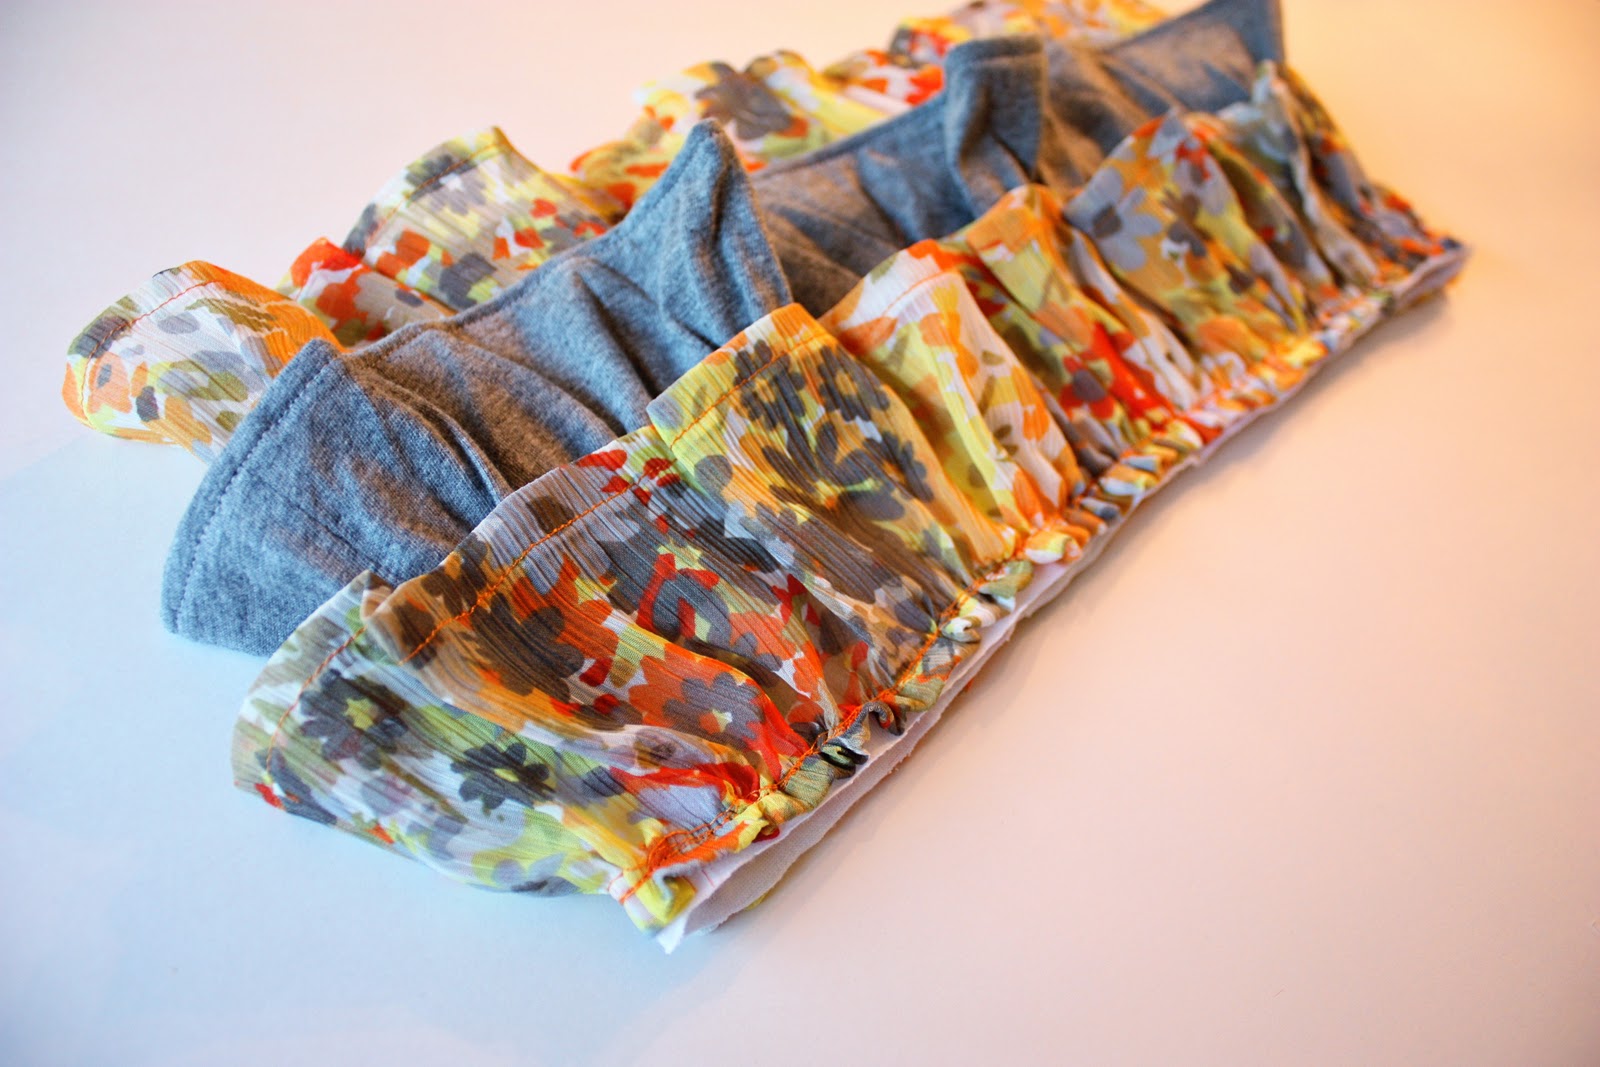
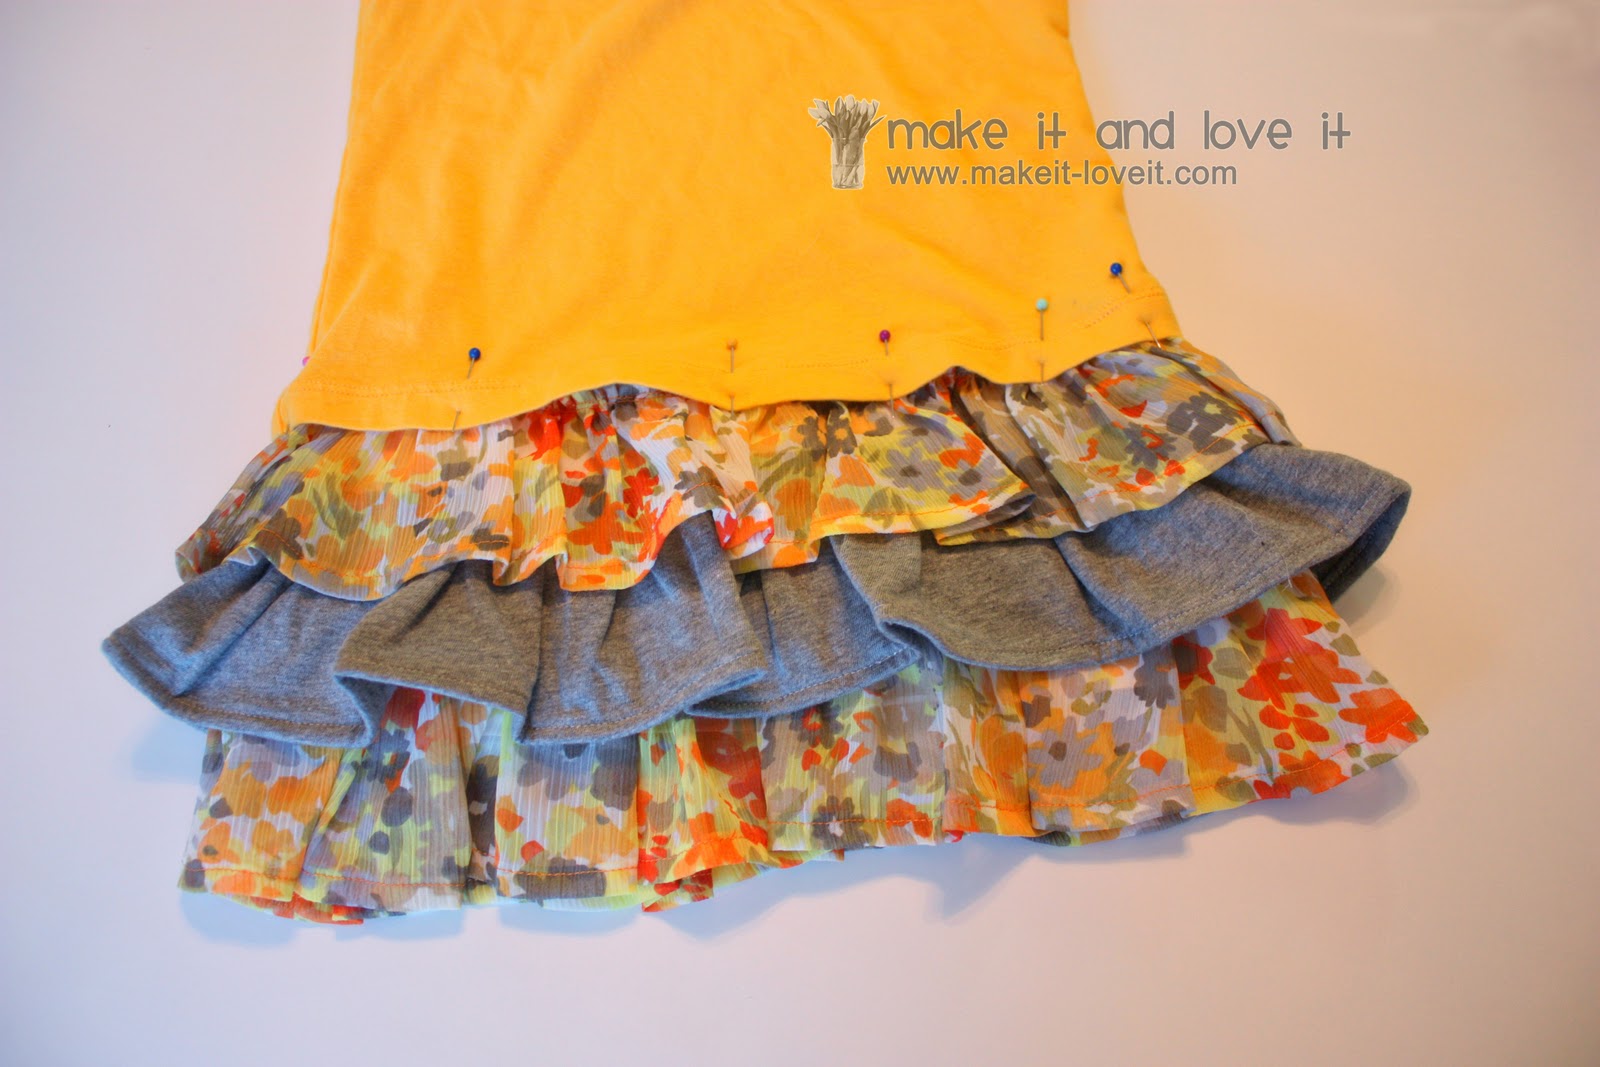
here.) Then gather each ruffle in until it’s the same width as your lining tube. Attach each ruffle to the lining, using pins to keep them in place. Allow the bottom ruffle to overlap the bottom of the lining by about an inch.
Space each of the ruffles on the lining, using pins to attach them all. Be sure that this ruffle section is 6 inches tall (or however tall you’re needing it) plus another inch at the top so that you can attach it to the shirt.
Sew all of the layers into place, sewing right on top of that basting stitch.
(**Hint: I steamed/lightly ironed over the top of the ruffle section, forcing the ruffles to lay down a bit. But don’t press them completely flat or they will lose their flouncy shape.)
Then pin the ruffle section right to the shirt, overlapping the shirt over the ruffles by about an inch. Measure as you go to be sure that it’s the length you want it and that it’s an even length all the way around.
Then sew the 2 pieces together, using 2 seams to really secure them together.
(**Hint: Increase your stitch length while sewing these seams, so that it doesn’t stretch the fabric while sewing. Then steam/iron over top to flatten it down and eliminate any bumps from sewing.)
And that’s it.
A new little dress for your little girl to flounce around in.