Home » DIY Tutorials » DIY Sewing » Sewing: Clothing » Accessories » 2-in-1 Bag: Stroller Bag into a Messenger Bag
2-in-1 Bag: Stroller Bag into a Messenger Bag
September 20, 2010 - By Ashley Johnston 195 Comments
Looking for the Pip and Bean giveaway? Scroll down or click here.
. . . . . . . . . . . . . . . . . . . . .
Okay, stroller users.
We need to talk about a few things.
Do you have one of these bag problems while strolling around with your little kiddo(s) in tow?
- Your purse/bag handles aren’t long enough to fit over both stroller handles, making it difficult to find a place to hang your purse?
- You decide to sling both straps over one of the stroller handles but it hangs too low and then wacks you in the leg each time you take a step?
- Or maybe you skip the purse all together and just throw your wallet, some diapers, your keys and phone down into the storage basket below the stroller. But then you arrive somewhere where you can’t take the stroller inside, so you have to grab your loose things from below, plus a squirmy child, and enter your destination. Eek.
Can you relate?
Well, we are heading down to FL for a week getaway and my word, I’m tired of the bag/stroller dilemma.
So I needed a quick-acting conversion bag.
So, here’s my solution.
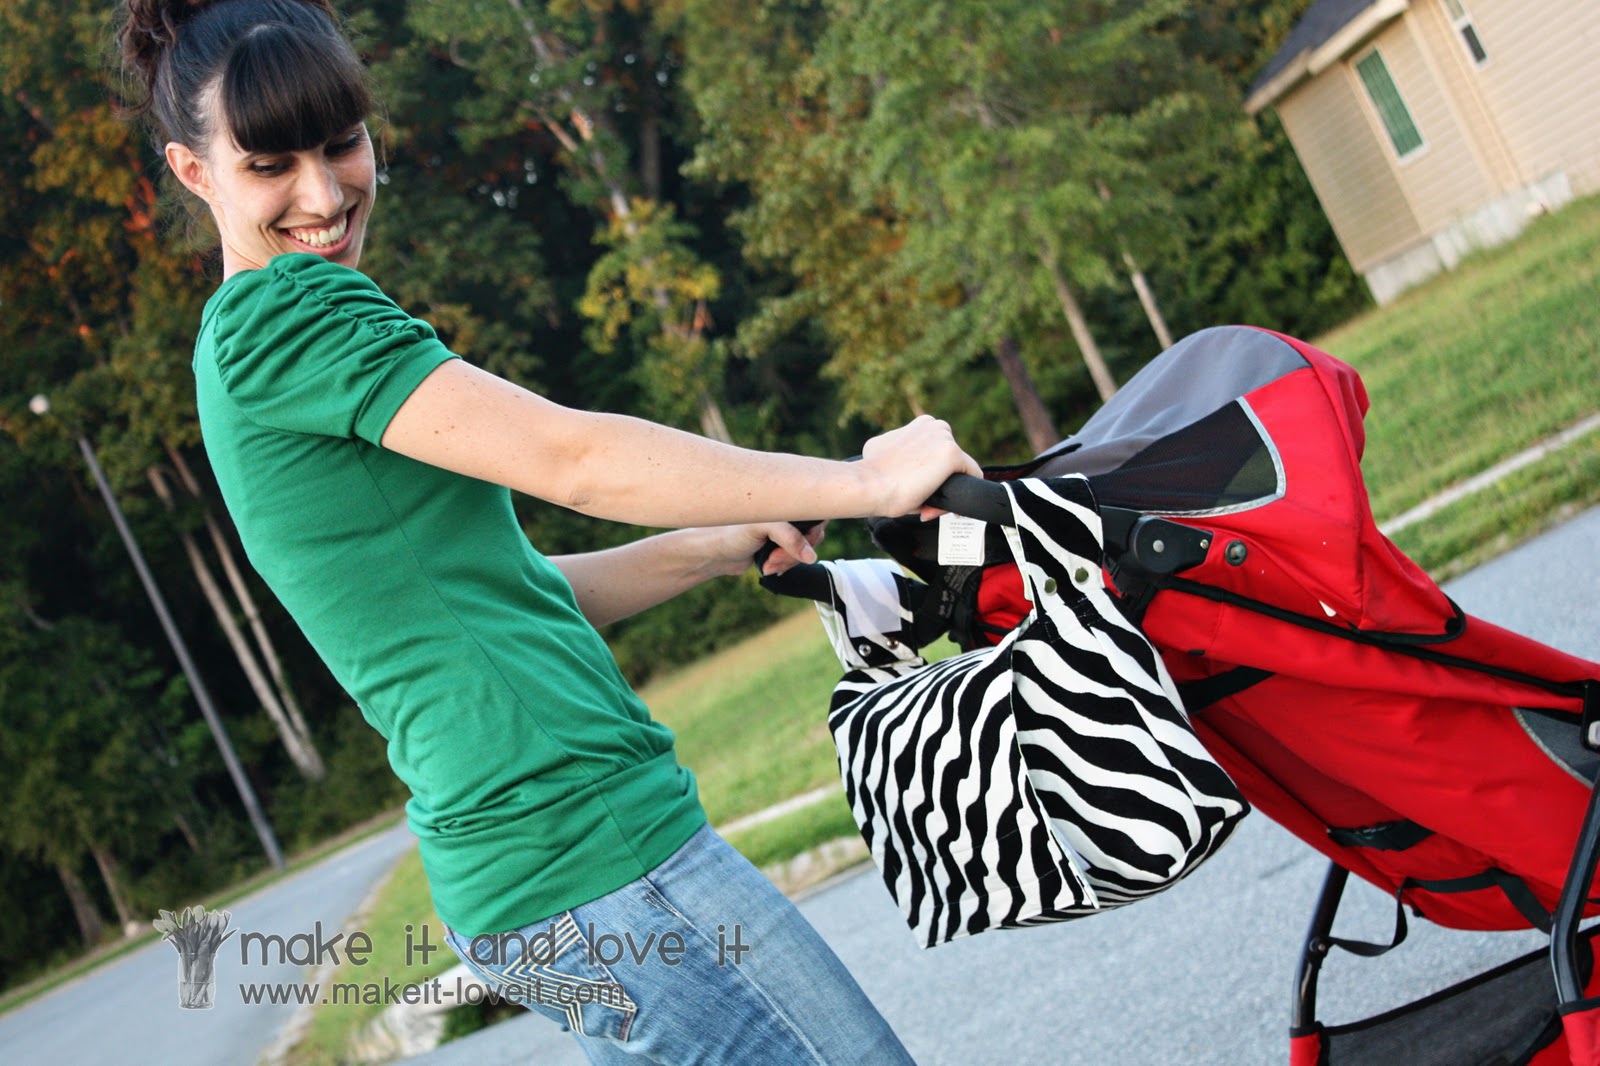
This bag begins as a stroller bag with 2 snap on straps on each side, holding the bag up high and out of the way. It also keeps the bag from slipping off the stroller handle(s).
The heavy duty snaps attach and release quickly, making the transformation speedy.
So when you’re ready to convert it into a messenger bag, just remove the permanently attached longer strap that is hidden inside of the bag while not in use…
Then un-snap the two side straps, removing the bag from the stroller.
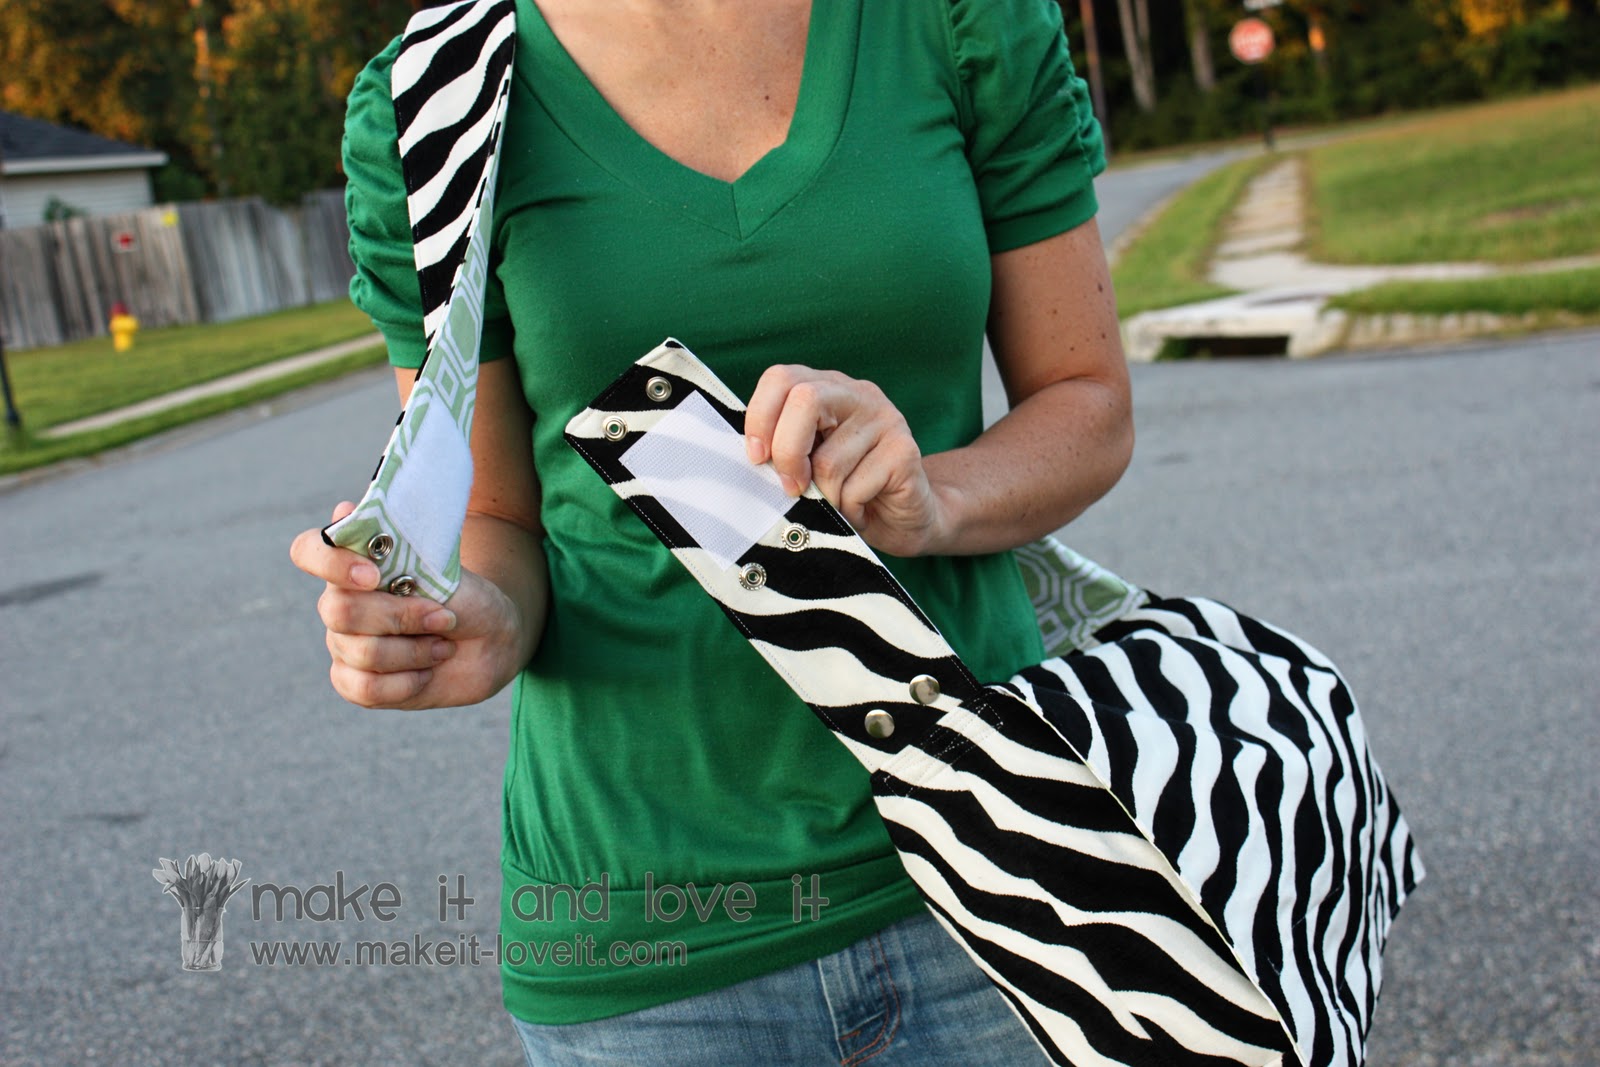
Next, sling the long strap over your shoulder and attach it to the short strap that was previously used as one of the stroller straps.
Then, just snap the two snaps, press the velcro into place (for added strength)………
………and you’re ready to go.
The other short strap that is not in use, can be re-snapped into a loop and then used as a toddler handle if needed.
(Remember this post here? Sometimes the little walkers just need something to hold onto.)And then when you return back to the stroller, just quickly re-attach the side straps to the stroller, tuck the long strap back into the bag, and you’re on your way again.
And oh my, thanks to this sweet friend of mine for demonstrating her little guts out for me.
Made it nice and easy for me.
Thanks Lizzie. You’re great. And your spunk……..ahhh, it’s refreshing.
Anyone in need of their own 2-in-1 Stroller/Messenger Bag?
Here’s how I made mine.
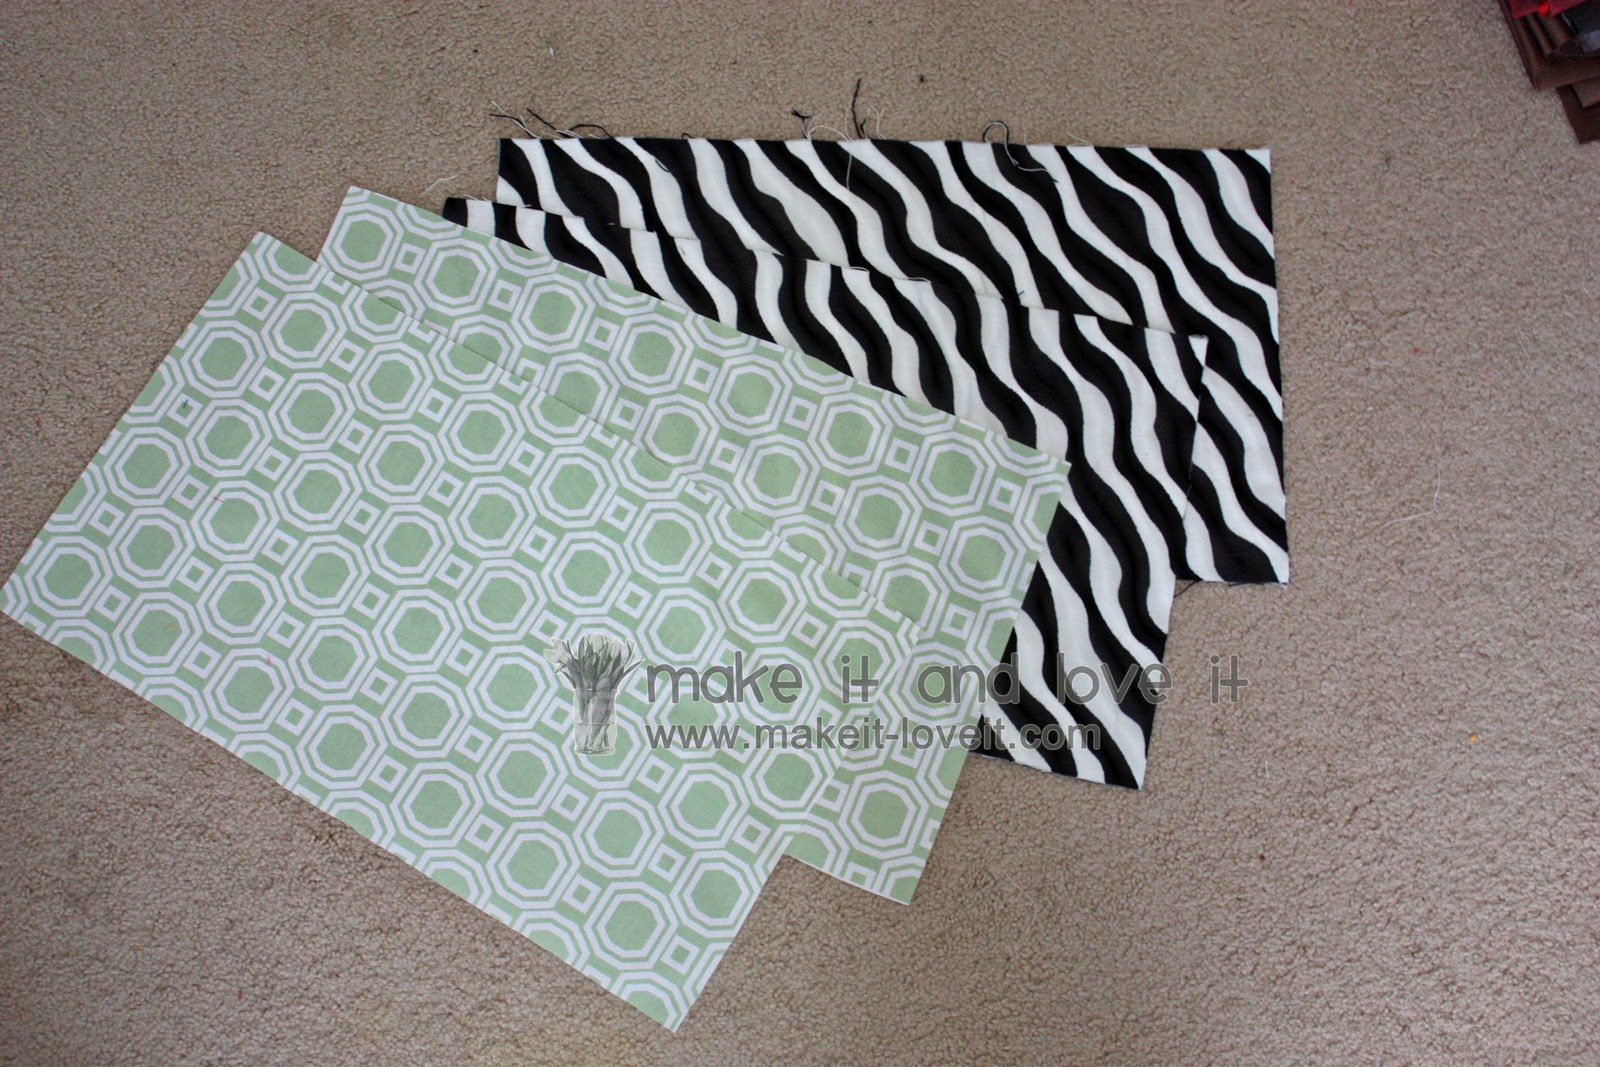
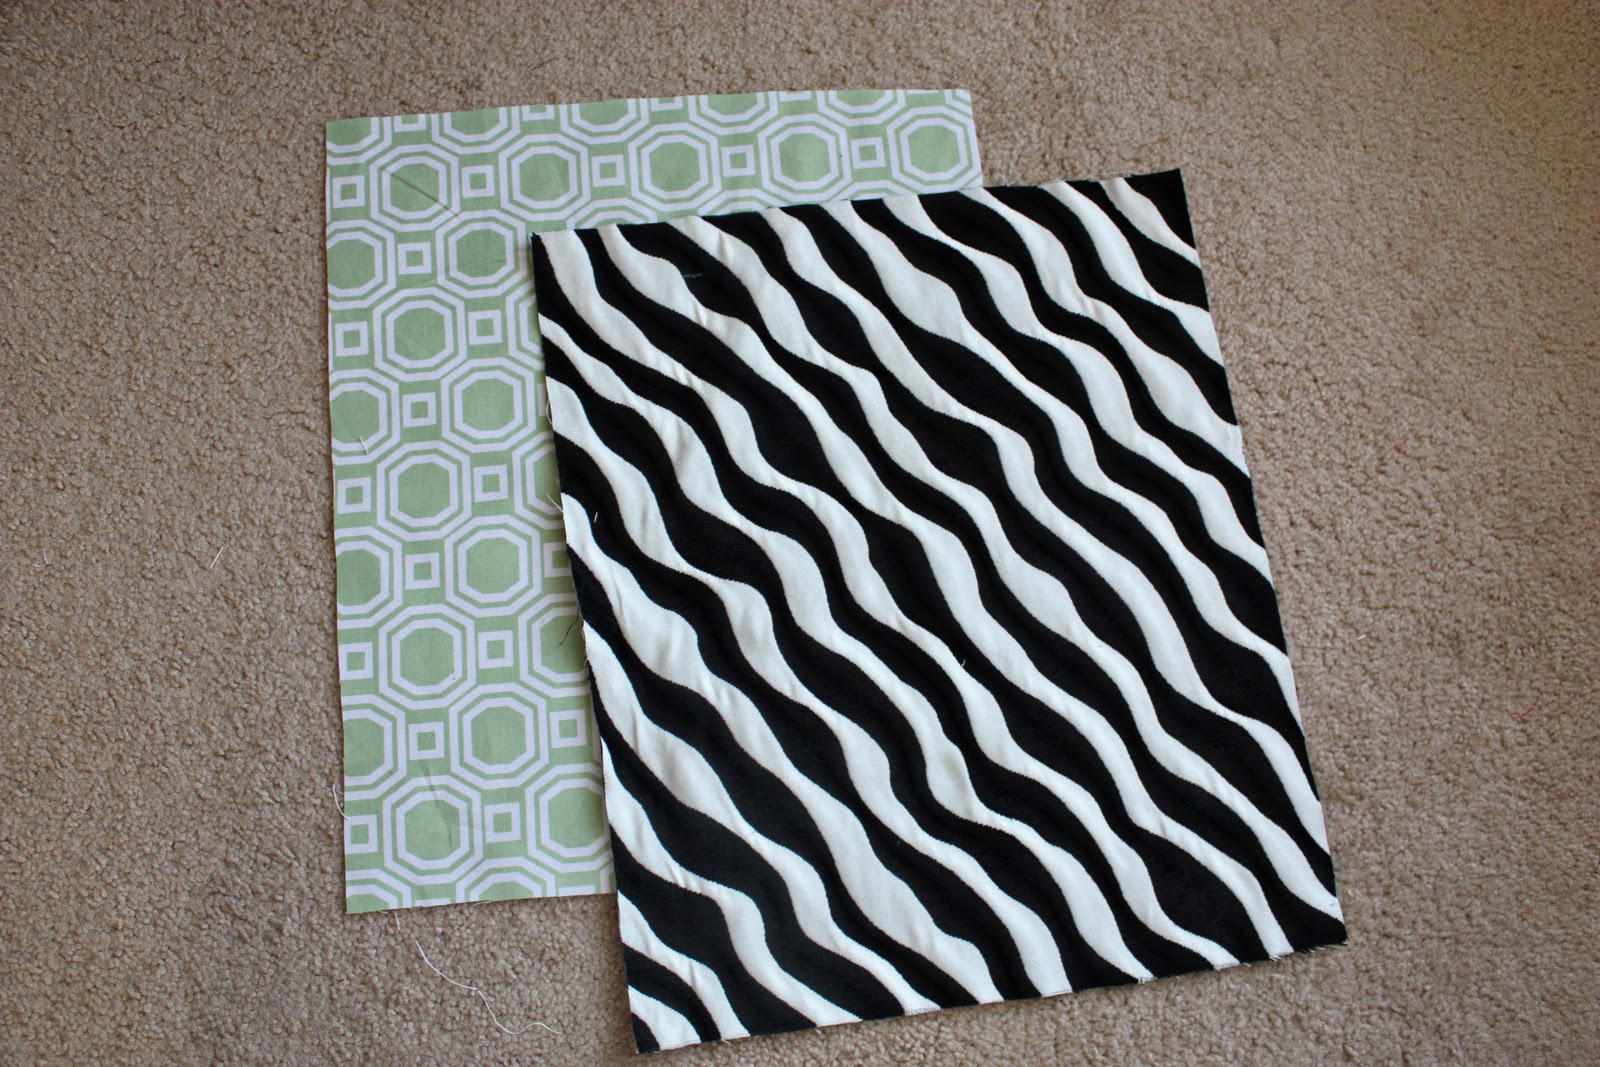
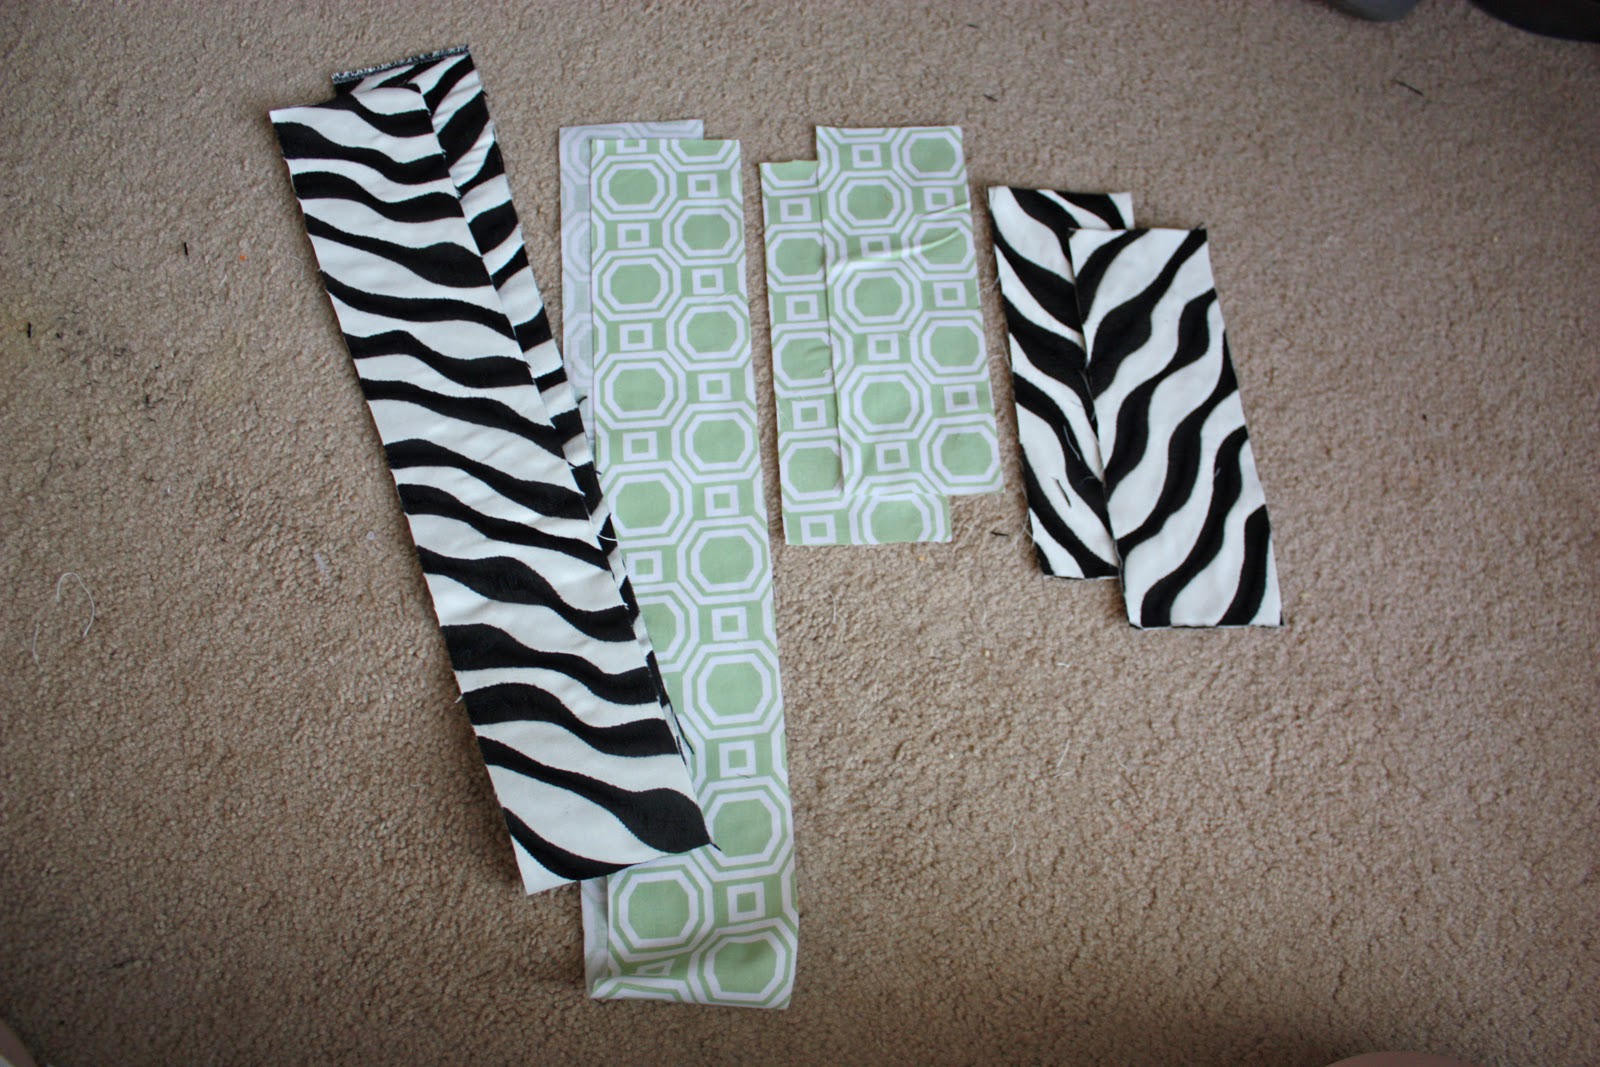
I started out with two outer pieces of fabric and two pieces of lining, all of which measured 12 x 22 inches. (My outer pieces of fabric were very sturdy pieces of upholstery fabric. The lining pieces are just plain ‘ol cotton. Worked great for this project.)
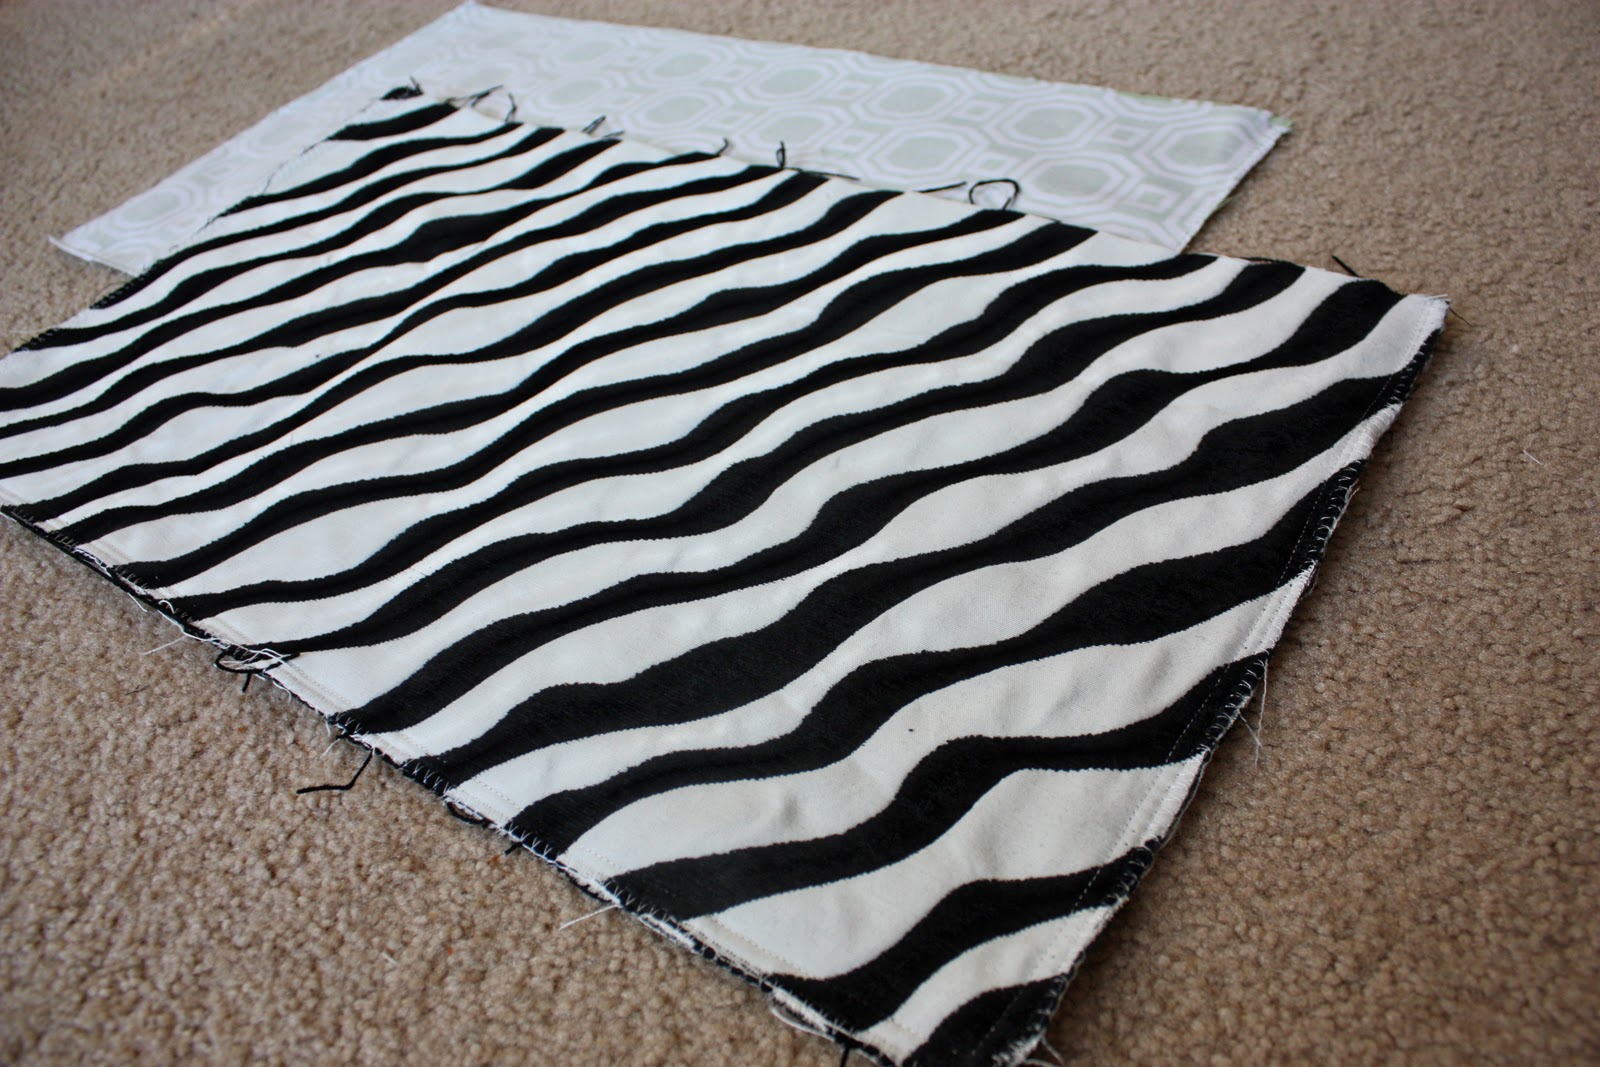
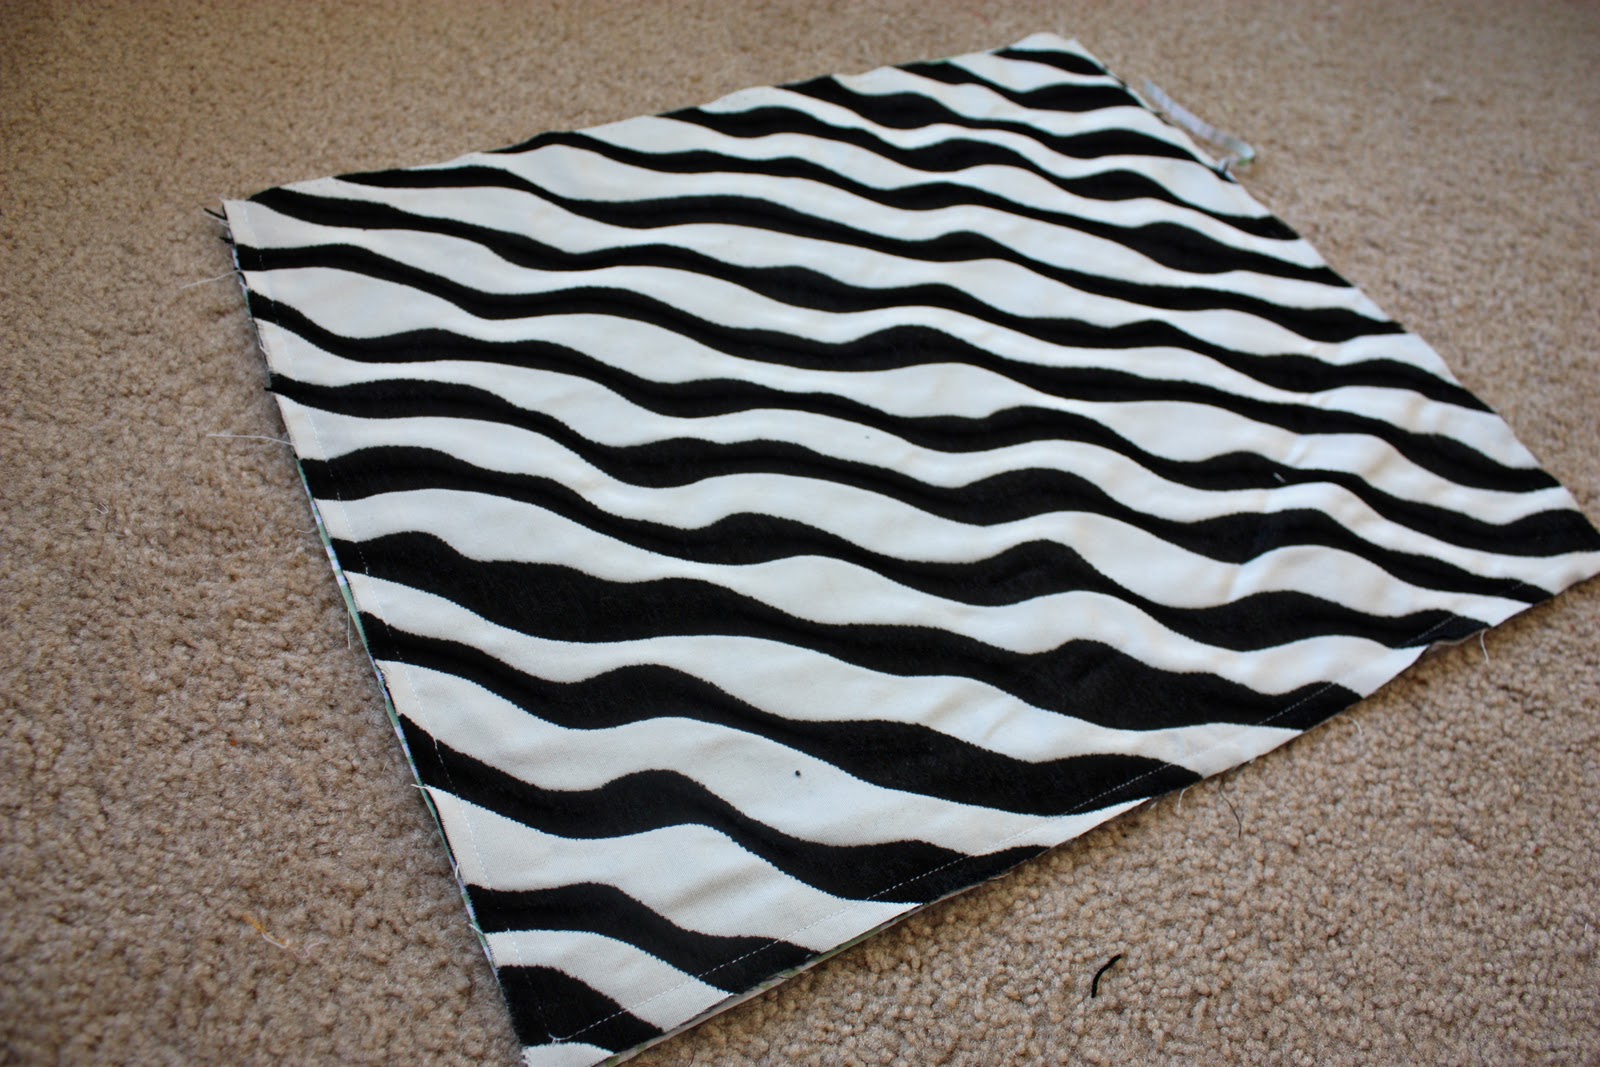
Then I placed the two outer pieces of fabric together with right sides together and sewed along the short sides and along the bottom, using a 1/2 inch seam allowance……and left the top open. Then I zig-zagged around those 3 sides as well. I did the same thing with the 2 lining pieces.
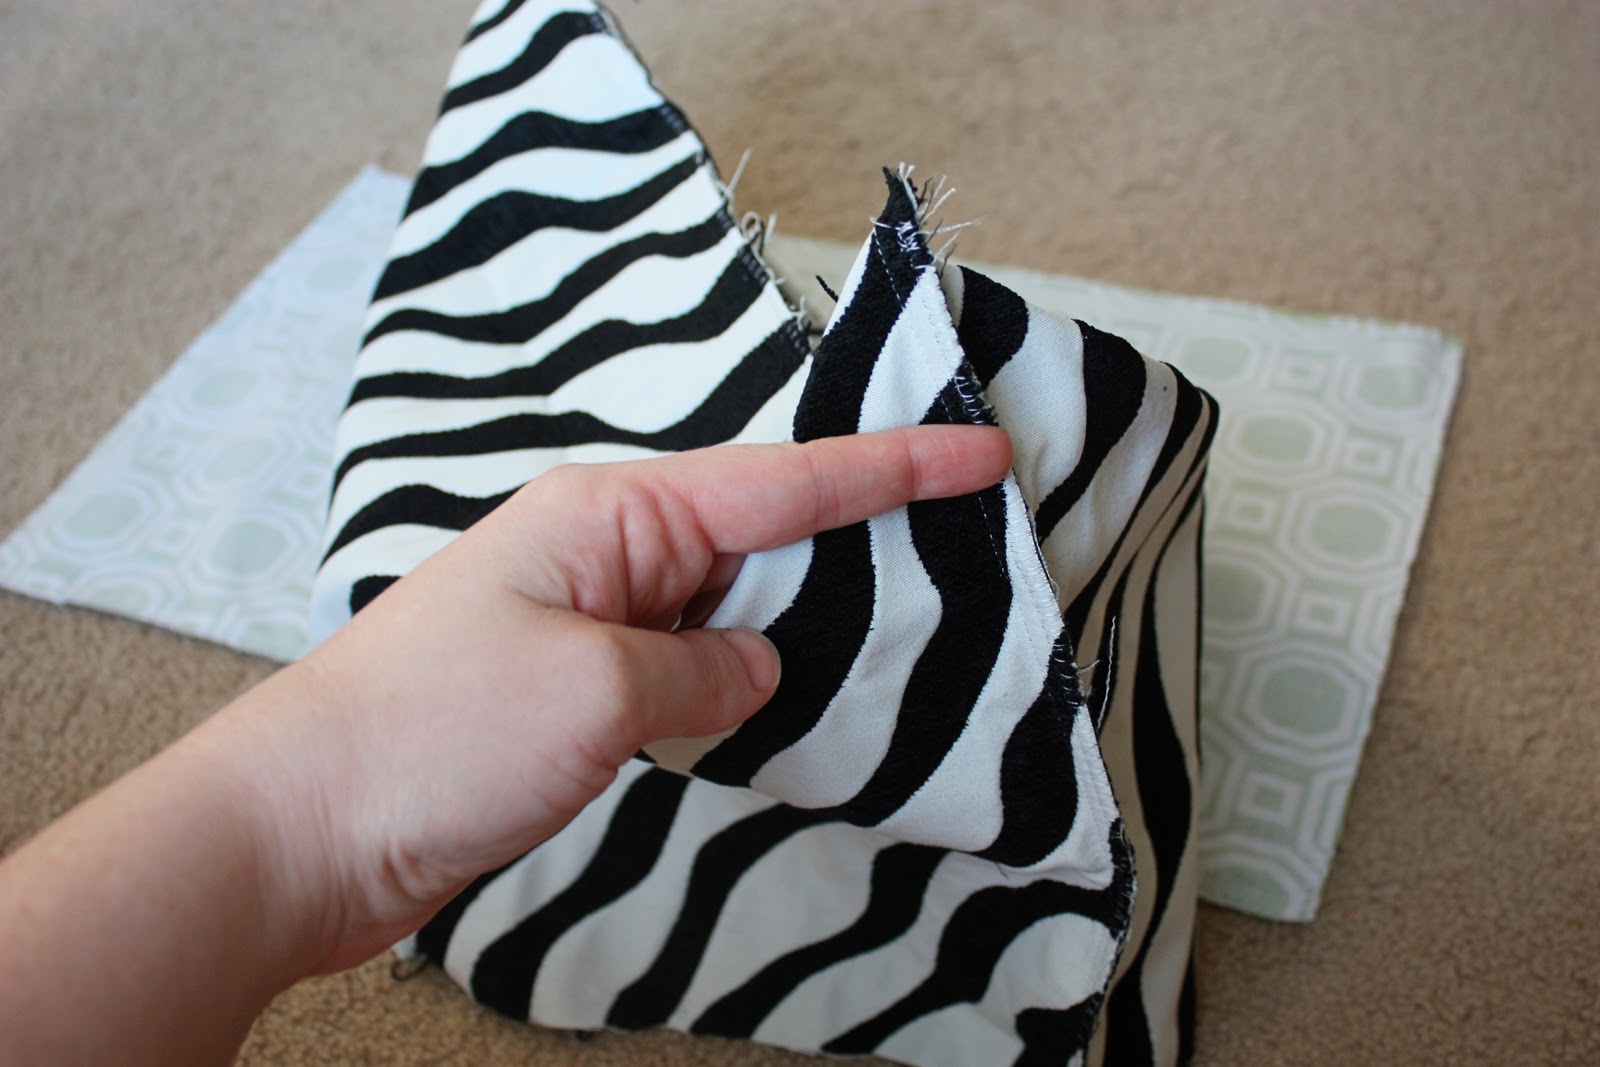
Then, I grabbed one of the bottom corners, stuck my hand up inside the bag, and then opened up the fabric a bit so that I could fold the corner down like shown below. Now the side seam of the bag is going up the front of this new point and the bottom seam of the bag is going directly down the back of this new point. Make sense?
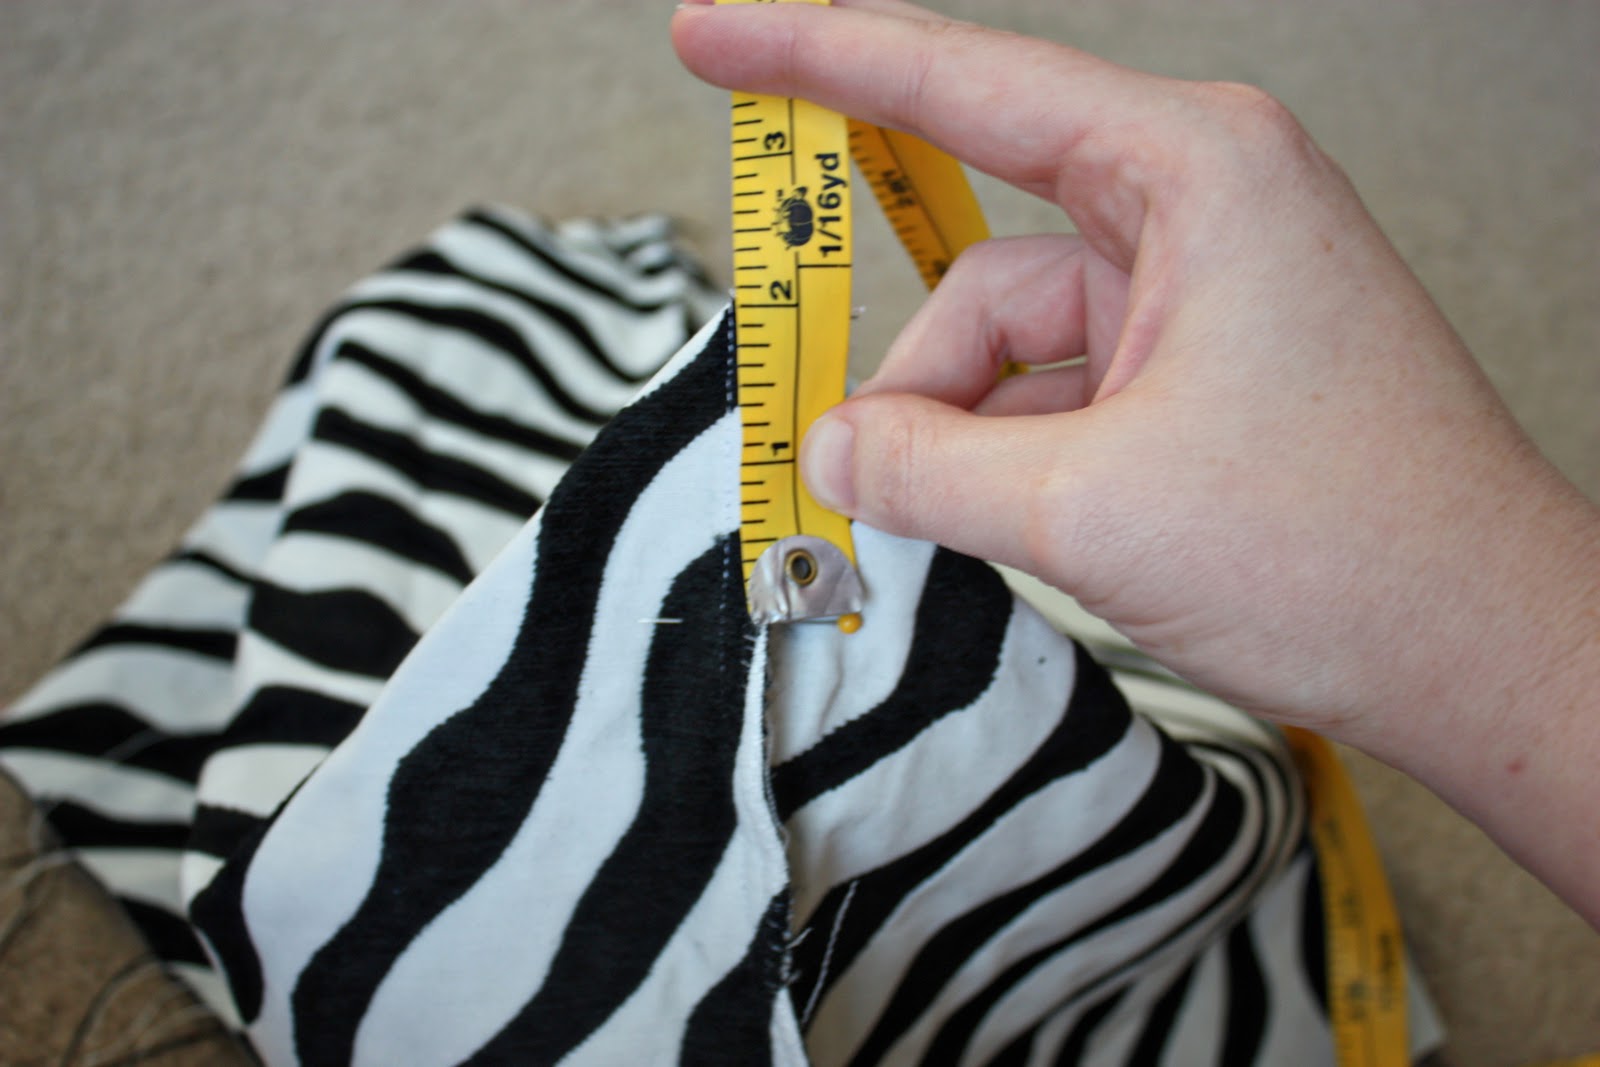
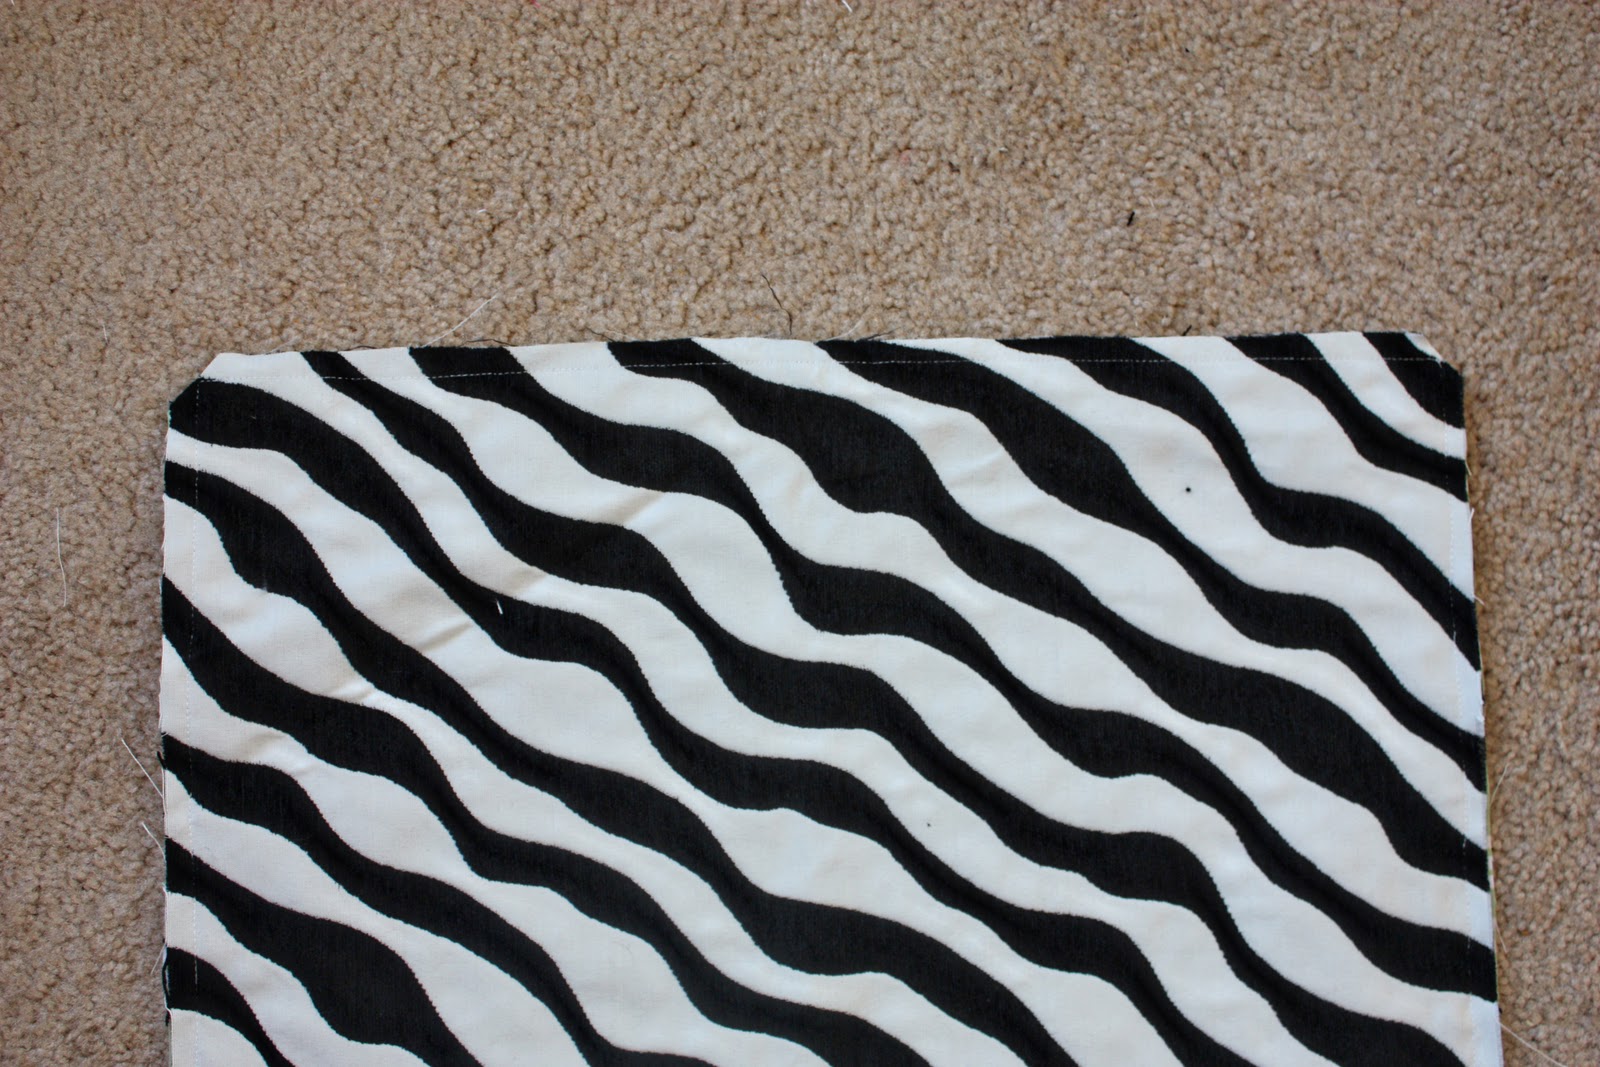
Then, keeping the folded corner exactly in place, I measured down two inches from the tip of the point, and placed a pin in place.
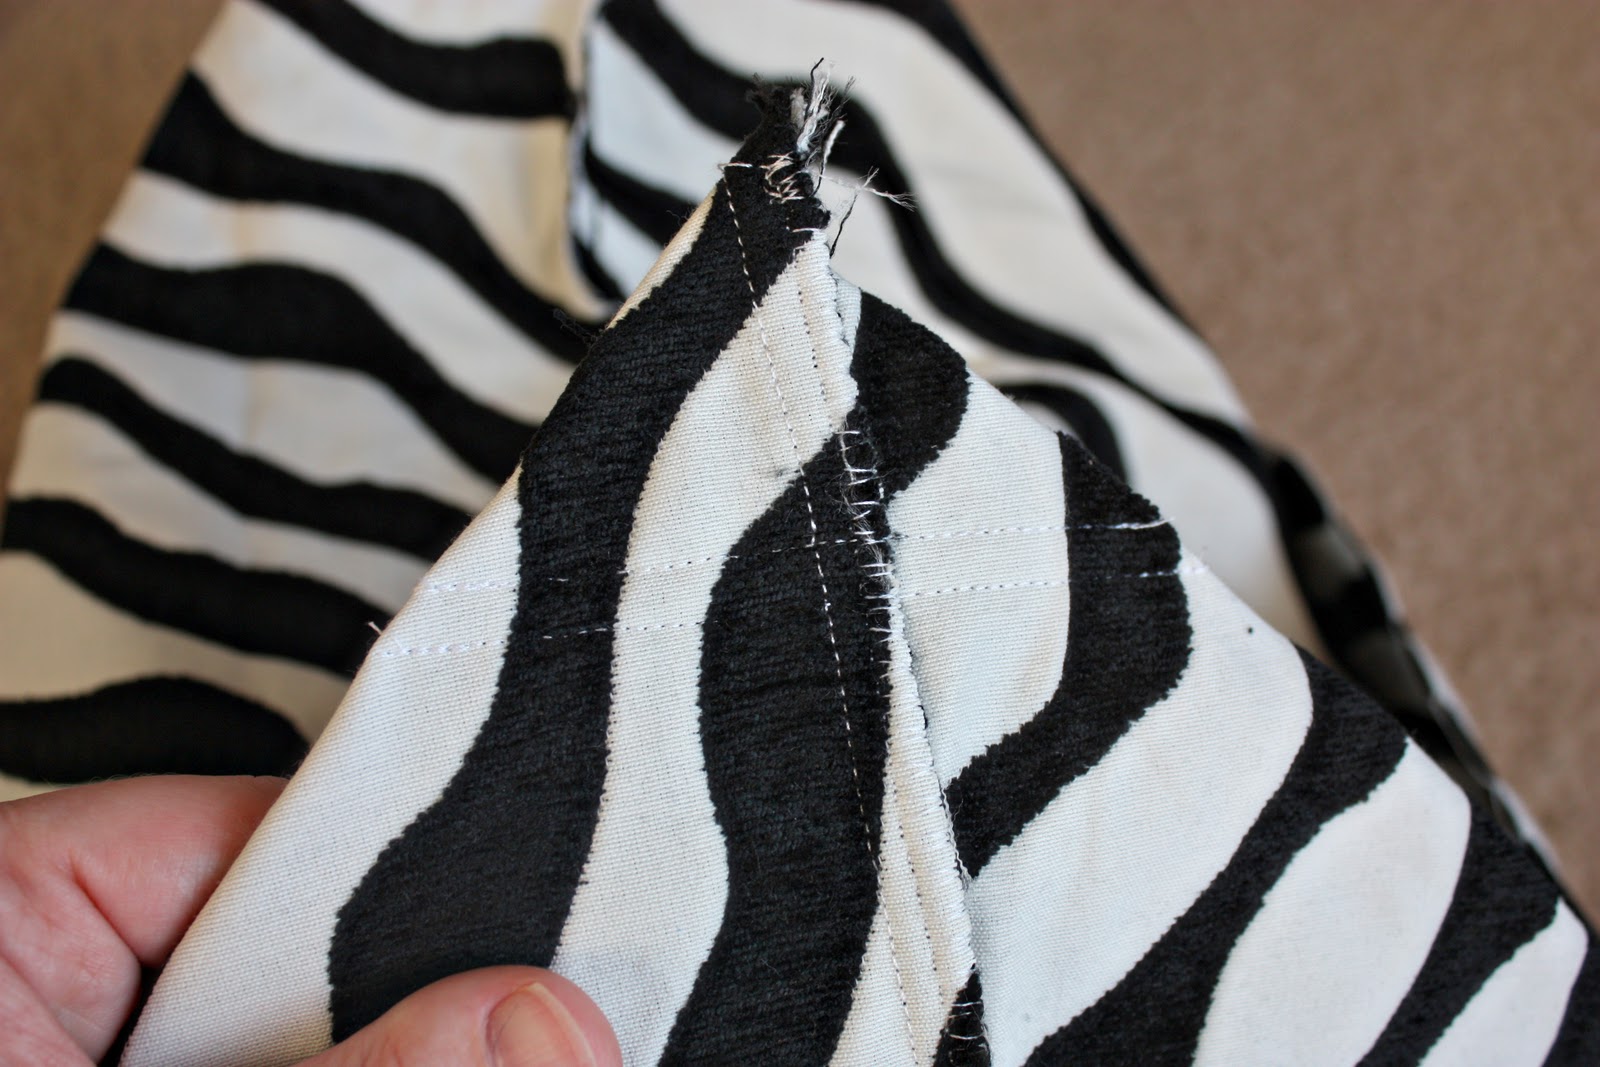
Then I sewed a straight line right across. And then another line right above that, to secure it in place. Repeat with the other corner and then both corners of the lining.
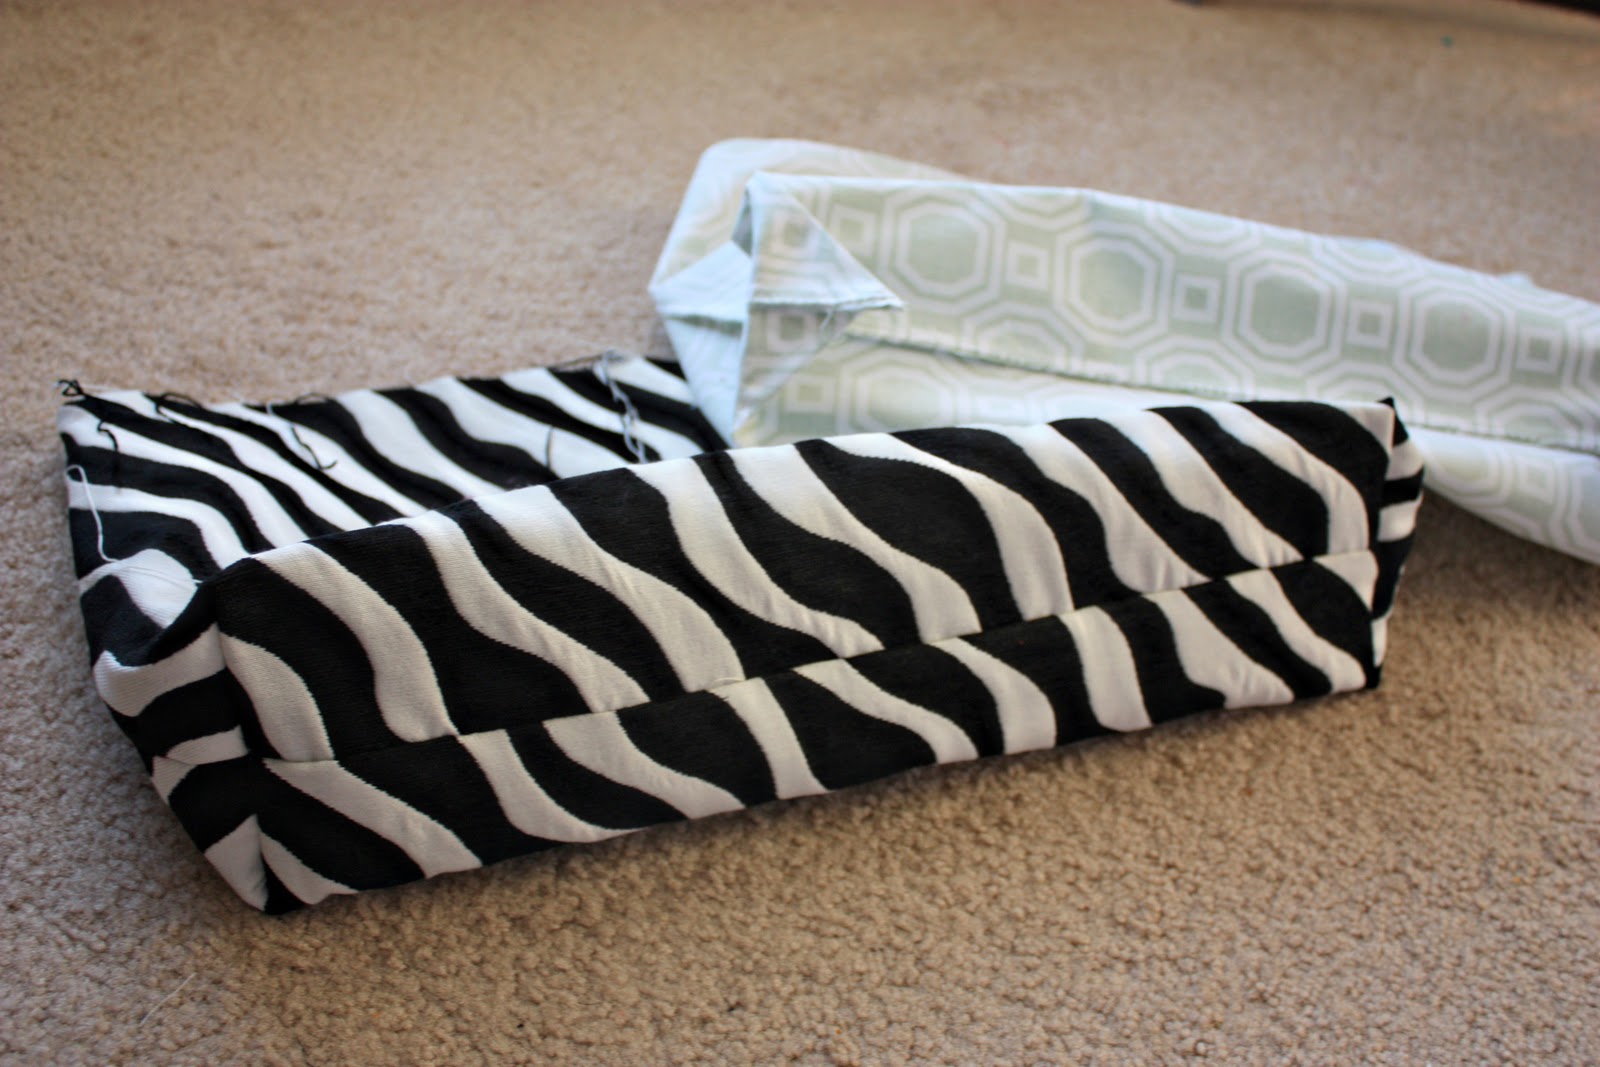
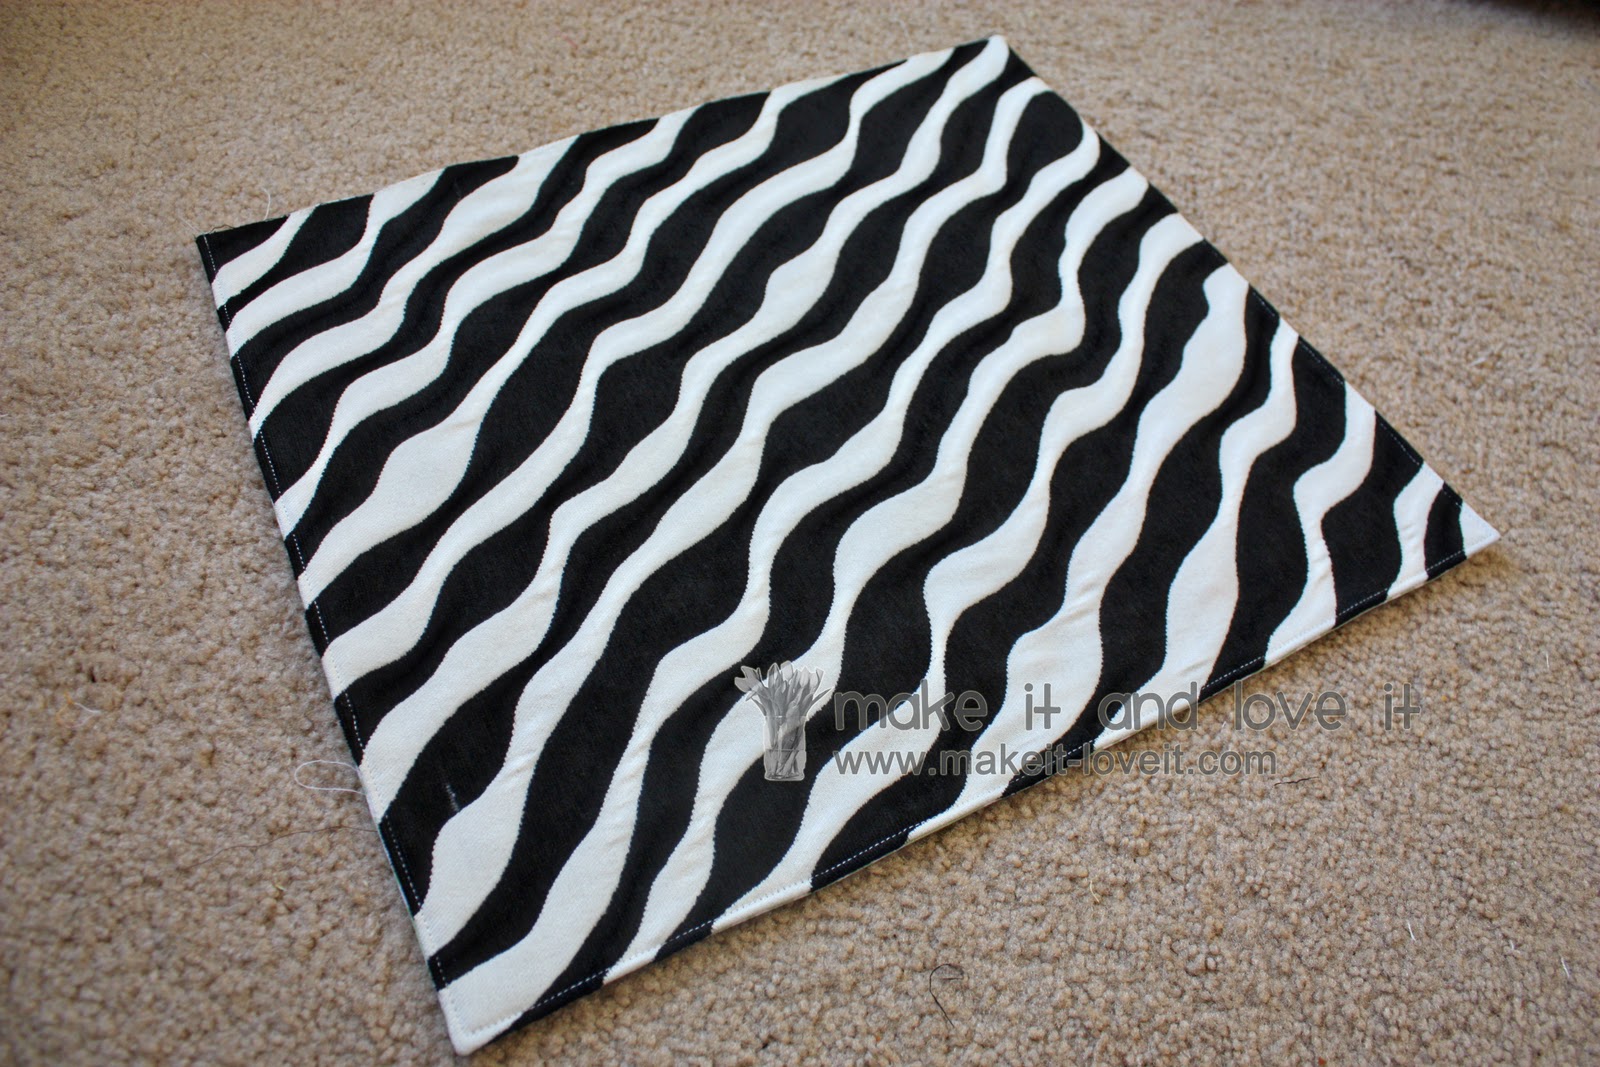
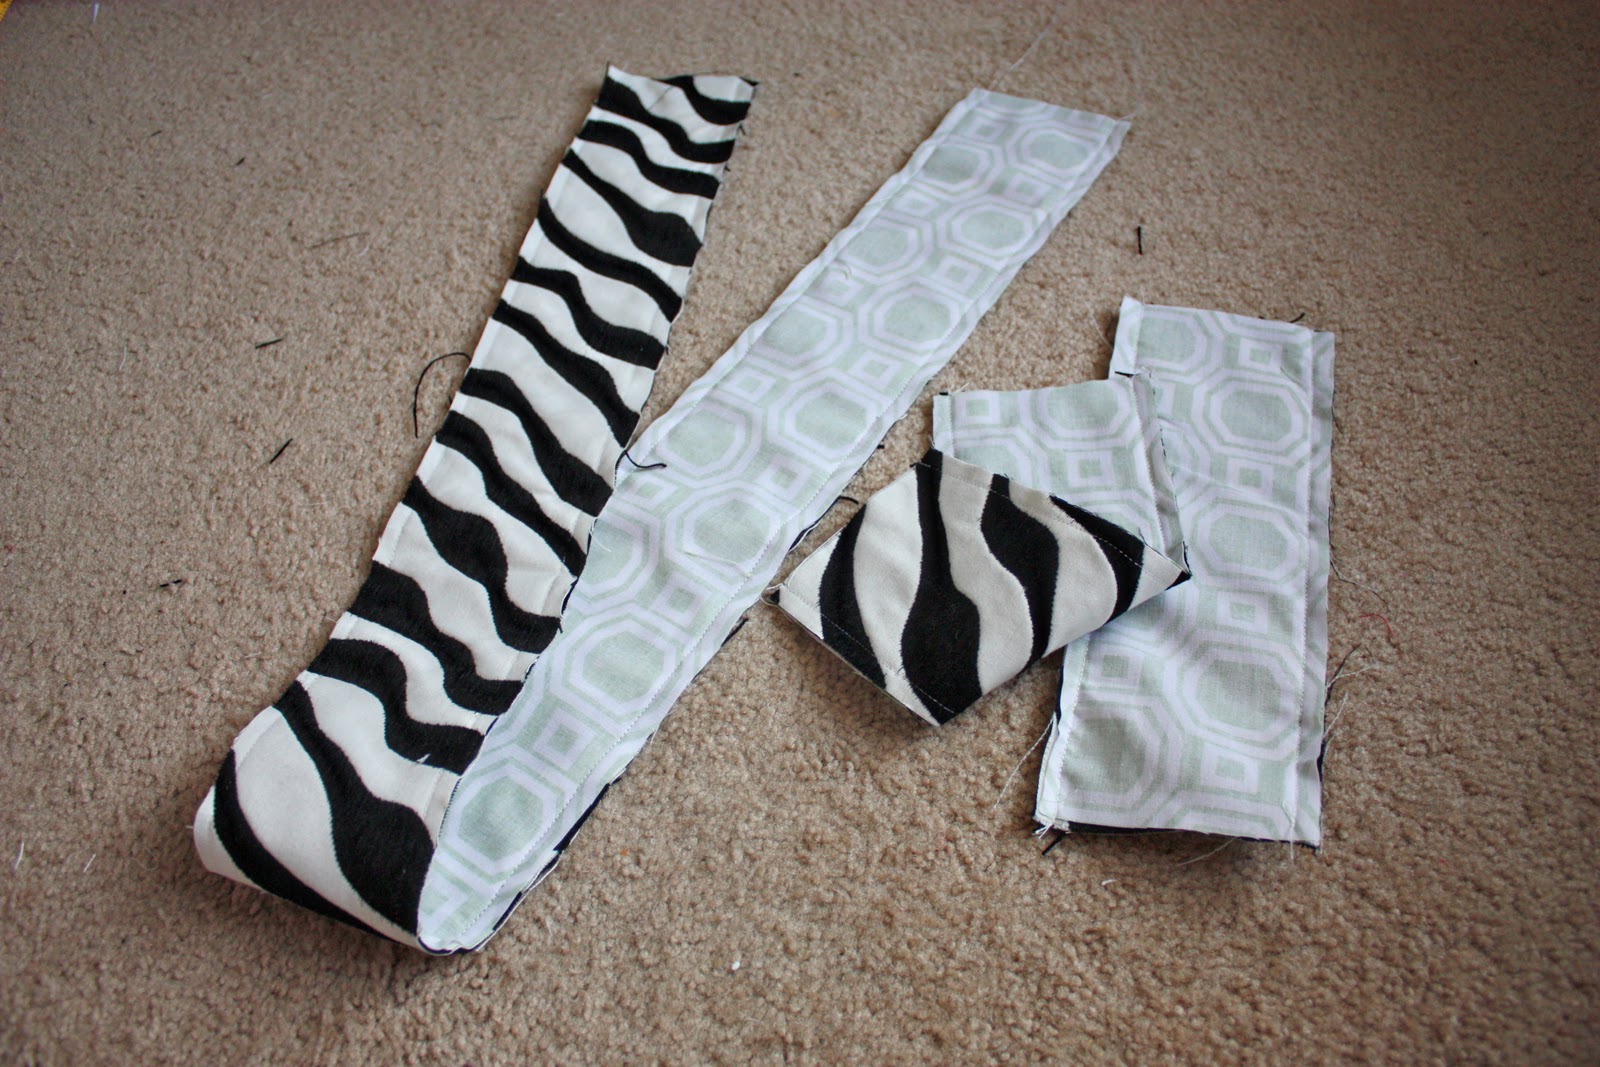
Then turn the outer fabric right side out and leave the lining inside out………and iron your seams flat as best you can.
Next cut out two pieces that are 17.5 x 14.5 inches, to be used for your bag flap.
Place the two pieces together with right sides together, then sew along the sides (14.5 inches) and the bottom (one of the 17.5 inch sides). Leave the top open.
Then clip the two bottom corners. (Not sure why? Take a look at why,
here.)
Then turn the bag flap right side out, poke out the corner and then press flat. Then top-stitch around the 3 sides, making a seam about an 1/8 of an inch from the outer edge.
Onto the straps.
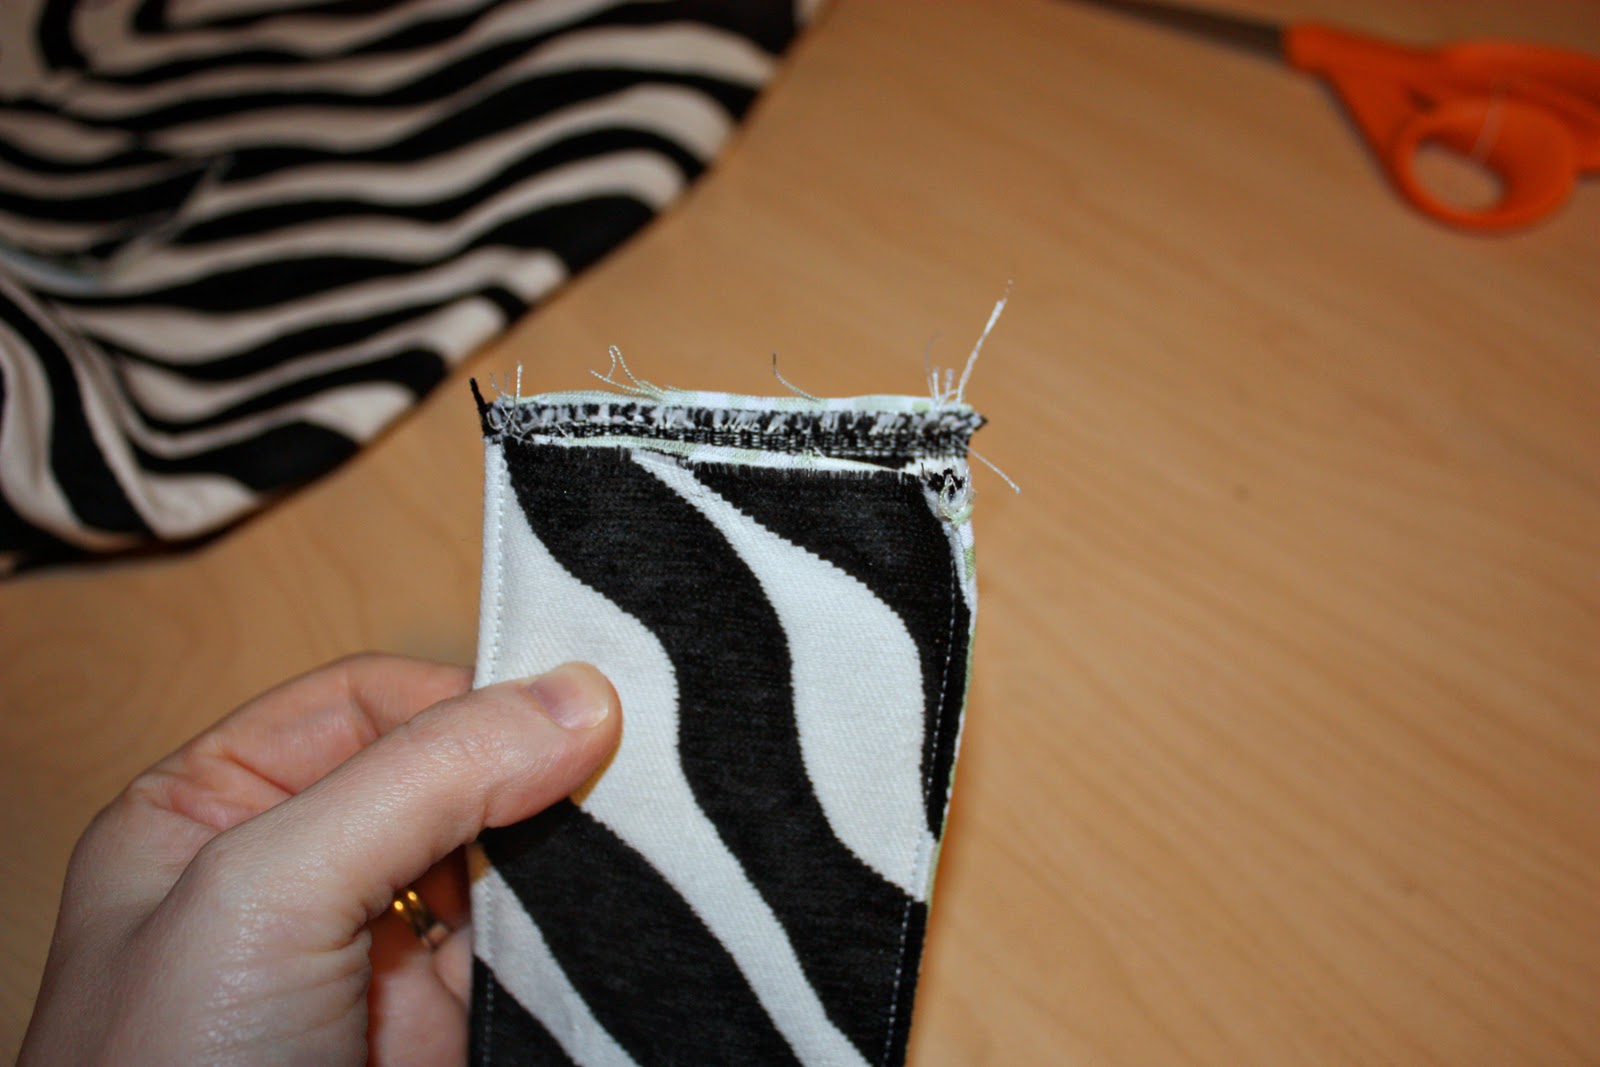
Cut out one outer piece of fabric and one piece of lining that is 43 x 3 1/4 inches. And then cut 2 outer pieces of fabric and 2 pieces of lining that are 10 1/2 x 3 1/4 inches.
Then sew the two long pieces together along the sides and one end, with right sides together. Then sew each shorter piece together with its matching piece of lining, with right sides together. Again, sew along the sides and one end. Use a 1/4 inch seam allowance.
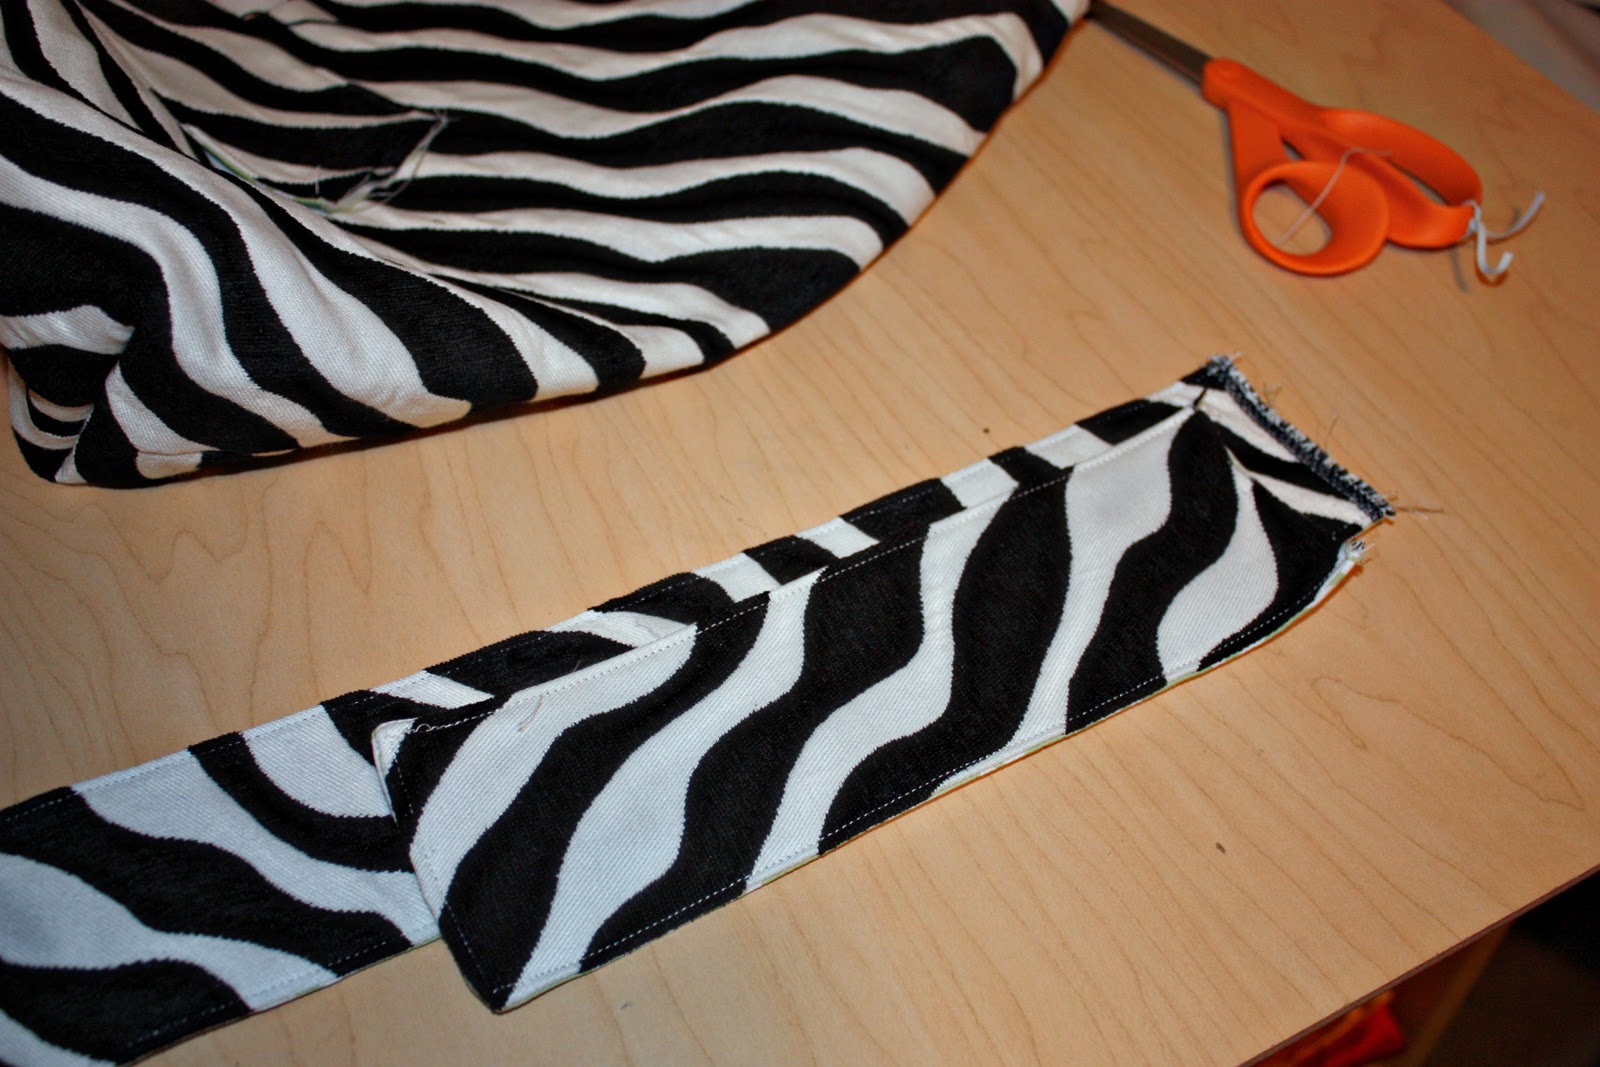
Then trim each corner on the one end of each strap piece, turn right side out, and press flat. Then top-stitch around the 3 sides, making a seam about an 1/8 of an inch from the outer edge.
Now onto putting the bag together.
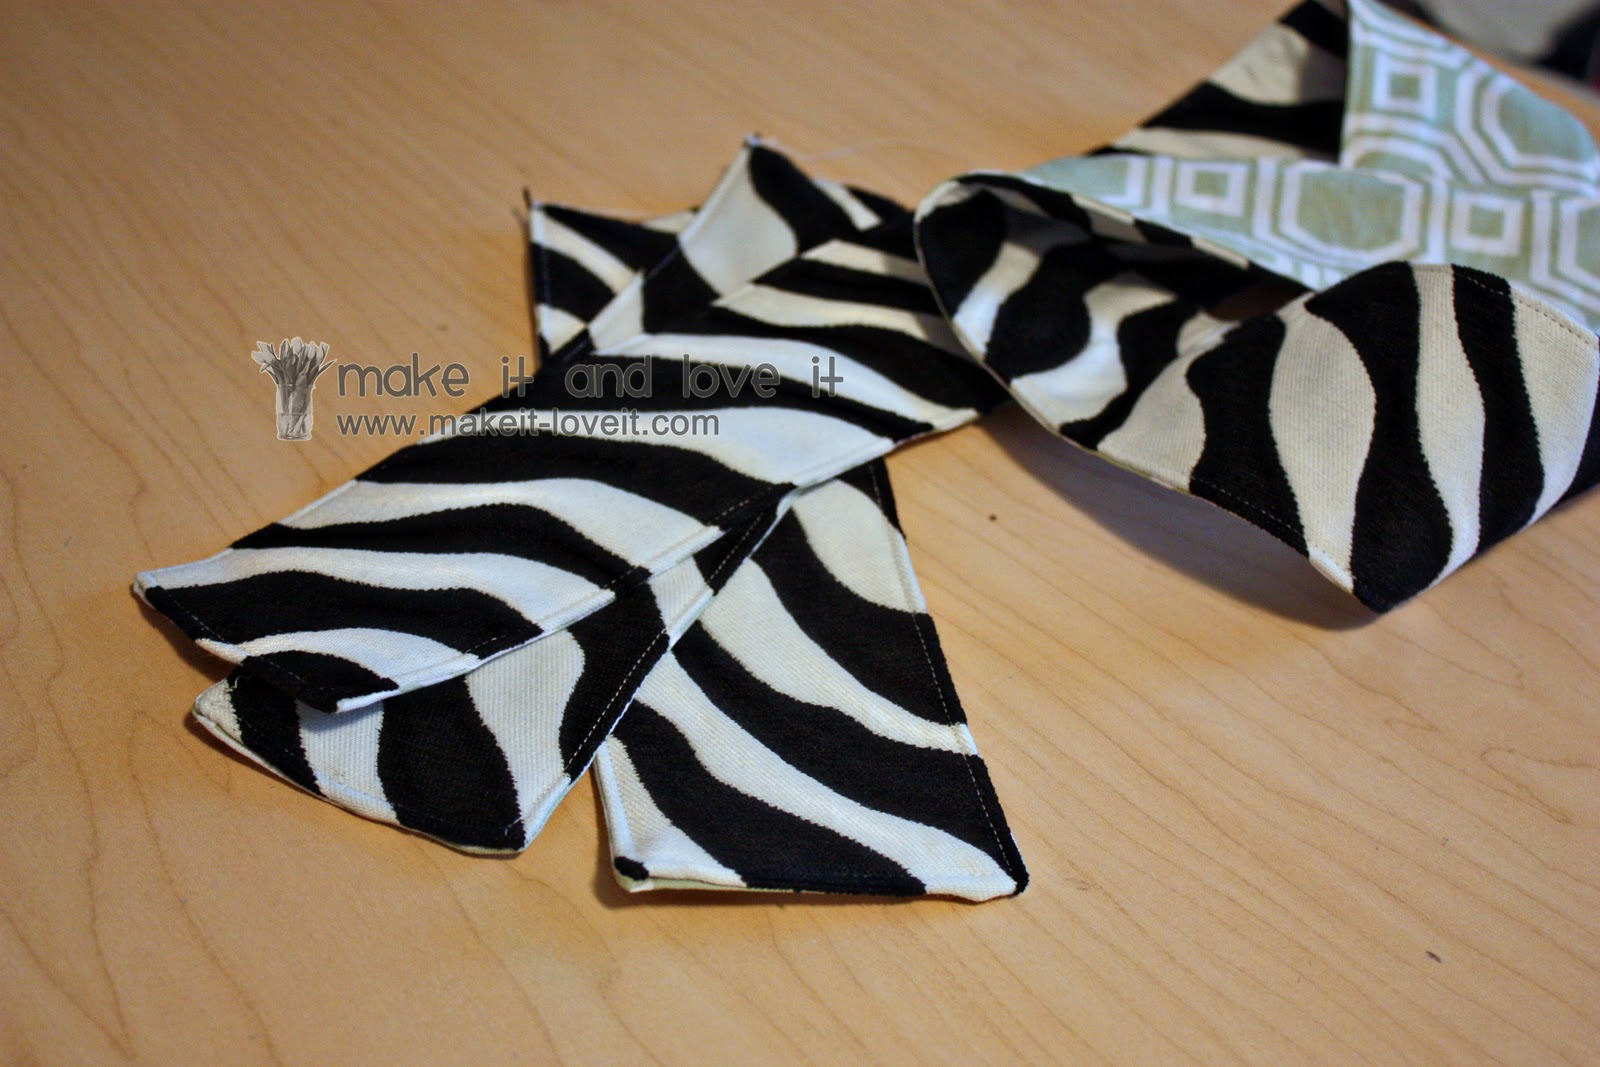
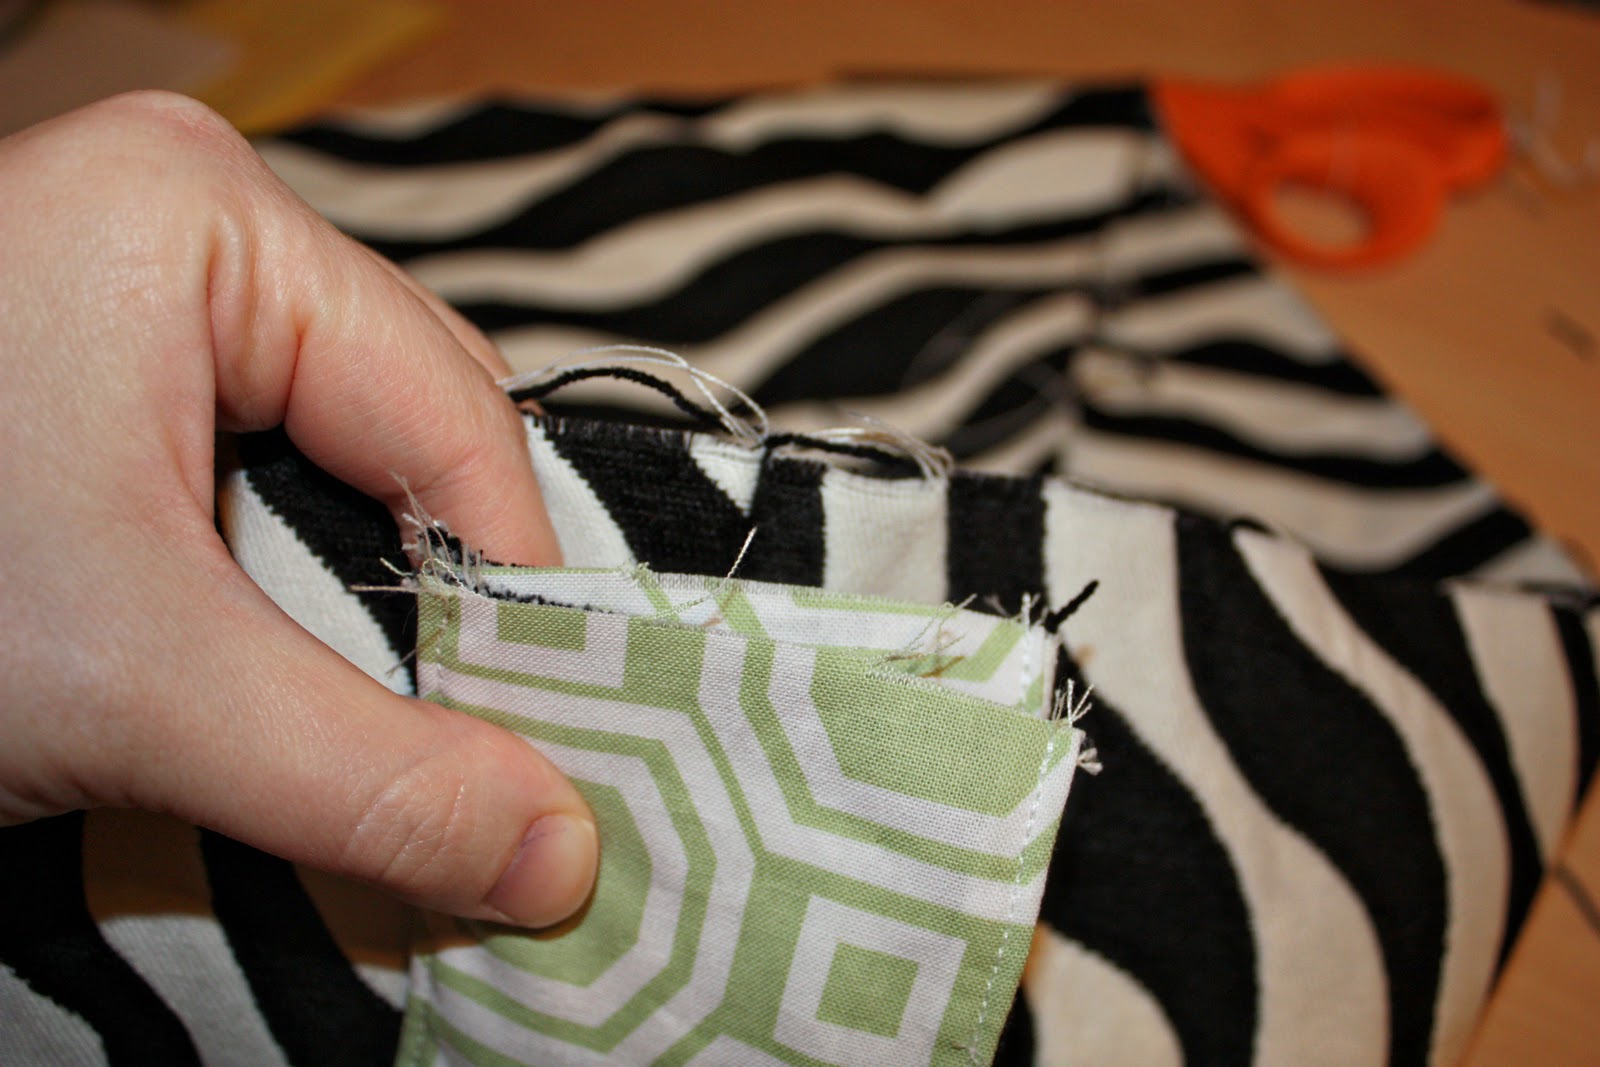
Take one of the short straps and place it face up on top of the long piece, which is also facing up.
Match up their raw, un-sewed ends.
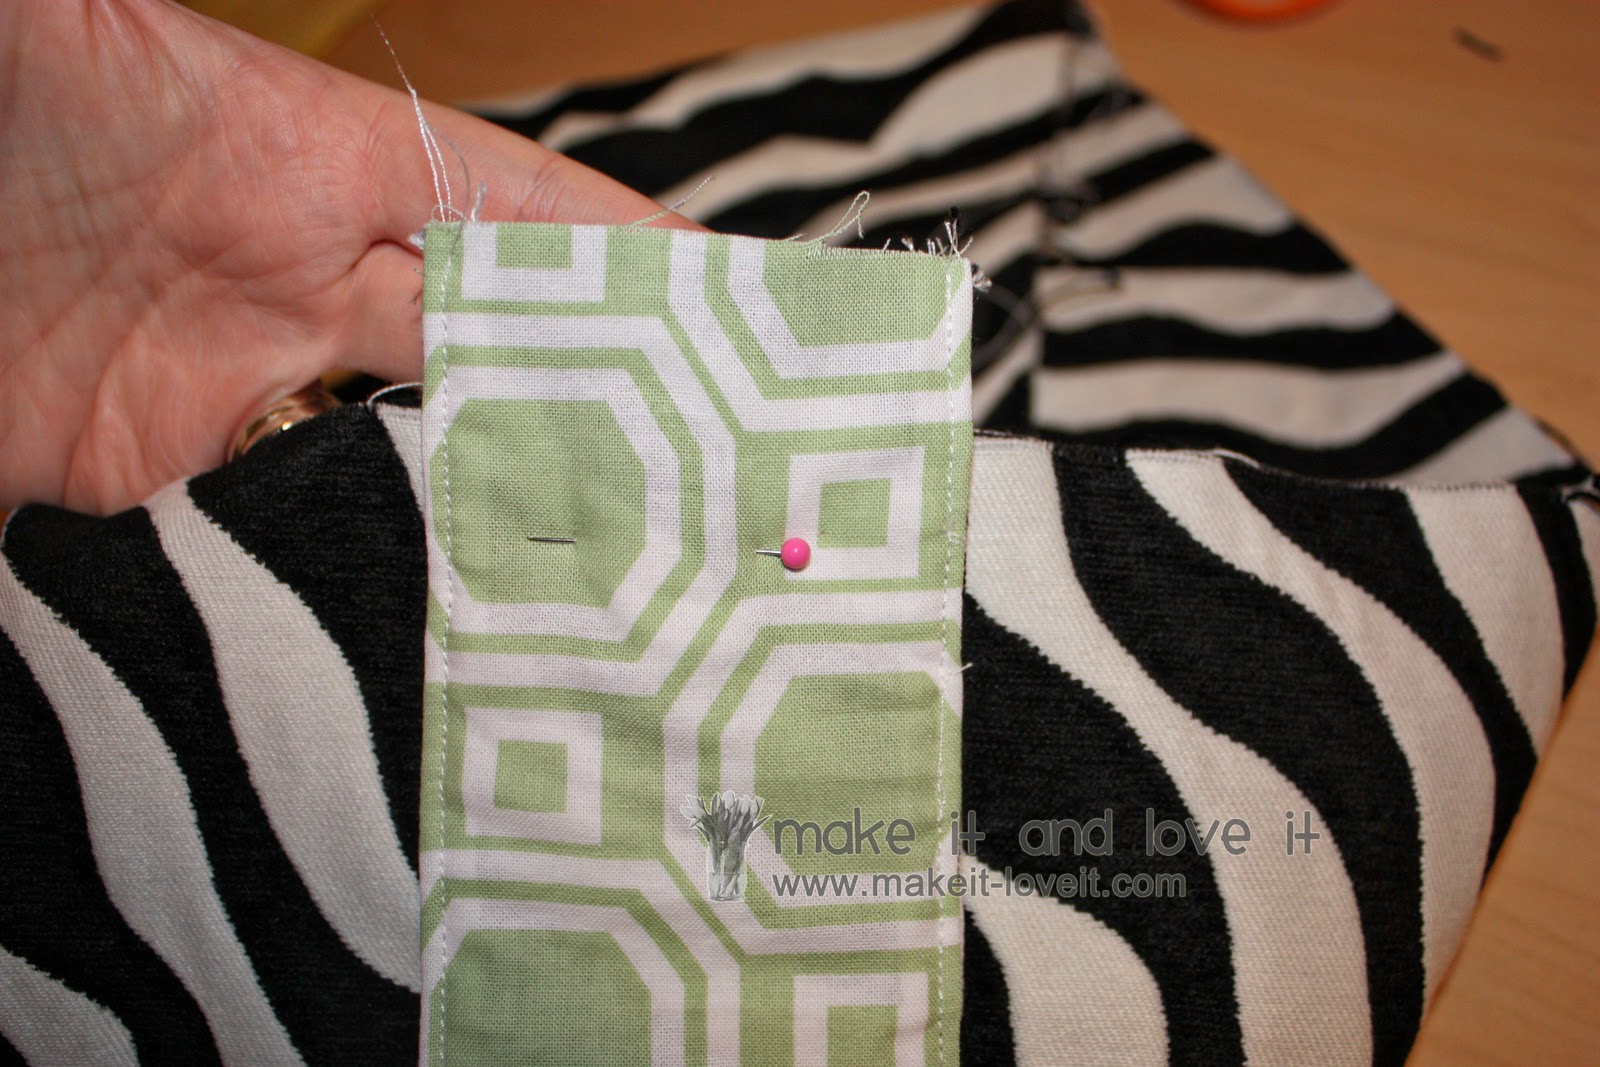
Then turn the two straps over and line up the exact middle of the 2 3/4 inch wide straps, right up with one of the side seams of your main bag piece. See the two straps there, with the right side of the fabric facing the right side of the bag fabric?
And instead of lining up the upper edges of the bag opening and the raw edges of the two straps, raise the straps up about a half inch above the edge of the bag opening and then pin in place, making sure the center of the strap is still lined up with that center side seam of the bag. (Doing this will allow you to have extra fabric to secure the straps to the bag, and provide you with more fabric to create seams to secure the bag strap in place. You’ll understand better later on.)
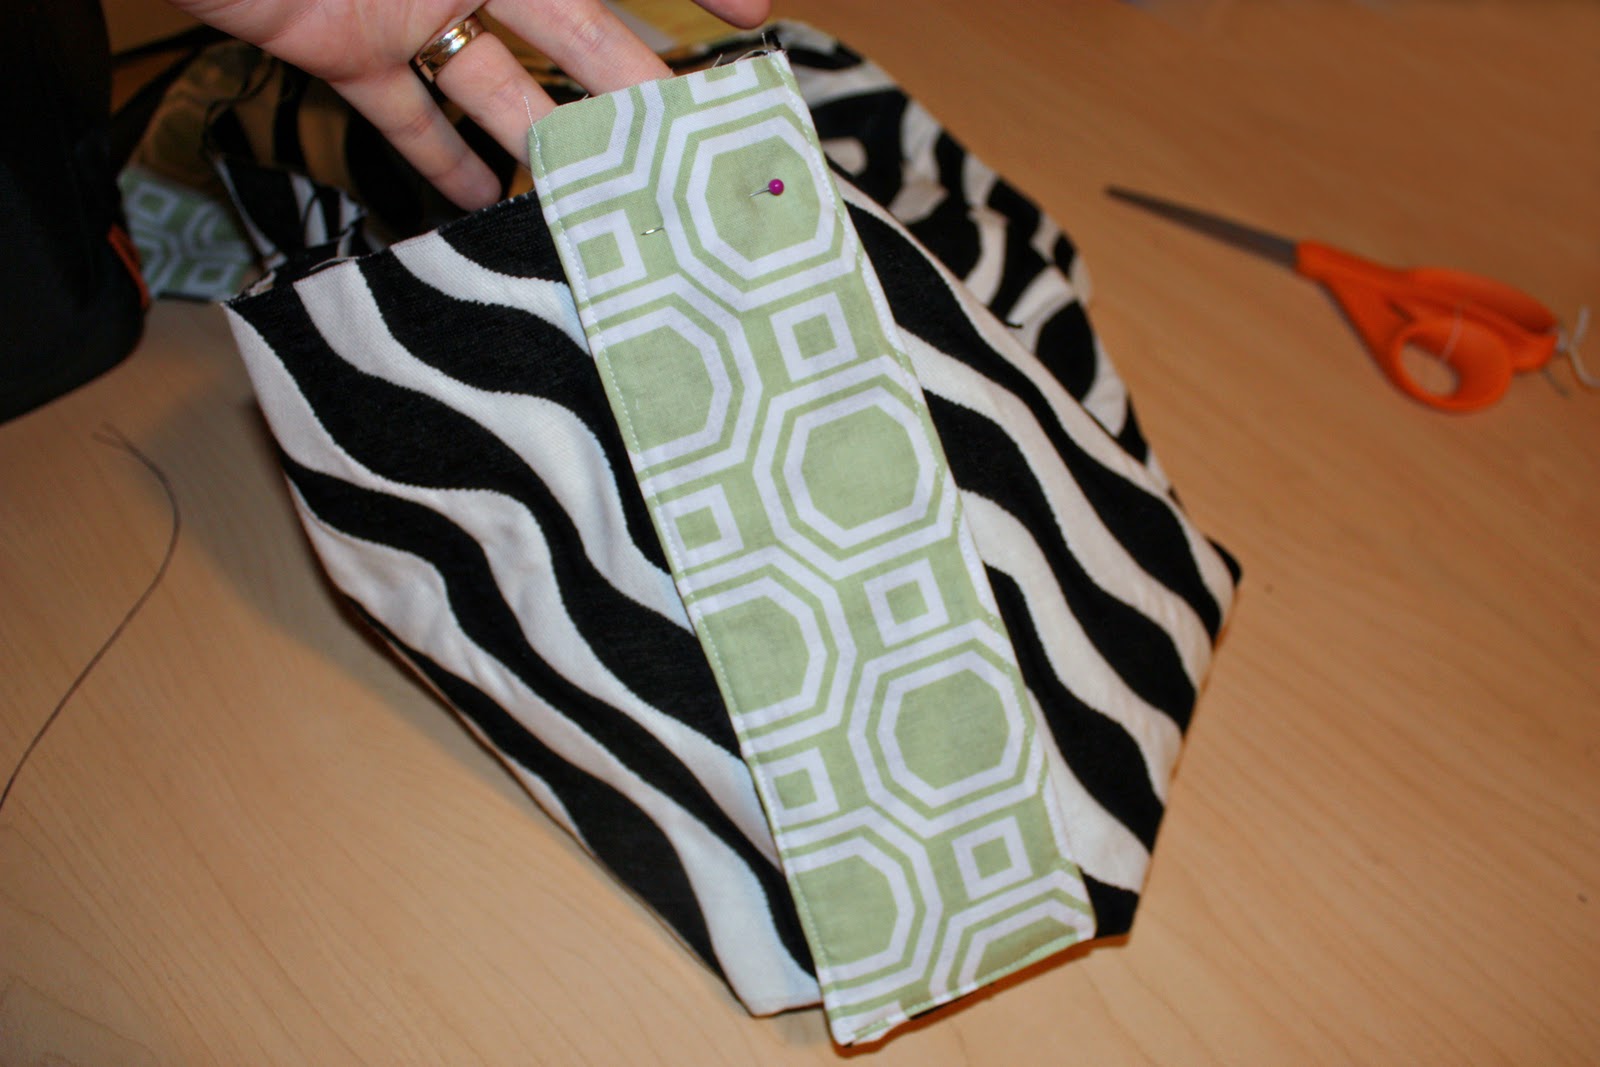
Then attach the other short strap to the other side seam of the bag, raising the strap above the top edge of the bag by about a 1/2 inch. Make sure to have right sides together and center the strap right along that side seam.
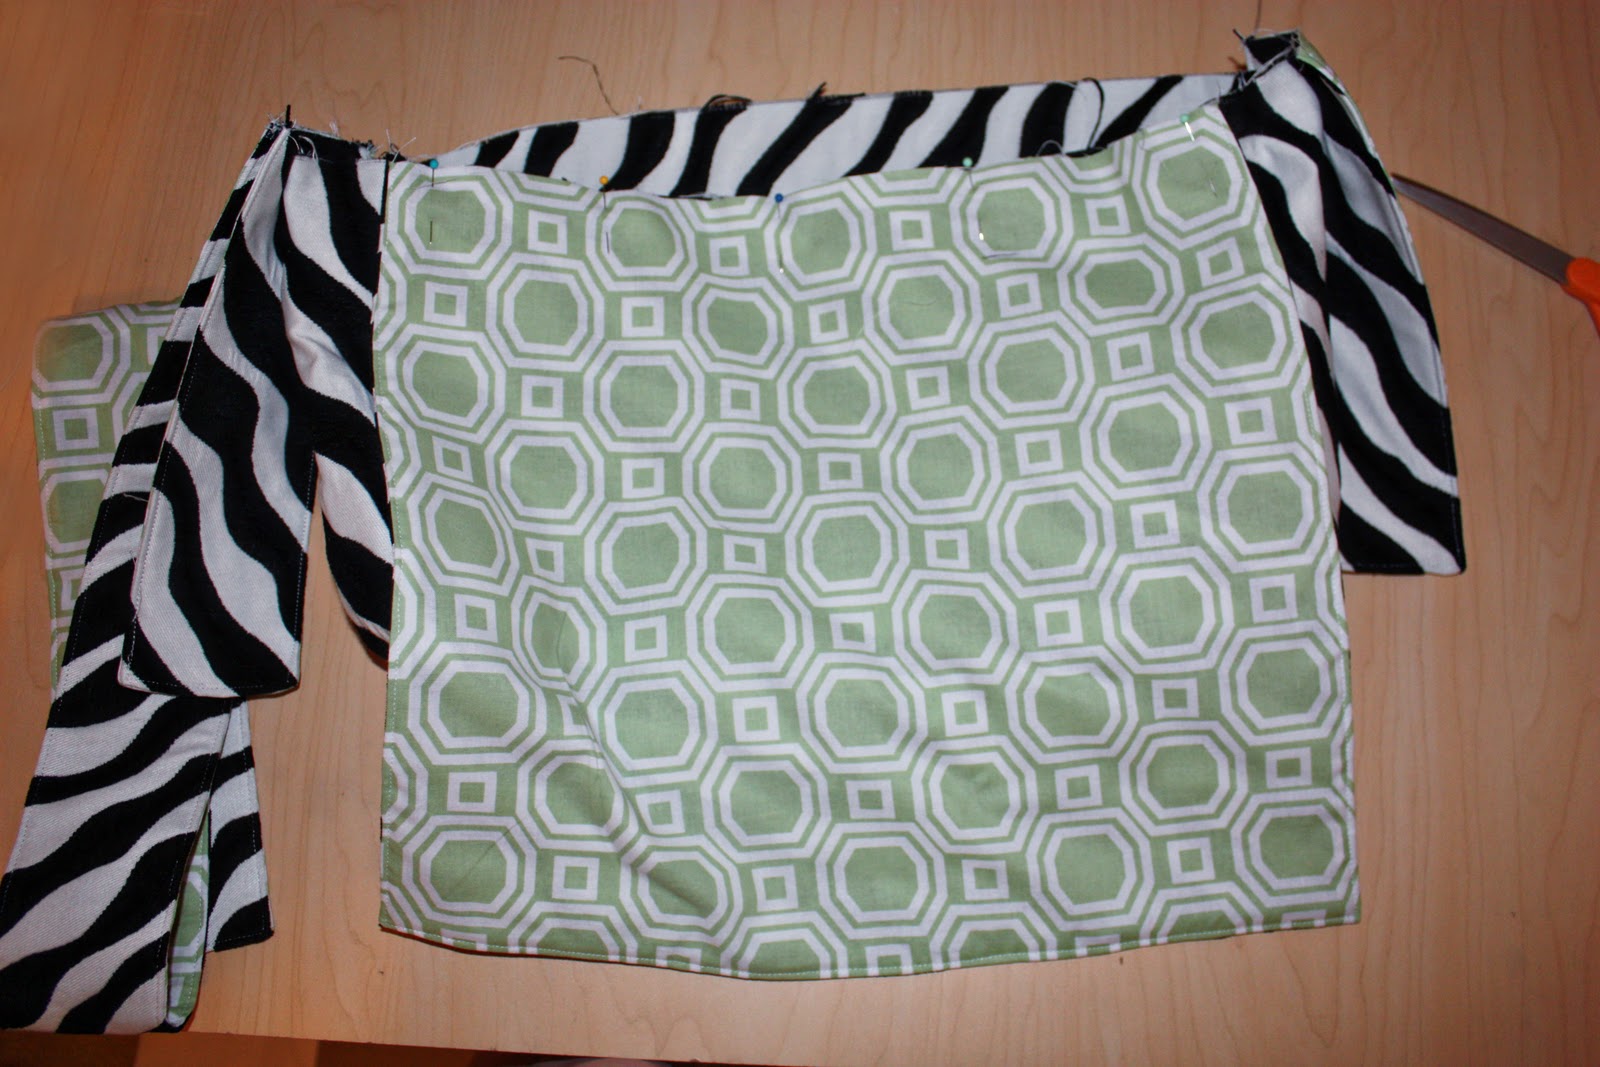
Next, grab your bag flap, turn it over, and attach it to the front of the bag with pins along the top……placing right sides together. Make sure to match up the raw edges of the bag flap (the un-sewn edges) with the raw edge of the bag. And also be sure to center the bag flap between the two side seams, along the front of the bag.
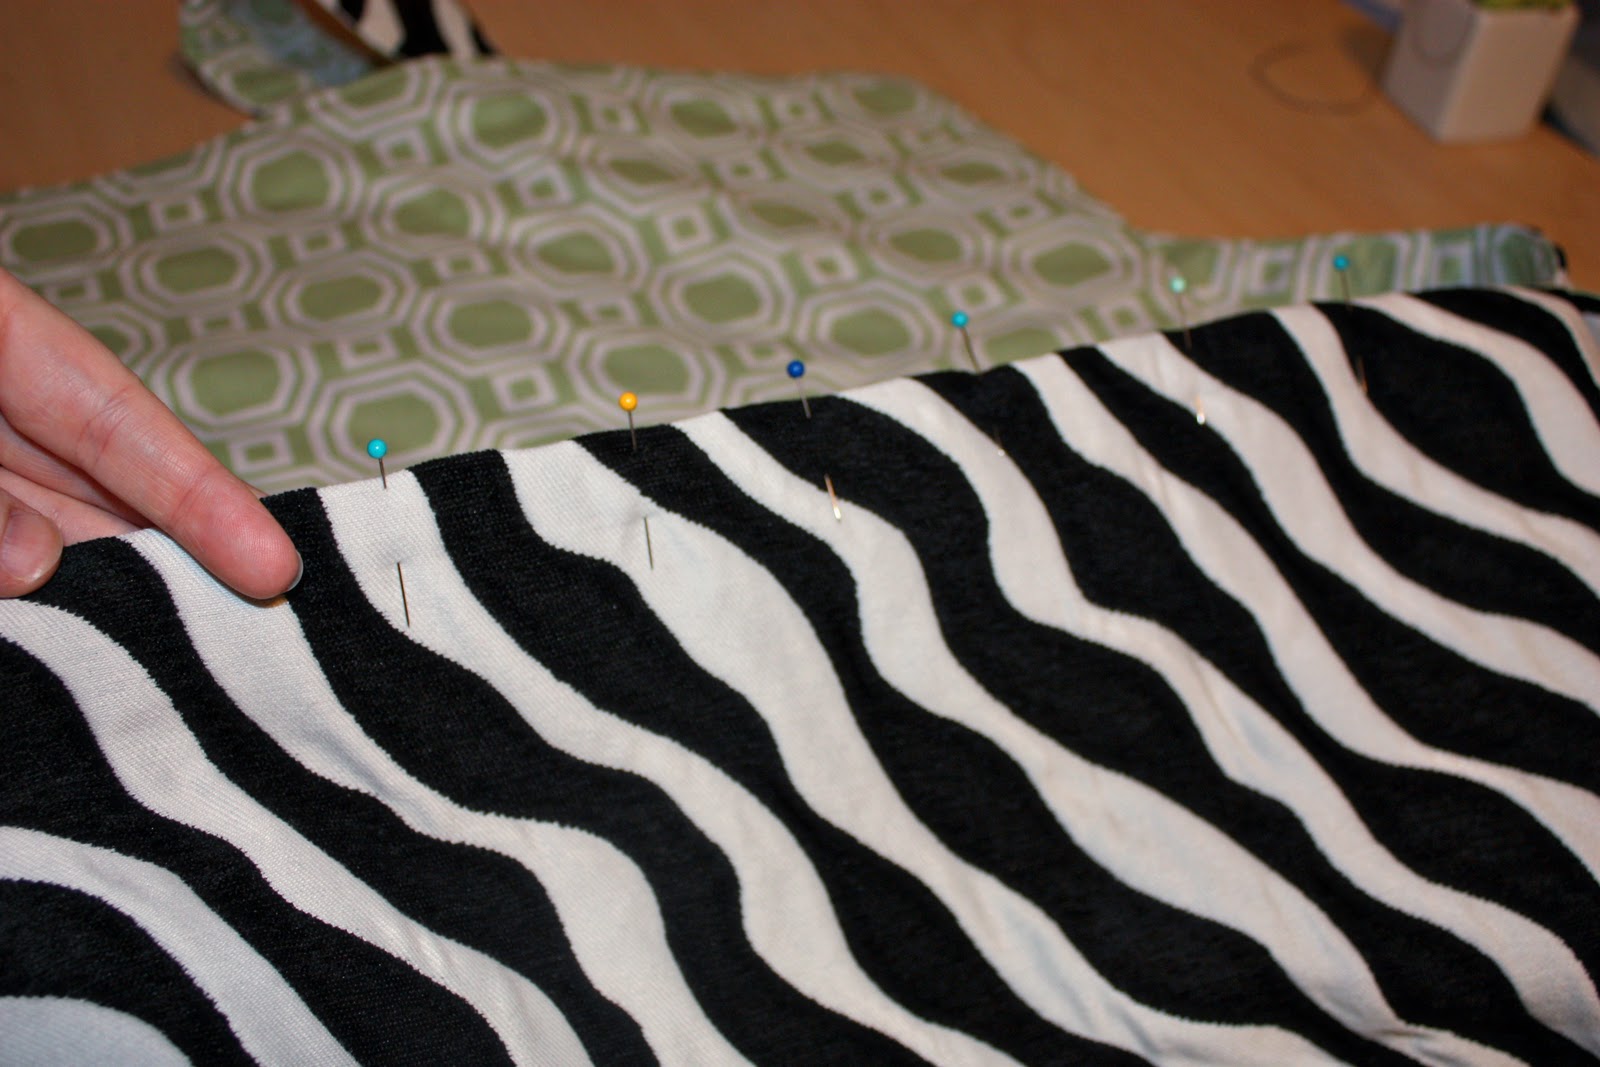
Once your straps and bag flap are all securely pinned into place, drop your bag down inside of the lining. At this point, your bag is right side out and your lining is inside out……..making the two fabrics rights sides together after you drop it down inside.
Line up the side seams and the top raw edges, and pin it into place all the way around the bag.
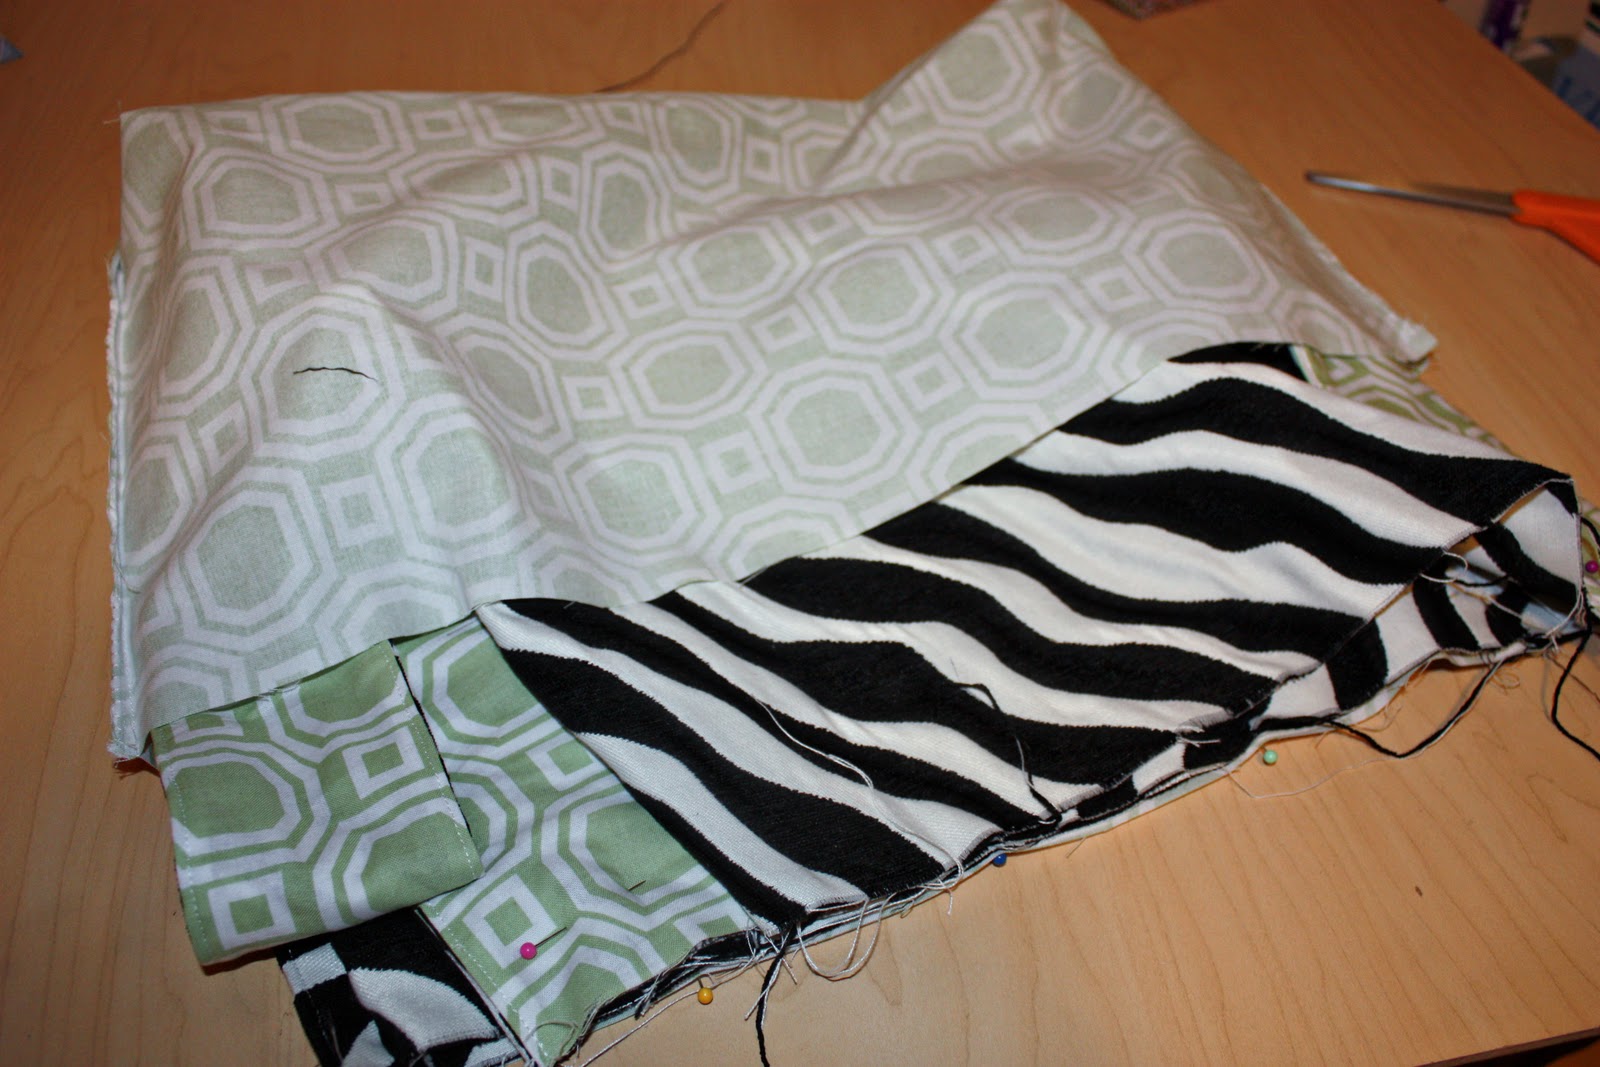
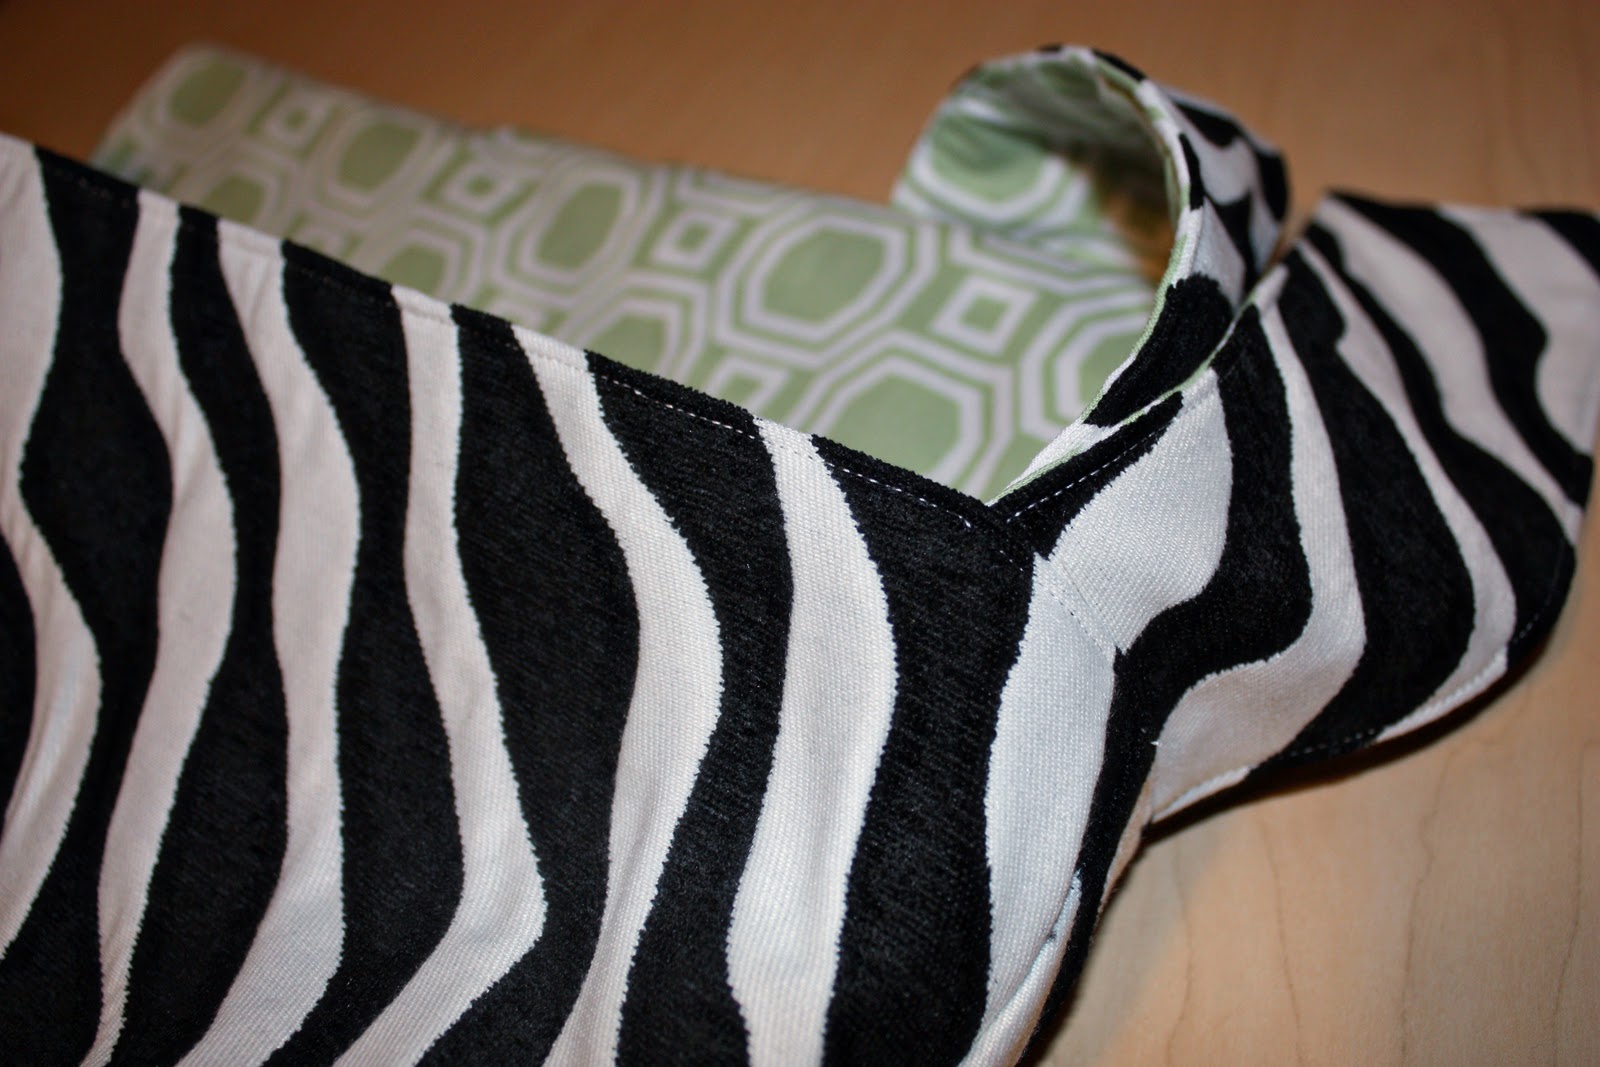
Sew all the way around the top, securing the straps and bag flap into place but leave about a 10 inch opening along the front side, opposite the bag flap. Use a 1/2 inch seam allowance.
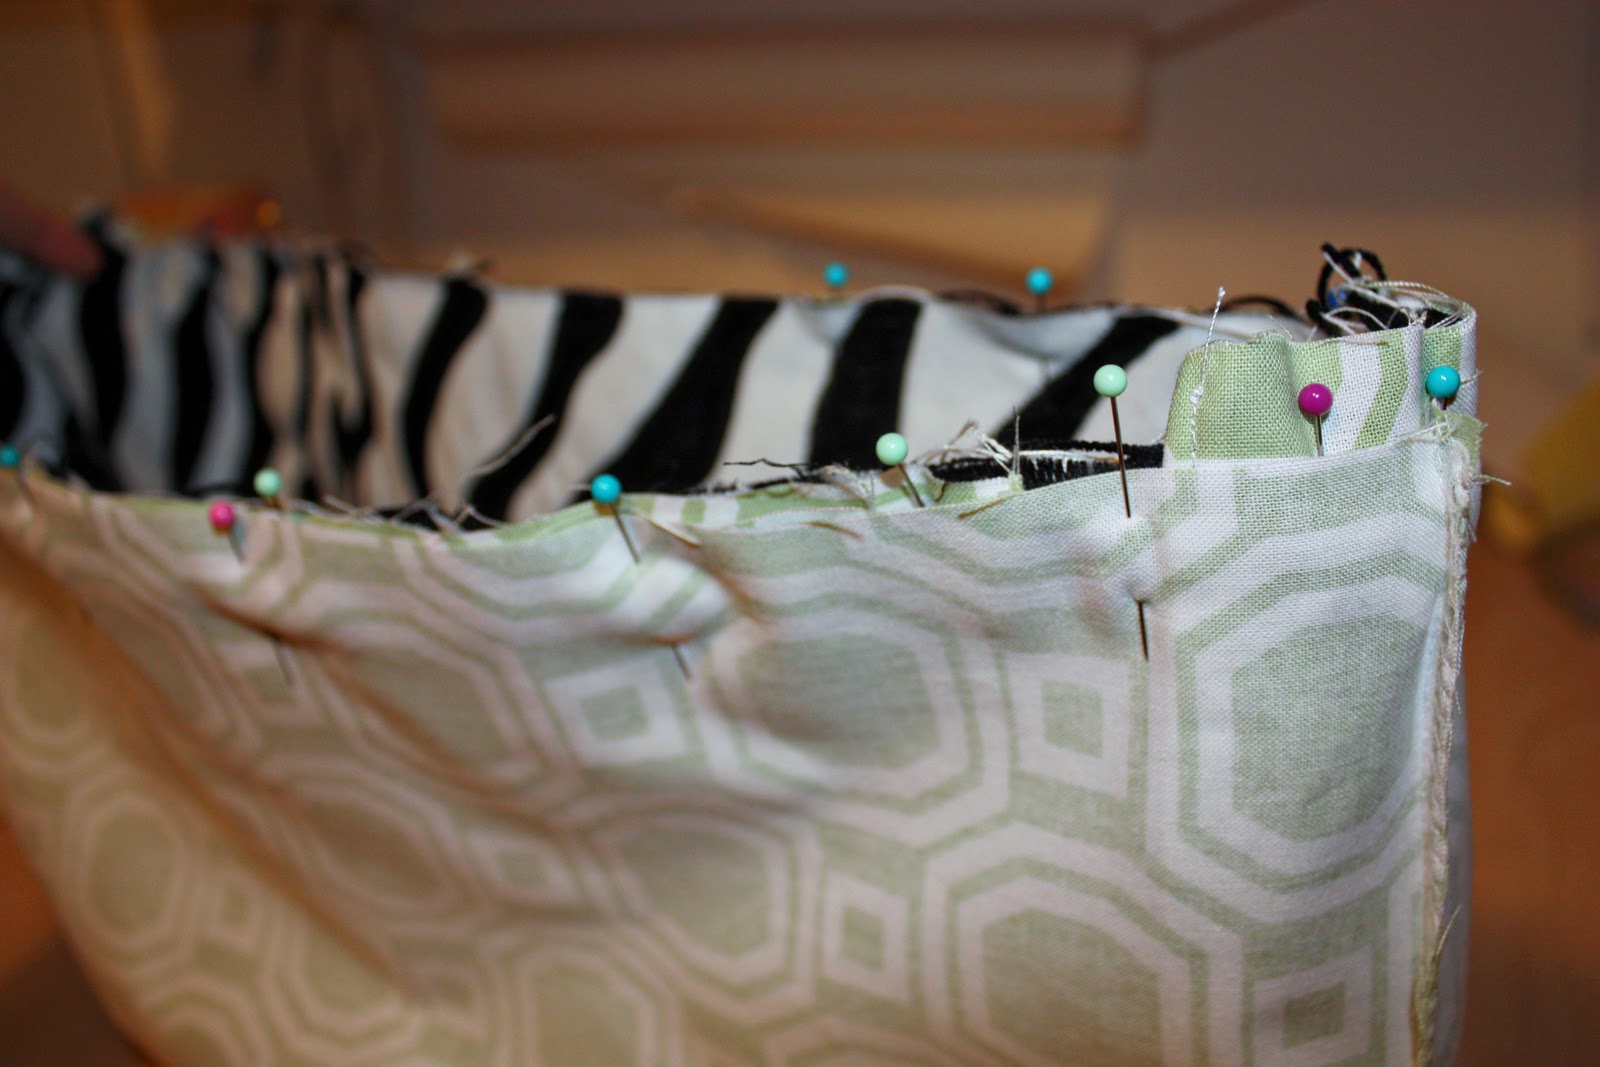
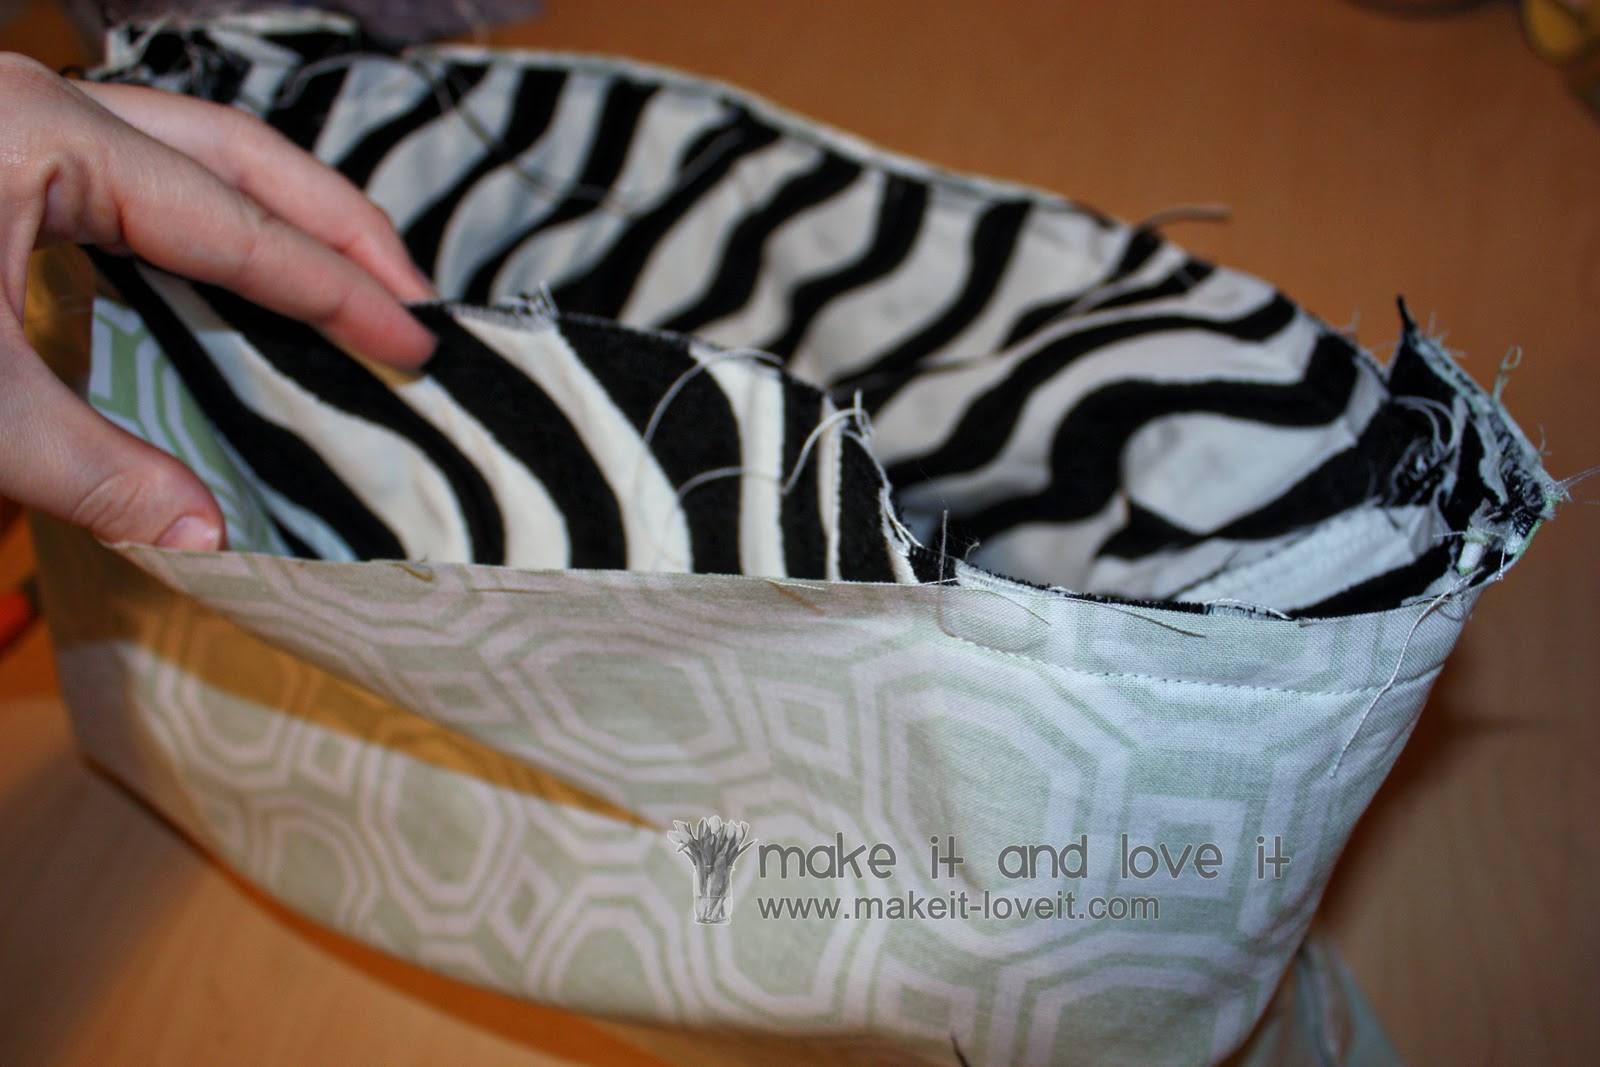
Then turn the bag right side out, pulling it out through that hole that you left. Then fold the raw edges of the opening down towards the inside of the opening hole, a 1/2 inch. Pin into place. Then iron flat all the way around the bag opening.
Then top-stitch around the top opening of the bag, making a seam about an 1/8 of an inch from the upper edge. Even continue sewing all the way around to the back of the bag, keeping the back seam flat and in place.
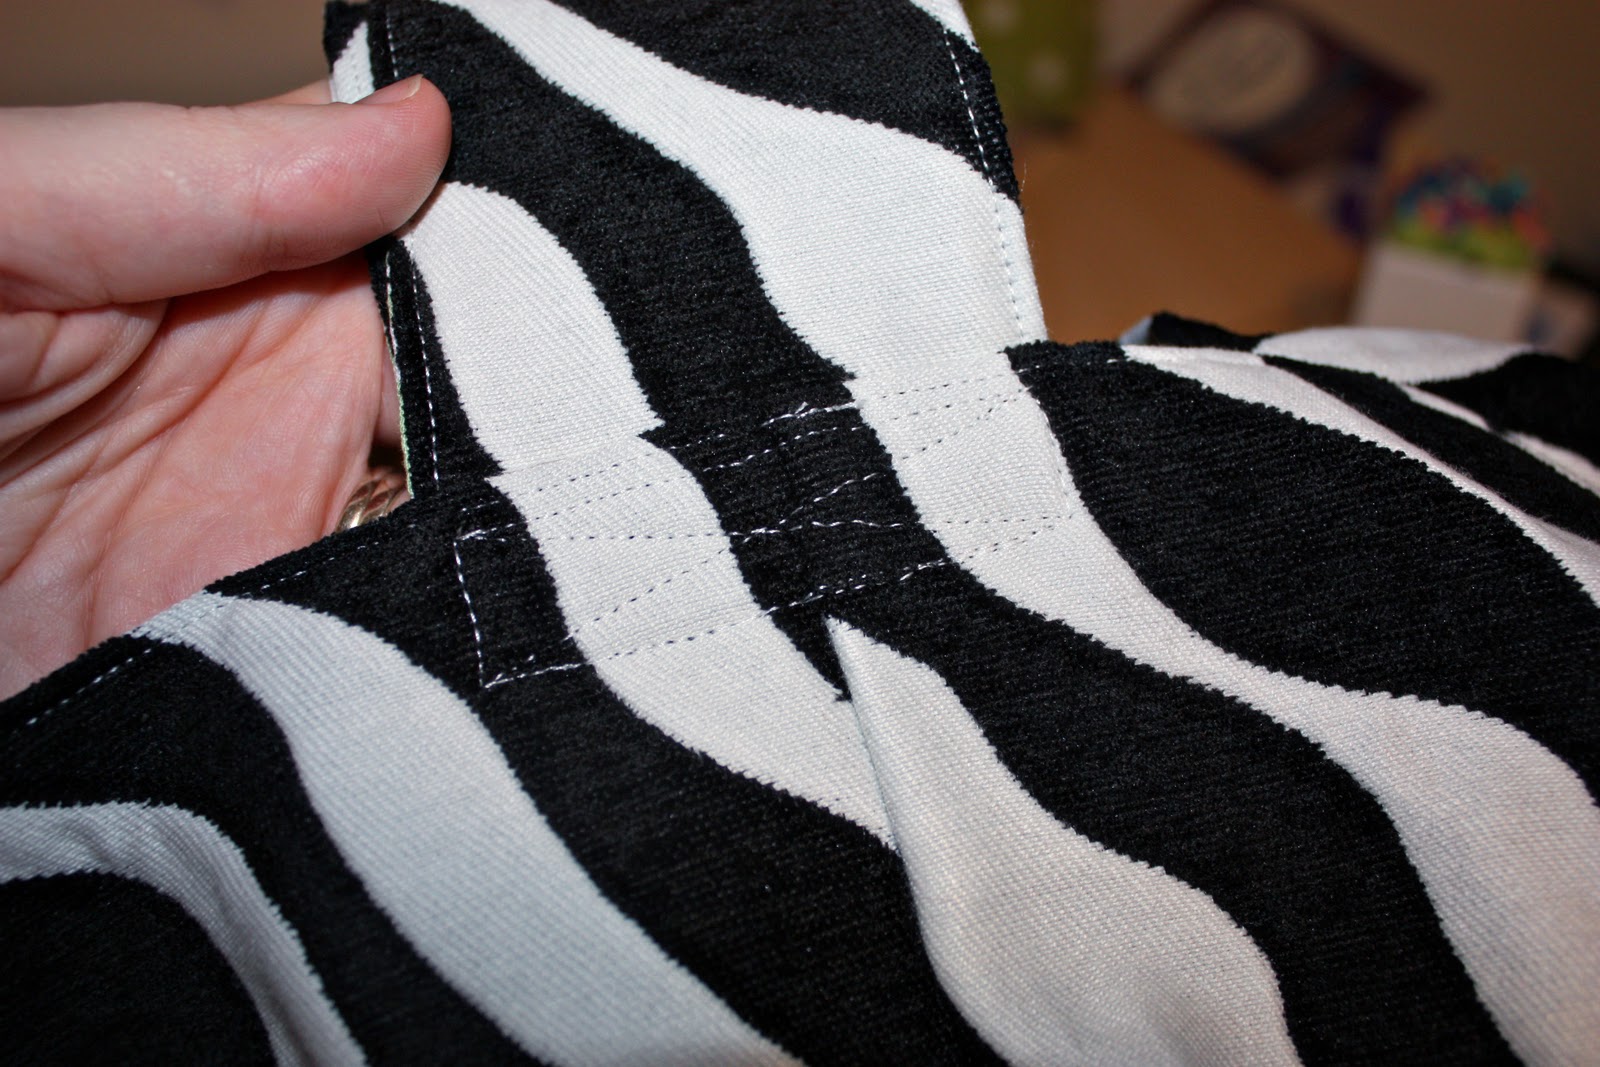
Then, sew a rectangle with an ‘X’ through it, adding extra strength to those side straps.
**Remember that extra 1/2 inch that you added as you pinned the strap to the bag earlier on? This allows the strap to hang down even lower so that you can create this rectangle with the ‘X’ in it. There is no need to make the rectangle any lower than the strap ends that are inside of the bag……so feel for the ends of the strap and use that as a guide to sew your rectangle.
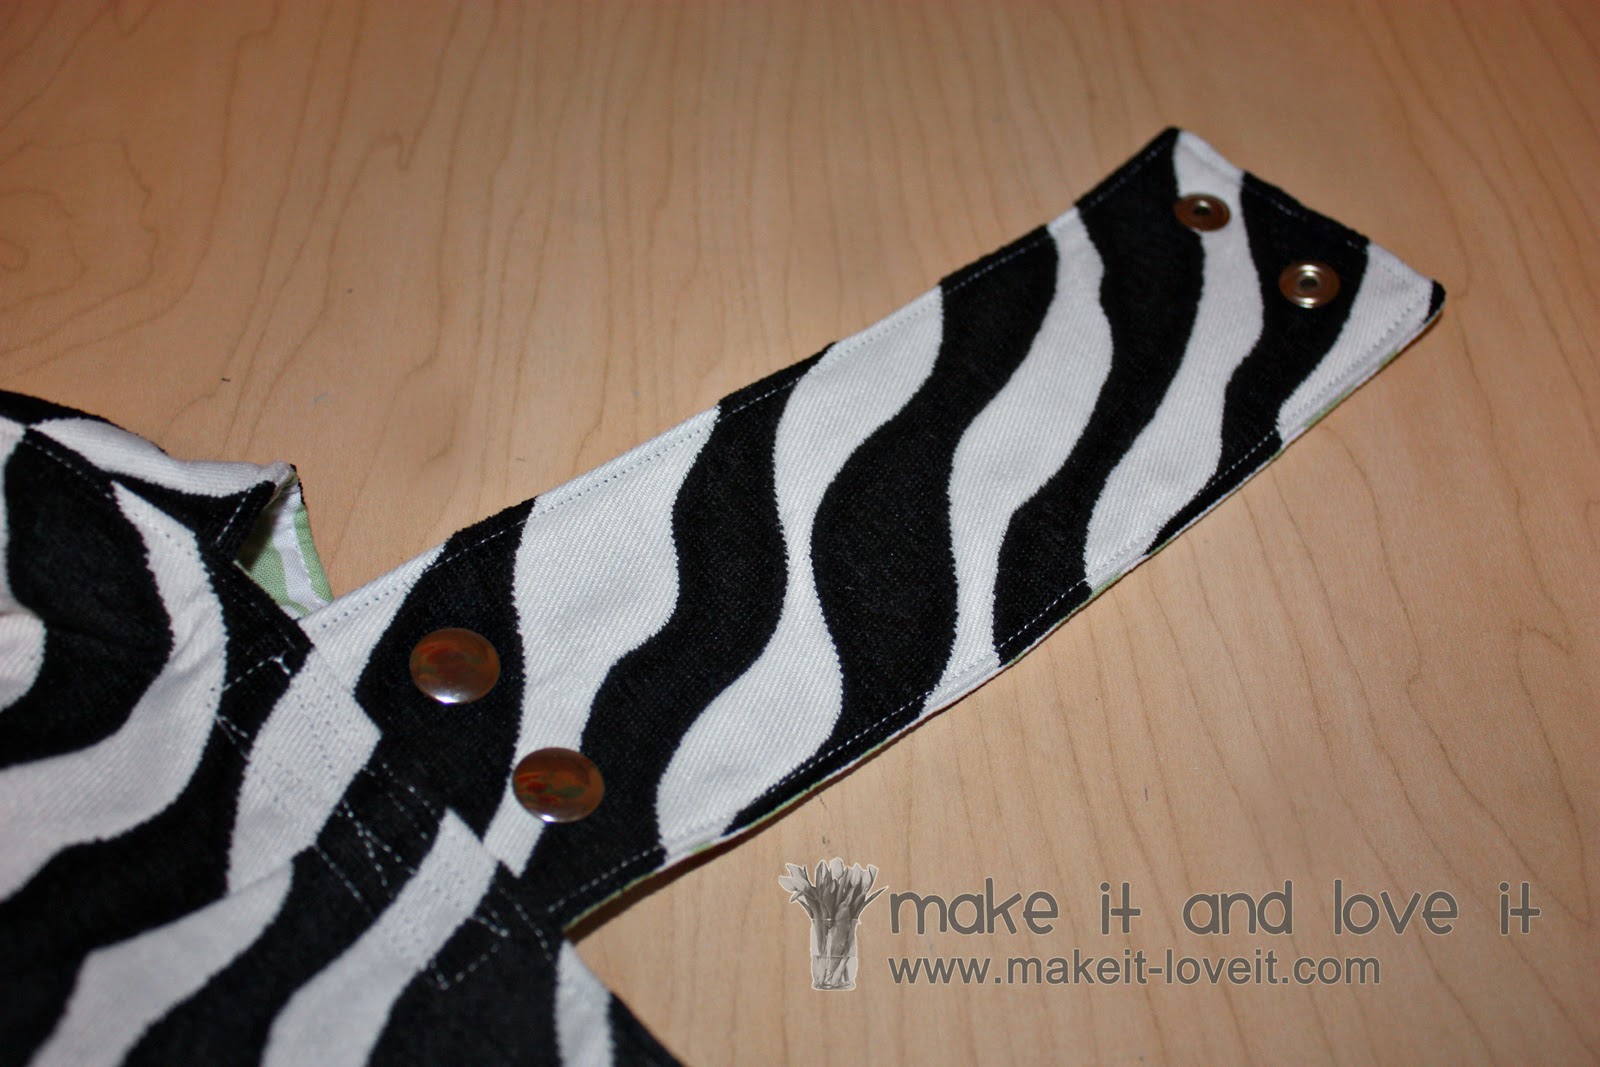
Lastly, adding the hardware.
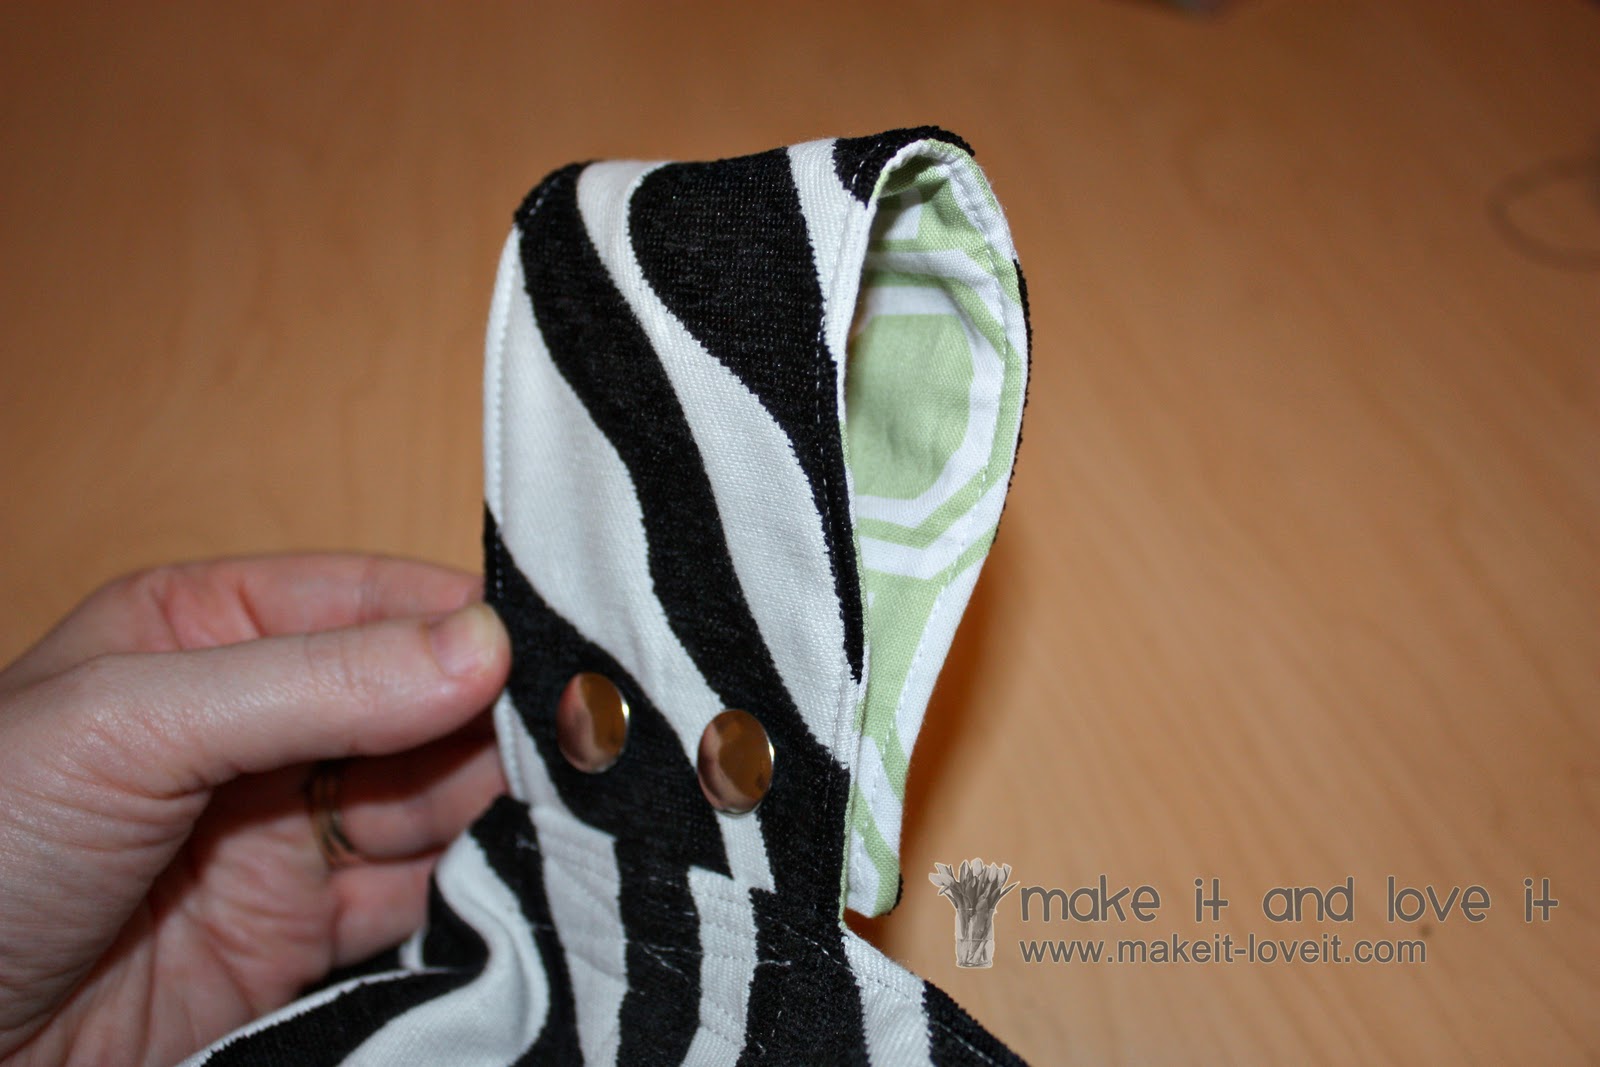
I purchased these heavy duty snaps in a package of 8, at Walmart for a few dollars. I added two snaps to the base of each of the short straps……and the back side of the snaps to the other end of the short straps.
So that I could snap the ends down to the base, creating a loop for both sides of the bag.
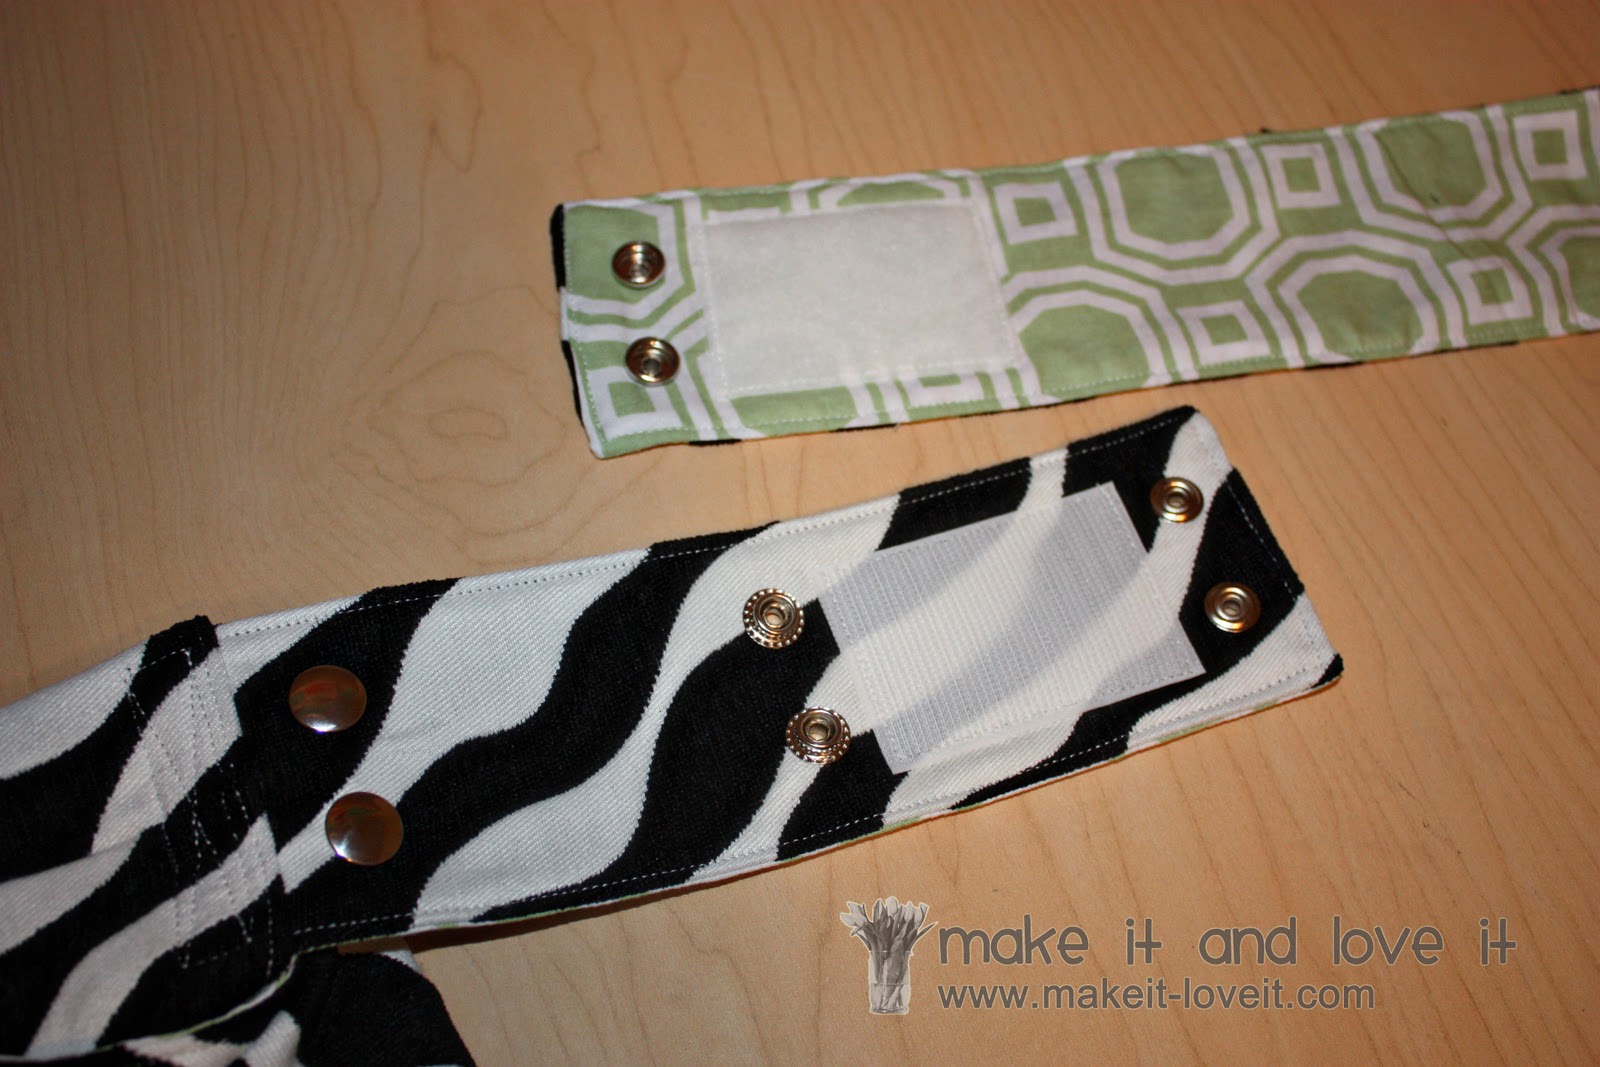
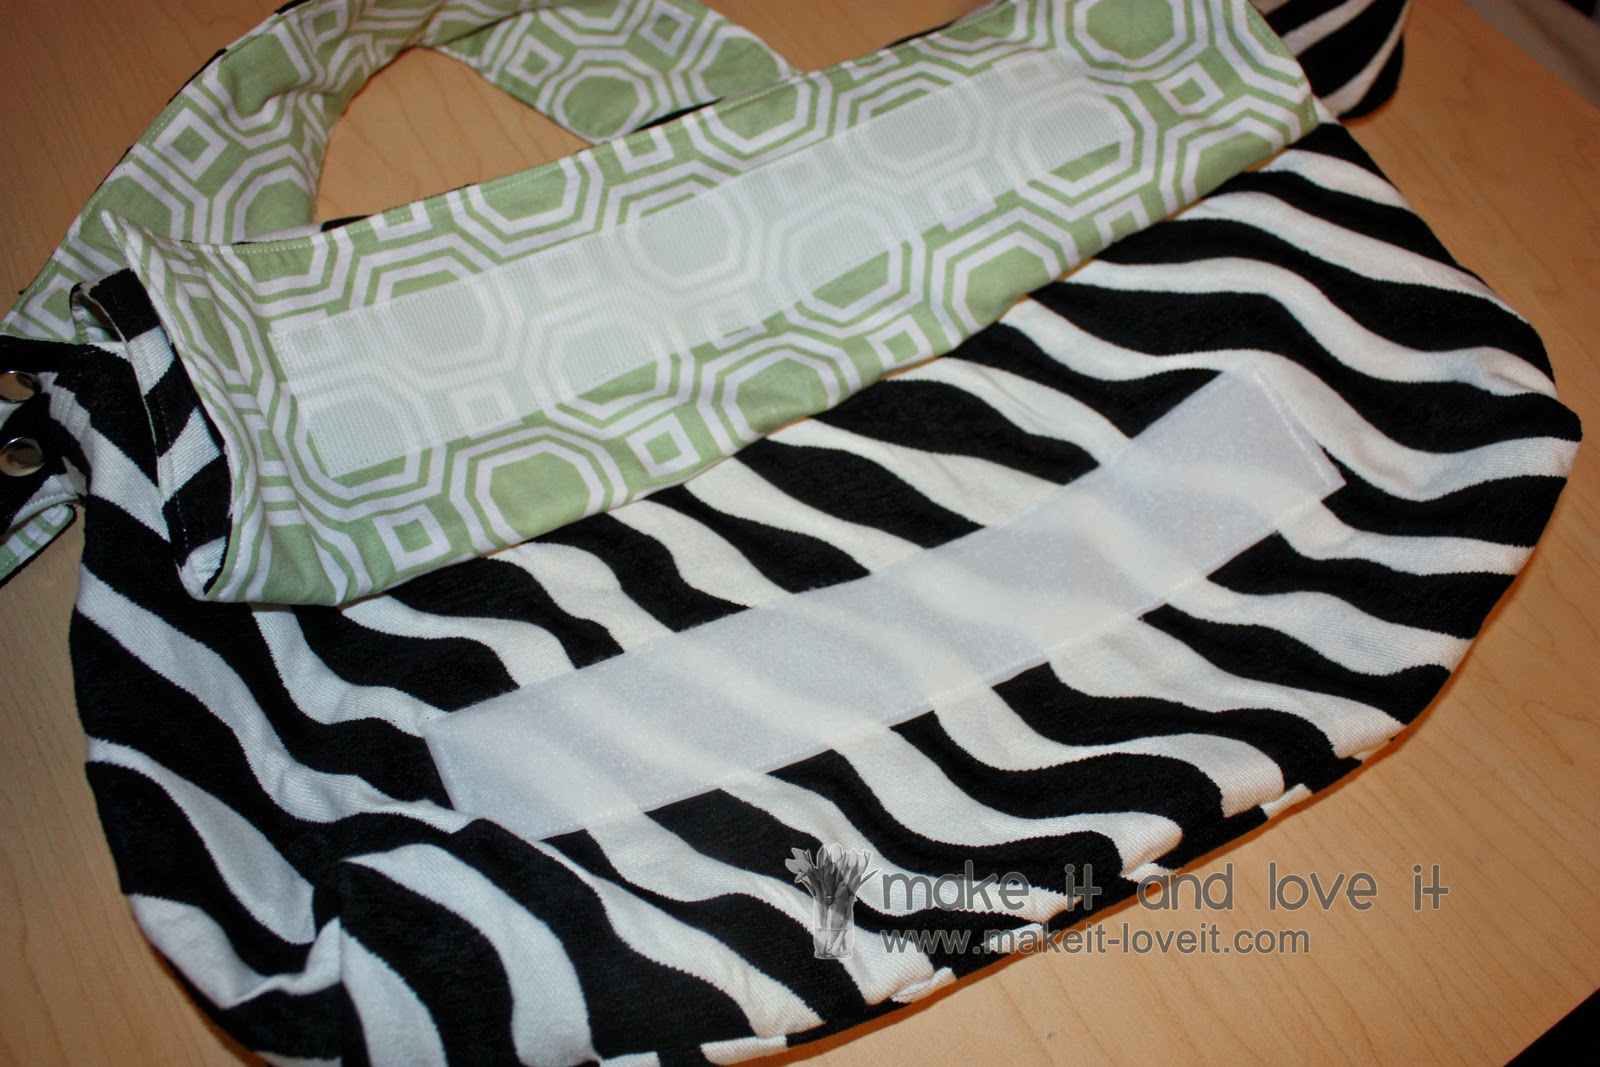
Then on the long piece, I added two snaps to the end. Then on the short piece (that is on the opposite side of the long piece), I added the back sides of these snaps about 4 1/2 inches from the end. Then I placed some wide velcro (also purchased at Walmart) along the underside of the long strap and then on the front side of the short strap. This will give the strap extra strength when being used as a messenger bag.
And then when the long strap is connected to the short strap, it looks like this.
Lastly, add a bit of velcro to the under side of the bag flap and then along the front of the bag.
You could add snaps or buttons instead. Whatever you prefer.
There you have it.
All done.
And because life just got a little simpler, you may just find yourself completely excited to speed along your way with your new 2-in-1 bag.
Go on, get going.