Home » DIY Tutorials » DIY Sewing » Sewing: Clothing » Baby Clothing » Re-Purposing: T-Shirt into Dress
Re-Purposing: T-Shirt into Dress
May 3, 2010 - By Ashley Johnston 135 Comments
Does your little girl have an old T-shirt?
One that is too short?
Stained on the belly?
Has a rip right through the fabric?
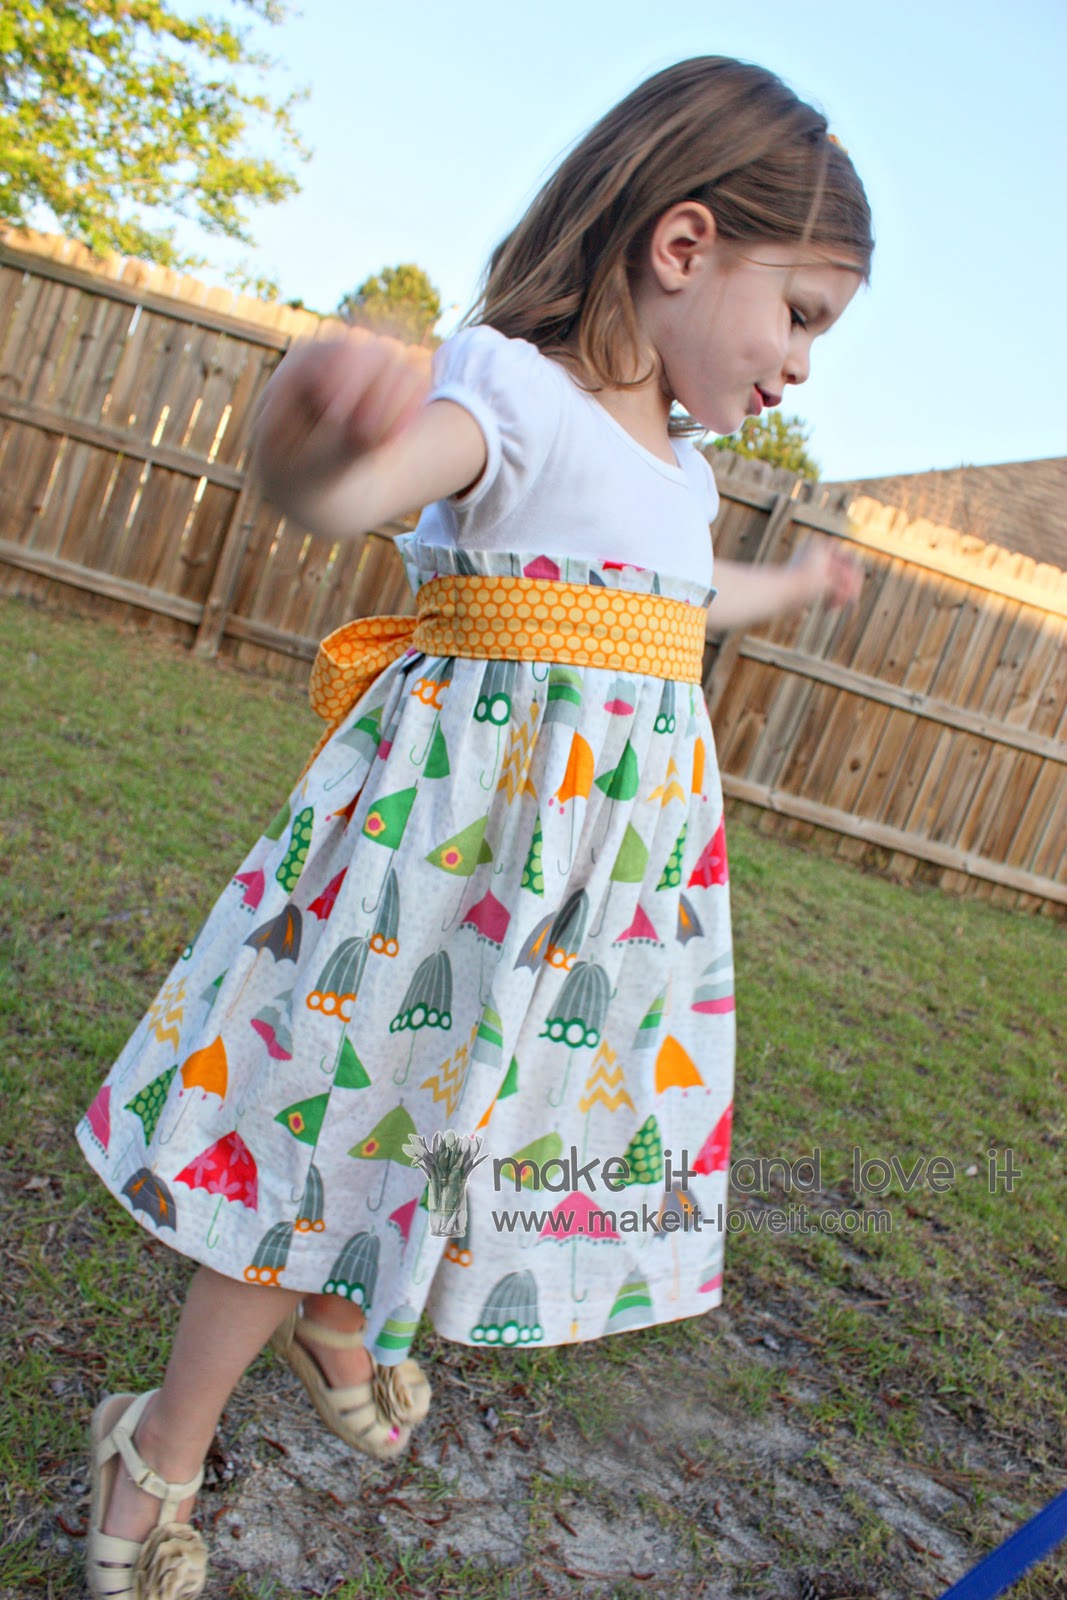
No worries……turn it into a sweet pleated dress.
With a nice big pleated waist line…
And a nice chunky bow to cinch it all in.
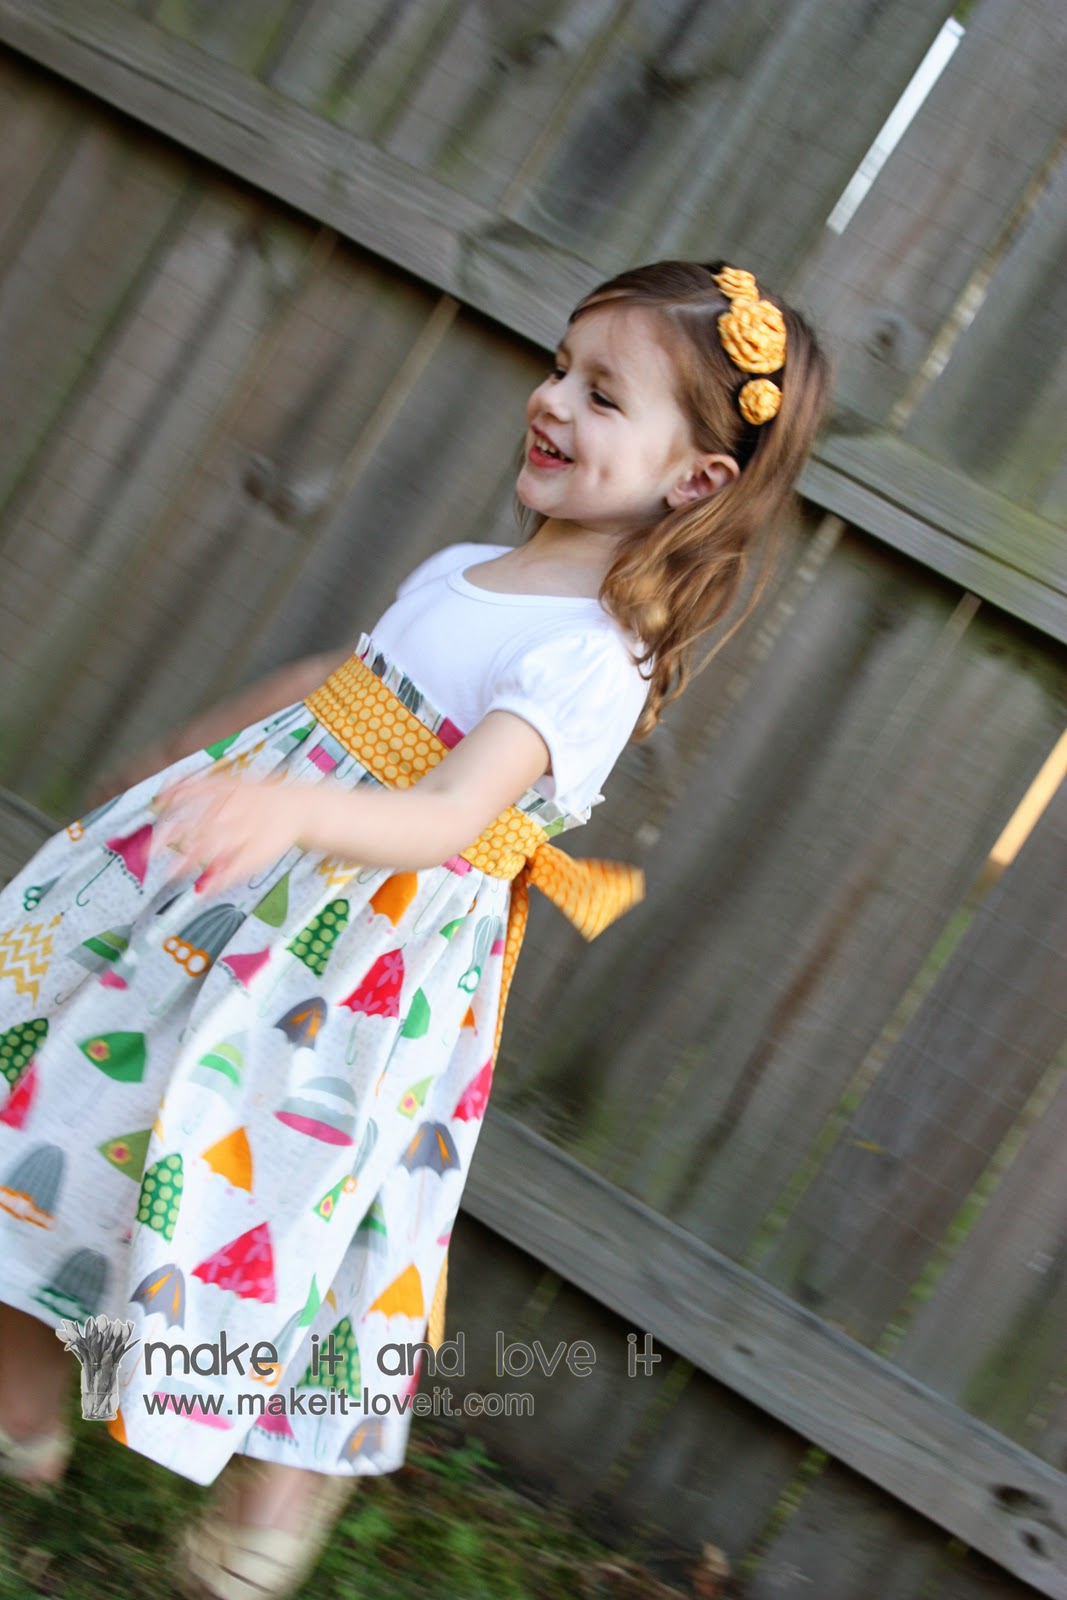
And yes, this dress is perfect for dancing…
and flapping like a bird…
Or just plain ‘ol
being a kid…
If interested, I bought this fabric at ‘The Fabric Store‘.
(Riley Blake Designs Umbrella Tops in White here.)
Perfect for this time of year.
Ready to make your own?
First, grab an old knit Tshirt and decide where you want the top of the waist line to hit your little girl. Place a pin there and measure down about 2 inches. Then cut the shirt off there.
***Don’t throw the rest of the shirt away….I’ll show you how to use it on a different project.
Then cut two large rectangles for the skirt section of the dress. My two pieces were 33 inches wide x 25 inches long. The front of my shirt was 11 inches across, so I tripled that and cut a piece that was 33 inches wide. For the length, I decided that I needed the bottom part of the dress to be 21 inches long from the top of the pleats, down to the bottom of the dress. And then I needed an extra 2 inches at the top and 2 inches at the bottom……so that’s 25 inches long all together.
Make sure to cut 2 of these pieces.
I decided to make french seams on this dress for the side seams. (But you can always just do a side seam and then zig-zag on the inside, to keep it from fraying. French seams always look nicer though.)
To do this, place your two pieces together with wrong sides together, then sew these two pieces together along the side (25 inch side in my case) using a 1/4 inch seam allowance.
Then flip the fabric the other way and enclose the raw edges of that seam (iron first to help it lay flat) and sew a 1/2 inch seam allowance with the right sides together.
Then open it back up. Those raw edges are nice and enclosed……no loose strings or edges. Do the same thing with the other side…..attaching the other side pieces together with a nice french seam. Iron both side seams open and flat.
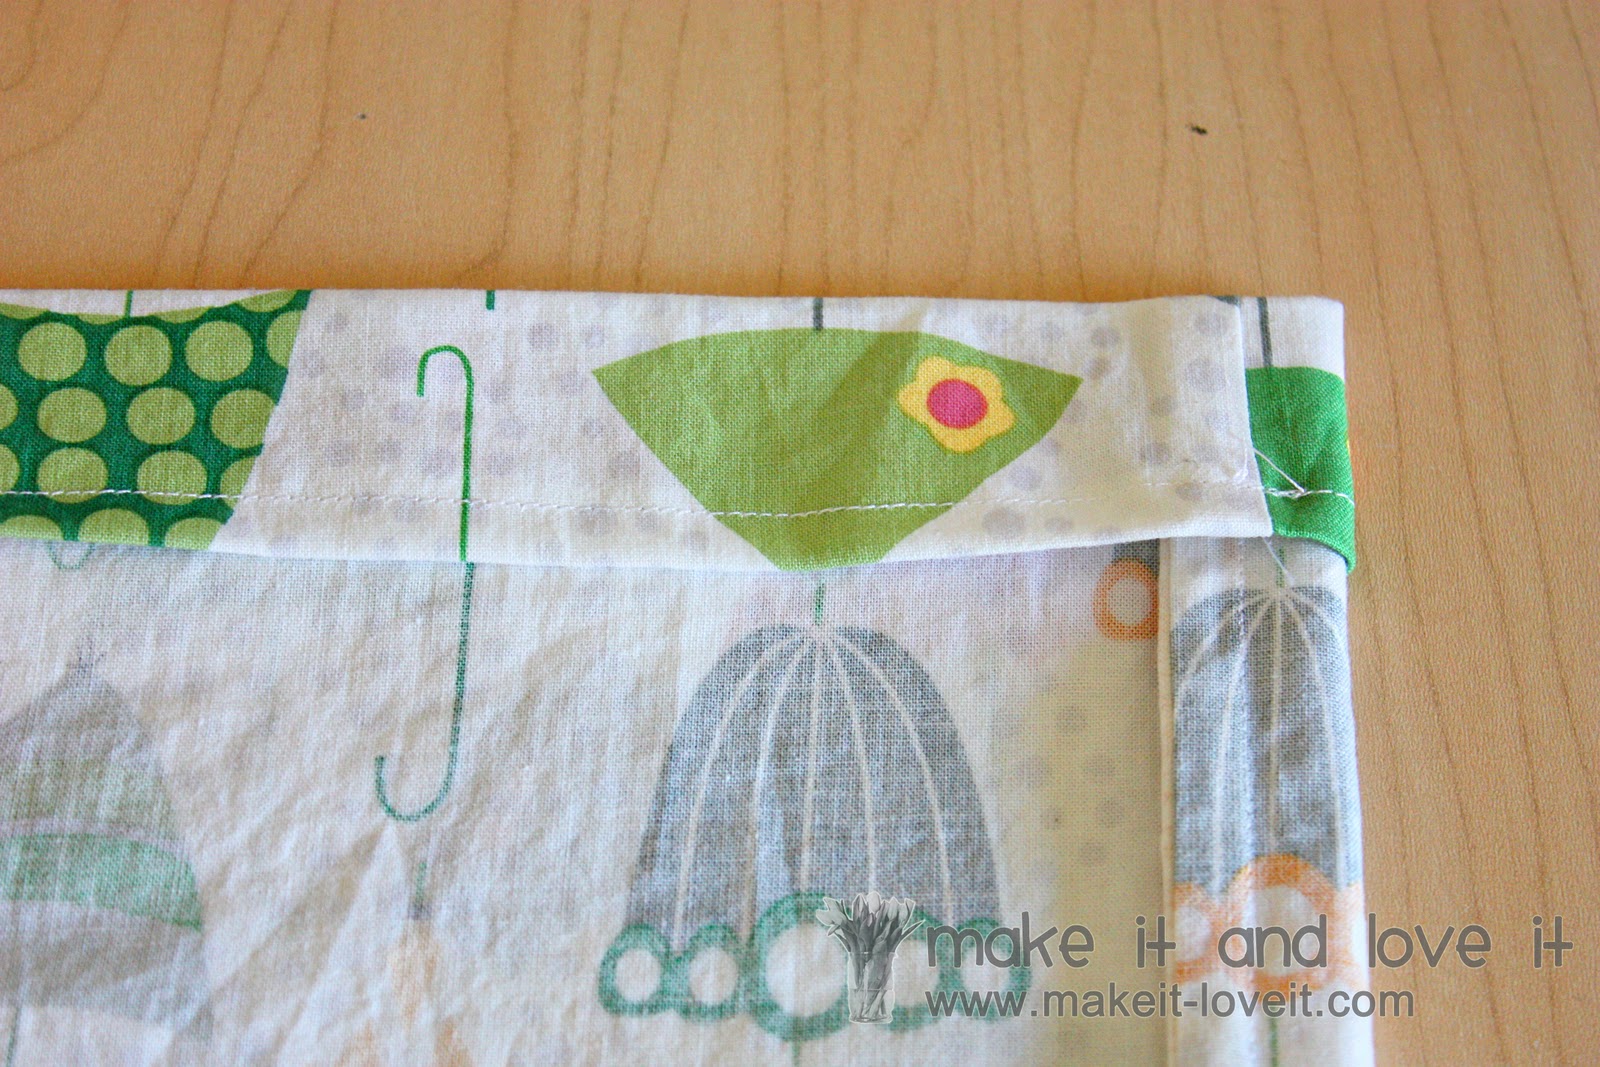
Now turn the skirt section inside out and then fold over the top of the skirt section a 1/4 inch, then another 1/4 inch and sew into place. Then fold the top down 1 1/2 inches and iron flat.
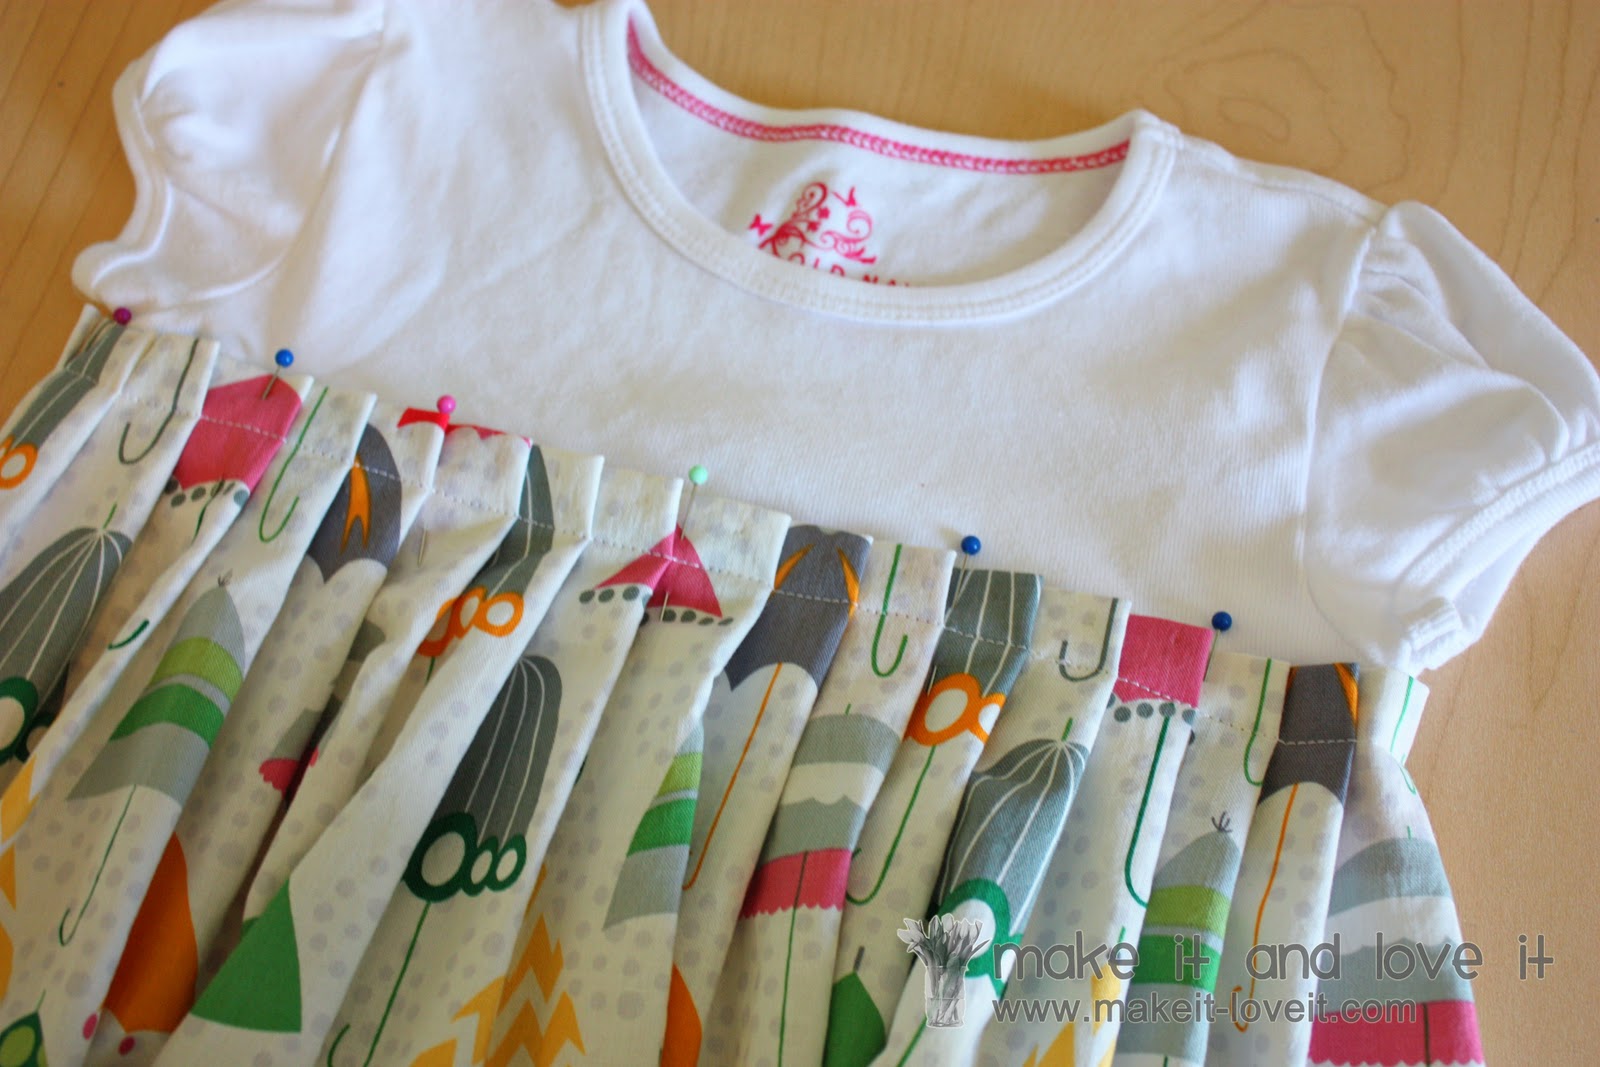
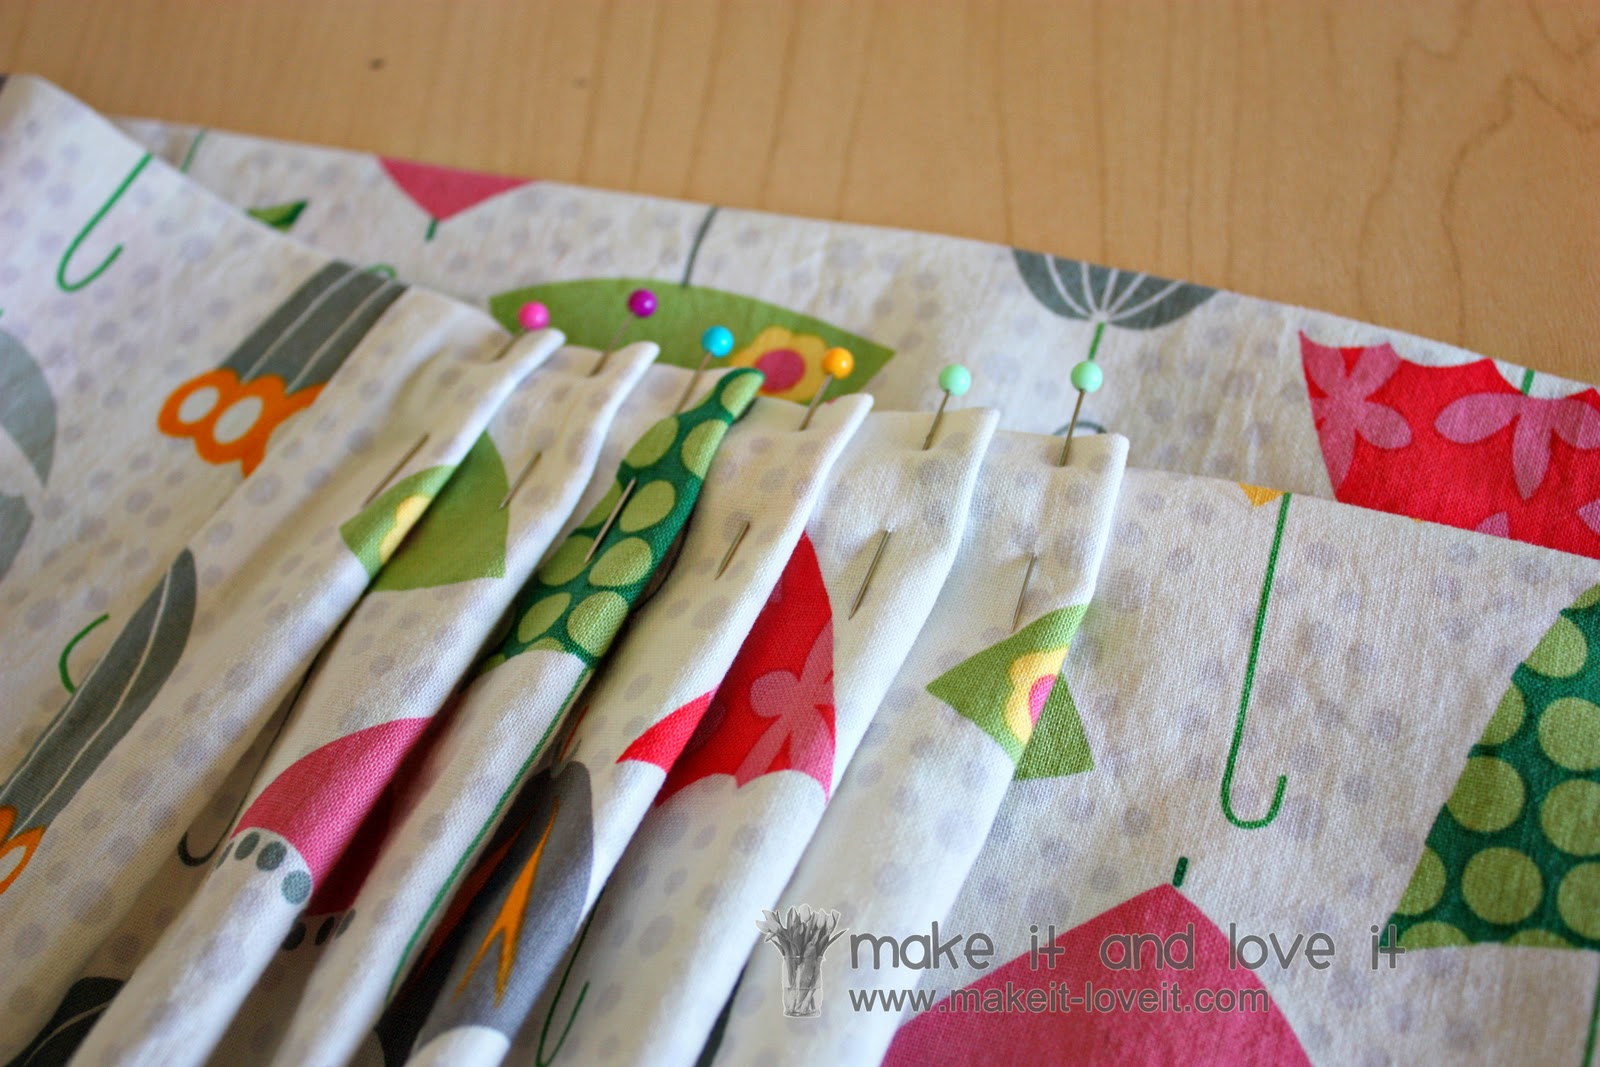
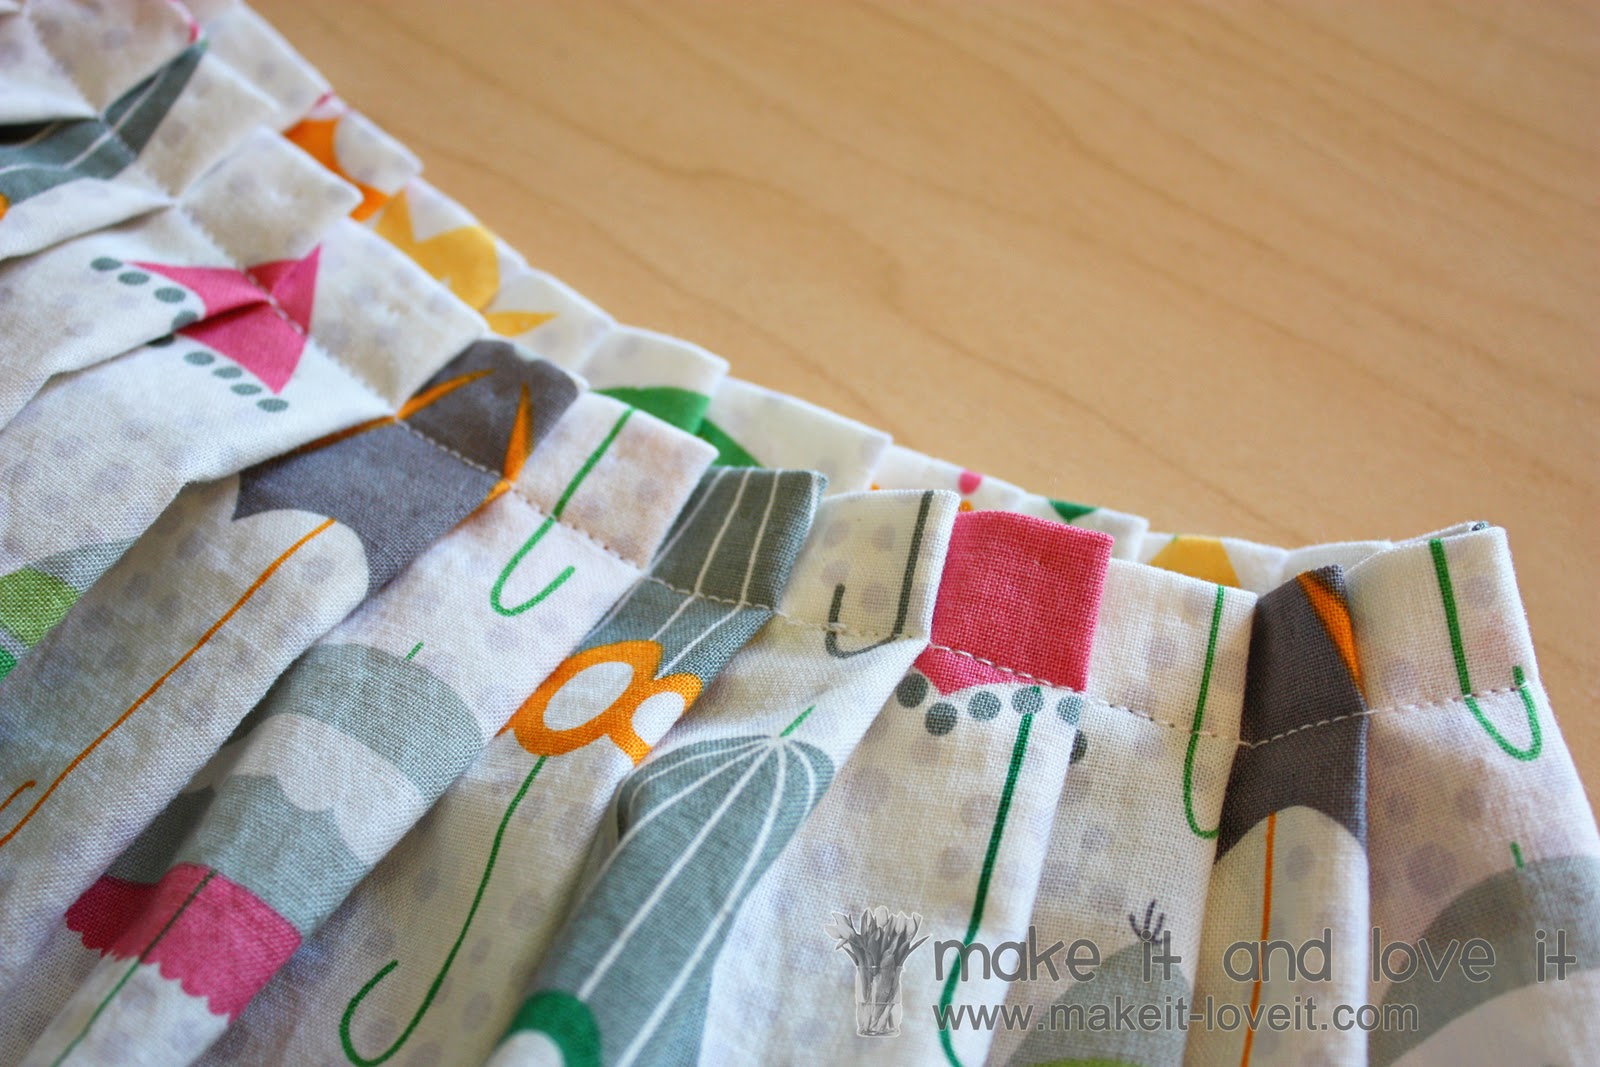
Then, turn it right side out and start making pleats along the front piece of the skirt. Use pins to keep the pleats in place. And keep the top edge of the fabric (where the fold is) lined up and even.
Here’s the top view of those pleats.
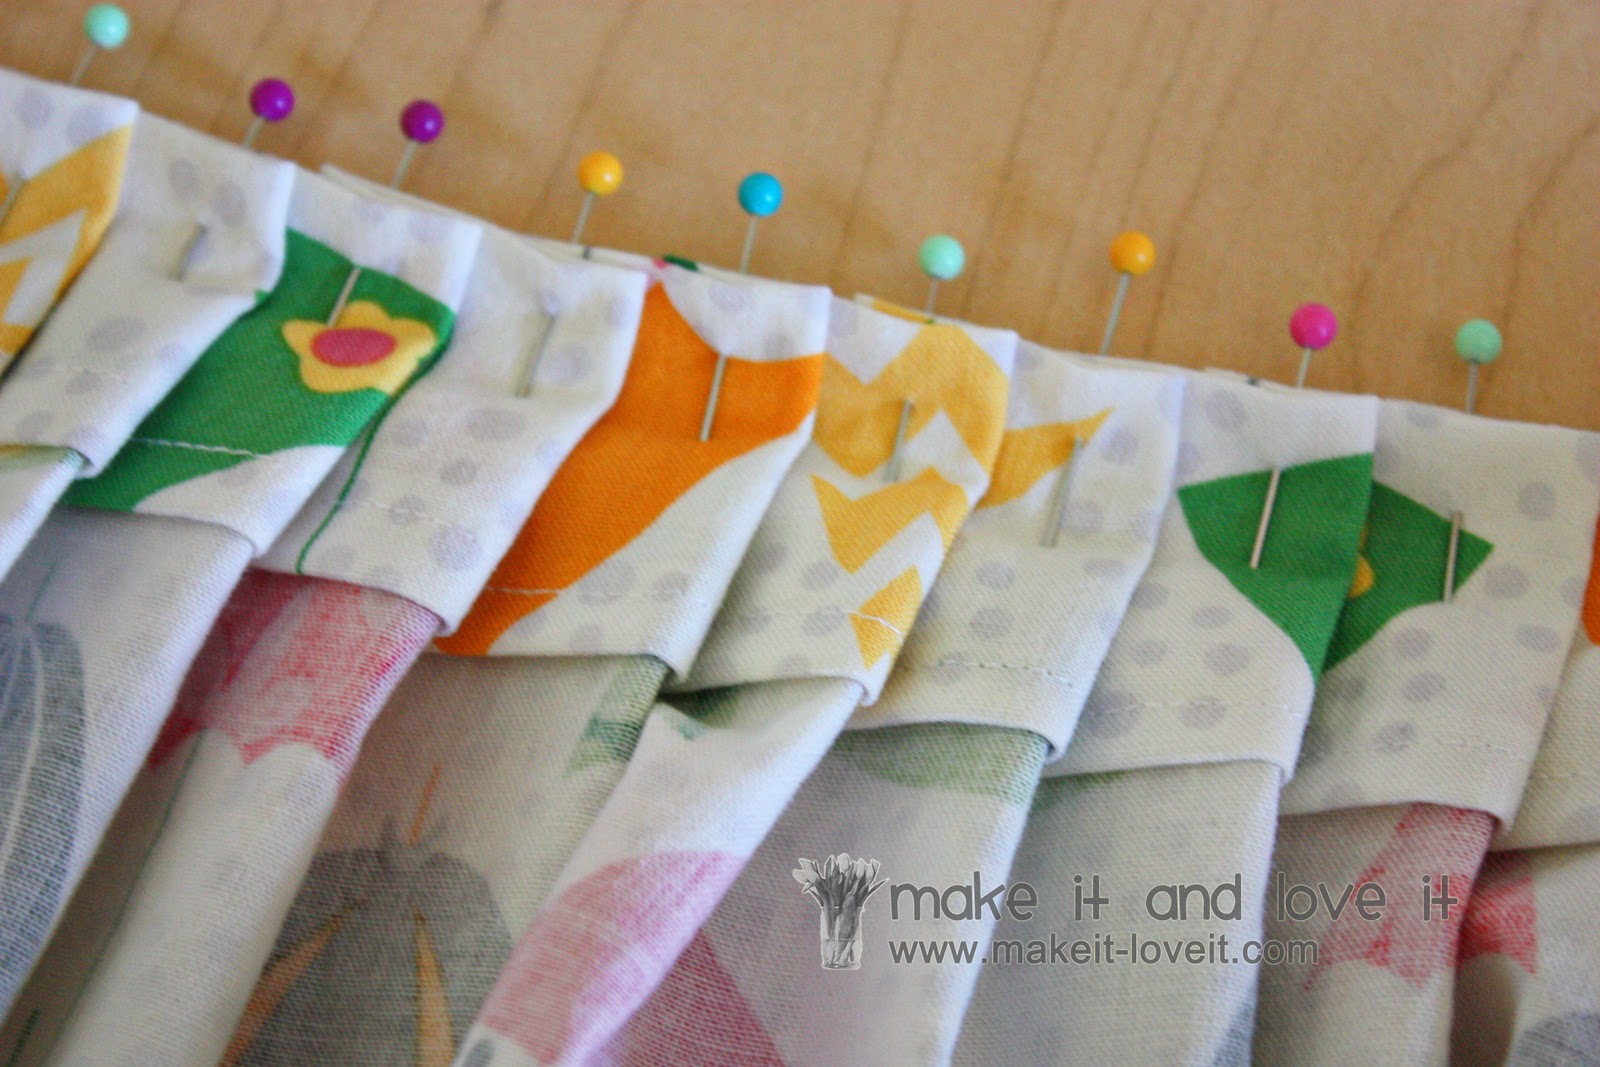
Here is the view from the back side. Nice and neat.
You’re going to have to play around with the size of your pleats. But by cutting out a piece of fabric that was 3 times as wide as the final width, that should give you enough fabric to play with and make the skirt kind of full. Once the front section (from side seam to side seam) is the same width as your shirt, you’re done.
And once the front matches up, do the same to the back.
Then make a seam 3/4 of an inch from the top of the pleats…..securing all of the pleats in place.
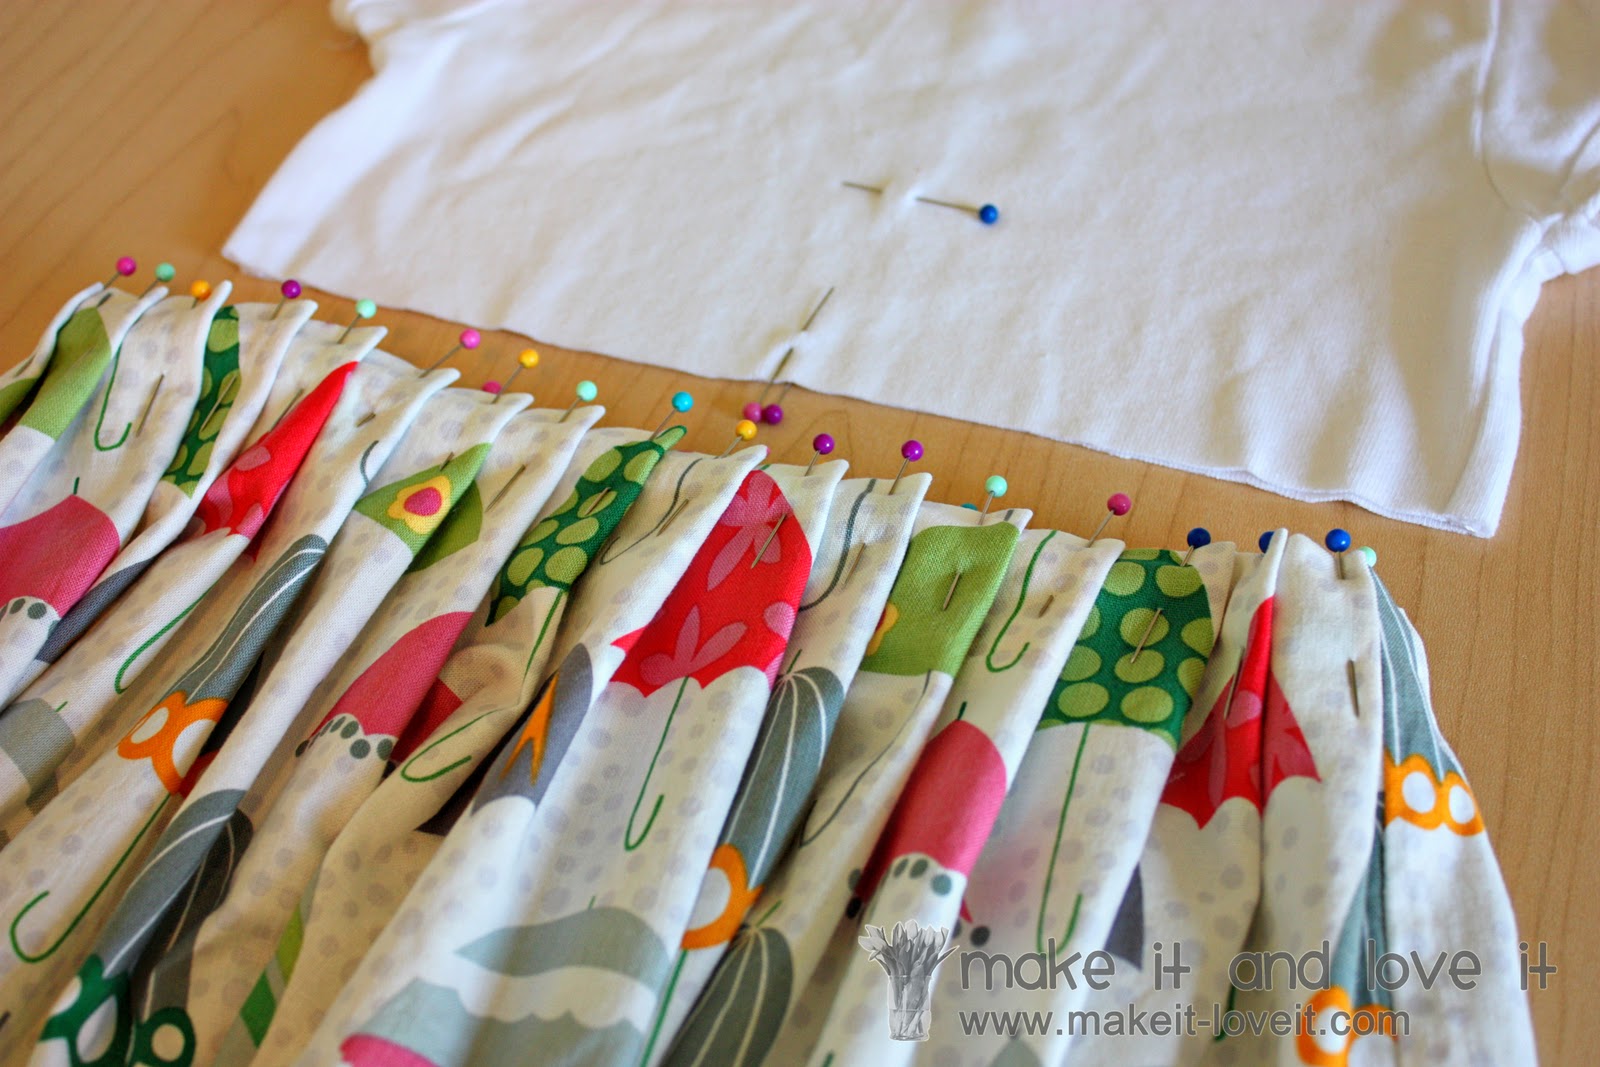
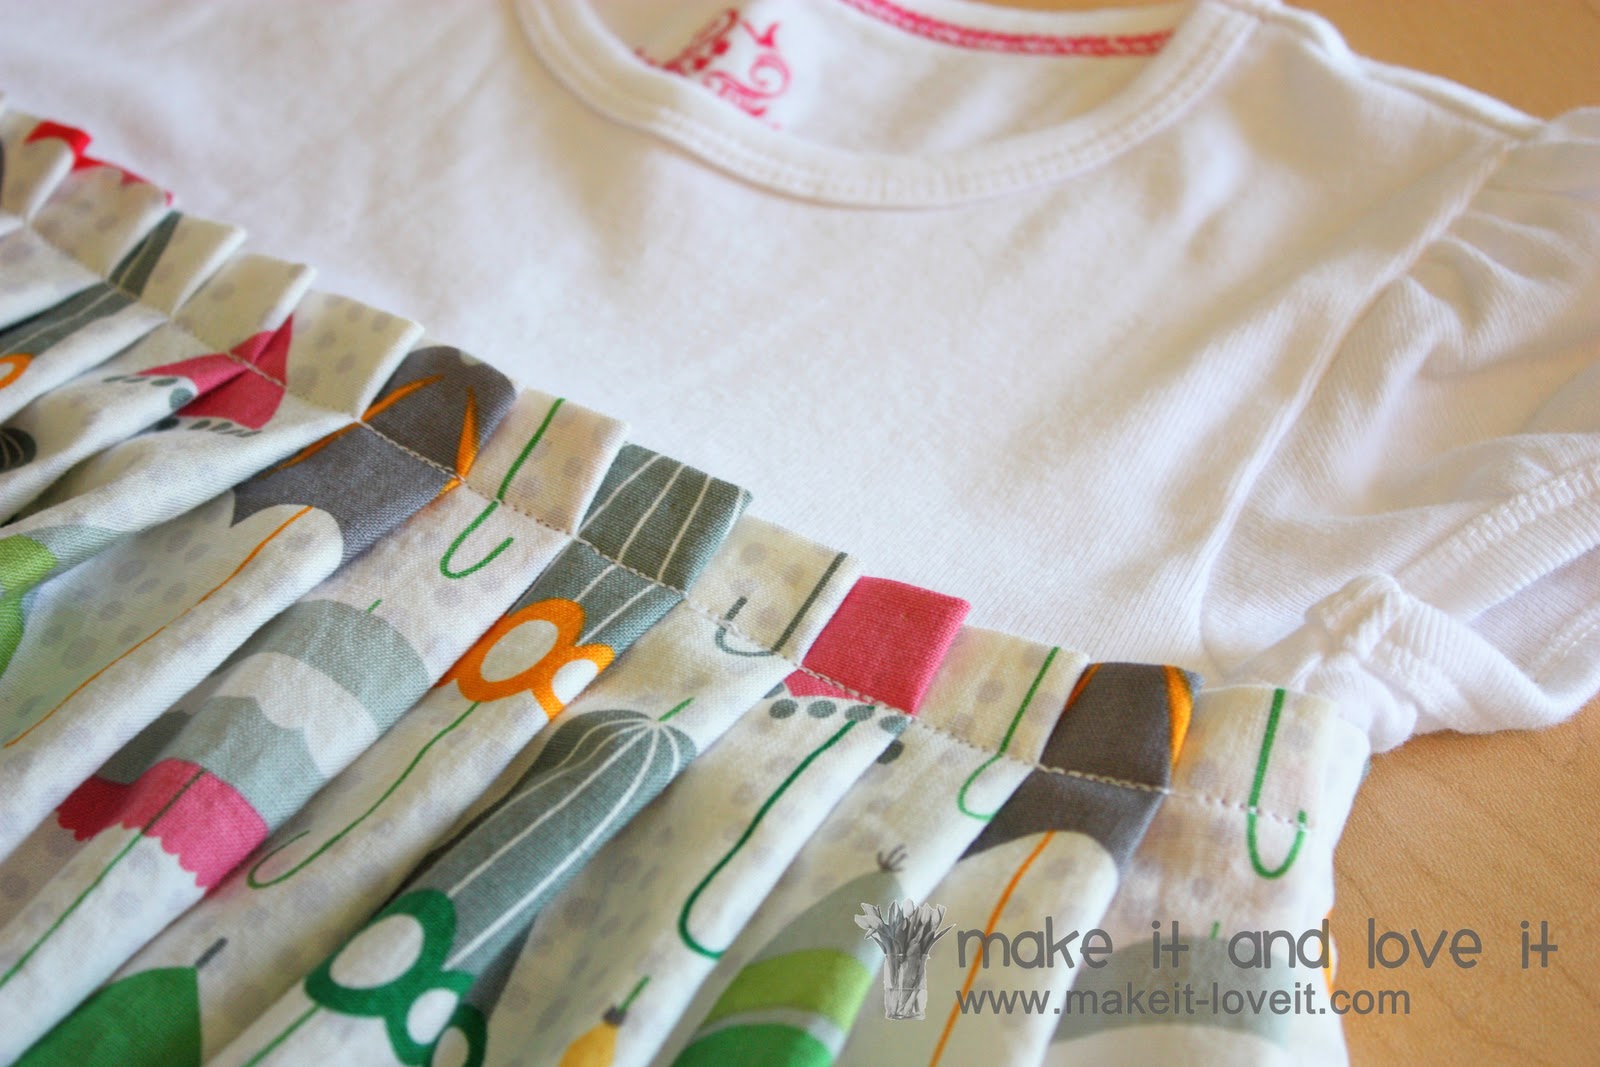
Then pin the bottom section of the dress to the shirt, 2 inches from the bottom of the shirt (because earlier you made sure to keep an extra 2 inches to the length of the tshirt, right?) Pin all the way around the shirt, attaching the pleated section to the shirt.
Then sew right on top of that seam, attaching the pleated section to the dress.
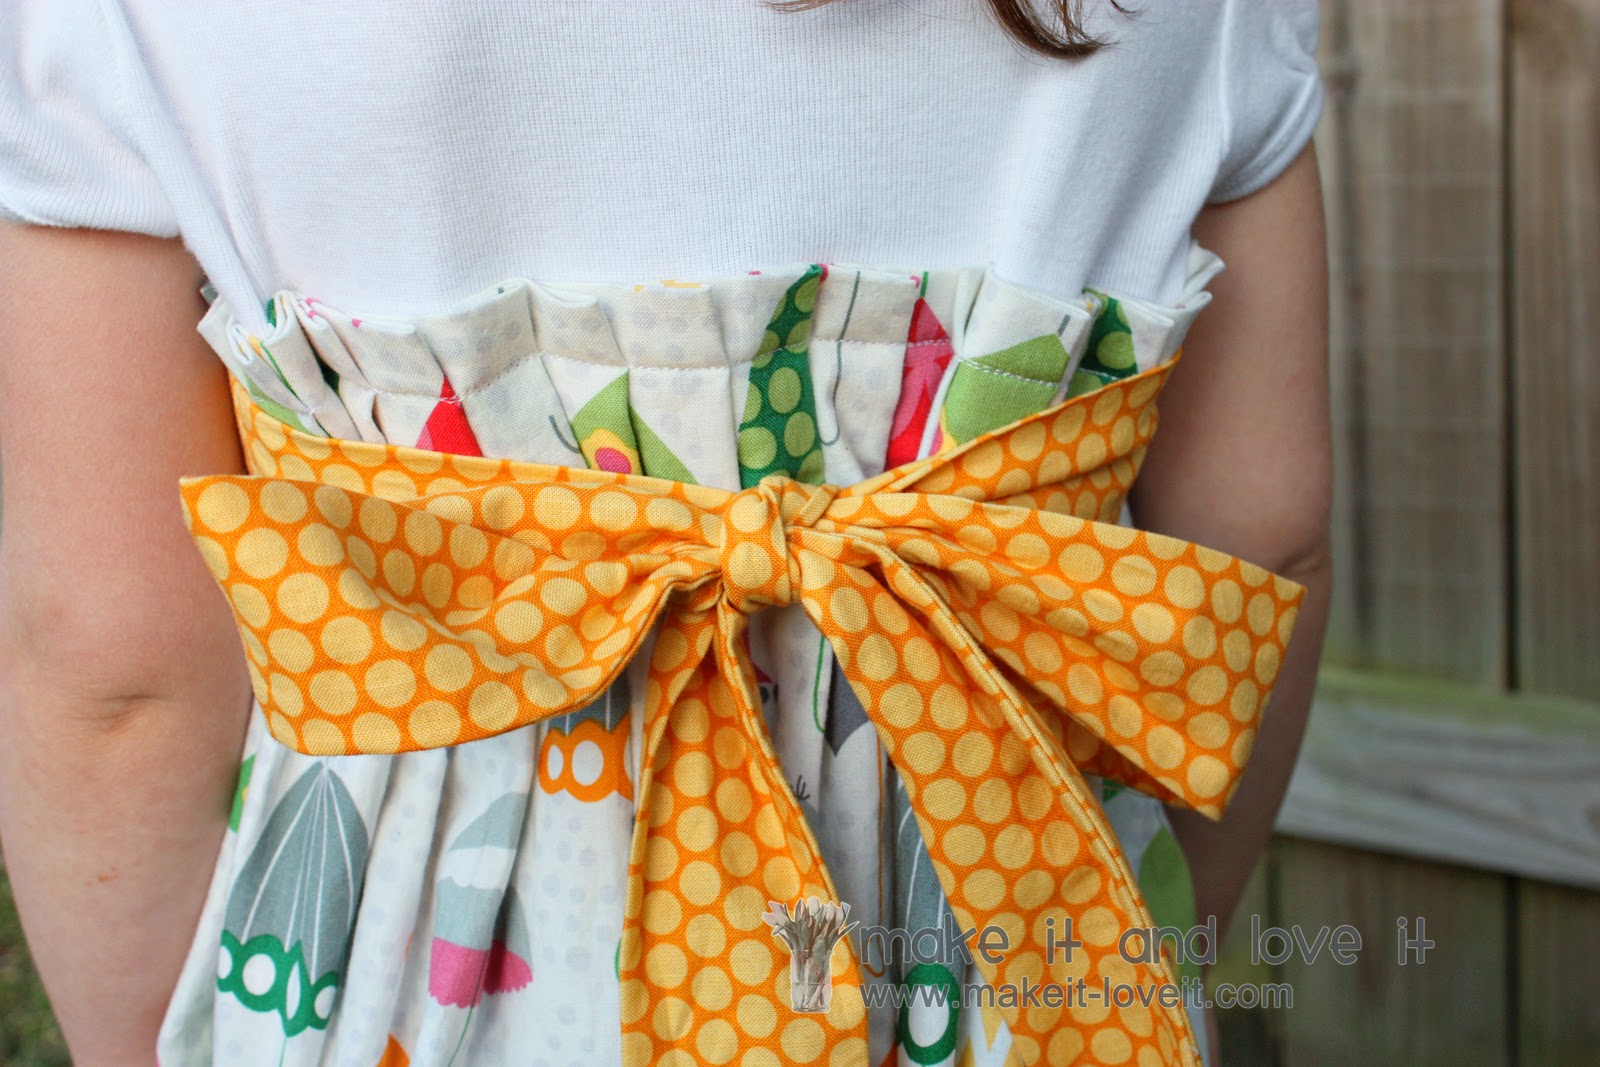
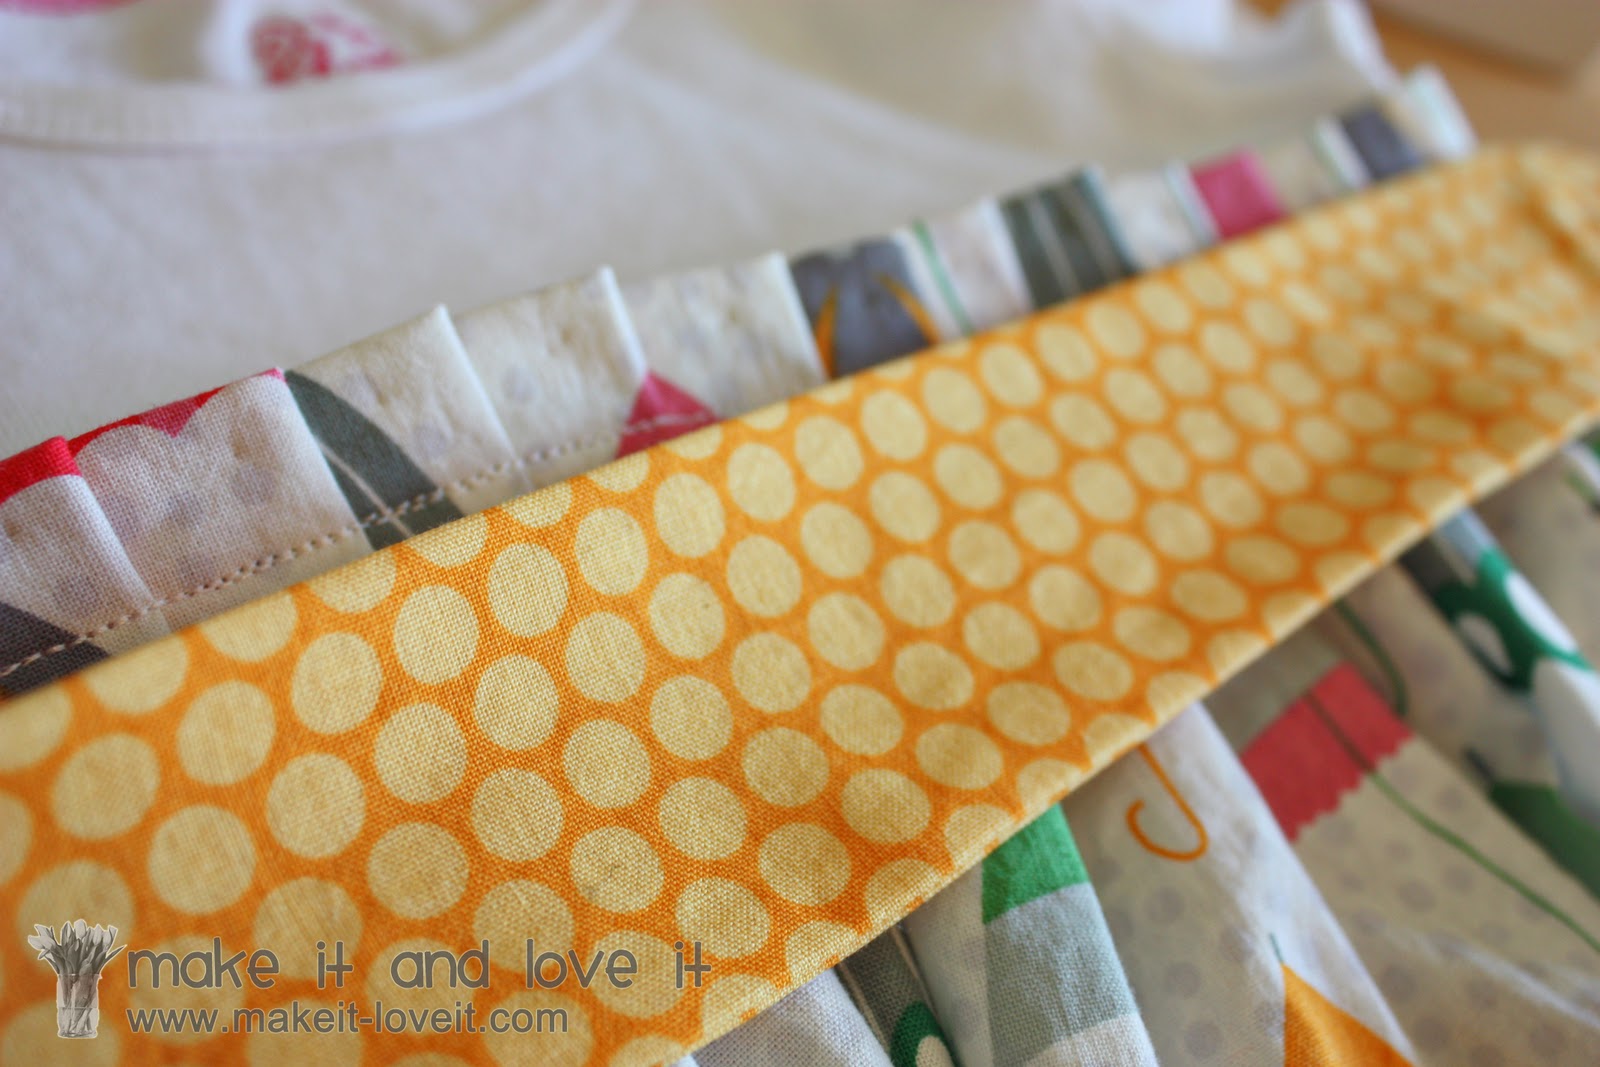
Now you’re going to make a tube that will be used for you tie. The dress I made fits about a 4T size and I wanted the tie to be about 1 3/4 inches wide………..then ended up being about 73 inches long. So I cut a piece of fabric that was 4 x 74 inches (and had to actually sew two pieces of fabric together to get a piece that was that long). Then I made the tube just like this tutorial
here. Then I ironed it flat.
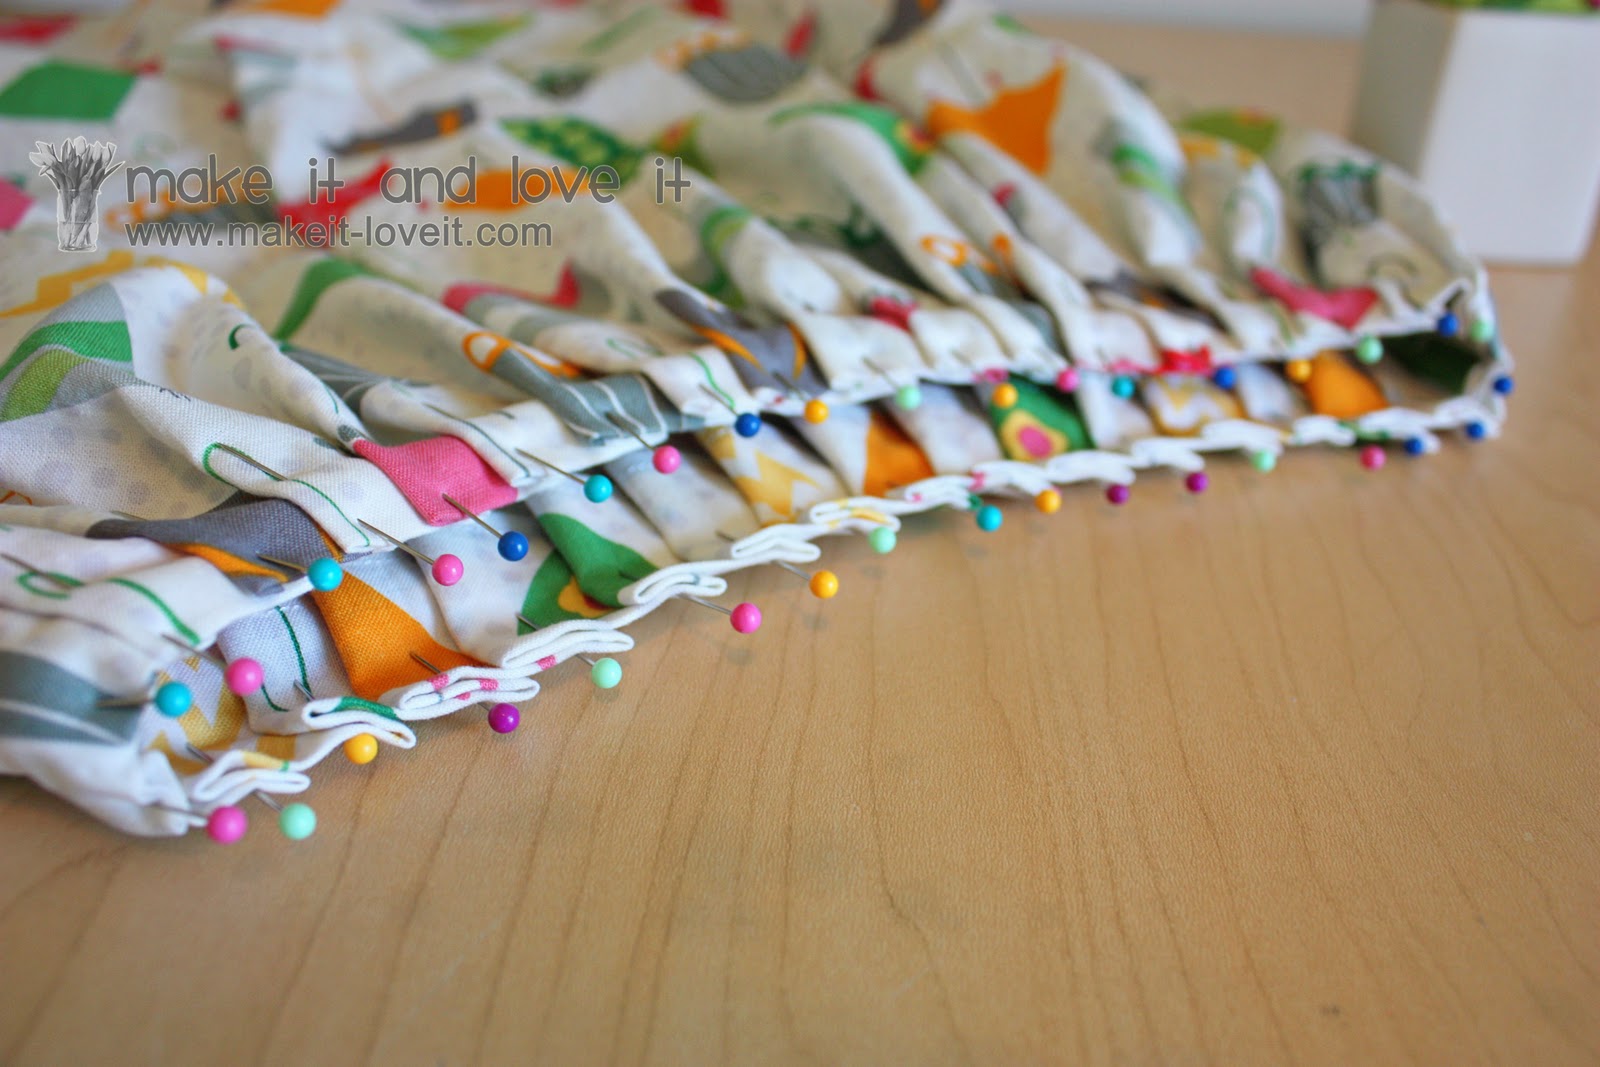
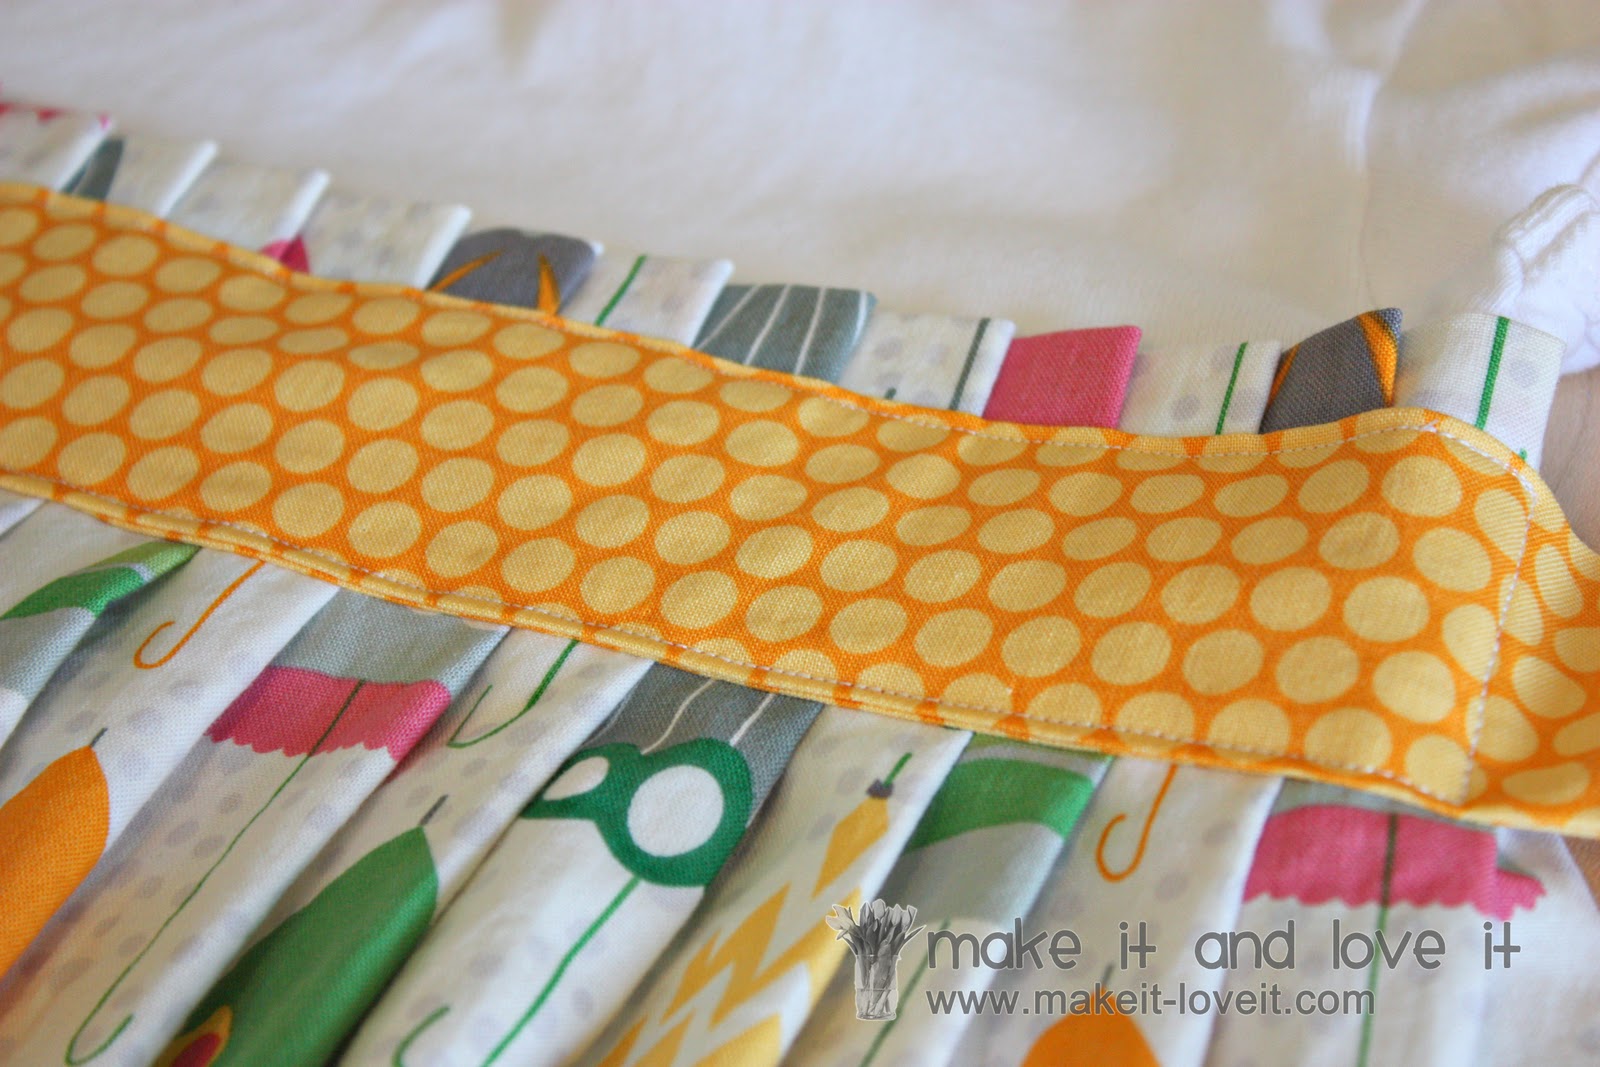
Next, I placed the center of the tie right on top of that seam that attached the pleat section to the shirt.
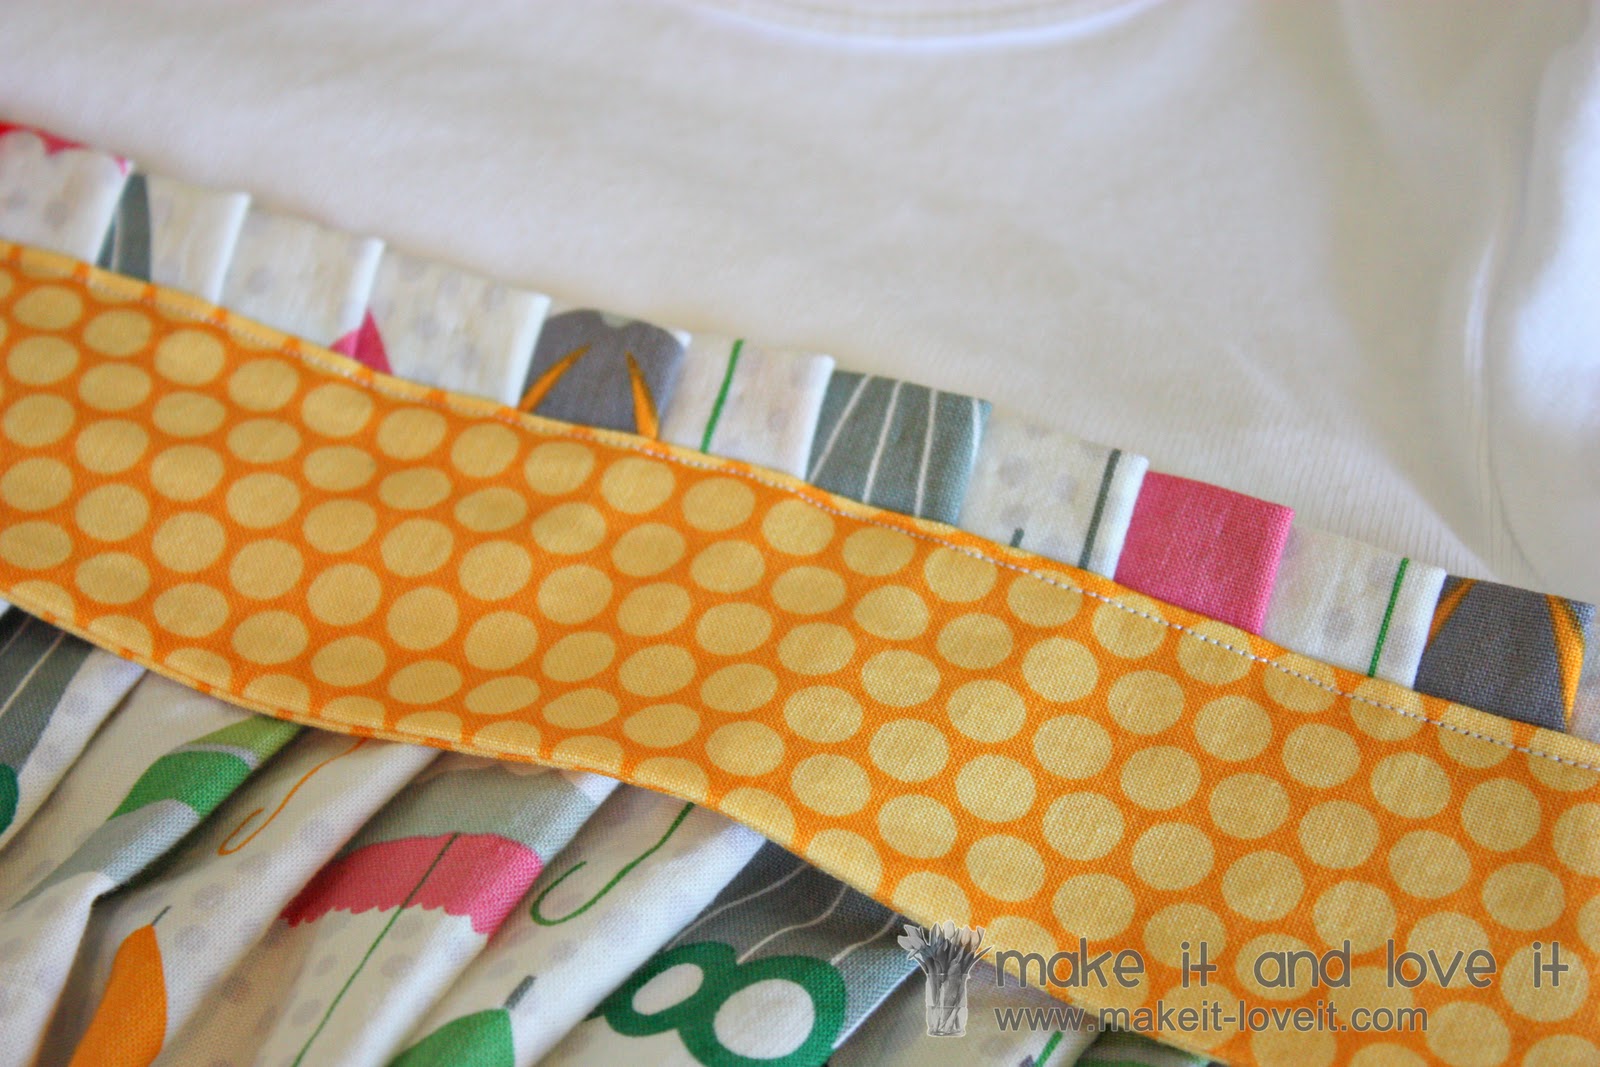
And I pinned the tie in place and sewed right along the top of the tie, very close to the edge. I only sewed from one side seam of the dress to the other side seam.
Then I made sure the pleats were laying flat and pinned the bottom of the tie down to the dress. Make sure to include the bottom of the shirt (that’s in the inside) while you pin, so that it will be included in your seam.
Then I sewed along the sides and the bottom of the tie, securing the tie to the dress.
Then I tucked in the raw edges of the ends of the ties towards the inside, about a 1/4 inch……..and sewed them shut. Nice and simple.
Lastly, I folded the bottom edge under a 1/2 inch and then another inch, sewed it in place, then ironed it flat. (But make sure to try it on your little girl to see how long you’d like it…..then hem the dress.)
And that’s it.
A new look for that old wrecked Tshirt.
One that is perfect for hopping and dancing……