.
I love tulips.
And wow, do I love the whimsy of filling plastic eggs with delicious candy, dipping rows of stark white hard-boiled eggs into vibrant colors, hunting for hidden treasures amongst tall blades of grass, etc.
I always have.
We keep the playful side of Easter pretty innocent in our home…..and enjoy the tradition of giving/receiving baskets of treats and wearing new spring outfits.
But along with that, I always enjoy adding a few new spring decor pieces to a shelf or an end table.
And reminds me that my favorite time of year has come.
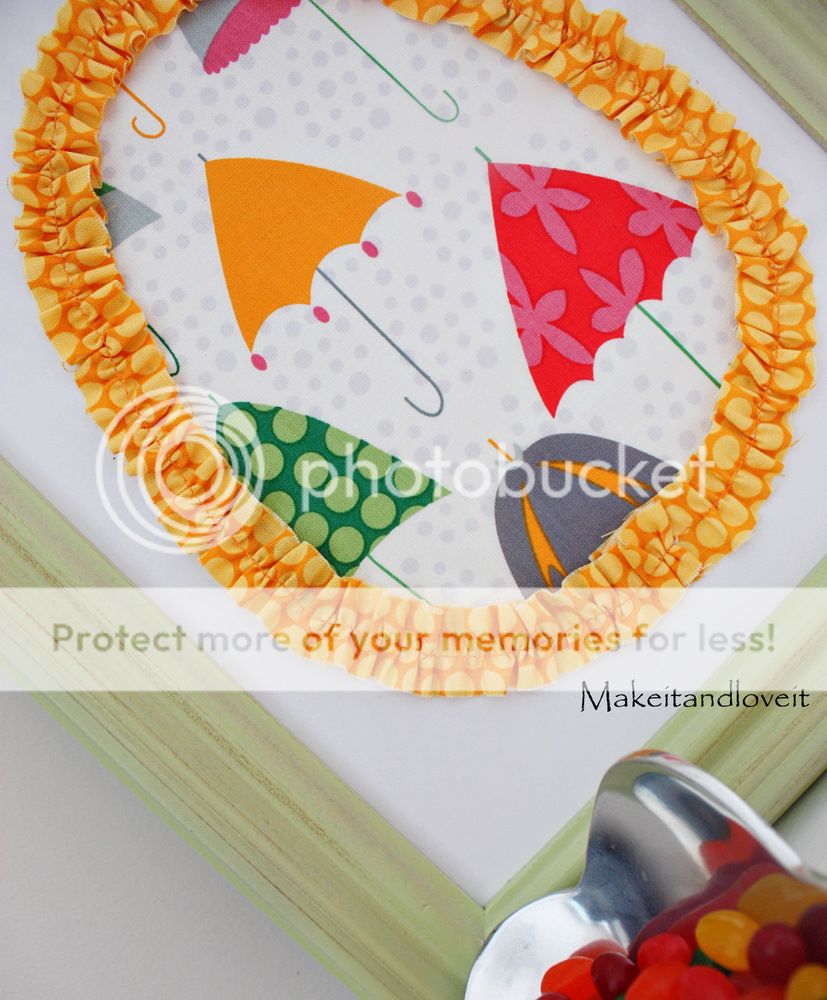
And what would spring be without color and a ruffled egg?
I bought this fabric for a different project but borrowed a bit for this framed egg. If interested, I bought this fabric here.
(Riley Blake Designs Umbrella Tops in Green)
And I love it.
Would you like to add an egg to your table or shelf this spring?
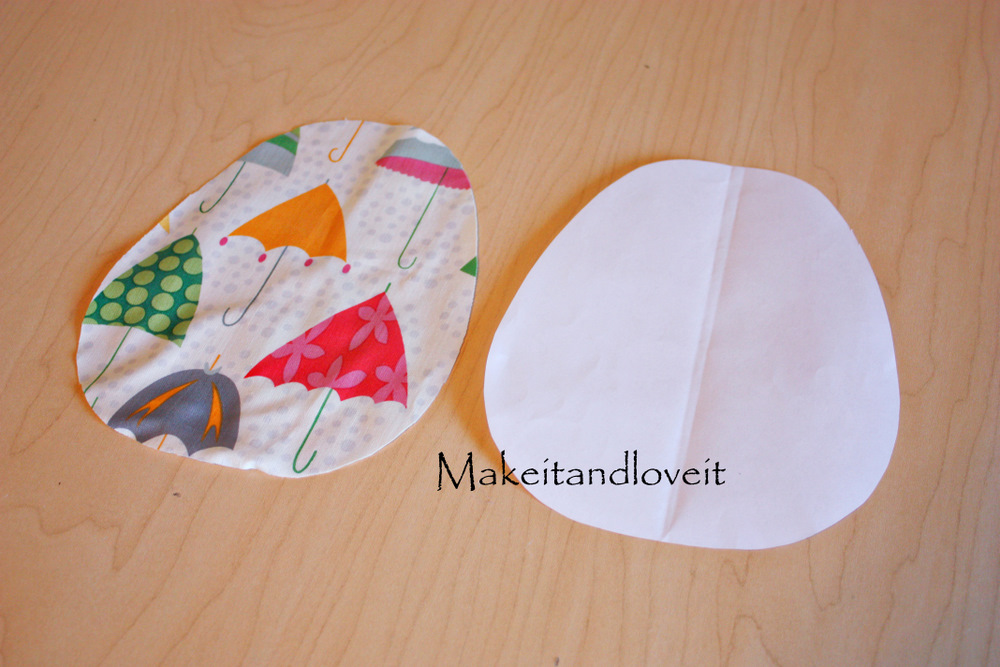
Find a frame that will work for this project (mine is an 8 x 10 frame) and cut out an egg out of paper. Then use that as a pattern as you cut the same shape out of fabric.
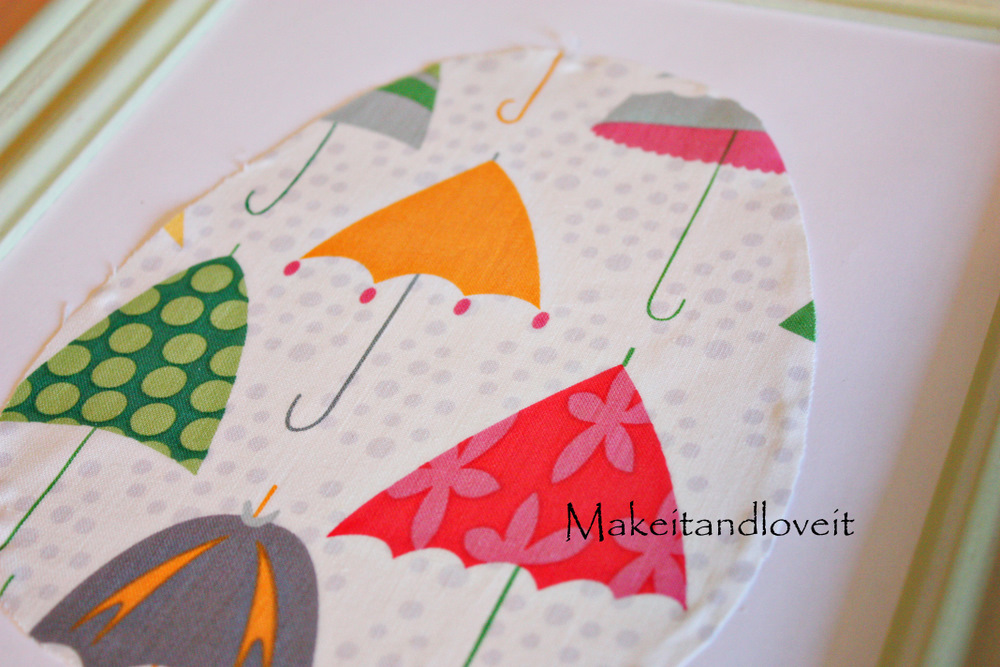
Then cut a piece of card-stock that is the same size as the glass of your frame and place the paper in front of the glass and put the frame back together. (Keep the glass in there so you can use the frame for something else during the rest of the year. Or use a frame that you generally have pictures in and borrow it while you have your spring egg up for a few weeks.)
Then glue your egg to the cardstock, centering the egg in the frame. (I used hot glue and only glued around the edges of the egg so that you wouldn’t see the glue through the fabric. You could also use mod podge or even a glue stick to keep the egg in place.)
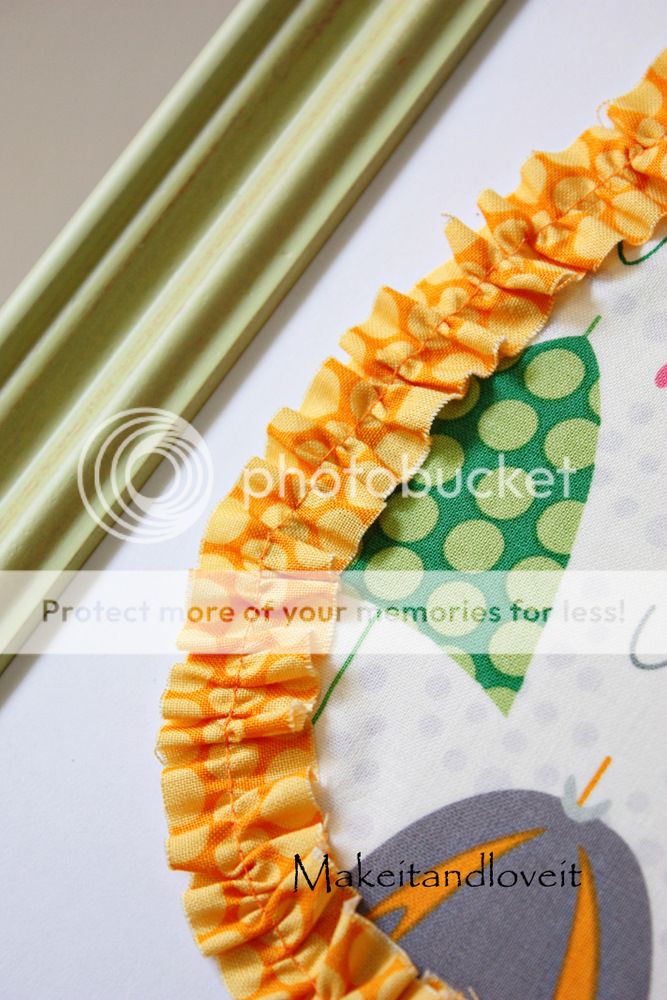
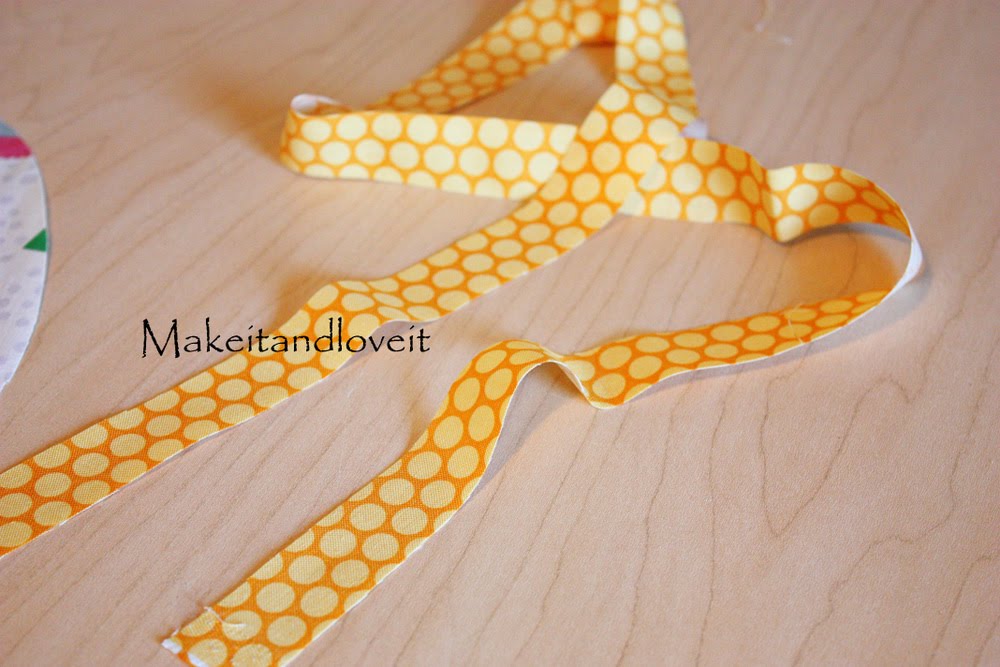
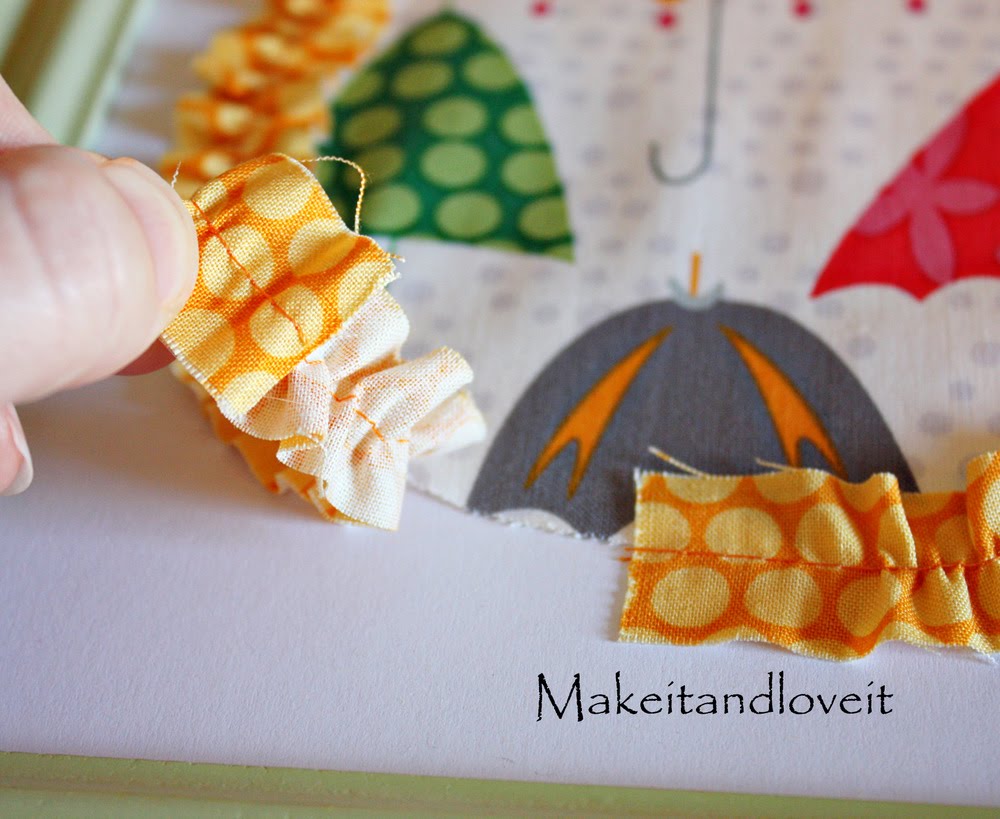
Then I cut a strip of fabric that was 1 x 45 inches.
Then I sewed a basting stitch down the center of the strip, making sure to not back-stitch at either end.
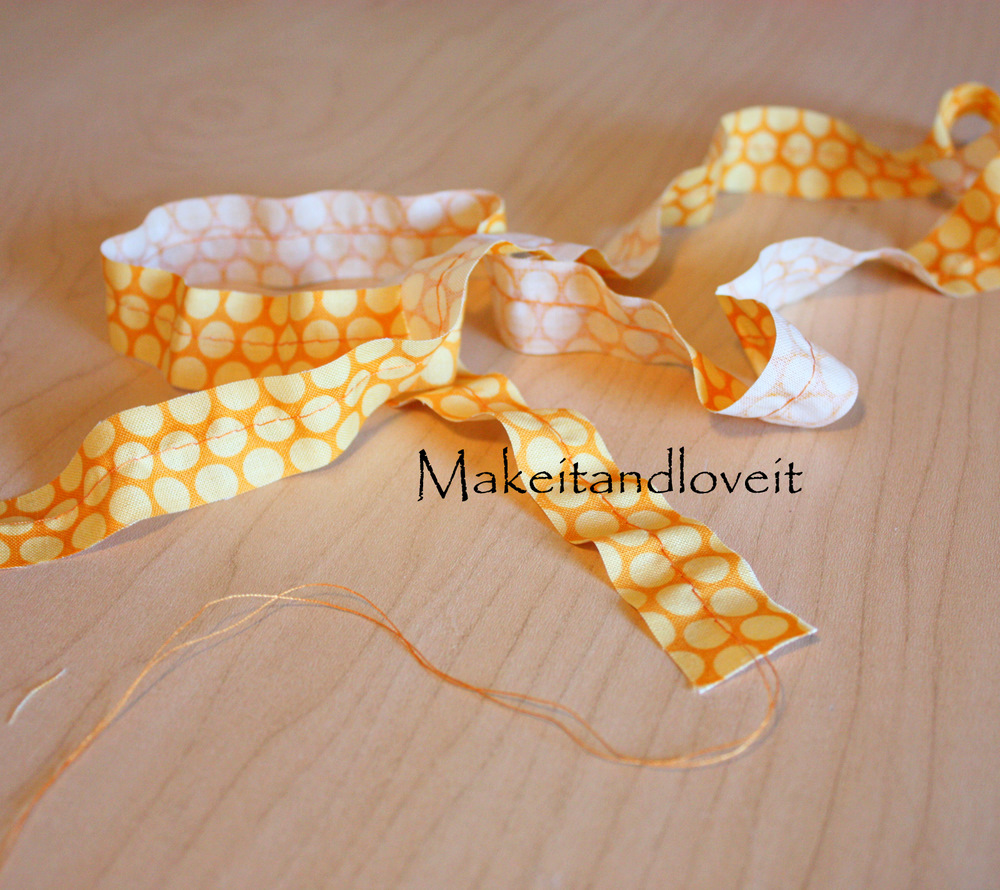
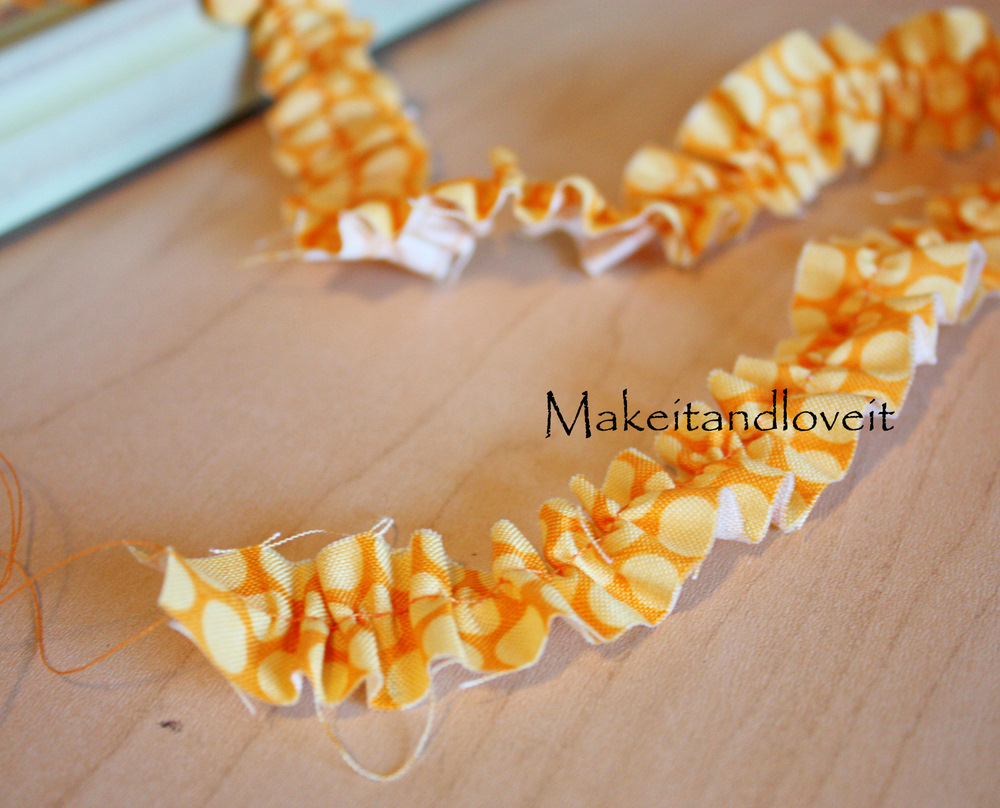
And then I gathered the piece of fabric until it was the exact length I needed to go around the egg. (Need help with gathering, refer to this post.)
Then, starting at the bottom, I carefully hot-glued the ruffle around the edge of my egg.
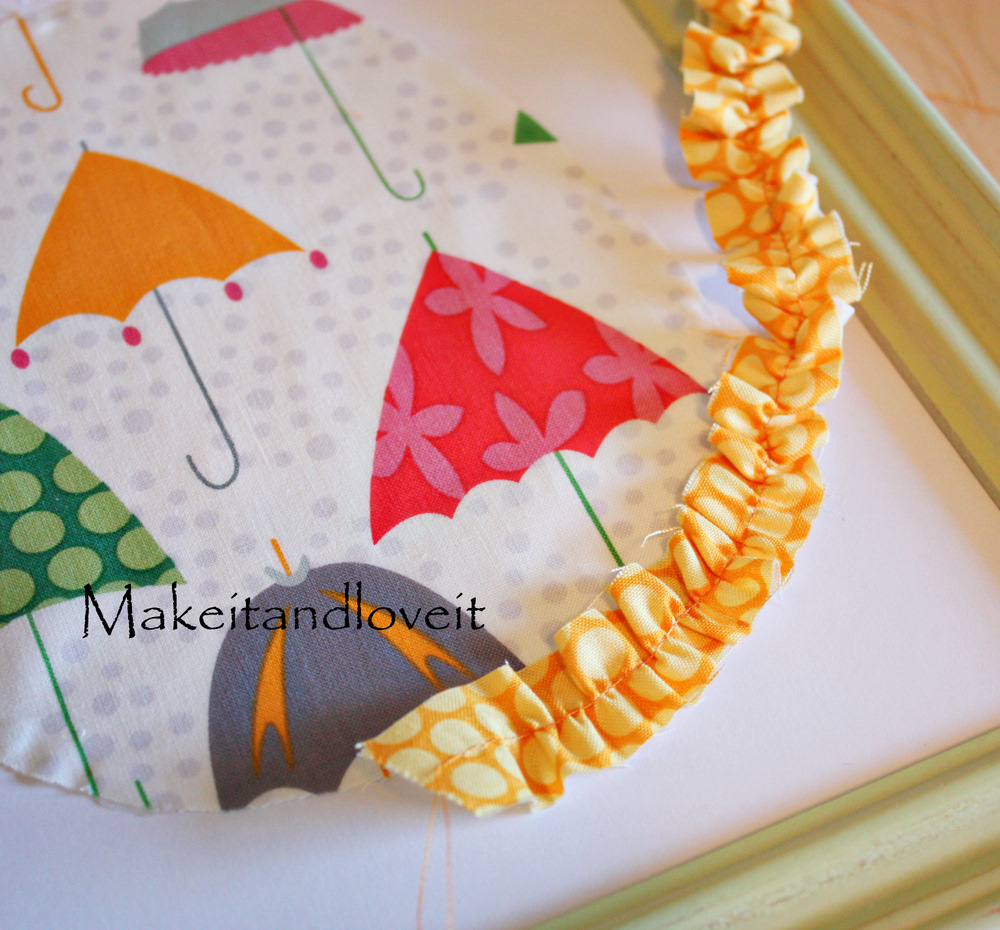
I worked my way around the top…..
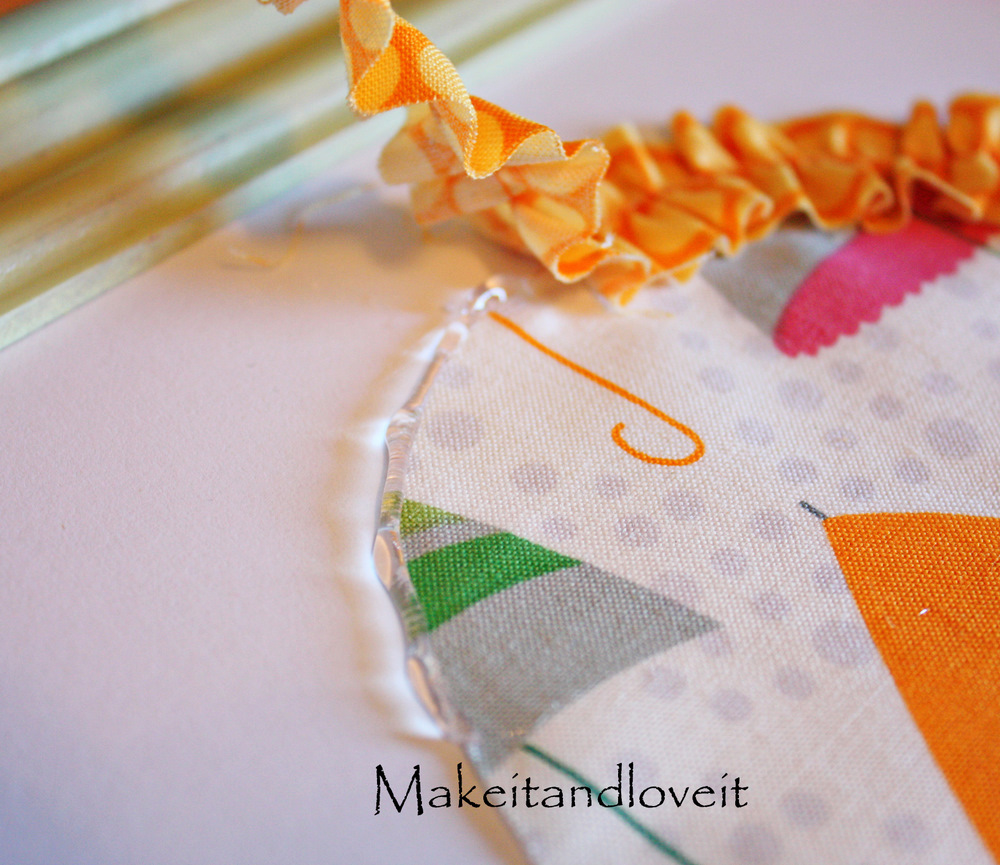
…..and then down to the bottom. Then I tucked the end of the ruffle under and glued it down, covering the raw edge of the other end.
And that was it.
Nice and colorful and a sweet little companion to a bowl of jelly beans.

Need some easter/spring ideas from past projects?
Check out this post, this one, this one, and this one.

Hi, I’m Ashley—the DIY-enthusiast behind this crazy blog!


