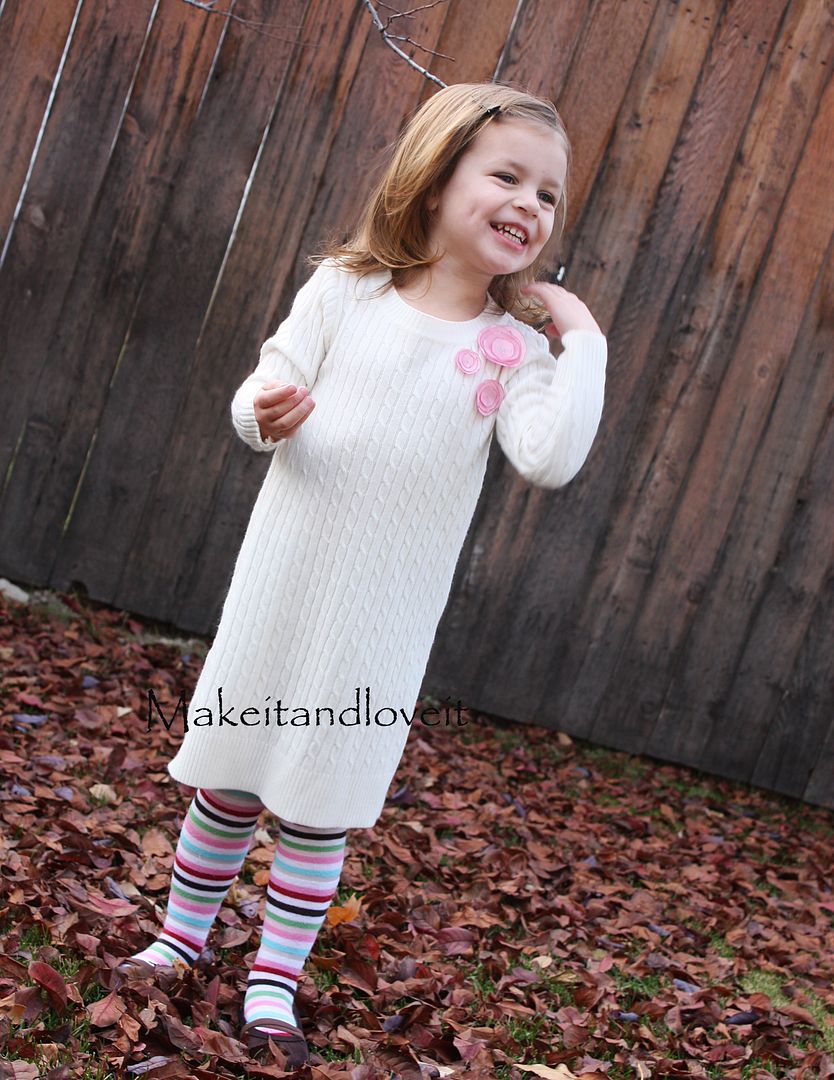
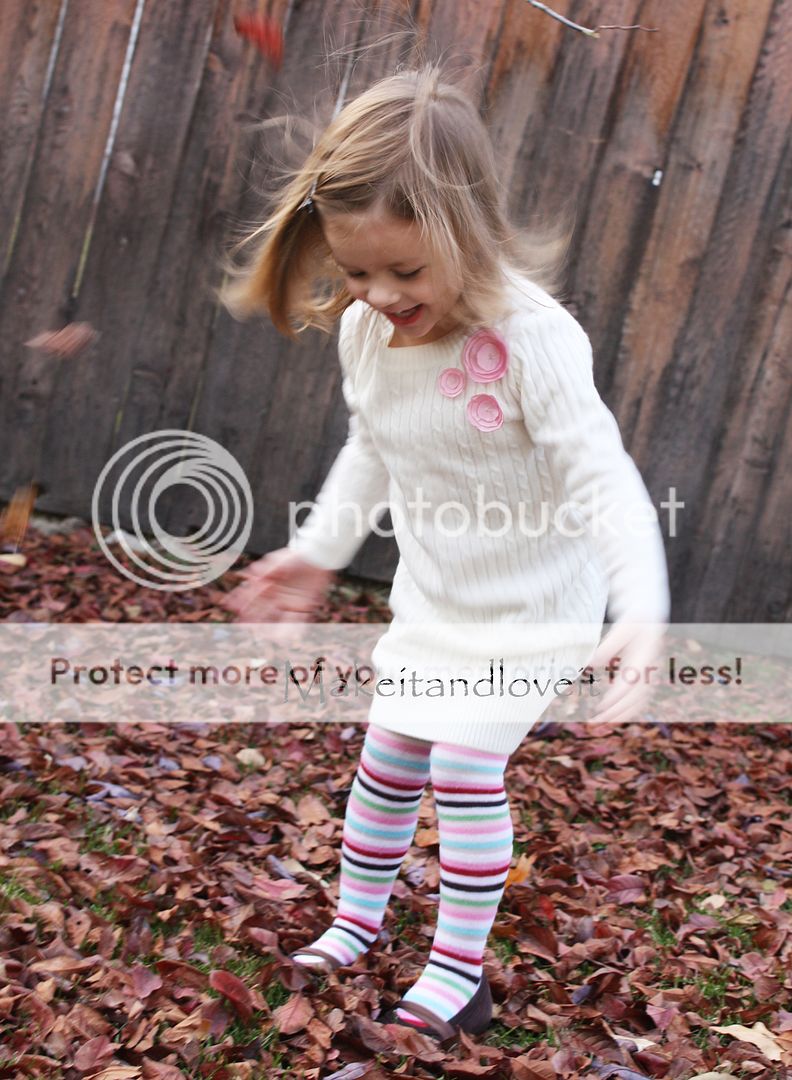
Mmmm…….something about a sweet new dress though.
Good thing my little lady loves to wear them.
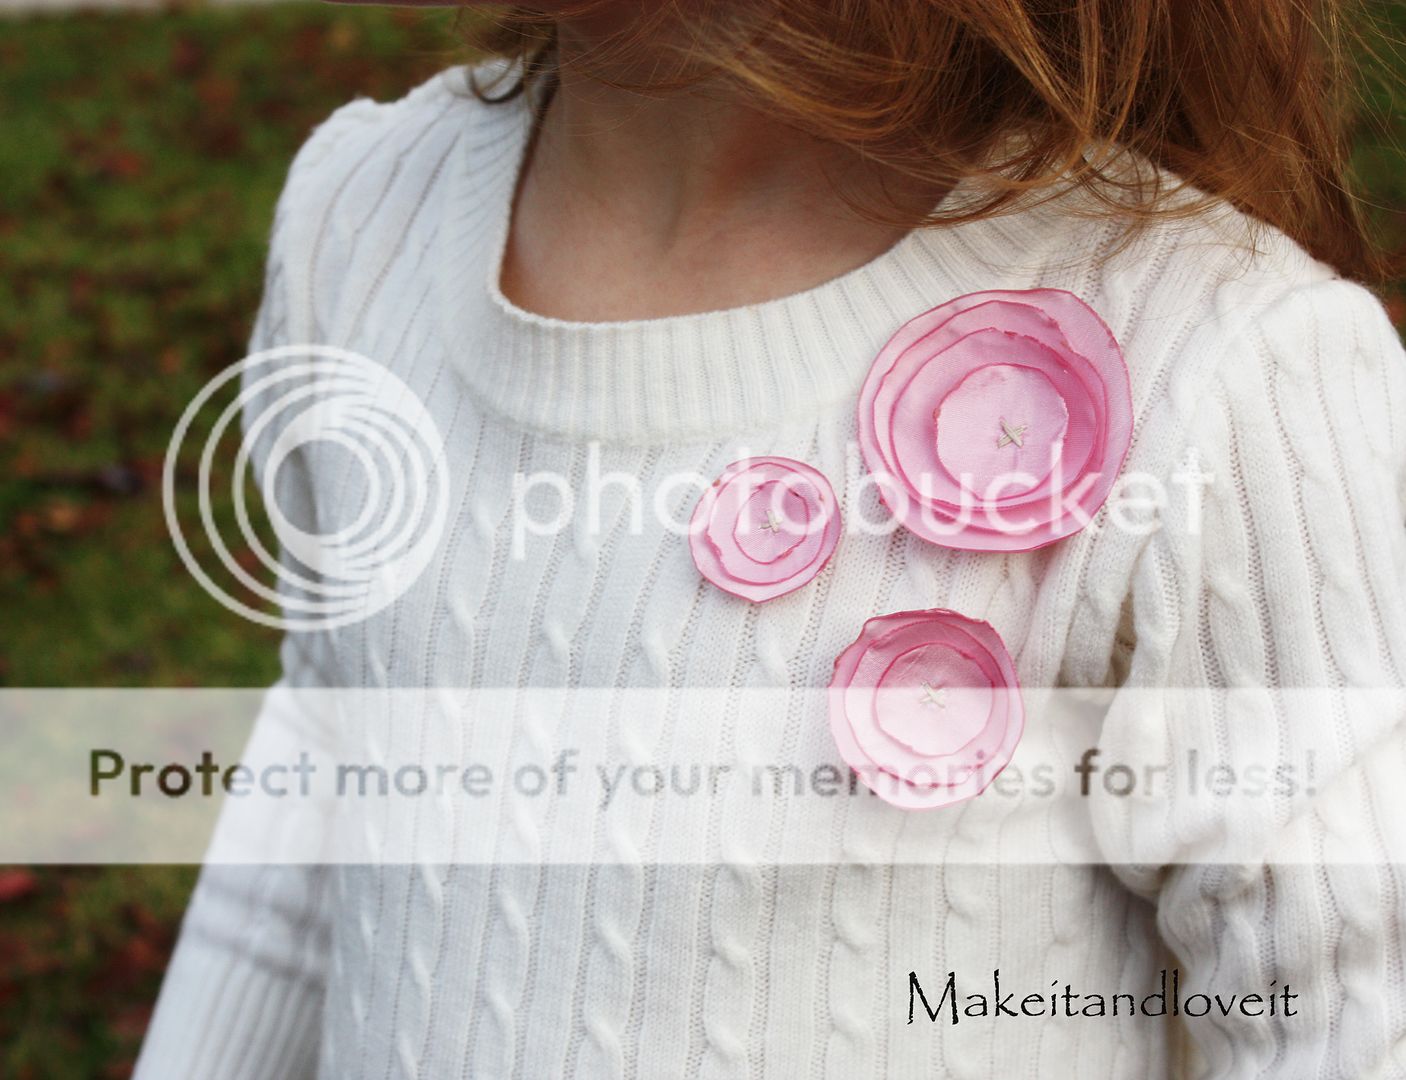
And perfectly adorned with some little satin flowers.
I found this sweater at the thrift store in great condition and decided to re-purpose the lifeless thing.
First, I cut off the sleeves and some of the sides into an A line shape. I also added a bit of a curve where the sleeves would attach. (If you need to, turn a simple cut dress inside out to use the shape of it….and get the proportions of the sleeve section right. You don’t want to make it too small of an opening.)
Then I wanted to use the original neckline, to keep things easier and that nice finished edge. But the opening was too big. So I cut a little off the top (the shoulder section) and sewed it back together with right sides together. Now you should have a smaller neck opening but should be attached again at the shoulders. (sorry…..I must have forgotten to take a picture of this step.)
Then I sewed the sides of the dress together with rigtht sides still together.
Then I used the sleeves of the sweater to create my new sleeves. Measure the length you’ll need by measuring the shoulder to the wrist of your little girl. You’ll have to cut the sleeve to be more narrow (depending on the size of your little girl’s arm) and then angle it at the top, where it will attach to the dress. Then, sew the raw edges closed with right sides together, so that you now have a tube….or your sleeve.
Attach the sleeve to the dress by pinning it all the way around while the dress and sleeve are still inside out but you’re pinning the edges together with the right sides together…….and with the seam on the bottom, matching with the side seam of the dress. If you need better step by step directions for this concept, refer to this tutorial here.
Turn right side out and embellish however you’d like. I saw these cute little satin flowers here. All you do is cut out circles of satin in different sizes and use a lighter to melt the edges…and keep them from fraying. Stack them up, put a button or a bead in the middle….or leave it plain and stitch them in place. Attach to your dress for some extra cuteness.
And then cozy up that little lady in her new sweater dress and let her do her thing.
Love it.

Hi, I’m Ashley—the DIY-enthusiast behind this crazy blog!