.
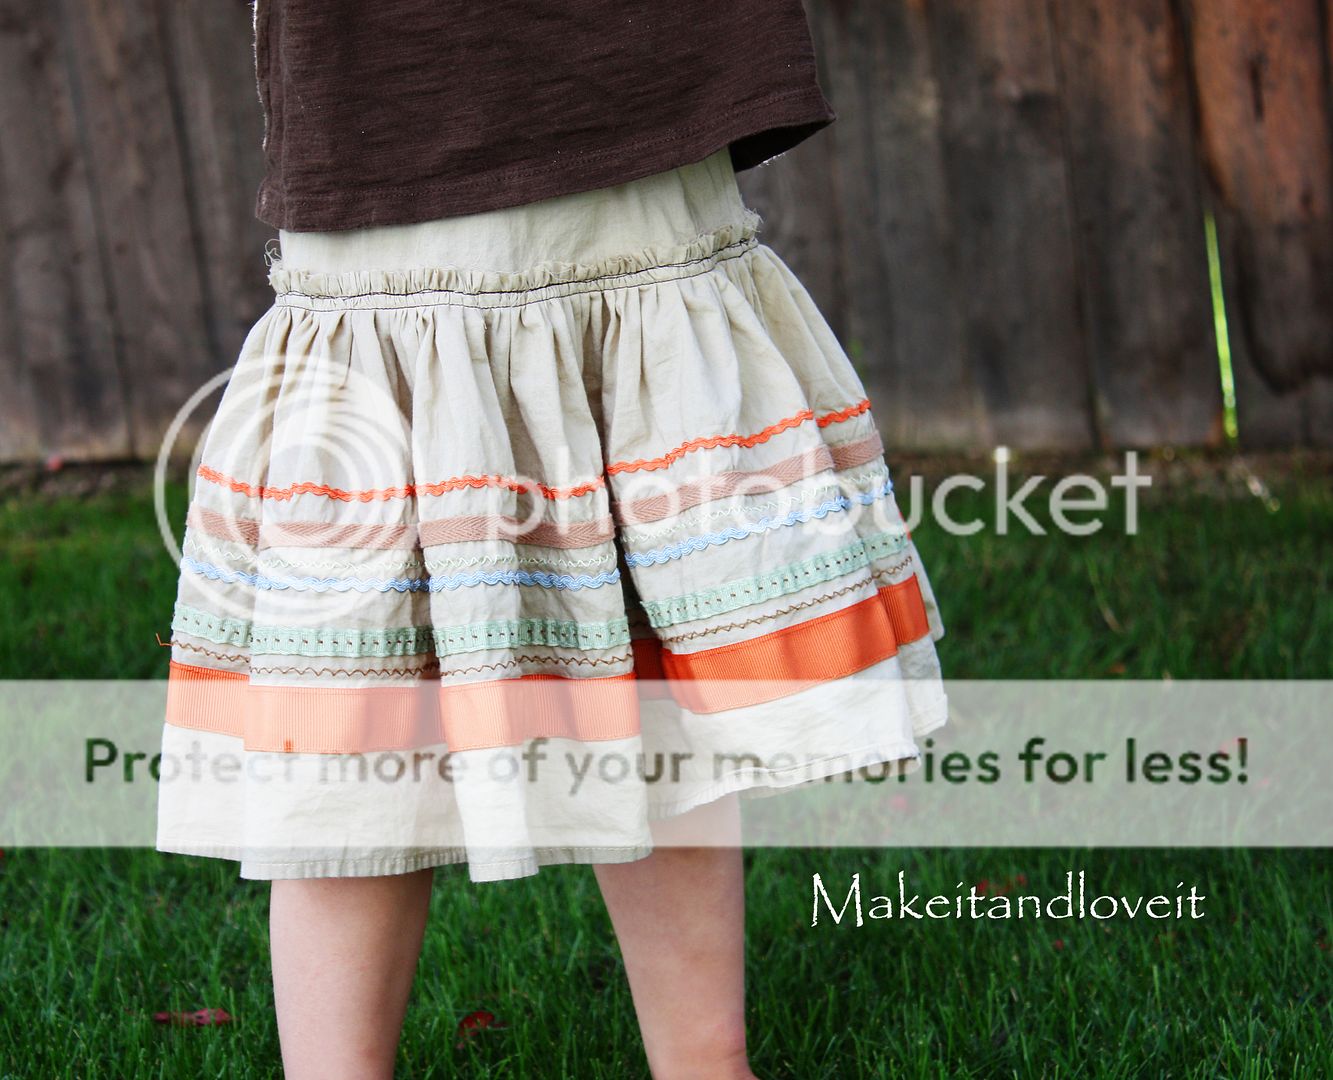
My only sorrow is that this sweet little flouncy skirt doesn’t fit me.
Darn.
Do you have a skirt that has a busted zipper, a tear or stain towards the top?
Go on, turn it into a skirt for a little lady. Here’s how:
(I made my little skirt for a size 3T, so my measurements are given accordingly.)
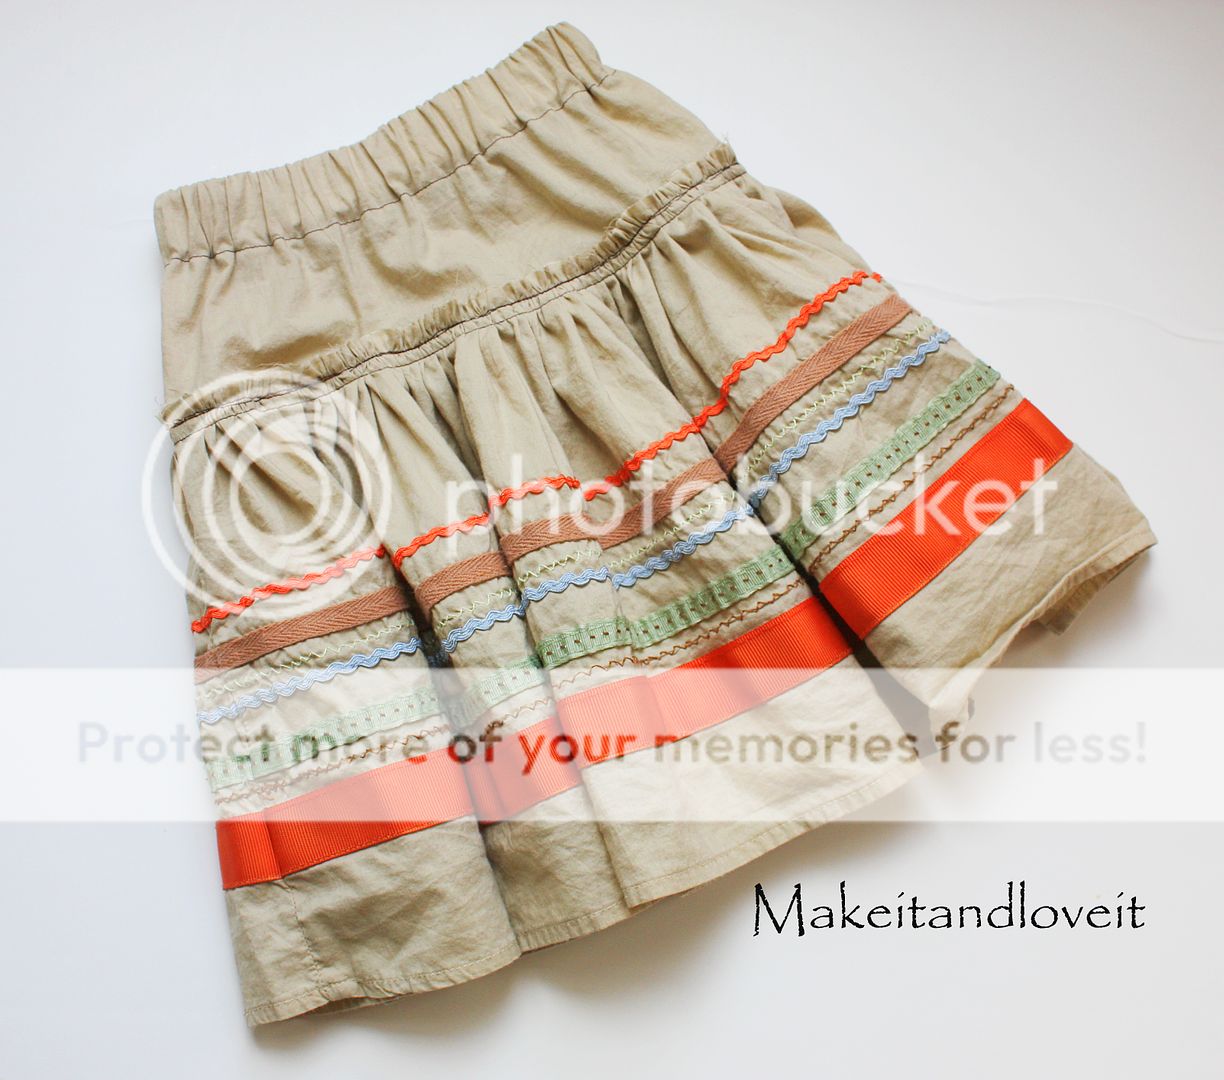
Cut the bottom of the skirt off, 9 inches from the bottom. By using the bottom of the skirt, you don’t have to hem it or sew up the sides. Eliminates some work from your project.
Then cut another piece that is 25 x 6.5 inches.
Then sew this rectangle piece together along the short ends (6.5 inch side) to form a tube. Then hem the bottom by folding under a 1/4 inch and then another 1/4 inch. Then make a casing along the top by folding under a 1/4 inch and then 1 1/4 inch. (We’ll be using 1 inch wide elastic. If you’re using a different size, adjust this casing accordingly.) Make sure to leave an opening for the elastic to go through.
Now you’ll make a basting stitch (the largest stitch length on your machine) a 1/4 inch from the top of your skirt section. Make 2 seams…….one along the front and one along the back. Leave long thread tails at each end.
Then looking at your main skirt section, place pins at the sides and then fold in half and put pins at the half marks on both sides. You now have the top part of your skirt sectioned off into 4 equal sections.
Then do the same with the waistband section along the bottom. Place 4 pins at each quarter.
Then line up the side pins of the skirt with the side pins of the waistbands. Pin them together, allowing the skirt fabric to overlap the waistband 3/4 of an inch from the bottom. Do the same with the other pins.
Now you’ll pull the top thread at one end and slide the fabric along until it is evenly gathered in this section.
Repeat with all of the sections, making sure to add pins to secure it in place.
Then sew right on top of that basting stitch (with a normal stitch length) and then another seam 1/8 inch below. (And yes, you’ll be leaving the top edge unfinished for that rugged look. If you’d rather, finish the top edge off…….but the frayed edges turned out so cutesy.)
Then cut out an appropriate length of 1 inch wide elastic. (Mine was 17 inches long.) Attach a safety pin to one end and thread it through your casing.
Then overlap the two ends and sew a couple seams to secure the elastic closed.
Then close off your casing and wow, you’re done.
A really quick a easy, yet sassy little skirt for any little girl. Ta-Da.

Hi, I’m Ashley—the DIY-enthusiast behind this crazy blog!