Along the same theme as yesterday, here’s another helpful running aide. Do you like running/walking with empty hands? Well, then where do you put your keys, cell phone (as a reader mentioned), debit card (if you’re running to the store), inhaler (if needed), energy bar, etc.?
How about in one of these arm band pouches?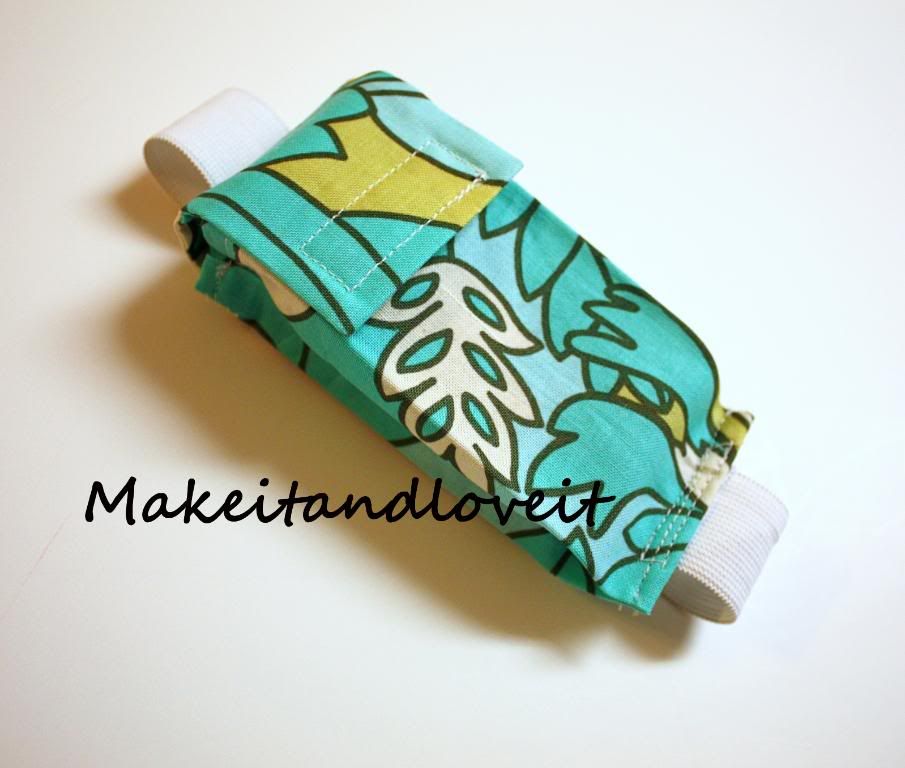
Want to make one too?
You’ll Need:
Cut out a piece of fabric that is 7 x 5 1/2 inches. Fold it together in half short ways and sew the two 5 1/2 inch sides together. Use a 1/4 inch inch seam allowance. Turn right side out and press flat with your fingers, with the seam on one edge.
Now, place pins on both sides of one end.
Then fold the pin in towards the center, a 1/2 inch. Fold the fabric down all along this side so that it will lay right.
Do the same with the other side and make sure all of the edges of fabric are even and are showing right at the end. Pin into place.
Now, sew these folds in place with a seam close to the edge. Then fold over a 1/4 inch and then another 1/4 inch and then sew into place.
Now fold the open end down 1/4 inch and then another 1/4 inch and sew into place.
Iron the entire pouch flat, extending those folds all the way to the other end. Keep it even and straight.
Now, you’re going to make the closure flap. Cut out a piece of material that is 7 x 2.5 inches. Fold in half width wise and sew along the 7 inch sides that are now 3 1/2 inches long (because you’ve folded it in half). You may have to adjust the width of this just a tad as you try to attach it to the main section of the pouch.
Turn right side out and press flat.
Fold the end over a 1/4 inch and then slide the flap into the main pouch section with the fold tucked under. (This is the bottom side up of the pouch.)
Sew into place with 2 seams. (Now this is the bottom side facing down.)
Then attach velcro to the flap and the main part of the pouch.
Now cut 2 pieces of elastic, according to the size of your arm. You’ll want it to fit snugly but not too tight, as that would become annoying. Also, leave enough room to make it adjustable in case your arm grows or decreases in size. (or if anyone else wants to use it.) Fold under one end of the elastic and attach it to the bottom back side of the pouch. Do the same to the other end, attaching it at about the same place that you attached the flap to the pouch. Make sure to keep the flap out of the way while attaching the elastic.
Now attach your velcro. I attached the velcro in smaller sections on one end so that it would still stretch. (click on photo to enlarge) You could do this on both ends just to be sure it has plenty of stretch.
Now, slip in any sort of necessity, strap around your arm, and you’re ready to go.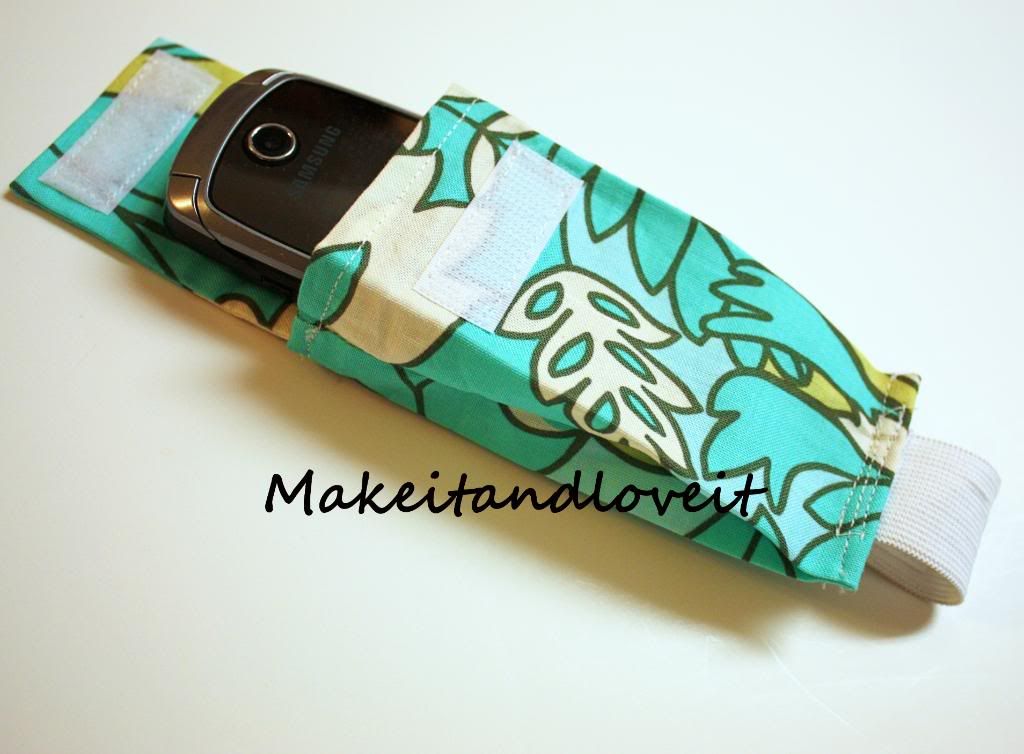
Enjoy your run/walk.

Hi, I’m Ashley—the DIY-enthusiast behind this crazy blog!


