My little 8-year old Elli, is starting to notice that there is a different between little girl clothing and big girl clothing. And she is starting to transition into this weird I-want-to-grow-up-faster-than-my-mom-wants-me-to phase. She never asked permission…..so I’m not sure why this is happening?! Ha! ;) But if she had the choice, I’m sure she would love to wear big ol’ high heels every day. And long dangle-y earrings. And bright pink lip stick. But yeah, those things aren’t happening. However, she has been asking lately if I would make her a few LONG dresses and skirts. I’m pretty sure it’s because she feels much more grown-up when they’re longer…….so this is one “grown up” style (according to her) I can say yes to!
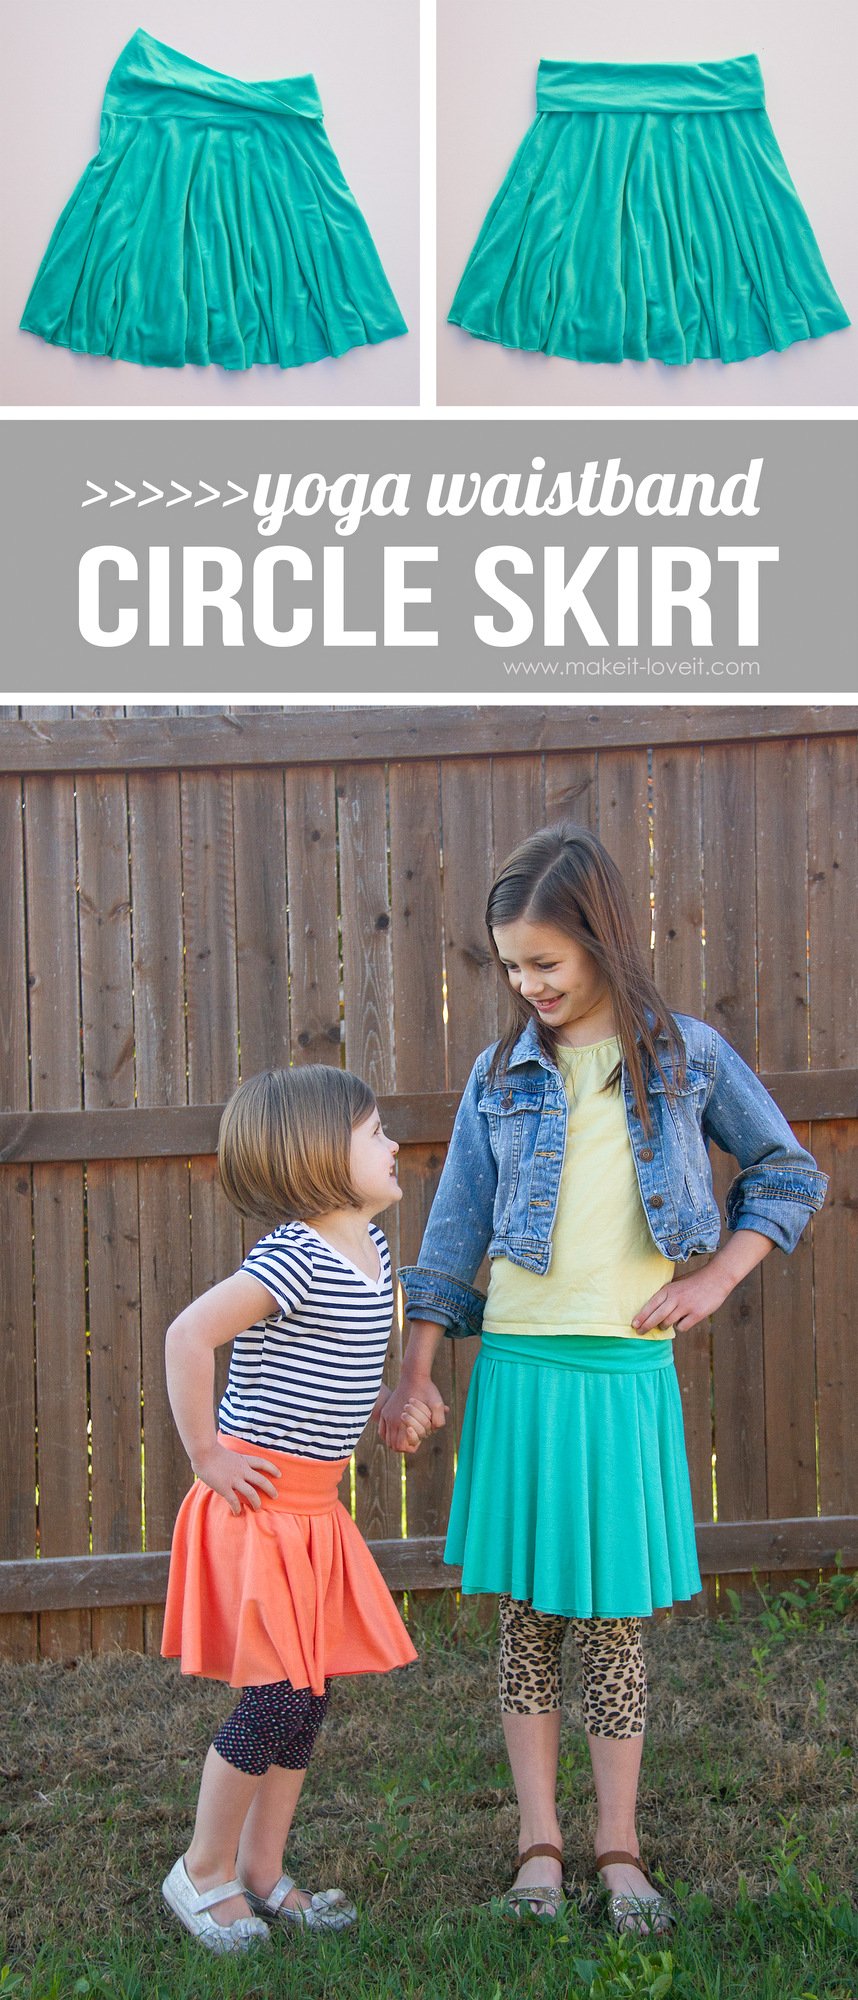
So, I made her a quick long Maxi Skirt the other day…..and she proudly wore it to school and loved every minute of it!
But the coolest part of this skirt — is that the top section of the skirt is made from, yep, OLD JEANS! So, no elastic is needed, no zipper, and no waistband of any kind. And it’s so quick to whip up!
These are actually some jeans that I dug out of her old jeans from last year that I was going to save for Chloe, but remember how I talked about how neither of my girls like wearing jeans much??….so Chloe probably wouldn’t have worn them either.
And I know this concept is nothing new but I haven’t seen it Maxi style, so I decided to give it a try!
And it turned out so cute!!!! In fact, just think….since the top section is jeans, they are nice and fitted and won’t add any extra bulk around the waist and hips. So, this would be perfect in grown women’s sizes too! :)
I used a nice slinky knit fabric (with a 2-way stretch) for this…..so not only is it super flow-y and drapes well, but I also didn’t even bother hemming the bottom edge. Such a fast skirt to make!
And presto, wham-o…….pockets are automatically included! :)
Such a quick and darling little skirt…..with minimal supplies/time needed! Are you starting to think about all the stacks of old jeans up in your (or your girls’) closet? Yeah…..go get ’em!
SUPPLIES:
***Check out my Sewing Terms 101 post, for additional help.
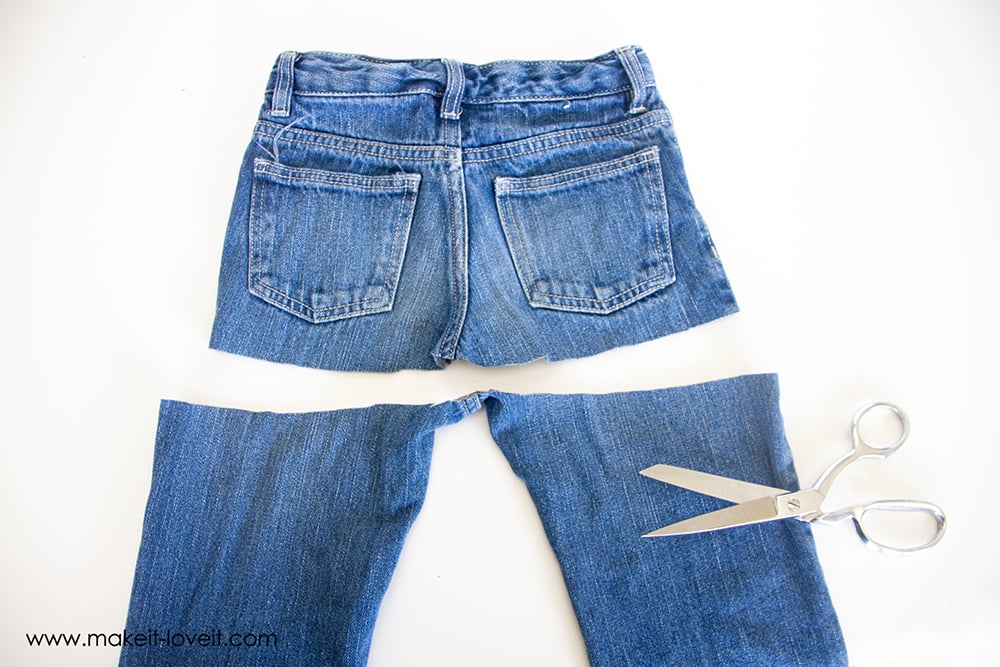
Place your jeans down in front of you, face down. Flatten them out and even out the sides. Cut the jeans off in a straight line, below the bum pockets…..making sure there’s enough jean fabric below the pockets for your seam allowance. (Also, be sure that the front pocket linings are pulled up so that you don’t cut through them, in case you still want the pocket function with the skirt.)
Now, you’ll notice that there is some extra fabric where the jeans would normally hug under the bum. To flatten that out, you’ll need to first un- pick the center seam between the two pockets (about 2/3 the way up)…
…then, flatten it down, overlapping the two sides of the jeans.
Now, follow along the marks of the original seams and sew the jeans closed again.
Flip the jeans over and unpick the center seam the same way.
Now, flatten the fabric, overlap the two sides, then sew back in place.
You’ll notice that now that you’ve altered things a bit, your straight cut line probably isn’t straight anymore. That’s okay, just trim it off and make it straight again.
Now, you’ll be attaching the skirt portion to the jeans. You can make any length of skirt you want…..so keep that in mind!
First, you’ll need to take some measurements.
Have your subject put the jeans on and then measure from 1/2 inch up from the bottom edge of the jean section down to the desired length. Then, you’ll add 1/2 inch to that length measurement (for the seam allowance)…..and that’s your fabric HEIGHT measurement. However, if you’d like to hem the very bottom of the skirt, add 1 1/2 inch to this measurement. But since it’s knit and won’t fray, I didn’t bother hemming it.
Next, measure around the circumference of the bottom opening of the jeans. Then multiply that number by 2. That will be your fabric WIDTH measurement.
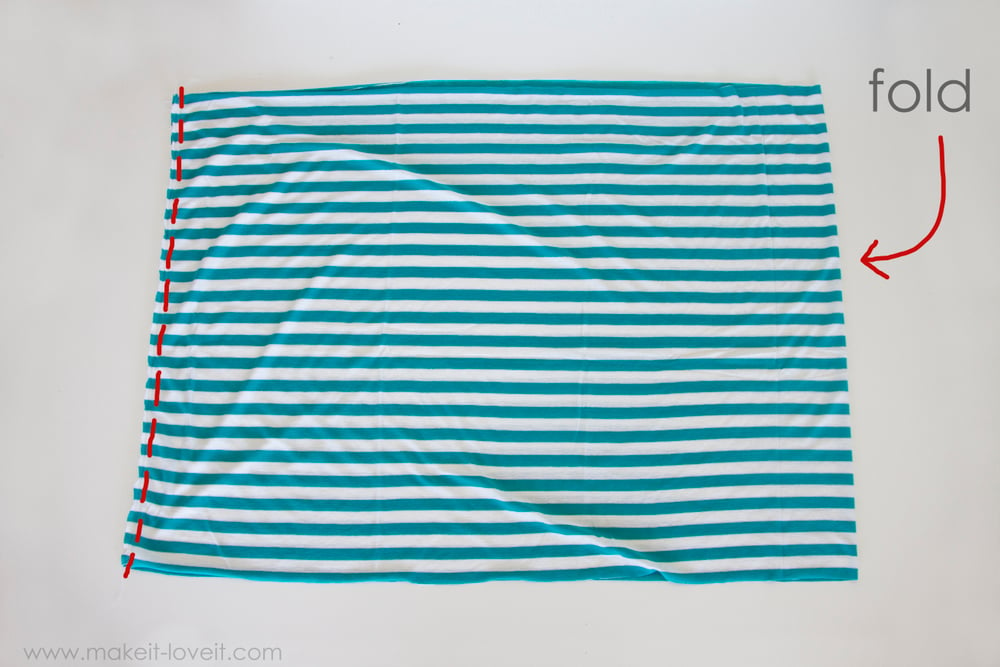
Now, I didn’t take a picture of this step with this fabric, so I’m using an image from another project that I did the same thing with. But, you’ll need to fold your piece of fabric in half, width-wise, and right sides together. Sew the two ends together with a 1/2 inch seam allowance. And then sew another seam right next to the first, just for added stability.
Now, you just need to gather up the top edge of the fabric down to the same dimensions as the bottom opening of the jeans.
I have a Making and Attaching Gathered Fabric tutorial HERE, which also explains a simple way to attach a larger skirt section to a smaller waistband…..which is essentially what you need to do here.
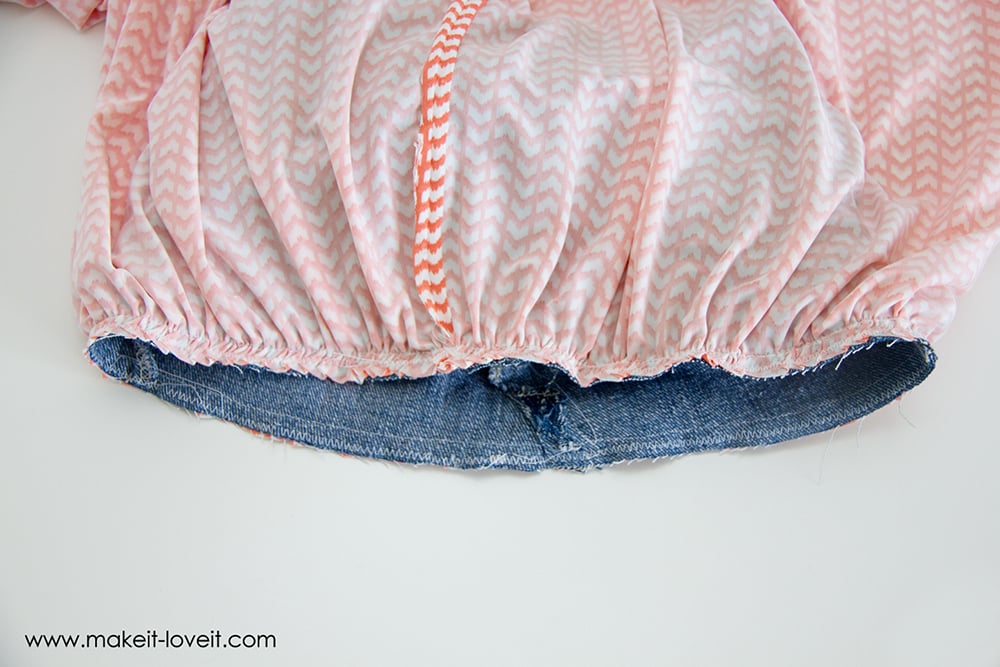
So use that tutorial to attach your skirt fabric to the jeans…..and just be sure that the vertical seam of the skirt section is going down the back of the jeans. (And that you’re placing the skirt fabric and jeans together with RIGHT sides together.)
Then sew them together, using a 1/2 inch seam allowance. And then sew a zig-zag stitch along the raw edges, to help keep them secure and from fraying.
Turn the skirt right side out and press/steam the fabric gathers flat.
And that’s it……and great new skirt to wear!
Enjoy!
-Ashley
. . . . .
Looking for more cute skirt tutorials? We’ve got a BUNCH you’ll love! Try these out to start:

Hi, I’m Ashley—the DIY-enthusiast behind this crazy blog!