Hi there! It is Crystal, from Stitched by Crystal! And today I have a bag to share with you that you are going to need for summer!
For us, summer means a lot of time at the beach or pool, which means lots of wet and sandy beach toys! I have really needed a bag that would work for throwing all those sopping wet toys in when we leave the pool, but something that would still let them dry properly – so I came up with this!
This bag is made out of cargo mesh on the bottom to let all the wet things dry (or to let the sand fall off the sandy toys) and the top is made of oilcloth, so it is waterproof. It makes toting my kid’s toys to and from the pool so much easier! And it is big, so it fits lots of toys, floats, and puddle jumpers; I even got a big beach bucket and beach ball in mine!
Want to make your own beach/pool bag? Great! I will show you how!
(***Check out this Sewing Terms 101 post, if additional help is needed.)
First, let’s talk about materials! You will need cargo mesh and oilcloth. I found both of these at my local Joann Fabrics. The cargo mesh can be found in the utility fabric section and the oilcloth was in the back of the home décor stuff. To make a bag this size, you will need 2/3 yard (or 20 inches if you can buy by the inch) of cargo mesh and ½ yard of oilcloth.
Sewing with oilcloth is a bit different than other fabrics. Oilcloth is a vinyl fabric that has a plastic-y feel. Here are a few helpful tips for sewing with oilcloth:
Ok, let’s make a bag!
Cut your cargo mesh in a rectangle that is 25 inches x 40 inches. From your oilcloth, cut two rectangles for the straps that are 32 inches x 6 inches and four rectangles for the top of the bag that are 24 inches x 4 inches. Put the oilcloth aside, we will start with the cargo mesh.
With the cargo mesh folded in half and the 25” side lined up, cut 5 inch x 4 inch rectangles from the bottom corners.
For durability, we are going to sew French Seams in this part of the bag. Sew the sides together with ½” seam allowances.
Trim the seam allowance down to about ¼ inch.
Flip the bag inside out and sew over those side seams again, sewing ½” from the seam. Now the raw edge should be contained inside the French seam.
Turn the bag right side out (so the French seams you just sewed are on the inside). Sew the corners of the bag by pulling the sides apart and lining the side seam up the center bottom, sew straight across the bottom corner with a ½” seam allowance. Trim the seam allowance down, turn the bag inside out and sew over the seam again to create a French seam.
Repeat with the other corner to finish the bottom of the bag.
To make your straps, fold your 32” x 6” strips in half right sides together, lining up the 32” sides (remember you can iron on low heat with a pressing cloth!) Unfold and fold the edges in to meet the center fold. Then refold on the center fold. Keep everything in place with some clips, then topstitch along both sides of the straps.
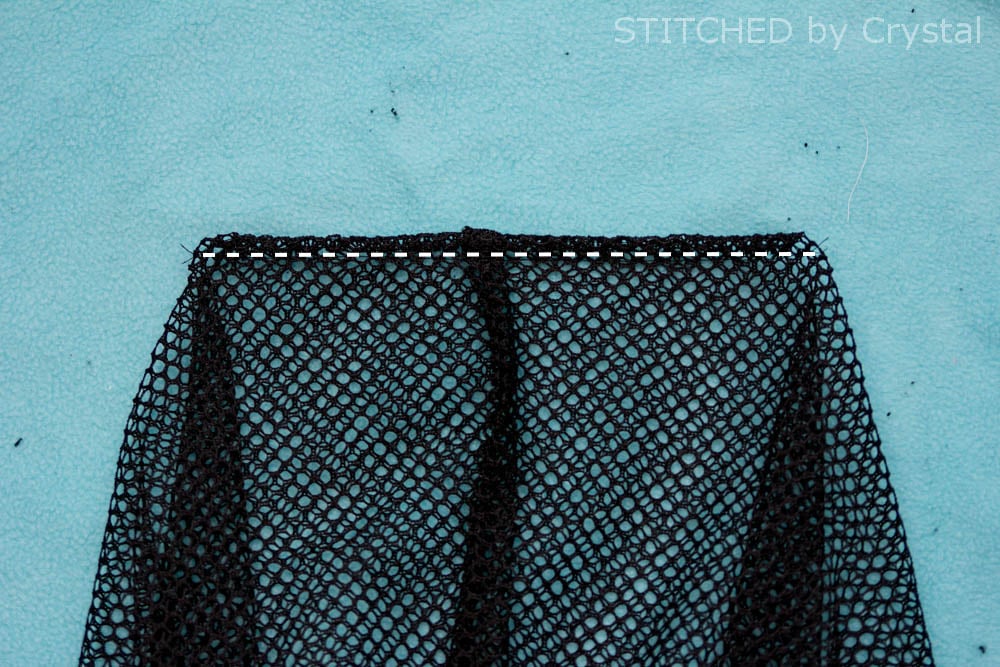
Grab one of your 24” x 4” rectangles. Place the ends of one strap 6” from both sides and baste them in place on the right side, making sure the strap is not twisted.
Place another rectangle on top, right sides together, so the strap is sandwiched in the middle. Sew along the top with a ½” seam allowance. Repeat those steps with your other strap.
Open up the bag tops and place the two right sides together, sew along the sides with a ½” seam allowance.
Fold along the center seam and top stitch.
Fold the bottom edge of one side under ½” and press using low heat and a pressing cloth.

Line up the side you did not press under with the top of the cargo mesh bag, right sides together. Use your clips to keep everything in place and sew them together with a ½” seam allowance.
Topstitch along the seam, catching the lining piece behind it. This part can be a bit tricky since you can’t use pins to keep everything straight. I just went slowly, sewing a couple inches at a time and then checking behind to make sure everything was in line.
Your bag is done!
Now fill it with toys and hit the pool!
-Crystal
Check out Crystal’s blog here. Her darling shop here. Follow her on Instagram here. And her Pinterest page here.
***ALL contributor posts by Crystal, can be found HERE.
. . . . .
Mesh bags aren’t just for the beach – they also work great to keep those bath toys dry and put away! Check out this tutorial and make your own Bath Toy Bag:
You’ll want your hands free to carry around your new cute mesh beach bag, so why not WEAR your towel as one of these Towel Ponchos? Brilliant! Find out how to make your own here:

Hi, I’m Ashley—the DIY-enthusiast behind this crazy blog!