When my oldest girl was a brand new baby (who is now almost 5 years old), I made bows for her head/hair.
Lots of them.
I got a little tired of telling people that she was a girl, not a boy. The pink and purple outfits were never distinct enough for people to realize she was a girl. But if I slapped a little bow on that sweet little head, there was never any mistaking that she was a girl. Whew.
I loved making her all those bows so much, that I started a little bow making business, through a blog.
(Okay, fess up! How many of you had your own bow business??)
That was almost 5 years ago, WOW………and back when blogs were such a brand new trend. And “blogging” was pretty much a foreign word. Remember that?!! Anyway, I should dig out some of those old pictures to show you what my old hairbow blog looked like. It was a mess! :) During that time, I made her big bows, little bows, loopy bows, flat bows, and every color of the rainbow bows. That girl had a bow for every outfit. Whew……I had a lot more time then. But my favorite thing to make, were these tiny little hair clips. With a no-slip grip, of course………so that the little clips would stay in her baby fine hair.
So now that I have another little girl, I pulled out the old stash of little hair clippies with the no-slip grip on it…….and have been clipping them right to her super fine hair too. You know, so there’s no mistaking that she’s a girl either.
(Though, this time around…….I could care less if someone thought she was a boy. Eh, worrying about that takes too much energy. Ha.)
Some bows are more complicated and are a serious masterpiece (though I don’t care for the bigger ones anymore)…….
………….but my favorite are these tiny little classic bows.
Simple. Girly. And just so sweet.
(These bows were all made years ago. I’m glad I was a crazy bow maker back then…….I use them all the time again.)
And yeah, so many people make them now (no more secrets)……..but maybe there are a few of you out there who never learned.
And you don’t even have to know how to tie a bow to make this variety. Easy.
And you better believe they are used in my older girl’s hair. Especially on ballet days (which was this morning…….and she’s still in her pink leotard).
She can’t have any hair in her face…….and these clippies stay in tight, while keeping the fly-aways under control.
What’s cuter than a little bow on a baby’s head?
(And yes, those are the leggings from this tutorial.)
And yeah, she doesn’t have much hair yet (we’re working on that)……but just enough to sweep it away from her forehead. Yay.
Lovely, right?
Would you like to make your own simple little hair bows……with a no-slip grip to keep them in place??
First of all, everyone has their own technique. And there are probably a variety of no-slip grip solutions out there. This is just what I did and what I used. All worked really well for me.
When I was first trying to make a bow that would stay in baby fine hair, I remember seeing bows online that had a no-slip grippy on it. Some of it looked like velvet, other stuff looked sticky. Some people used velcro and others used magnet material. We didn’t have a lot of money and so I was trying to figure out a cheap solution. I remember walking around Wal-Mart one day, trying to decide what I could use to re-create that no slip grip, and I walked by rows of this shelf liner stuff and had an “ah-ha” moment. This liner material keeps things from slipping in cupboards and on shelves…….why not baby hair. So I started using it on my hair clips, and it worked like a charm.
And just when you think you have the best idea ever……..you realize other people have it too. Ha! Because I have seen other people use this stuff to make their own bows since I thought it up for myself that one day. How funny! I swear, we should all participate in a huge think-tank and share all sorts of tricks and secrets. It would save us all a lot of grief.
Anyway, to make these hair bows (without actually tying a bow), I used 3/8 inch ribbon. (Grosgrain works best in my opinion.) I cut 3 pieces that are 4 inches long. I also use a double prong hair clip that I always buy at Sally Beauty Supply….and they’re about 1 3/4 inches long. (I found similar ones online here, in case you don’t have a Sally’s.) Then I cut a piece of the shelf liner that is the same size as the prong section……so about 1 and a 1/4 inch by 1/3 of an inch. And a piece of felt that is about the same size.
To begin, grab your roll of ribbon and heat seal the end (I use a lighter).
Then hot glue about a 1/2 inch of the end of the ribbon to the very bottom of the clip with the right side of the ribbon facing out (if you have a right and wrong side).
Then add a strip of hot glue to the next section of ribbon…
…..and then fold it around the contours of the pinch part of the clip. (Don’t worry, the clip will still pinch and the glue won’t affect the spring at all.)
Then measure how much more ribbon you’ll need by stretching it to the tip of the clip, then fold it back up the length of the prongs. Cut the ribbon off.
Heat seal this end of the ribbon now too.
Now add a long strip of hot glue down the back side of the rest of the ribbon. Then lay it flat across the top of the top prong, then fold it under towards the bottom of that top prong…..to completely conceal that top prong. Press the ribbon together to seal the glue together, and keep the ribbon in place.
Now, grab your 3 pieces of 4 inch long ribbon. Tie a single knot in the center of one of the pieces of ribbon. Try to make it a neat little knot and keep the two ends flat and laying in the same direction. Heat seal the ends of the 2 un-tied pieces.
Then grab one of the plain pieces and bend it into a circle. Overlap the ends by about a 1/3 of an inch and then hot glue them together (image on left). Then pinch the circle right in the center, creating half of your bow shape, and add a little dot of hot glue to the inside center to keep it pinched together (image on right).
Do the same thing with the other piece of ribbon. Then cross the two pieces together……not into an actual “X”, more like a squashed one. Add a dot of glue between the two, to keep them together.
Then place the piece of ribbon with the knot in the middle, right in the center of the squashed “X” (image on the left). Place a dot of hot glue right under the knot, so it doesn’t move around. Turn the bow over and cut off the long ends just a bit and glue them down on the back side (image on the right).
Now, glue the piece of shelf liner to the piece of felt. Press the two layers together.
CAUTION: this can get hot. Test it with your fingers and wait until the glue has cooled from hot to warm and then squish the 2 layers together. Glue will most likely ooze out. Just peel it off your fingers and continue on!!
Trim off the excess along each edge, making a nice clean line around all sides.
Then hot glue the felt side to the top prong.
Then glue the bow to the very top of the clip…..right to the ribbon.
Why I do the bows this way:
And that’s it.
Now make more…….you may need some for every single outfit your child (or friend/granddaughter) has.
(And while you’re at it, make doubles of every color. They look so darn cute when their hair is long enough for pig tails.)
Enjoy.
You might also enjoy these fun hair accessory tutorials:
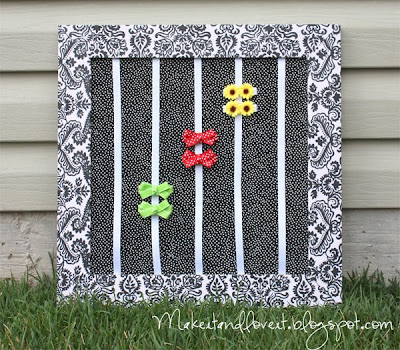
And you’ll need a place to store your beautiful hair accessories, so try your hand at this hair clip holder:

Hi, I’m Ashley—the DIY-enthusiast behind this crazy blog!


