Home » DIY Tutorials » DIY Sewing » Sewing: Clothing » Accessories » Rounded & Embellished {Faux Leather} Zipper Pouches
Rounded & Embellished {Faux Leather} Zipper Pouches
May 16, 2011 - By Ashley Johnston 36 Comments
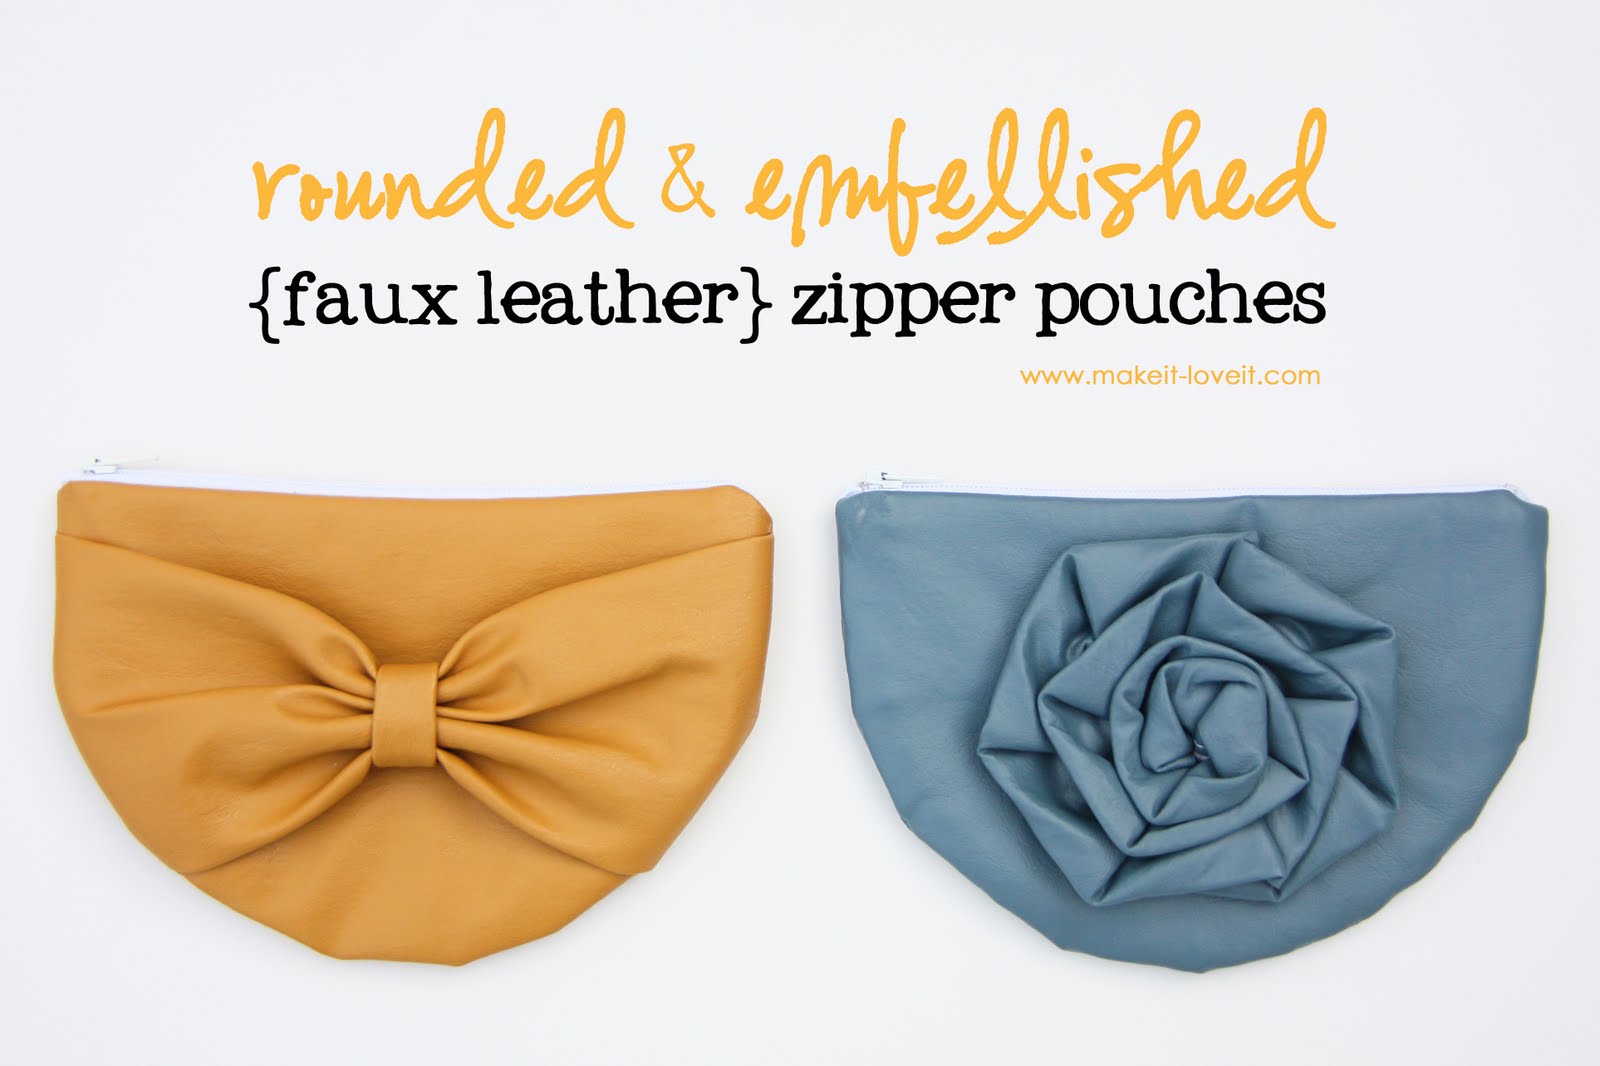
A friend of mine had a birthday……and that gave me a good excuse to make her a little something.
Instead of making her a regular ‘ol zippered pouch (like my tutorial
here), I made it rounded. And with Faux Leather…….AKA, vinyl. Ha.
If you remember my post
here, I purchased a stack of this vinyl on the sale table at the fabric store. Nice and inexpensive and can be used for many projects. Like the hair accessories from
that post.
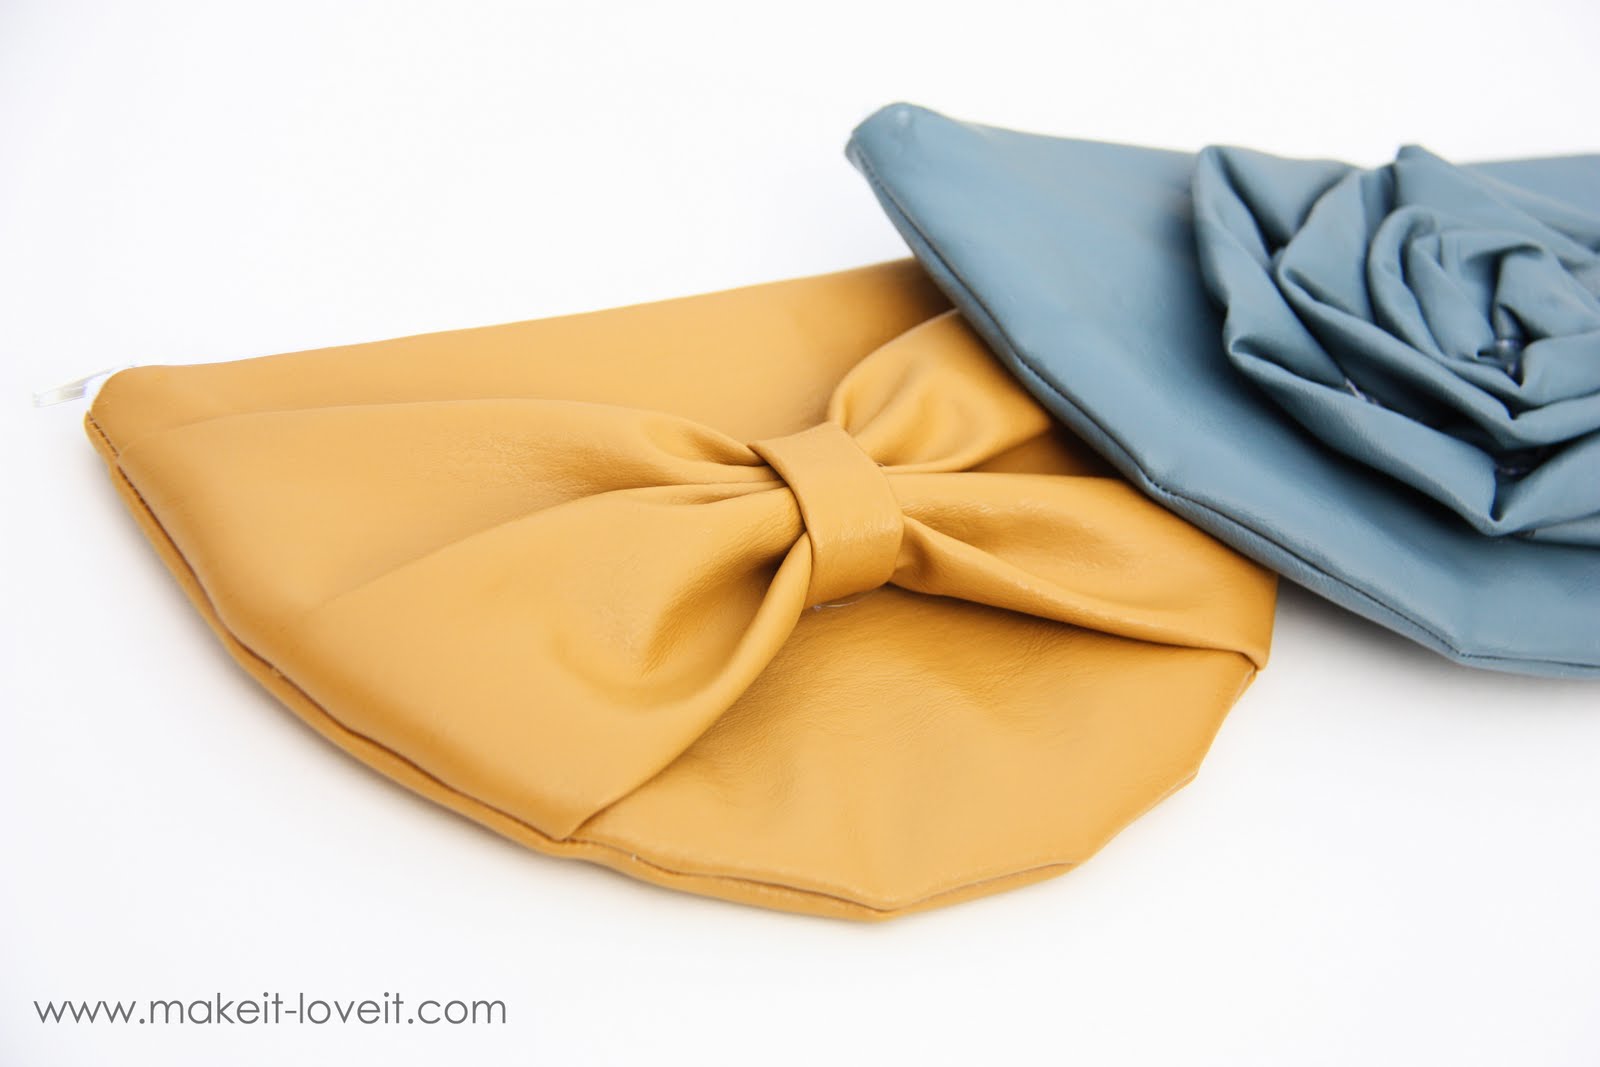
But here’s a couple rounded pouch ideas using the vinyl…….
………but these pouches can be made with any sort of fabric. Go on, experiment.
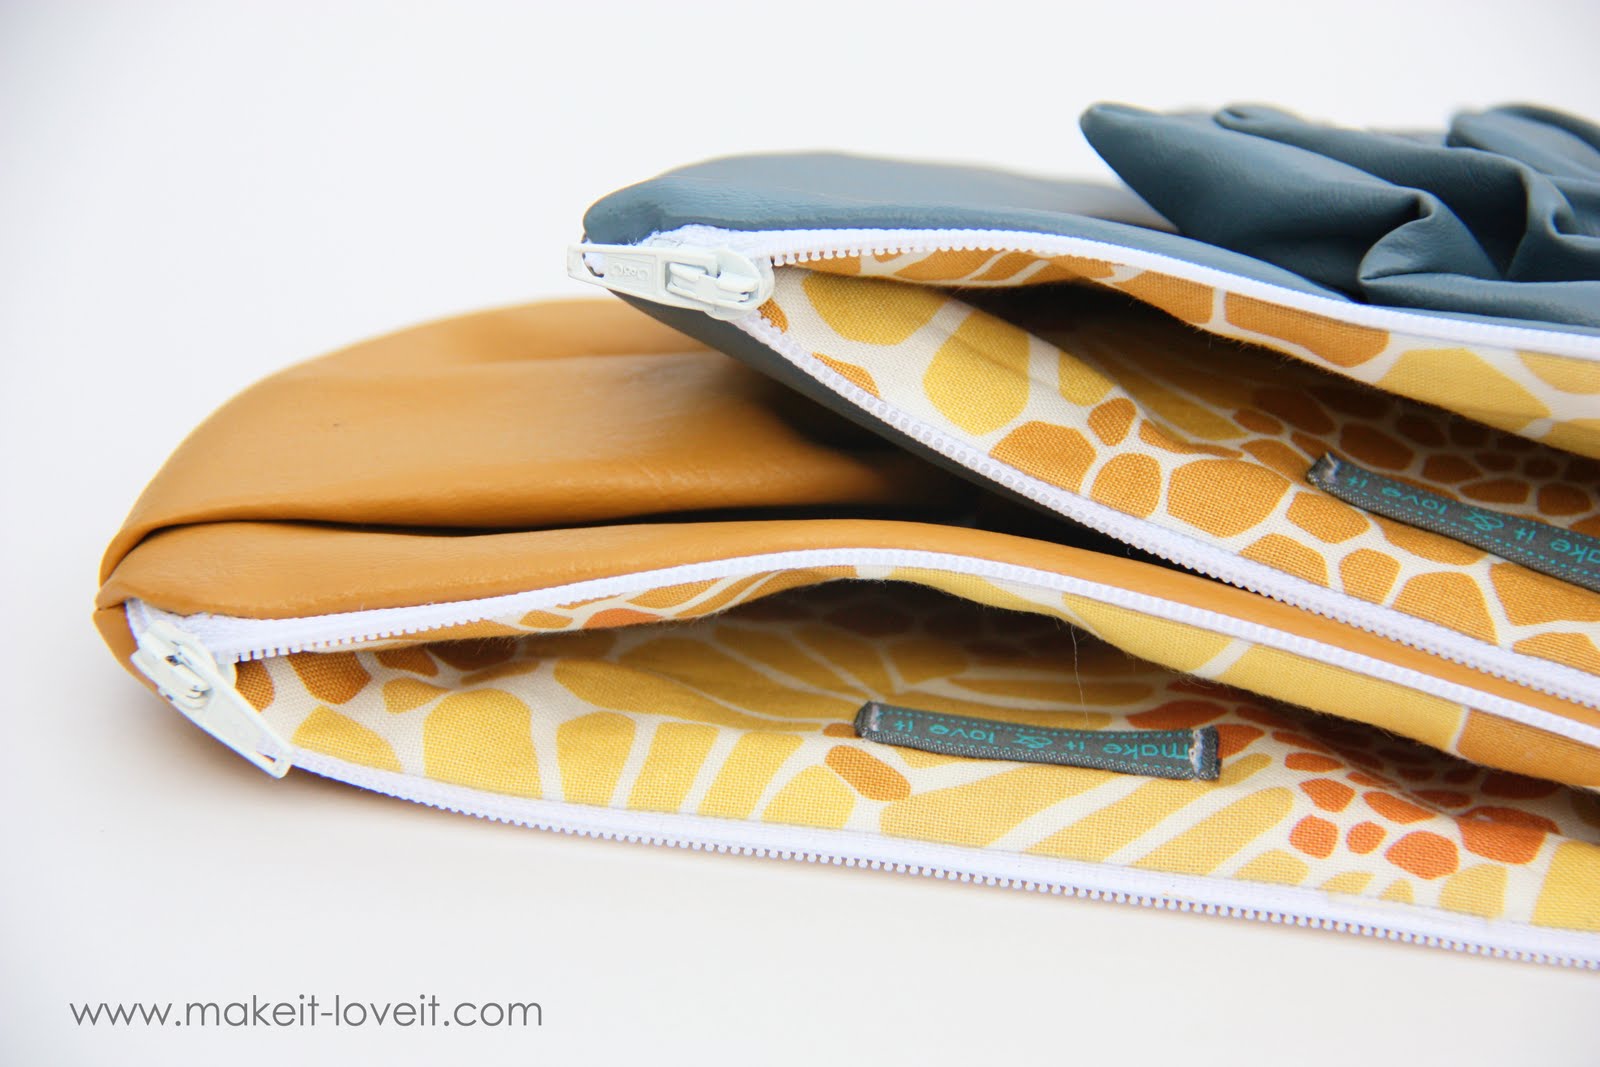
Both pouches are lined with a printed cotton fabric.
And adorned with
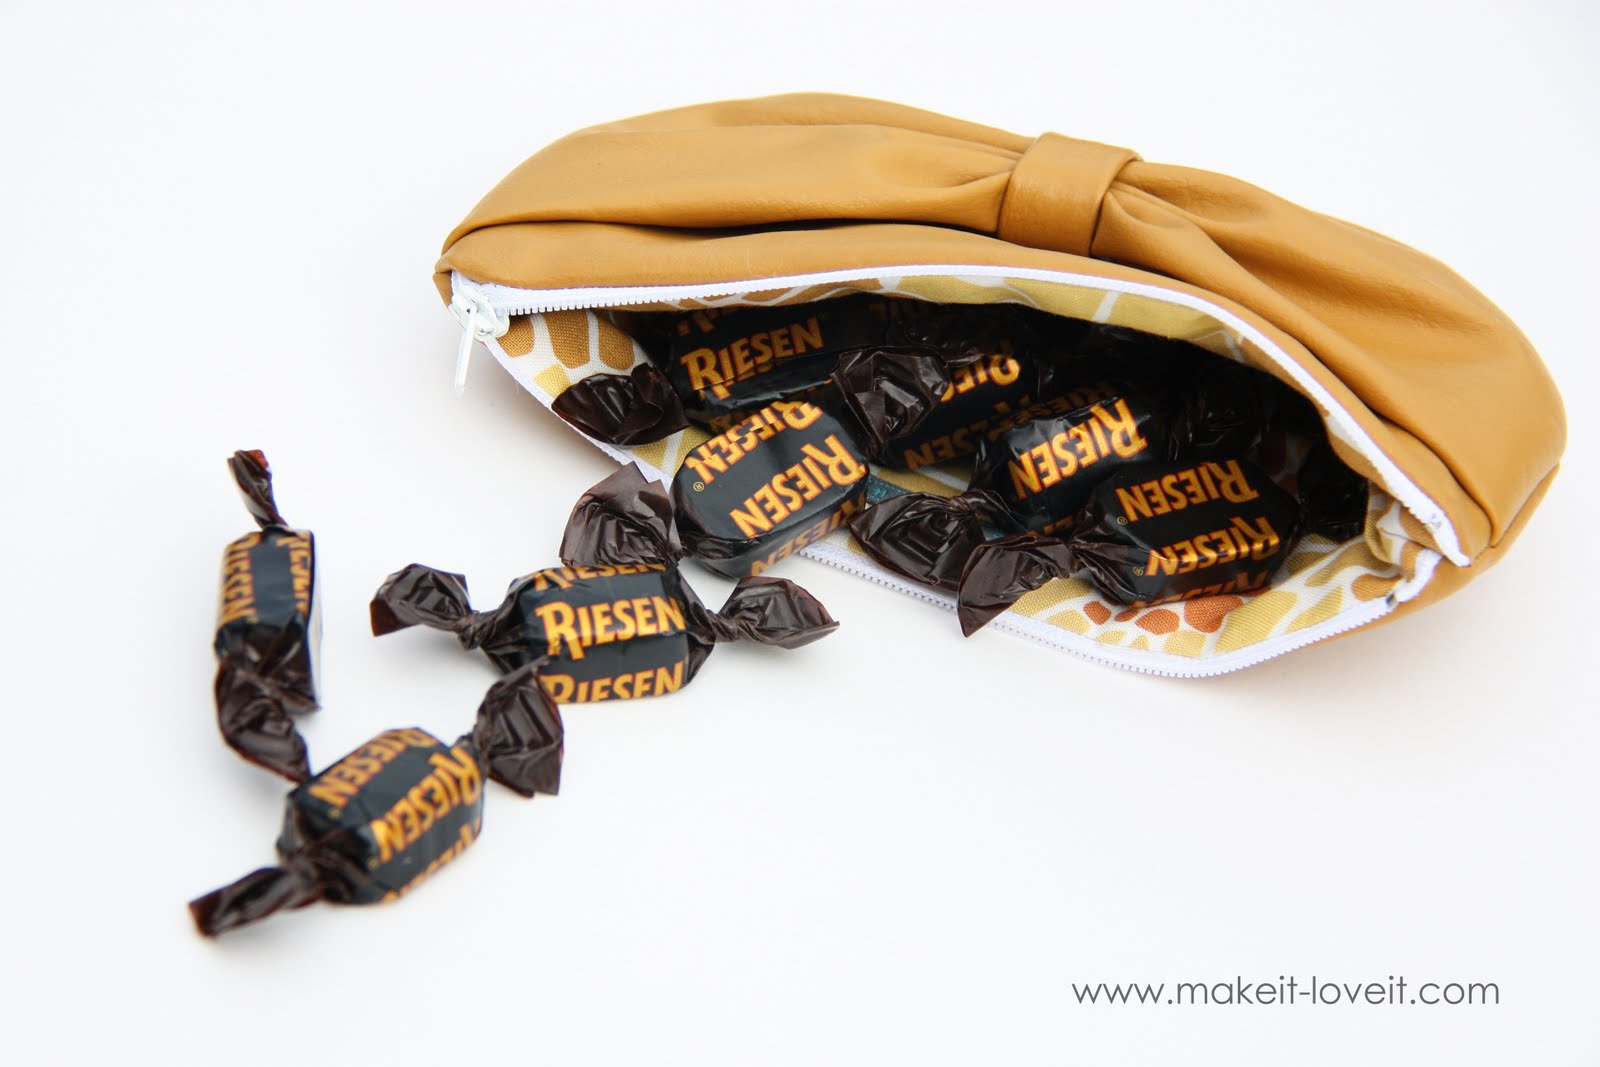
a little label. (My label info here.) Just think of what you could stuff these with. You can carry them alone or toss in your purse to stay organized: makeup, pens, nail polish, jewelry, money, credit cards………or all of that together.
And if you are anything like me, you’d appreciate a pouch stuffed with treats.
(Good thing this friend of mine is a sugar junkie like I am. Happy Birthday Val!)
Make one for you, a friend, or that neighbor down the street who could use a little handmade love.
Would you like to make your own rounded pouch?
**Remember, you don’t have to use vinyl…….any fabric would work just fine.
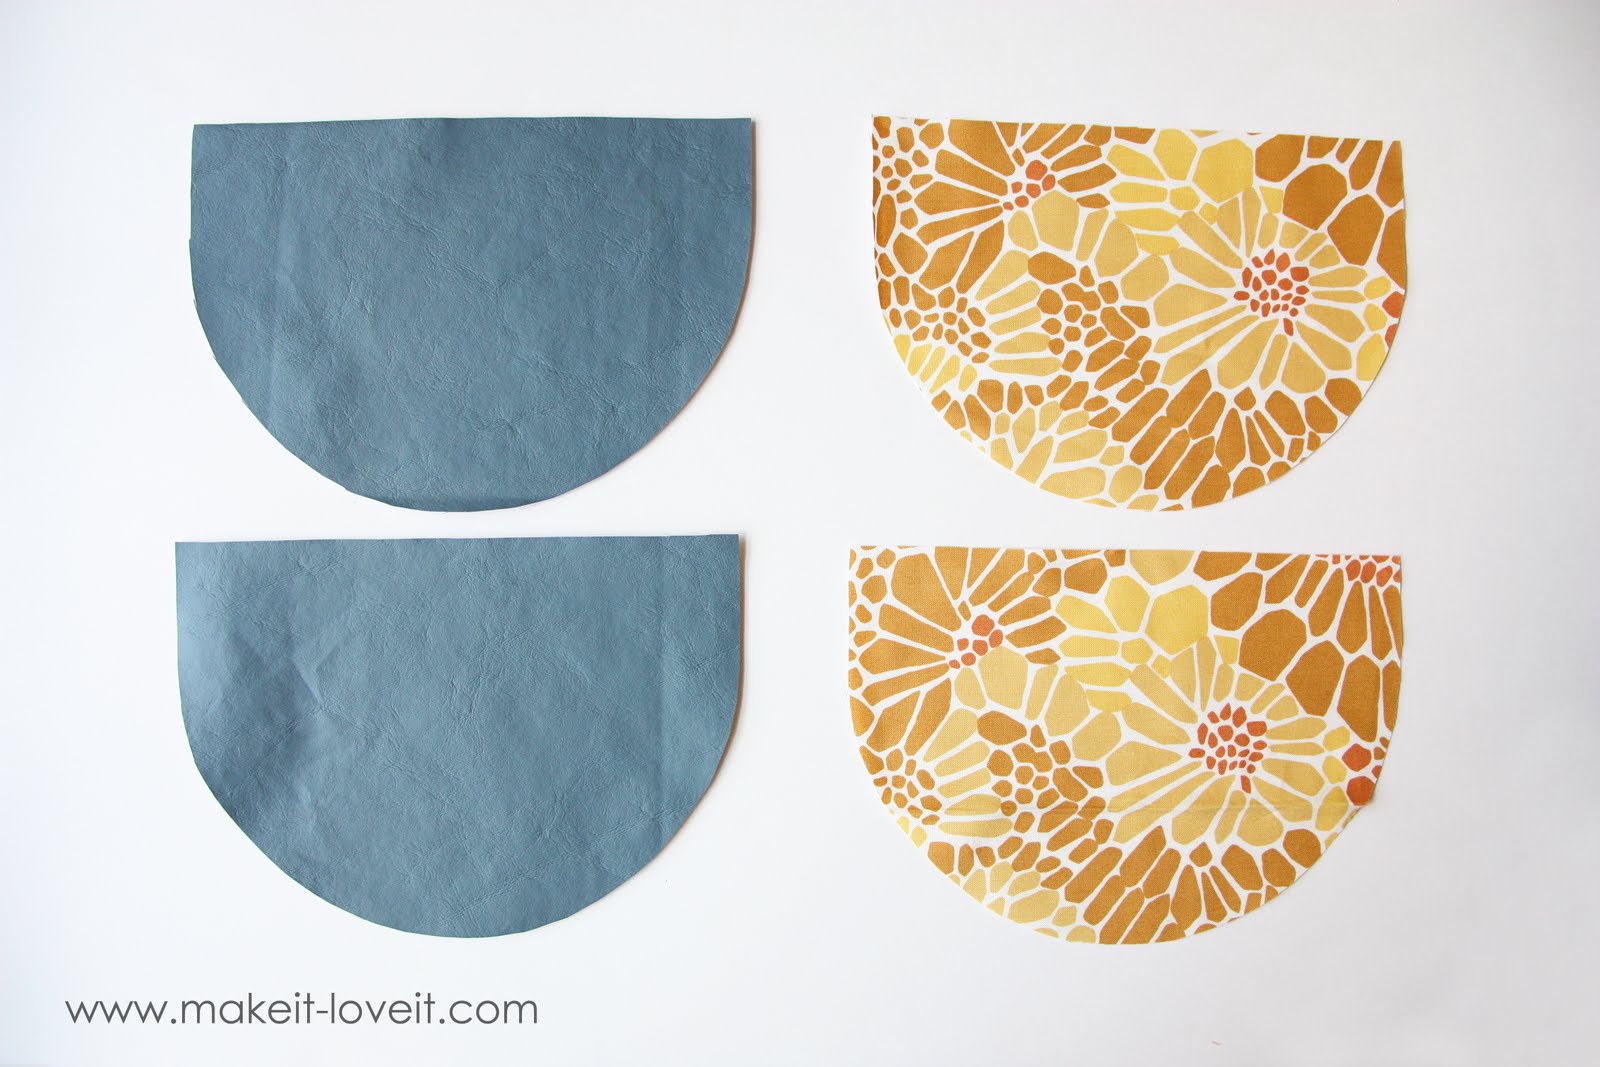
First decide on your fabric and prints.
Then begin by cutting out 2 outer pieces of fabric and two inner pieces of fabric of your pouch shape.
If you hate free-handing……..the pouch shape I used can be found
here.
(Just click on the image below the title “Rounded Zipper Pouch, save it to your computer, upload it into a document, change your margins to ‘0’, and expand the image to full size. Print and use.)
The rest of the pouch construction is just like the tutorial
here. So if you want to skip the bow or flower on the front, skip to this other tutorial.
But if you want to attach a little loveliness to the front, here’s how I did it:
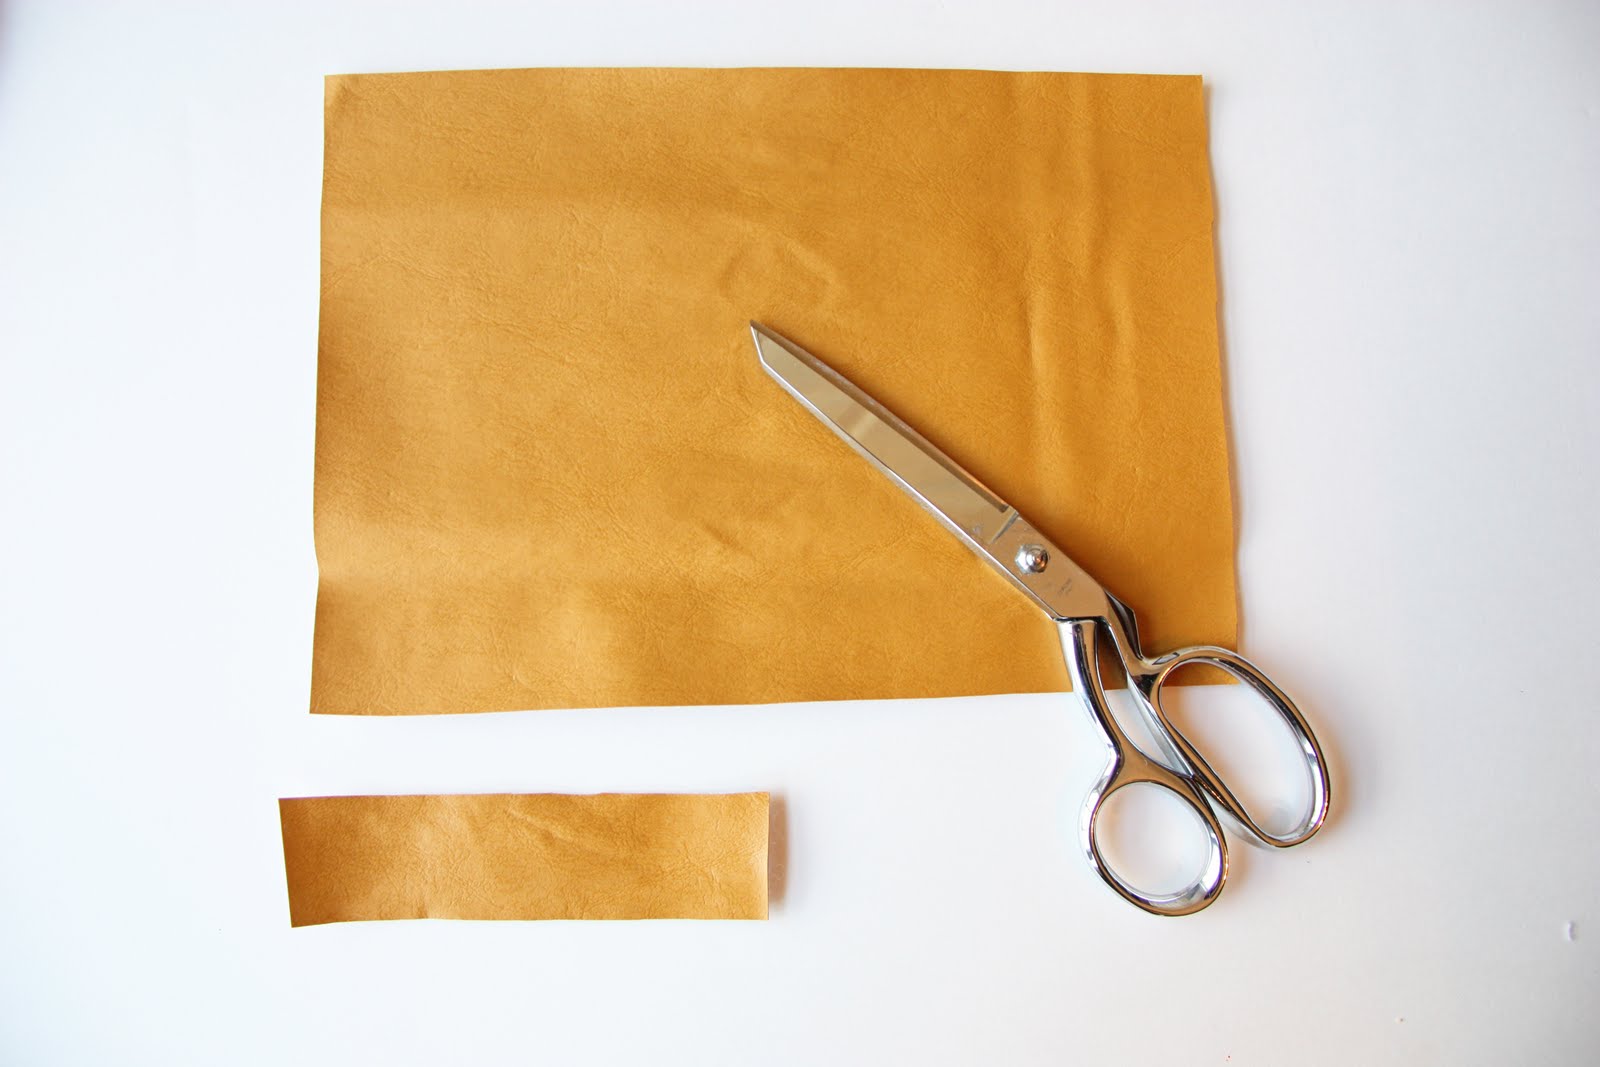
To make the bow pouch, cut out a strip of your vinyl (or outer fabric) that is 6.5 x 9 inches and a little piece that is 1.5 x 3.5 inches.
The larger piece will be your main bow piece. You will be folding under the top edge and the bottom edge until the meet in the back. Set aside.
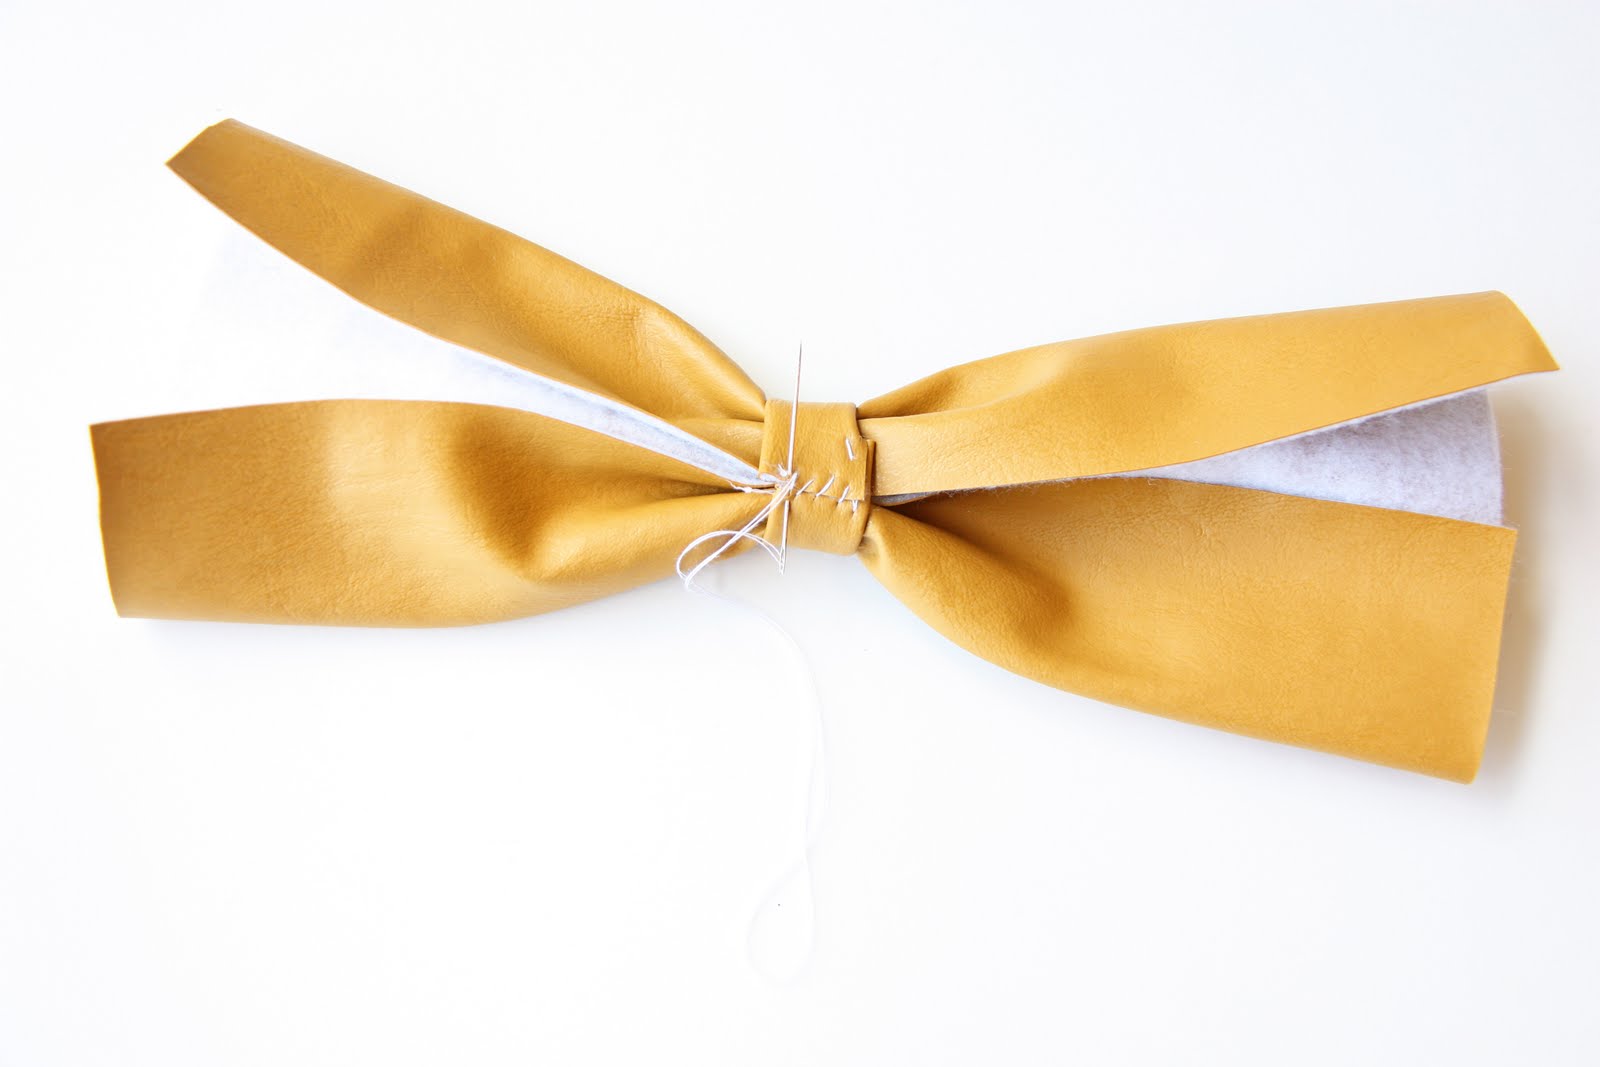
Fold the top edge and the bottom edge of the little strip towards the back too……..and hand stitch it closed. (Need help with hand-stitching? Click
here.)
Then cinch in the middle section of the bow piece and wrap this little strip (with the stitches towards the inside) around the center. Stitch the center strip closed in the back.
Then lay the bow flat on the front pouch piece. Stitch the bow edges right to the pouch, really close to the edge. (You don’t want these stitches to show after making the pouch.) The trim off the extra edges. Now you have your front piece for your pouch.
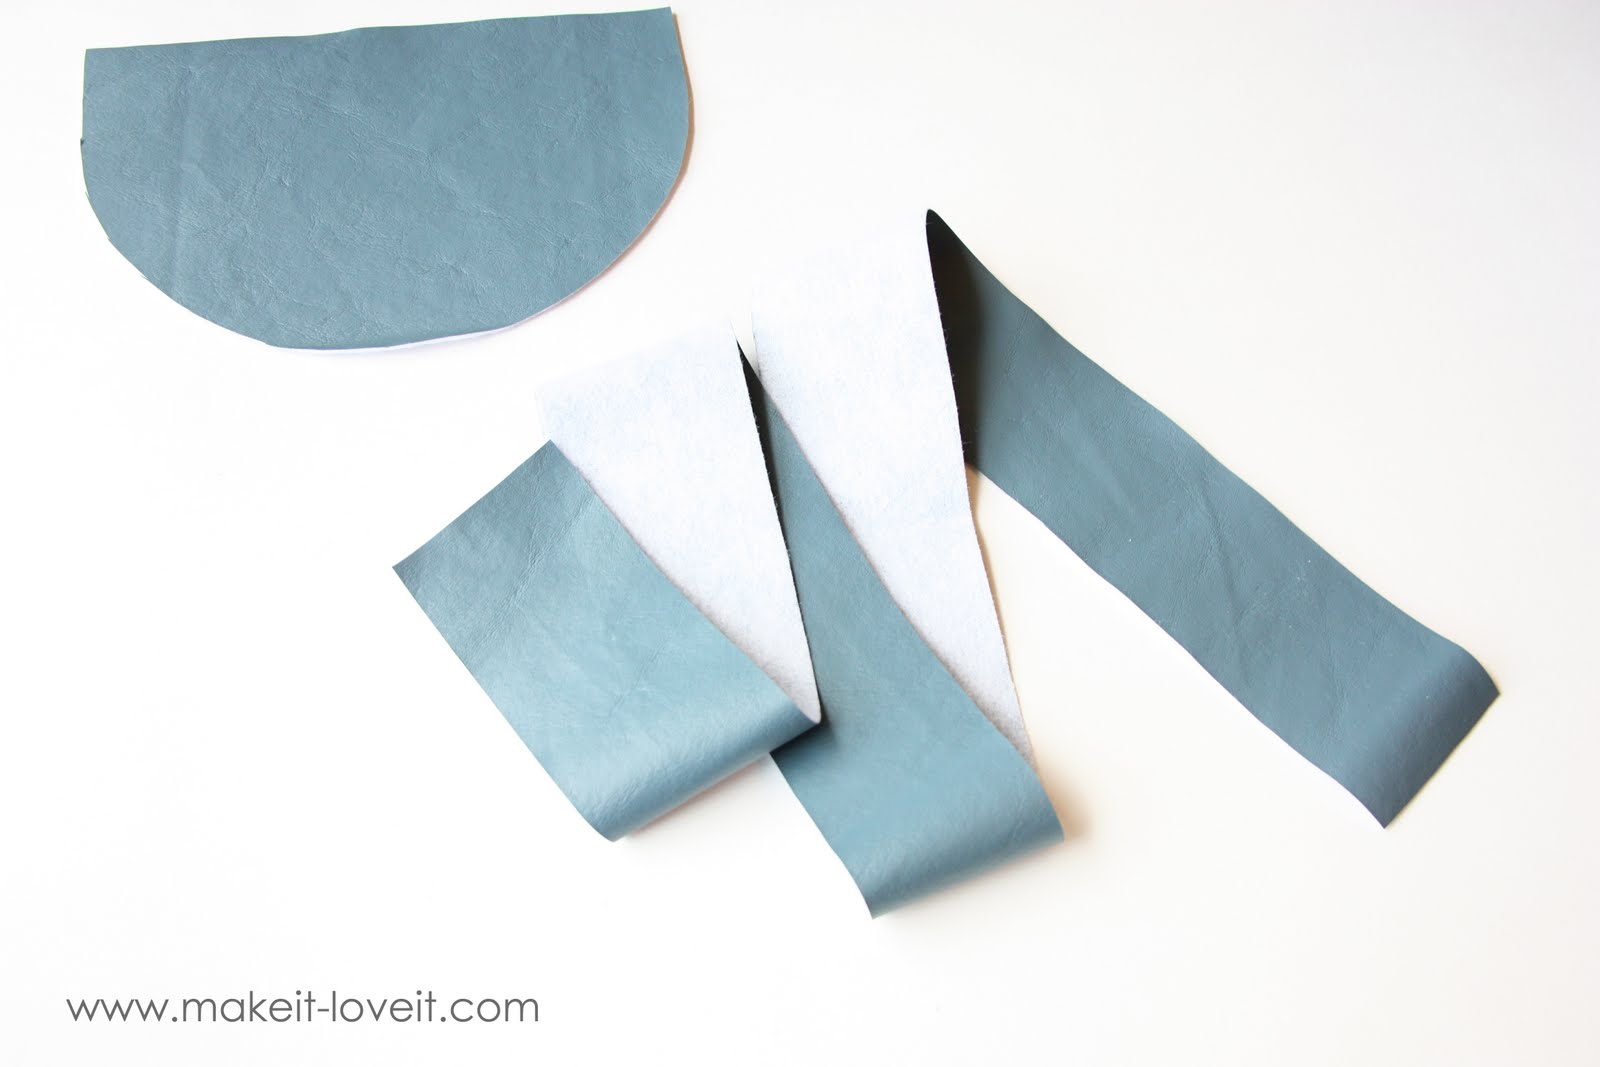
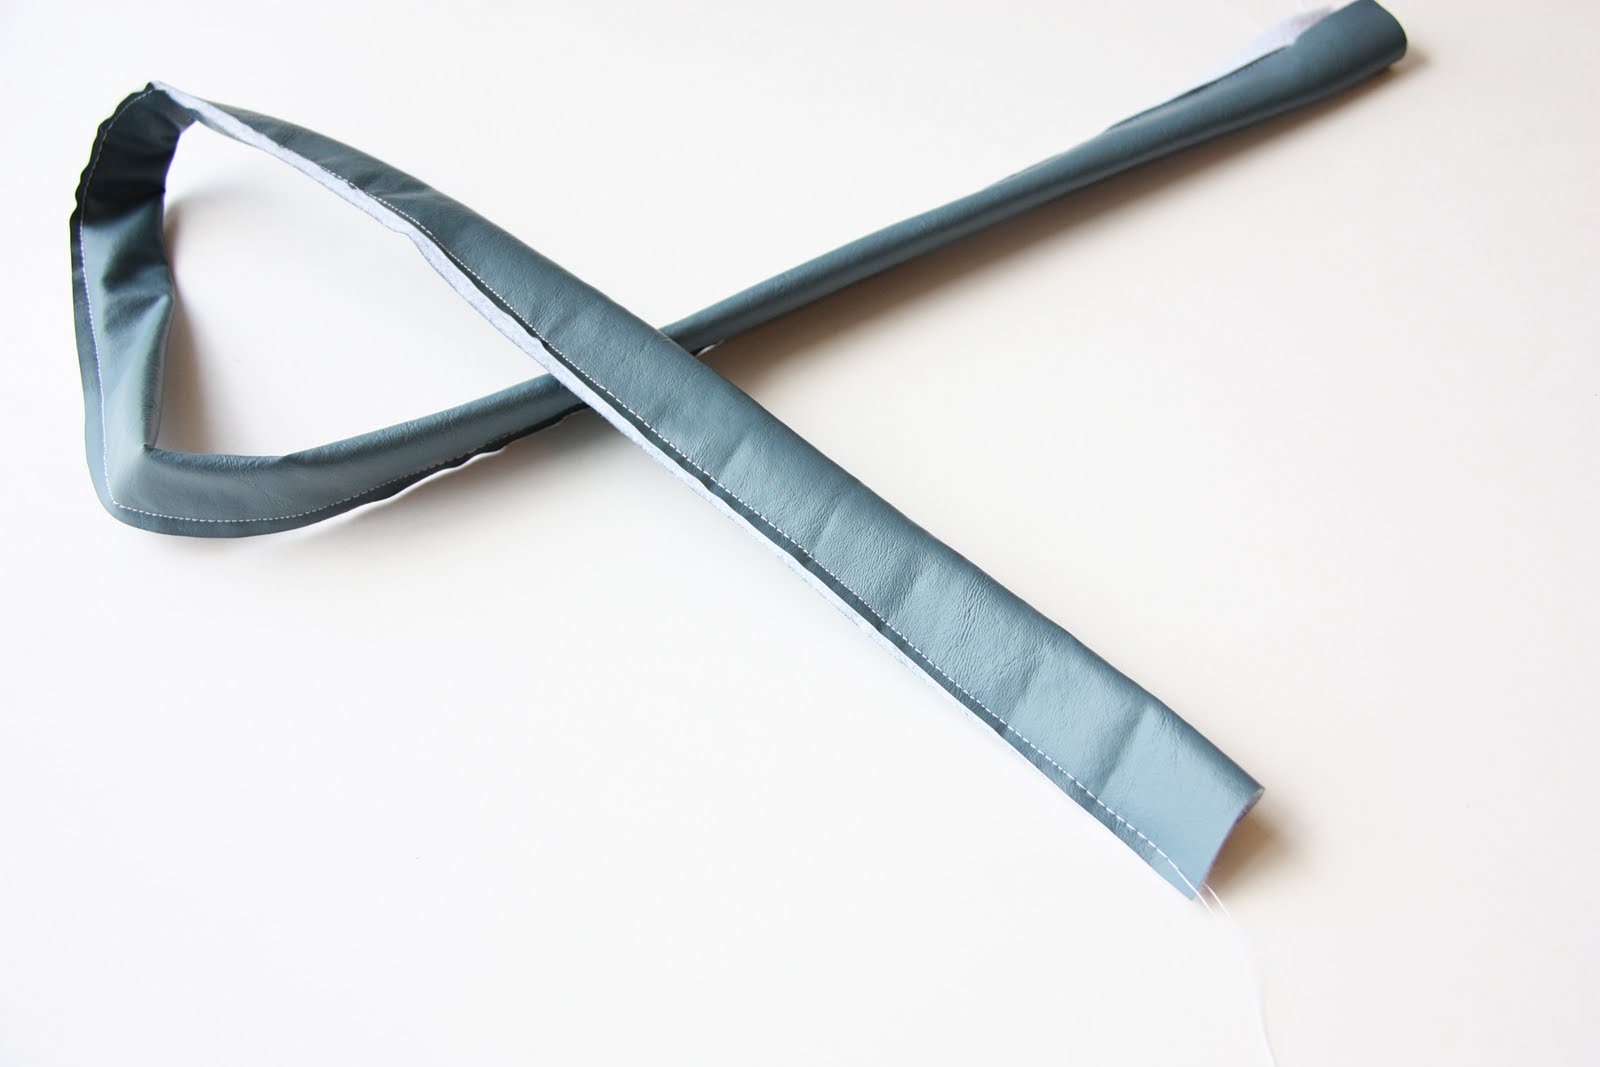
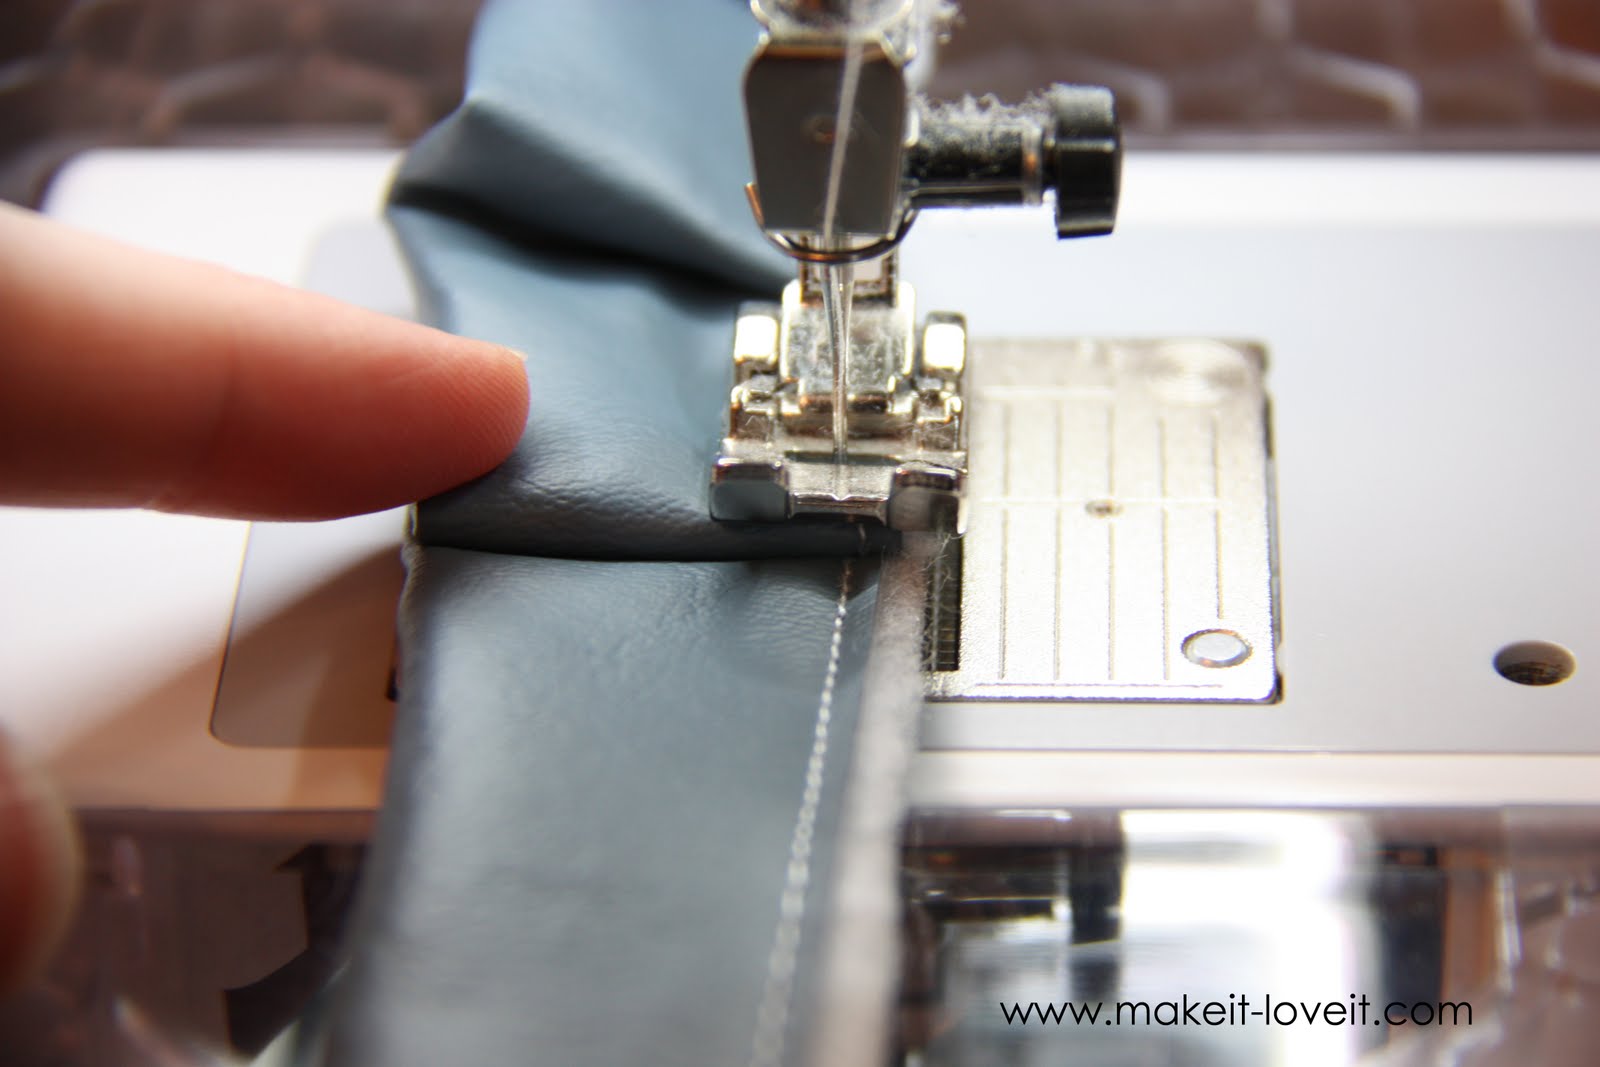
To make the flower pouch, cut a long strip of vinyl that is 3 x 35 inches.
Then fold this strip in half lengthwise (right side out) and sew together along the long edge.
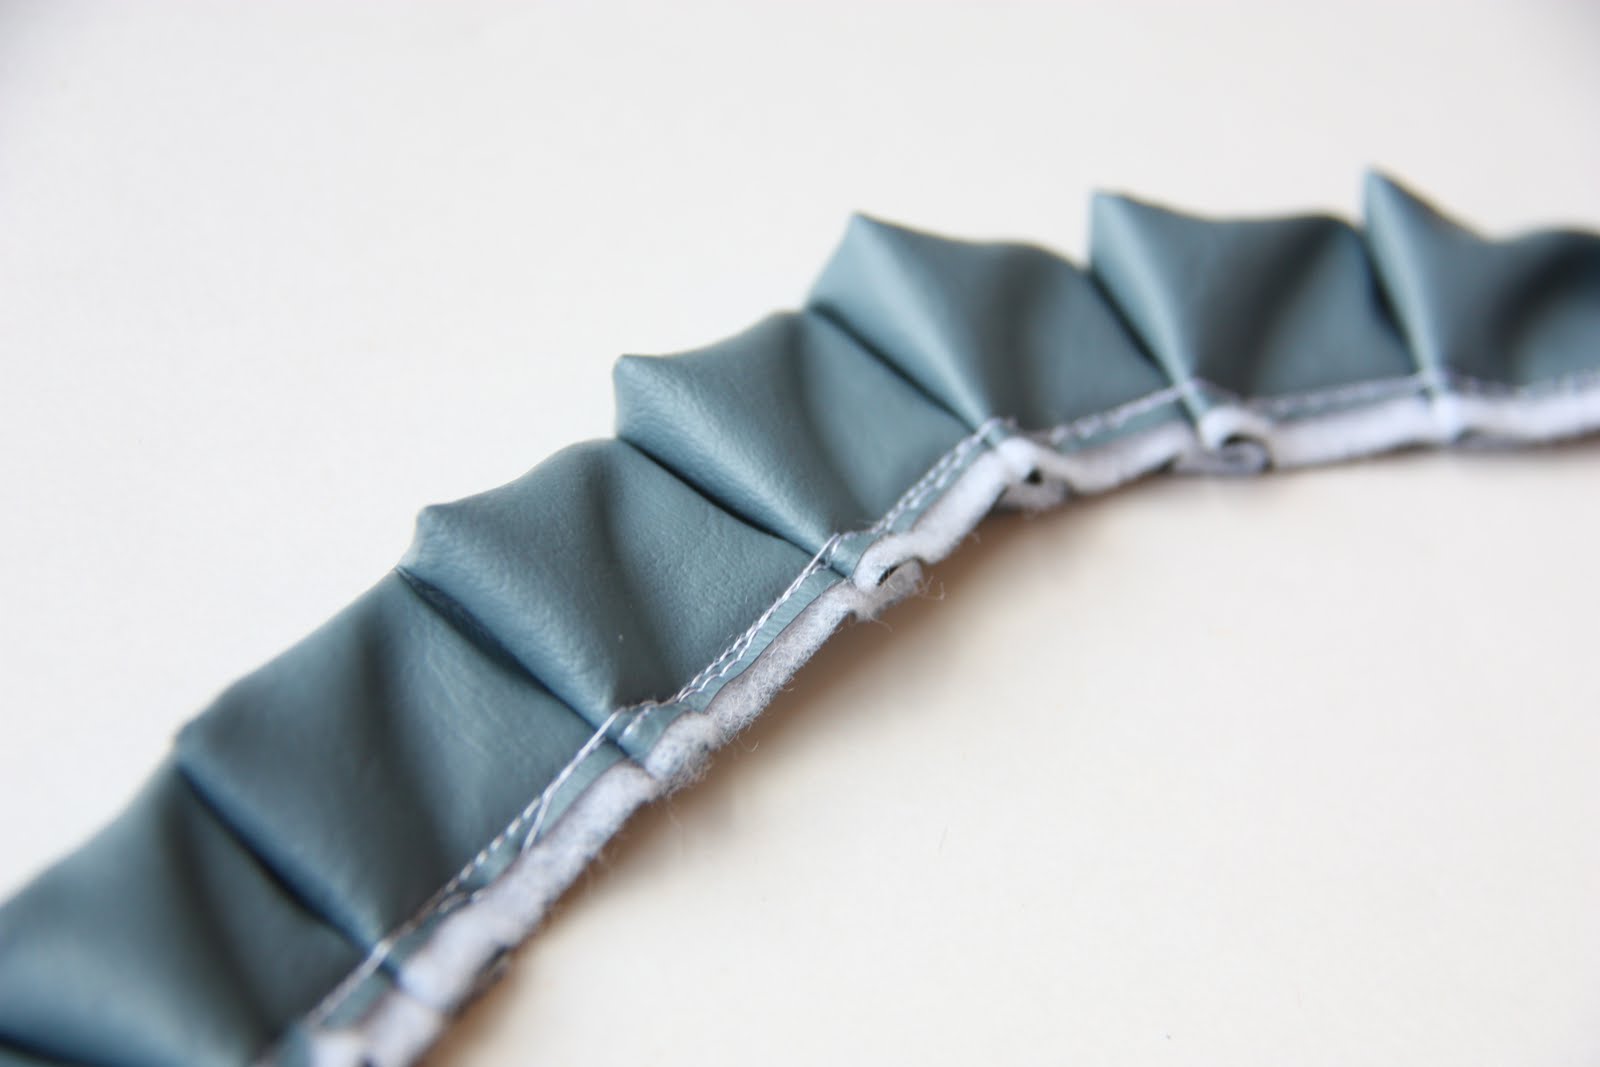
Then pleat this fabric every inch or inch and a half.
Don’t worry about pinning and measuring…….you just need it to be pleated a bit so that you can circle the fabric around to make the flower shape. (If you’re using a thin cotton as your flower, you could gather the fabric and circle it around in the flower shape……but this vinyl is too thick to gather.)
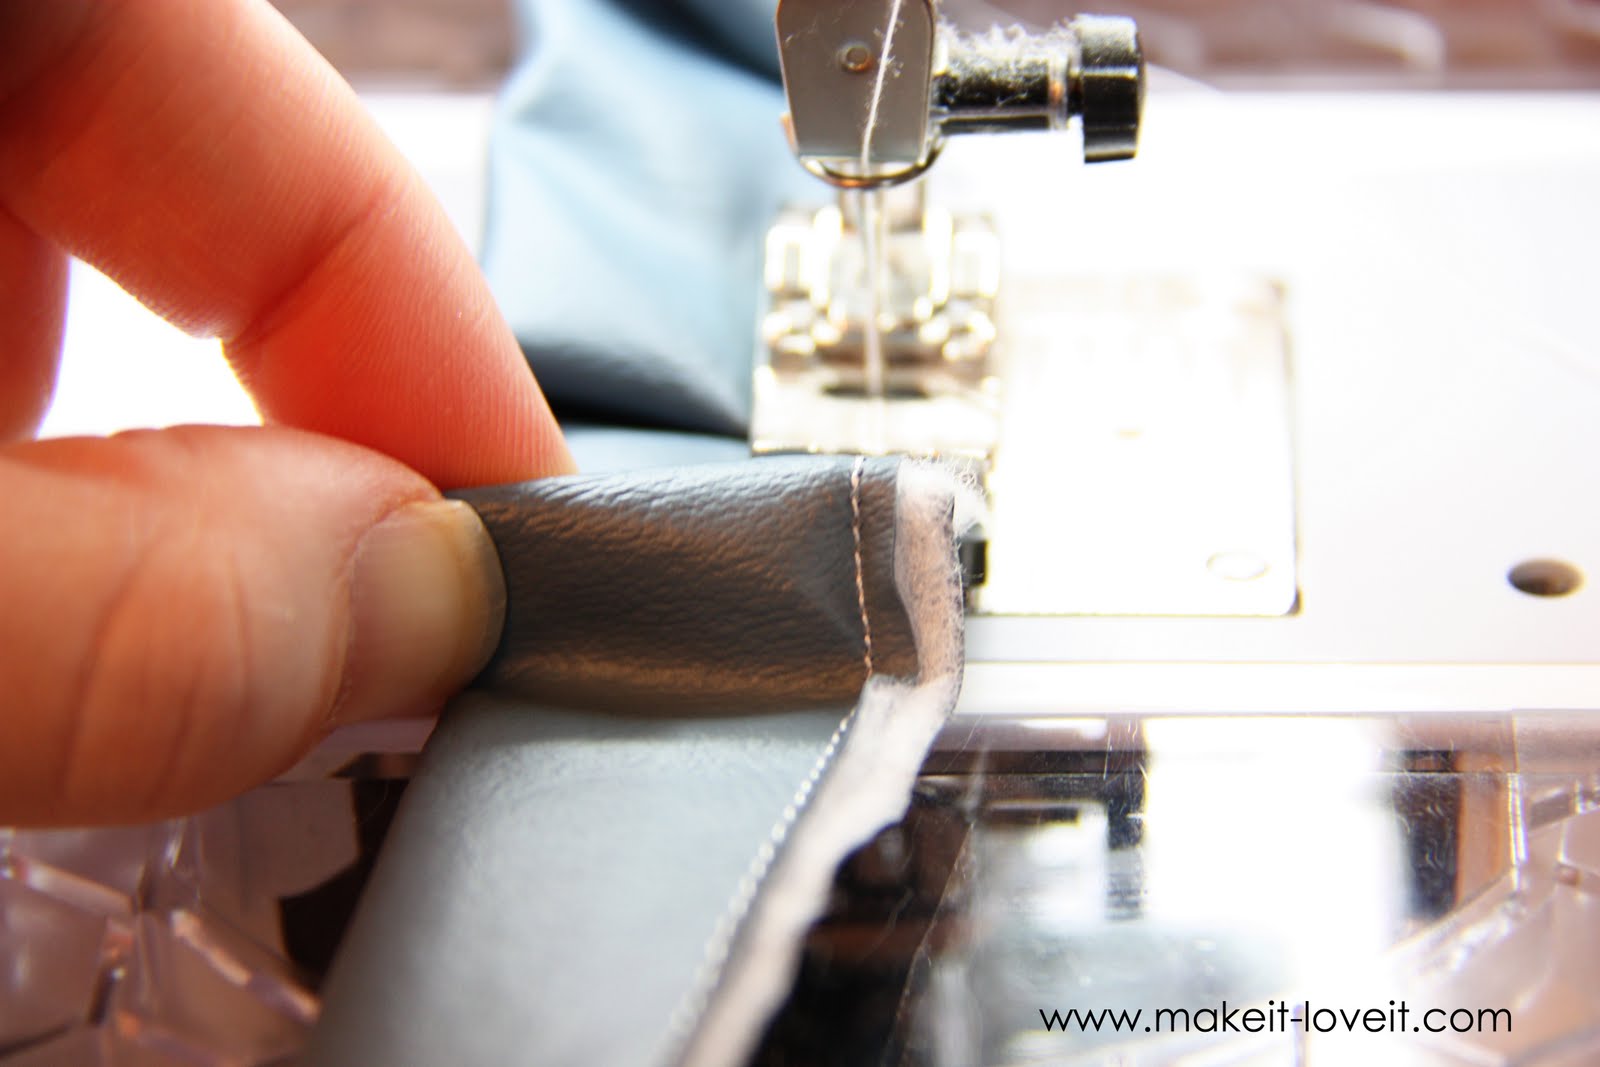
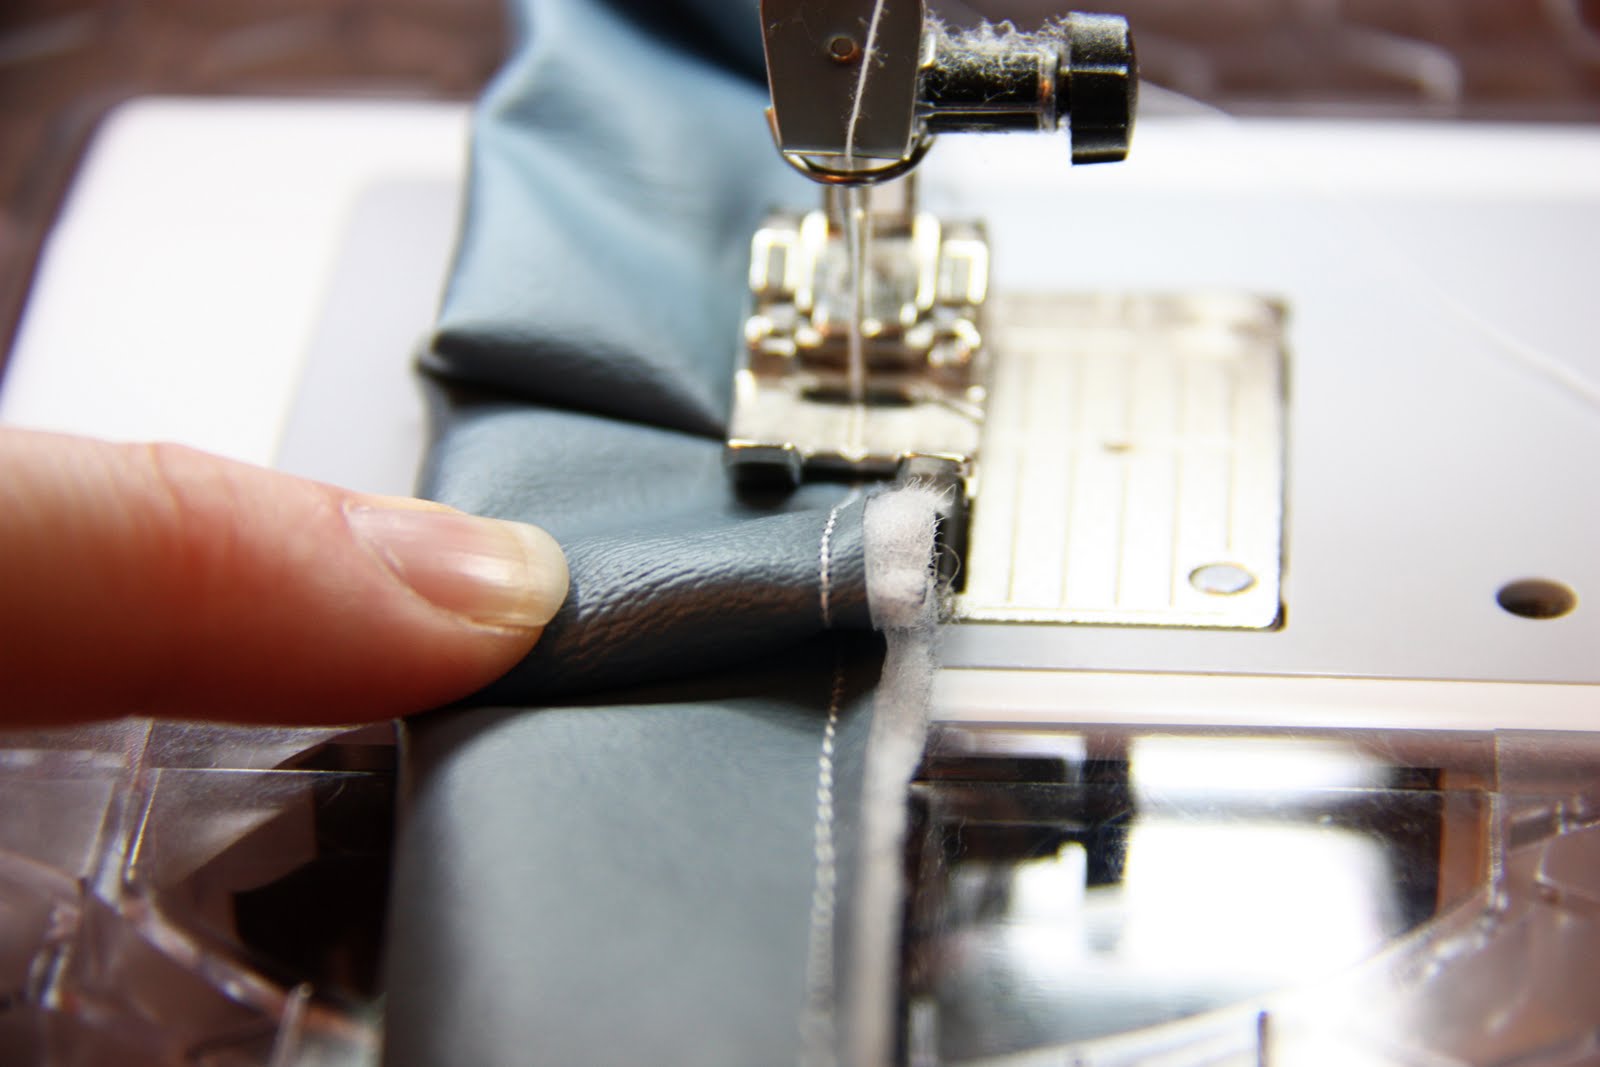
To do this the easy way, I began sewing along that same seam on the edge and would grab a chunk of fabric………
…..folded it over towards me……..
……..then helped it along as I sewed the little pleat in place. Continue every 1 1/2 inches or so, until you pleat the whole strip.
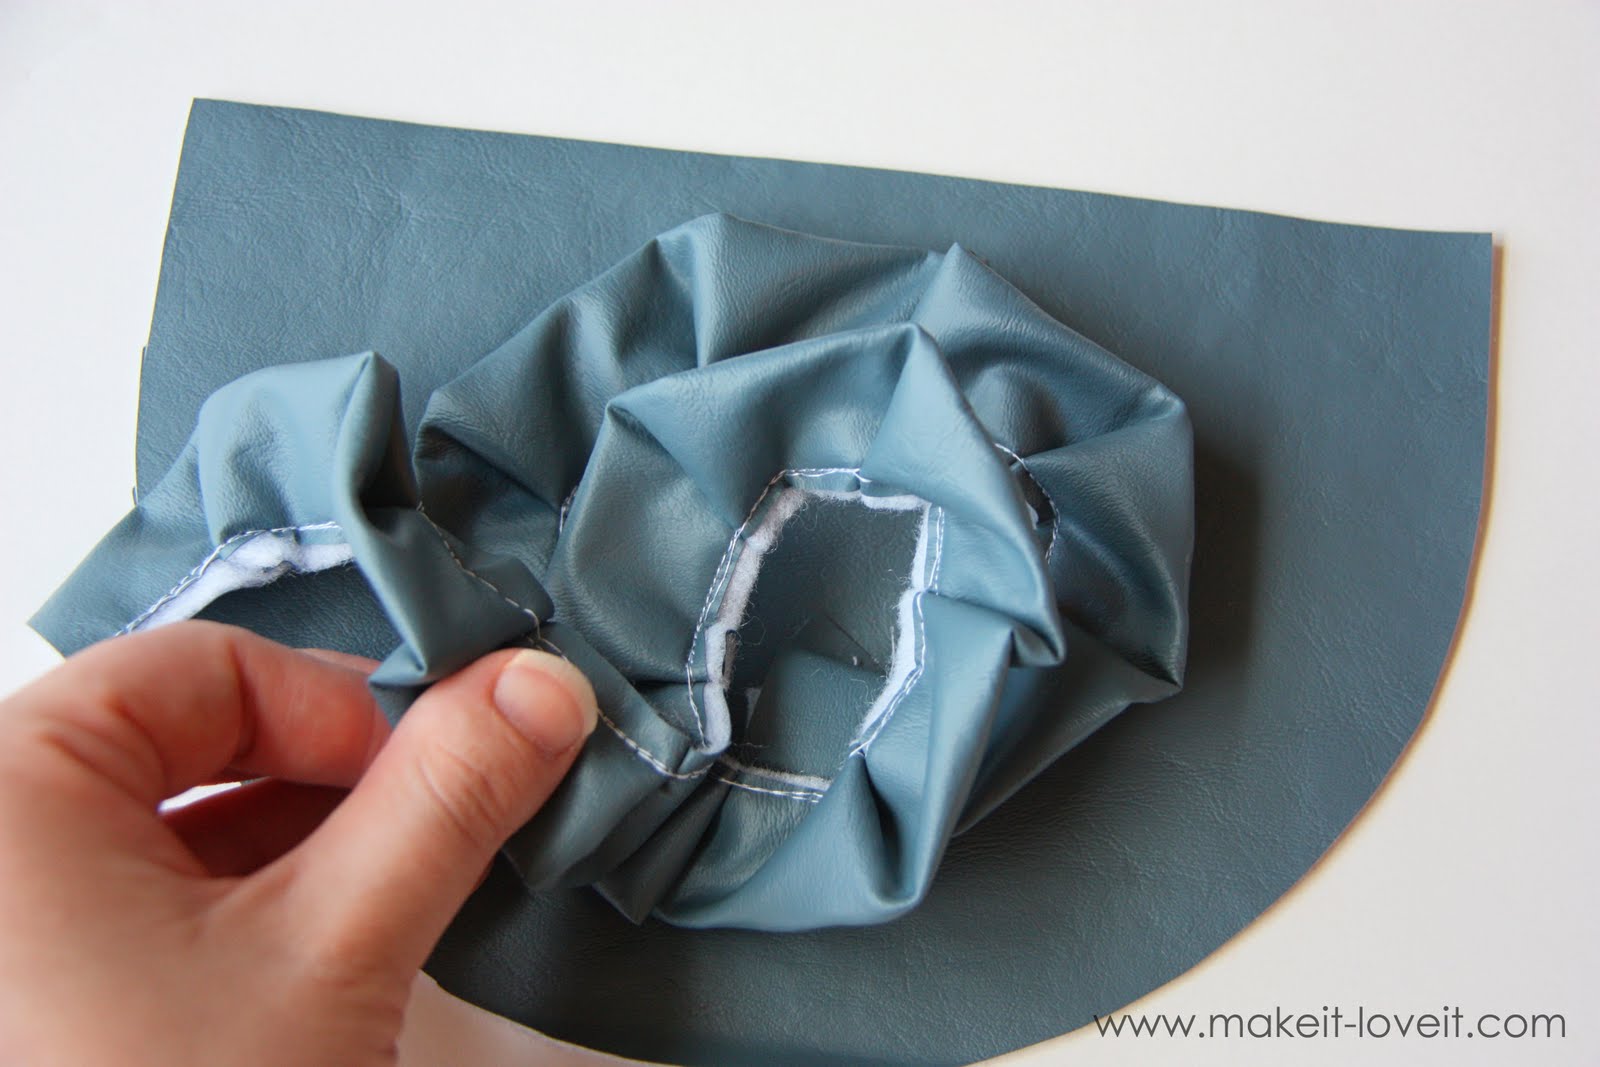
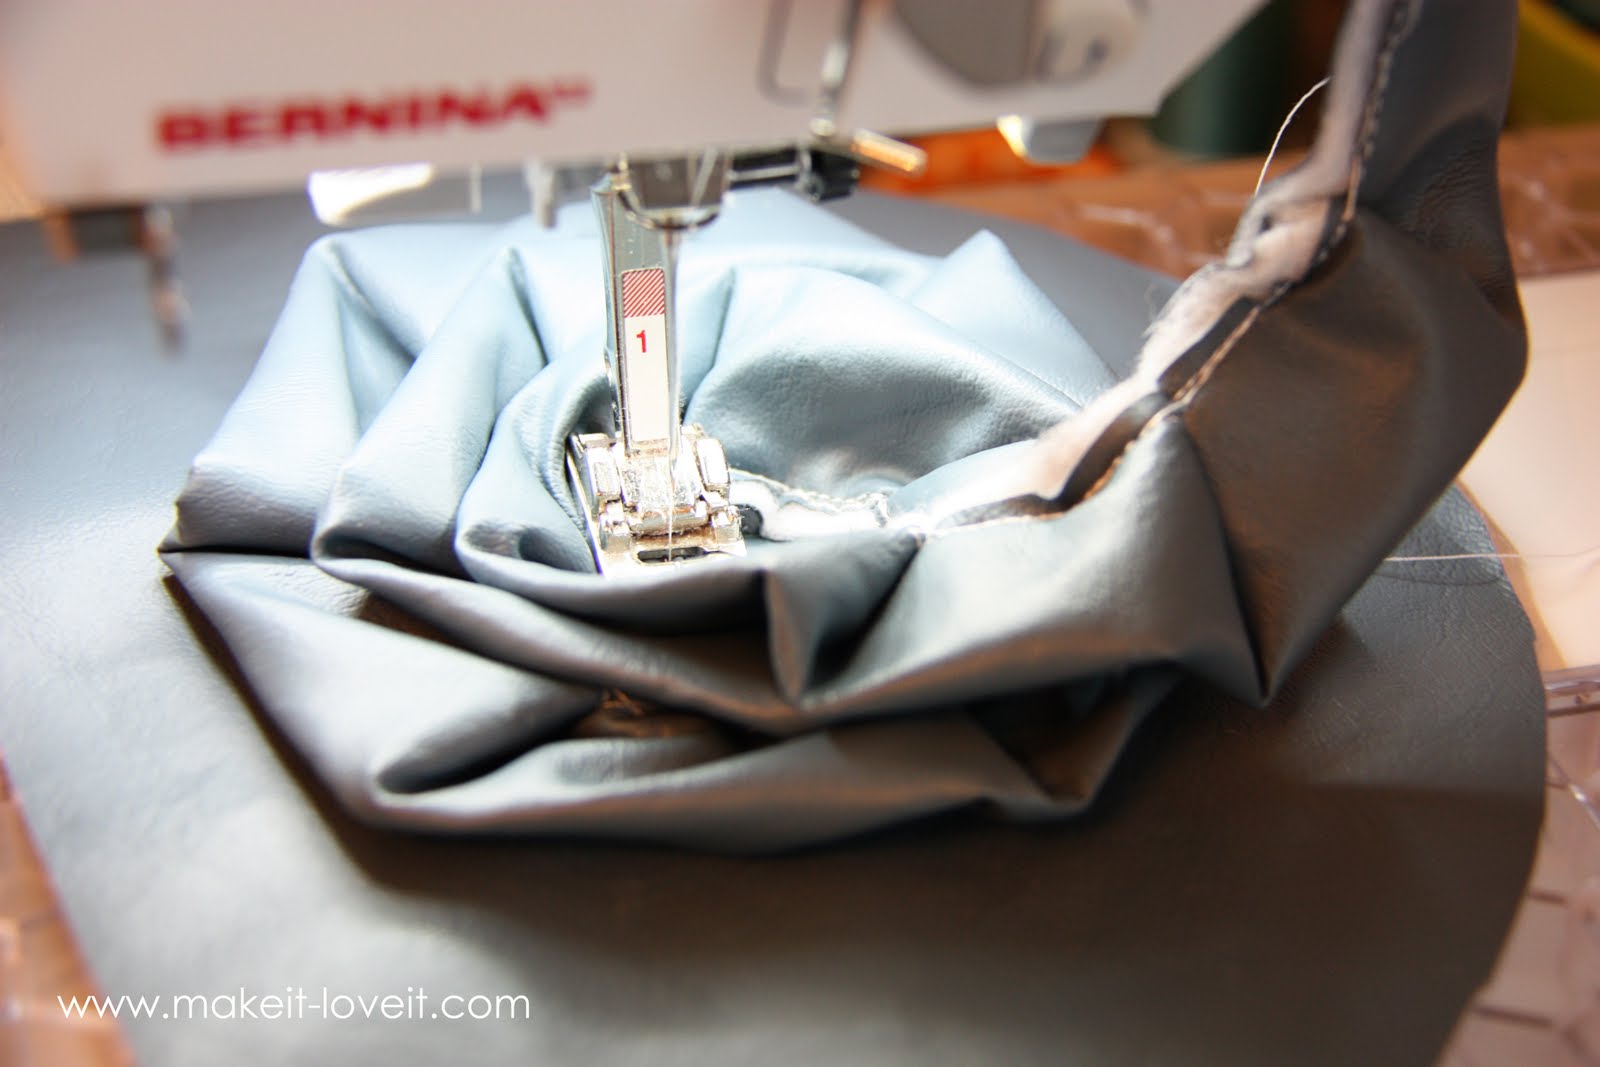
Then lay the strip down in a circular shape to see how you’d like it. (Don’t go all the way to any of the edges of the pouch because you still need a seam allowance to sew the pouch together.)
You can pin the strip down along the biggest circle of the flower, then sew in place, remove, pin the next circle, then sew again, etc………..or you can free hand it and just re-position and sew as you go. But sew along the the seam of the strip and sew around in a circle from the outer ring of the circle, spiraling in towards the center. (Make sure the overlap enough to hide the seams from the spiral below it.)
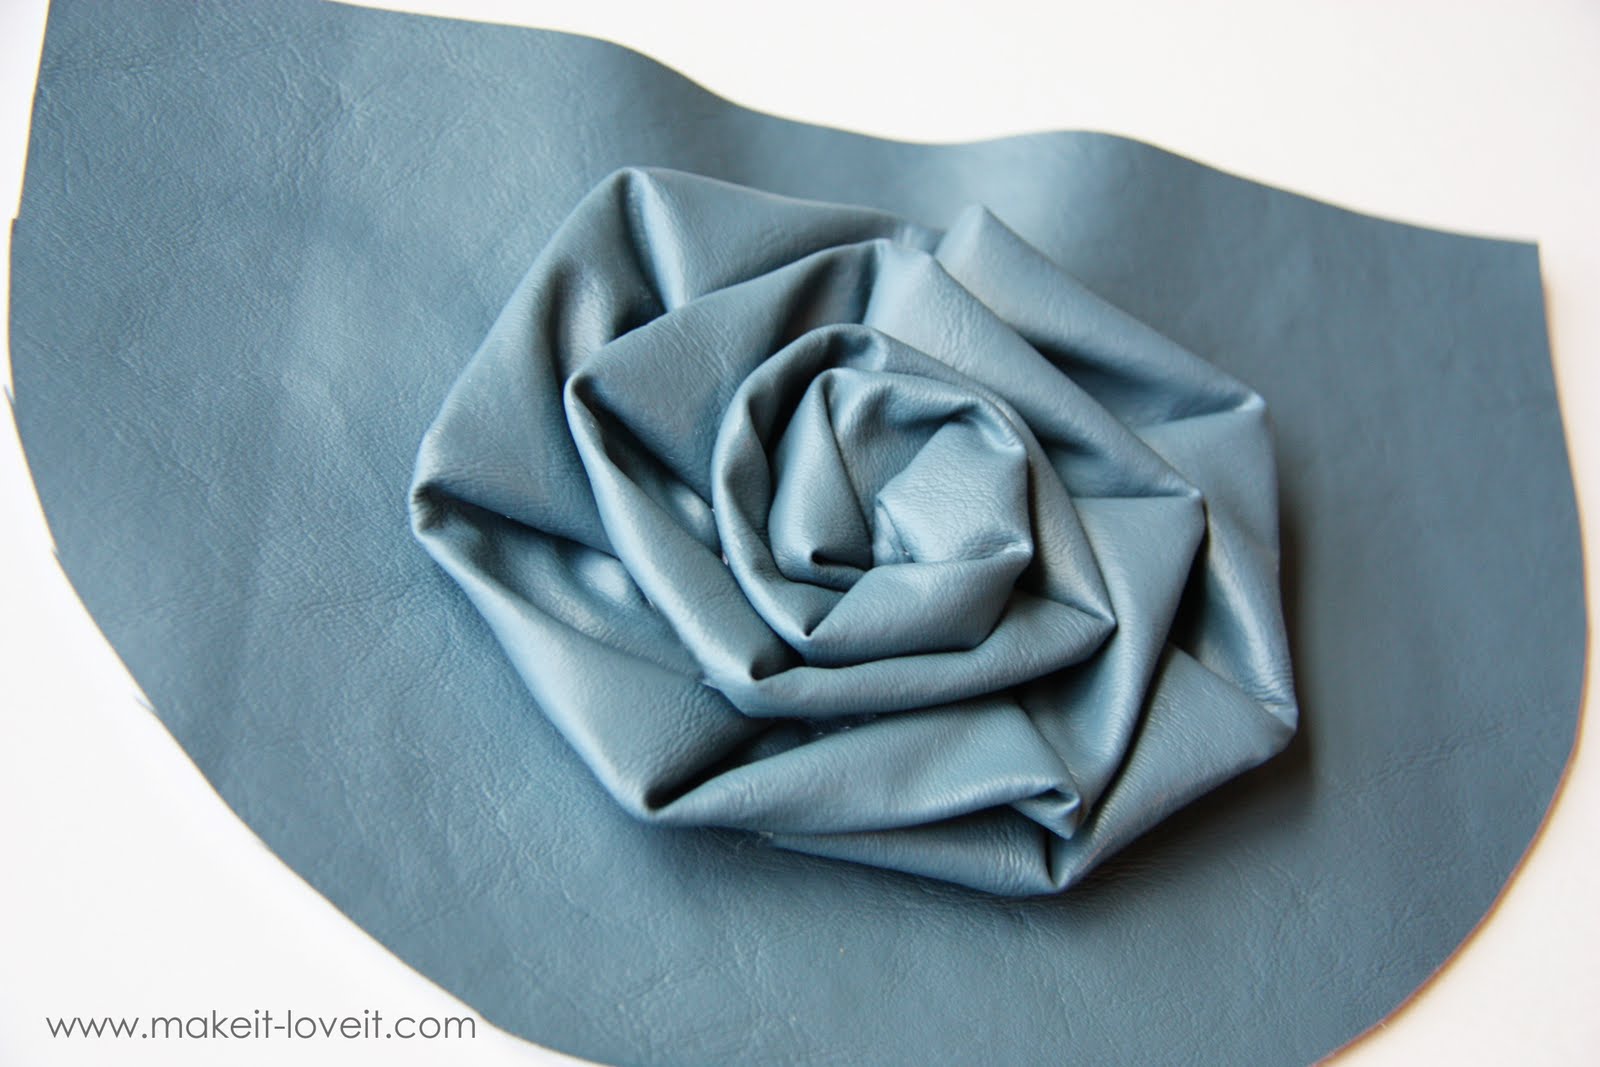
Stop when you have a short tail left or can’t go much more in the center.
Then tuck under the end and hand stitch it in place from below…..hiding your stitches.
Now you have the front piece ready for you pouch.
Now be sure to check out the zippered pouch tutorial
here to put your pouches together the exact same way.
And enjoy your little rounded pouches.


