.
I’ve been trying to get the room done…….so only a couple more things to share.
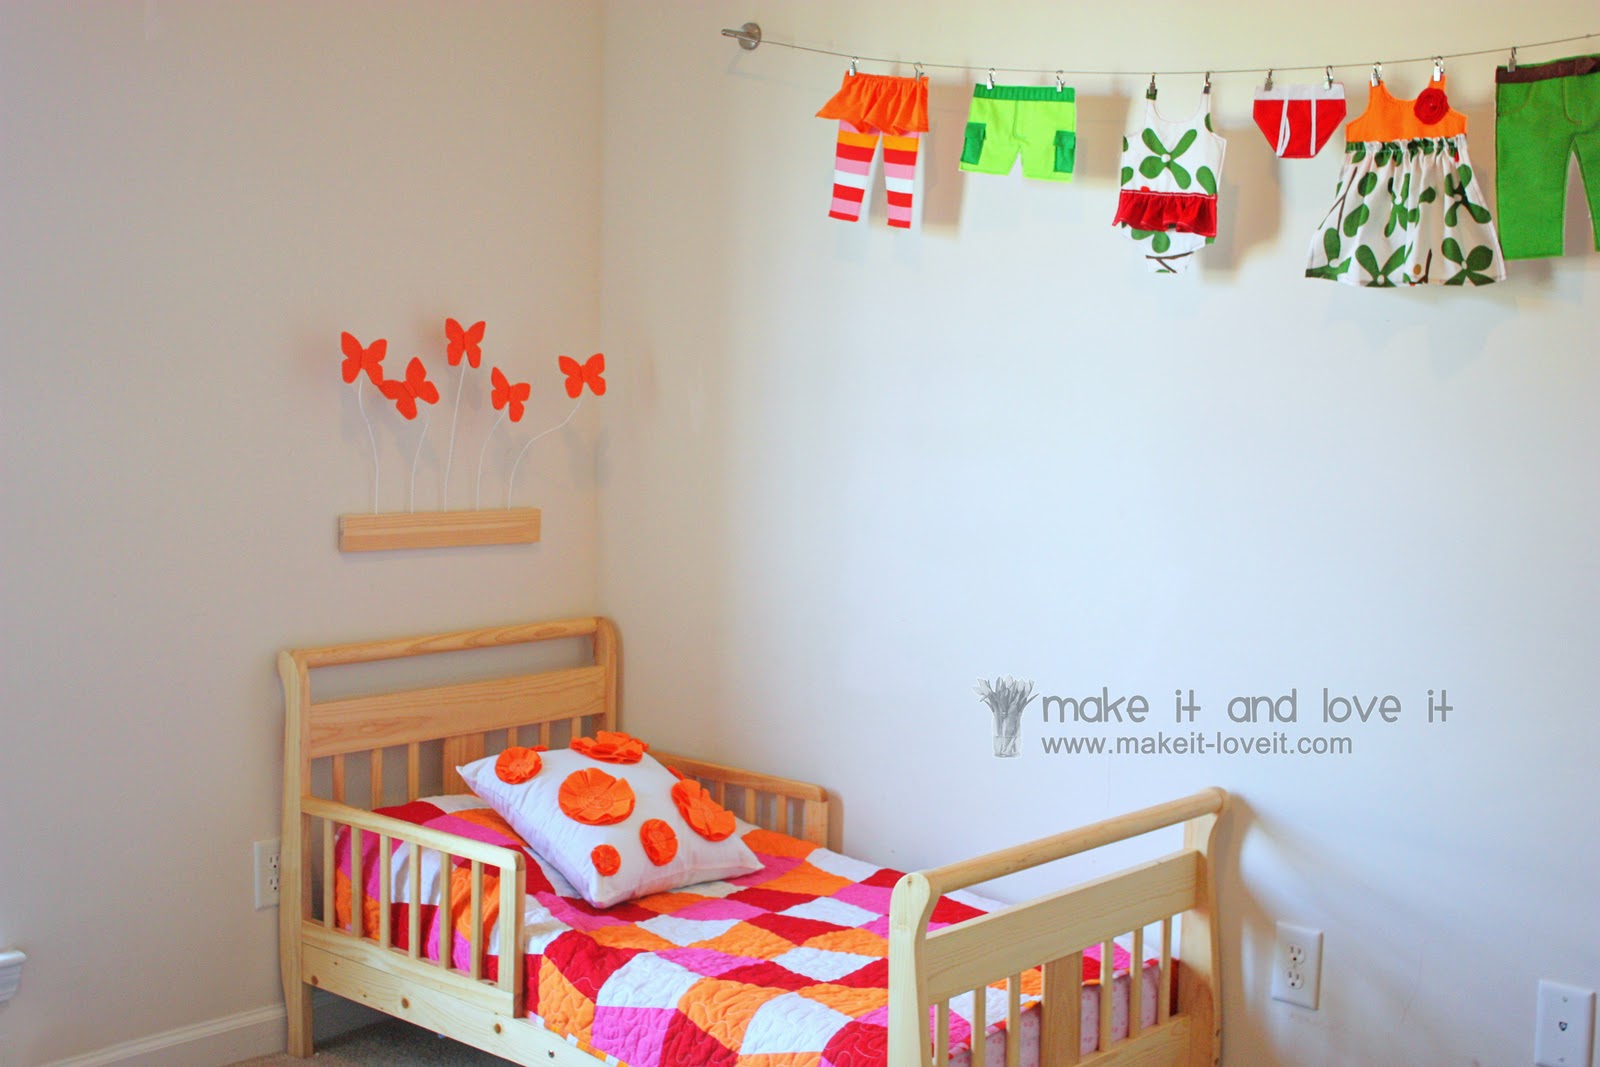
And for this time, I have a quick little 3D butterfly display to share.
All from scraps from home.
It gives some nice dimension to the wall.
Especially to the space above this bed, that was shouting at me to fill it up.
Want to make your own?
And hopefully you have the same scraps laying around that I did.
Nice and inexpensive.
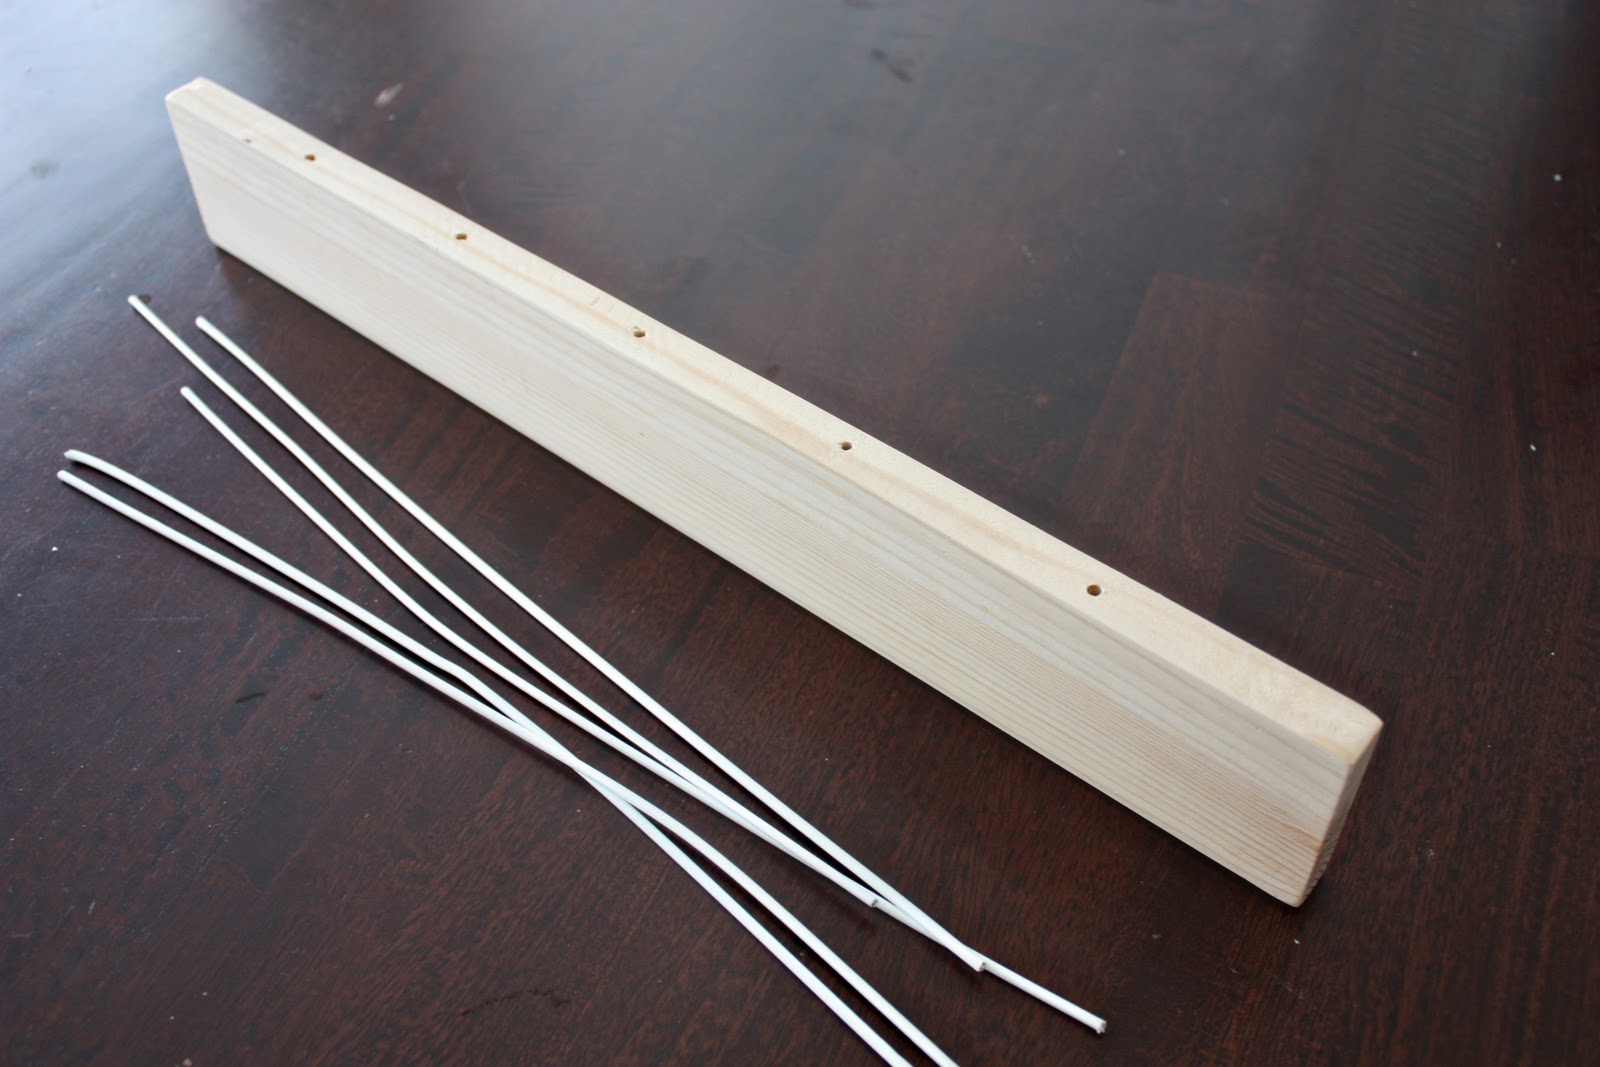
I had some scrap 1×4 wood, that I trimmed down to 18 inches long. Then I drilled 5 holes along one side that were about 2.5 inches deep. Each hole was about 3 inches apart. Then I sanded down the entire piece of wood. Then I cut up old white coated wire hangers, some 15 inch long pieces and other 12 inches long. (Any size works though.)
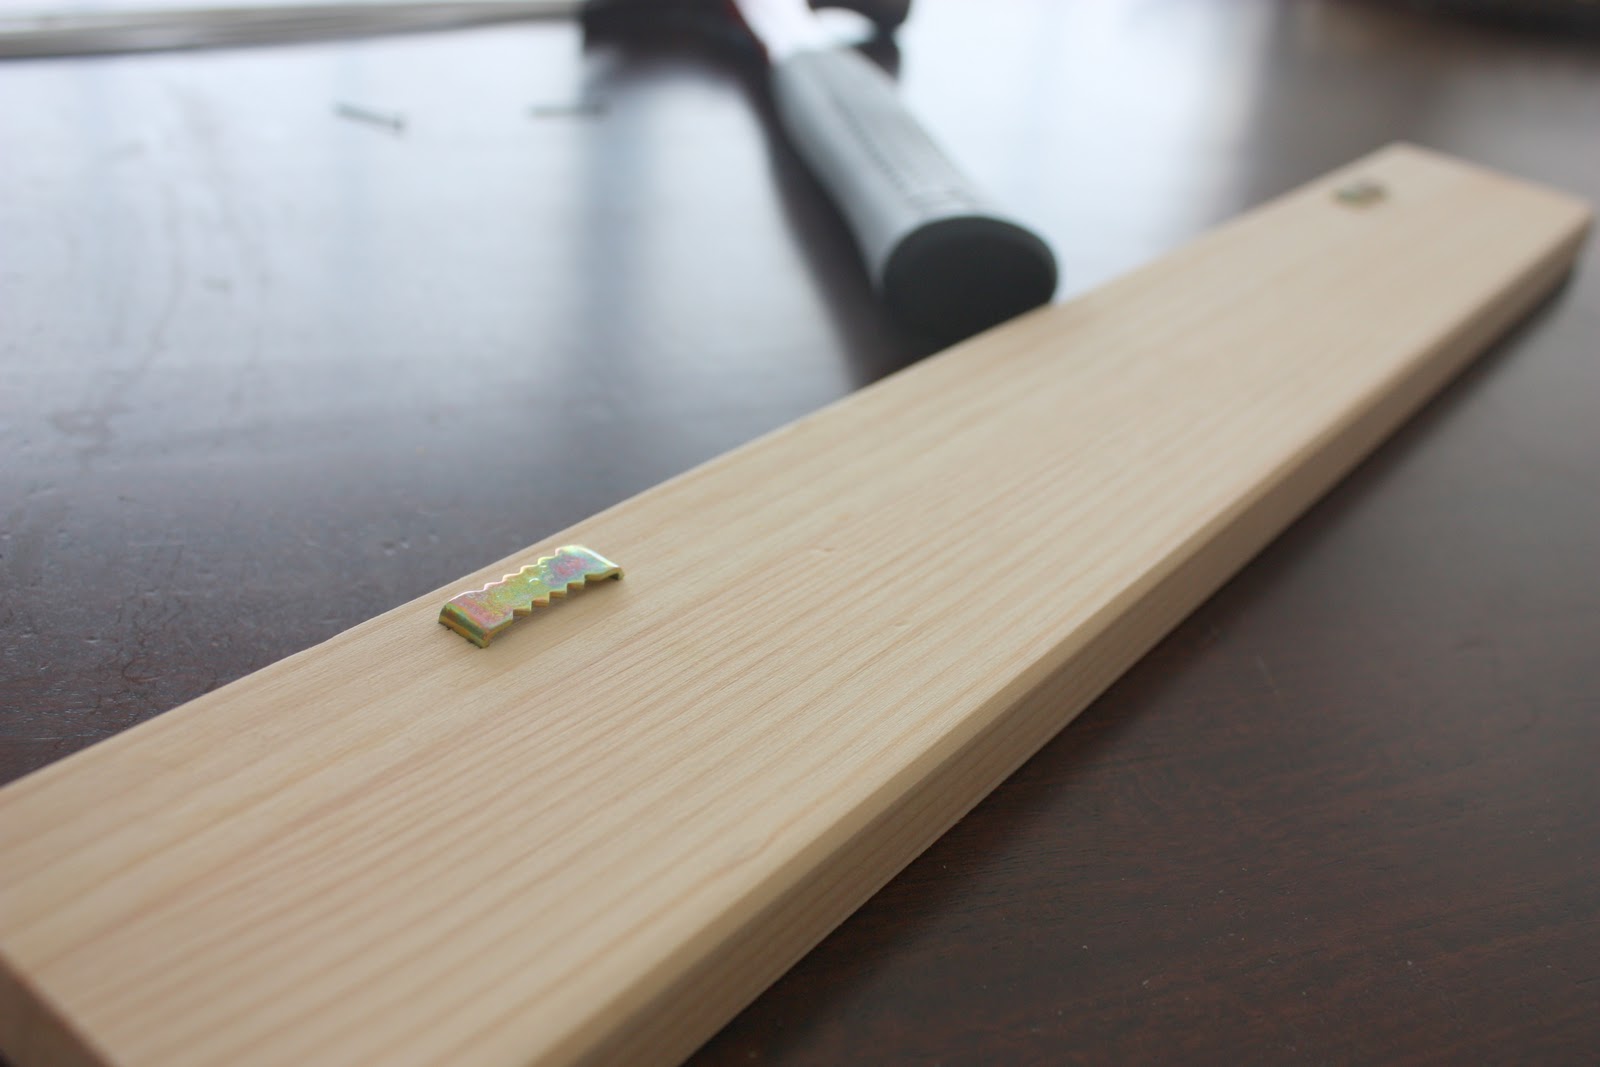
Then I pounded picture frame hangers into the back of the wood.
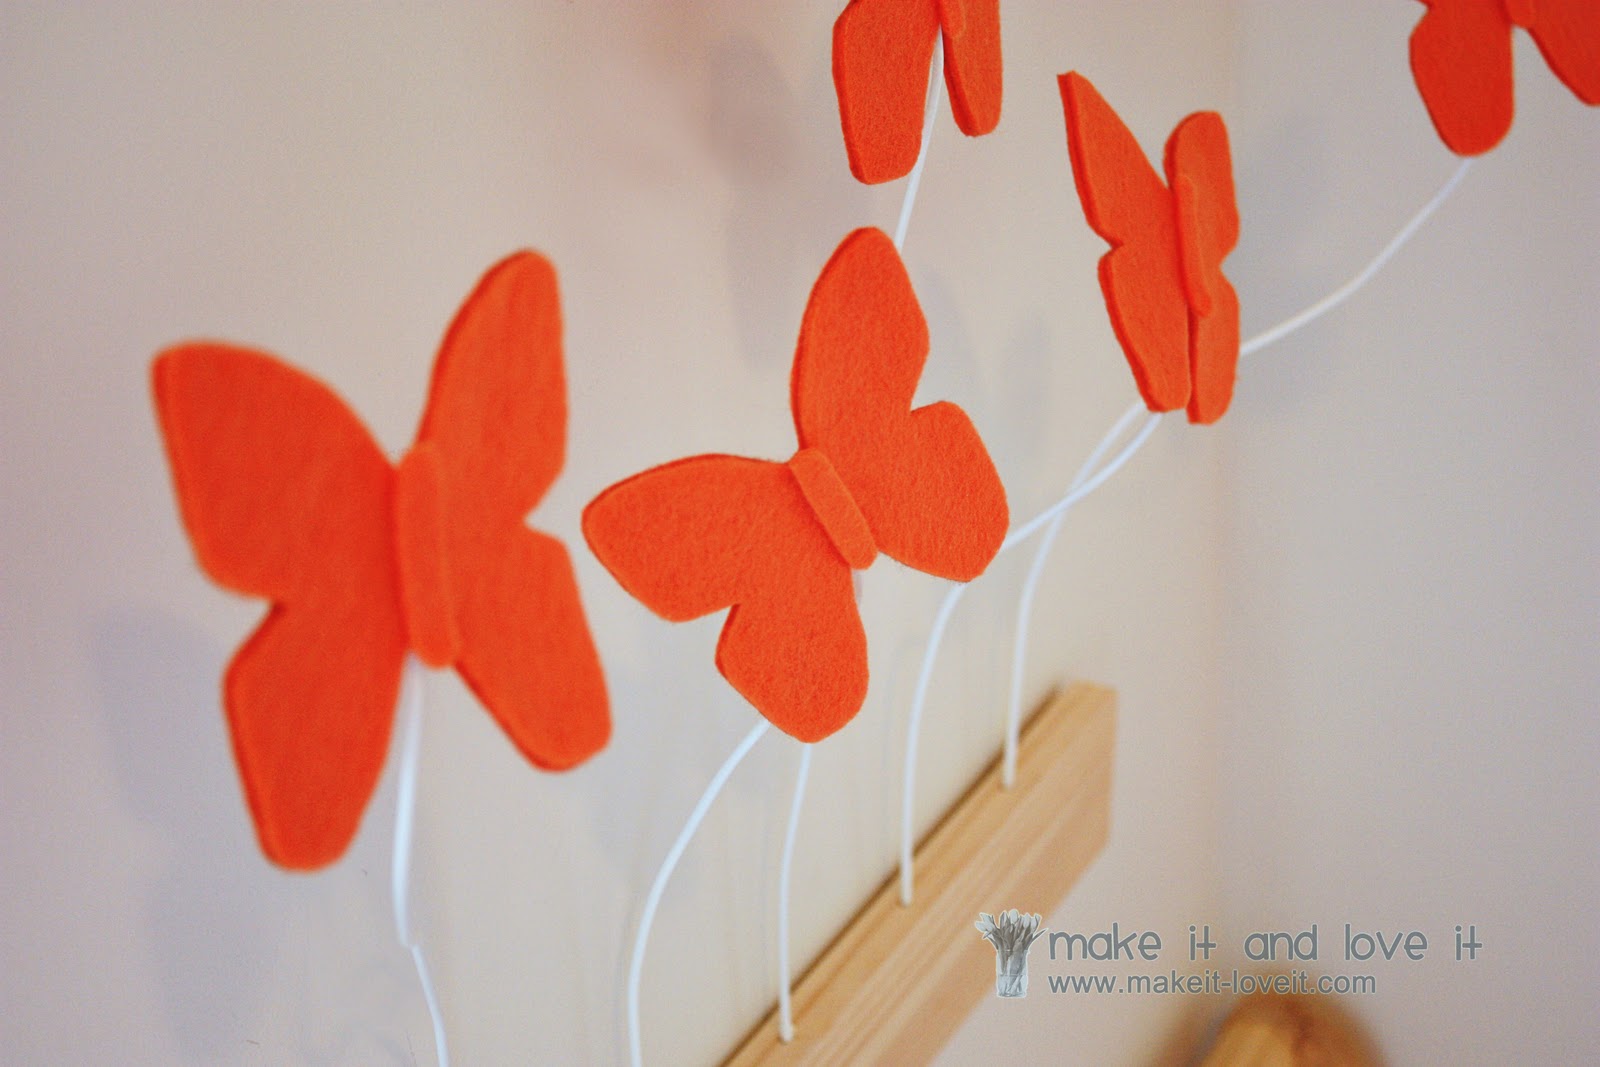
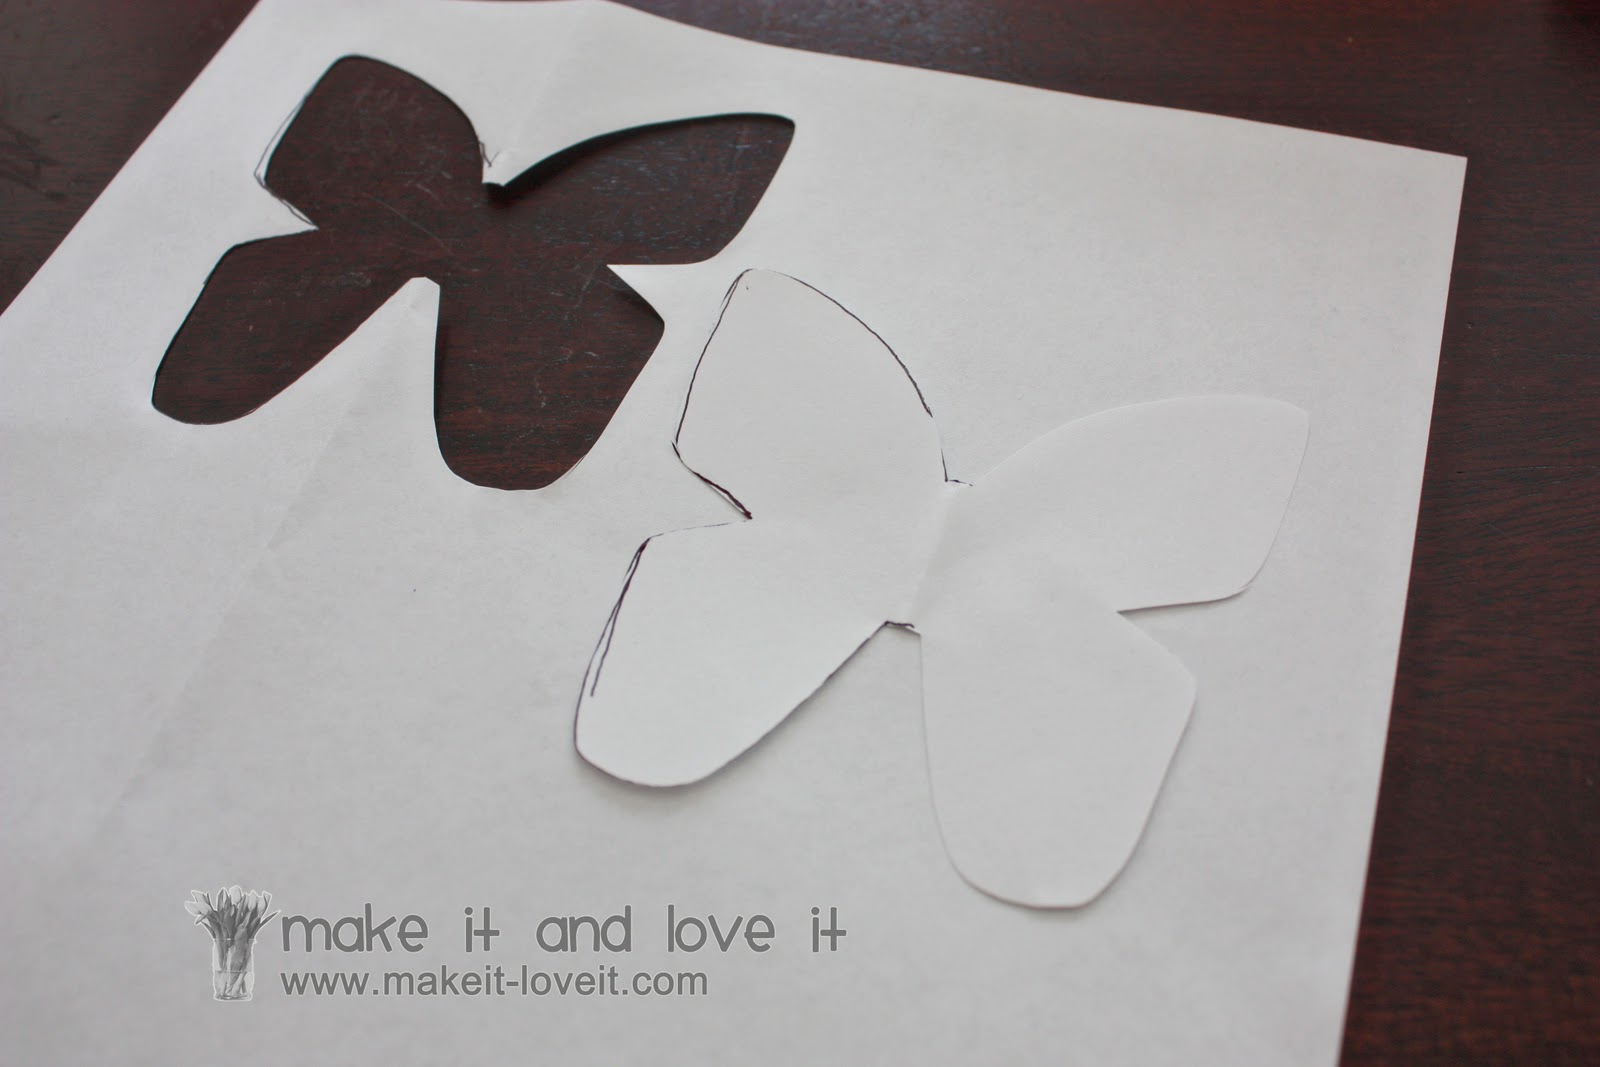
Then I sketched out a butterfly shape and cut it out.
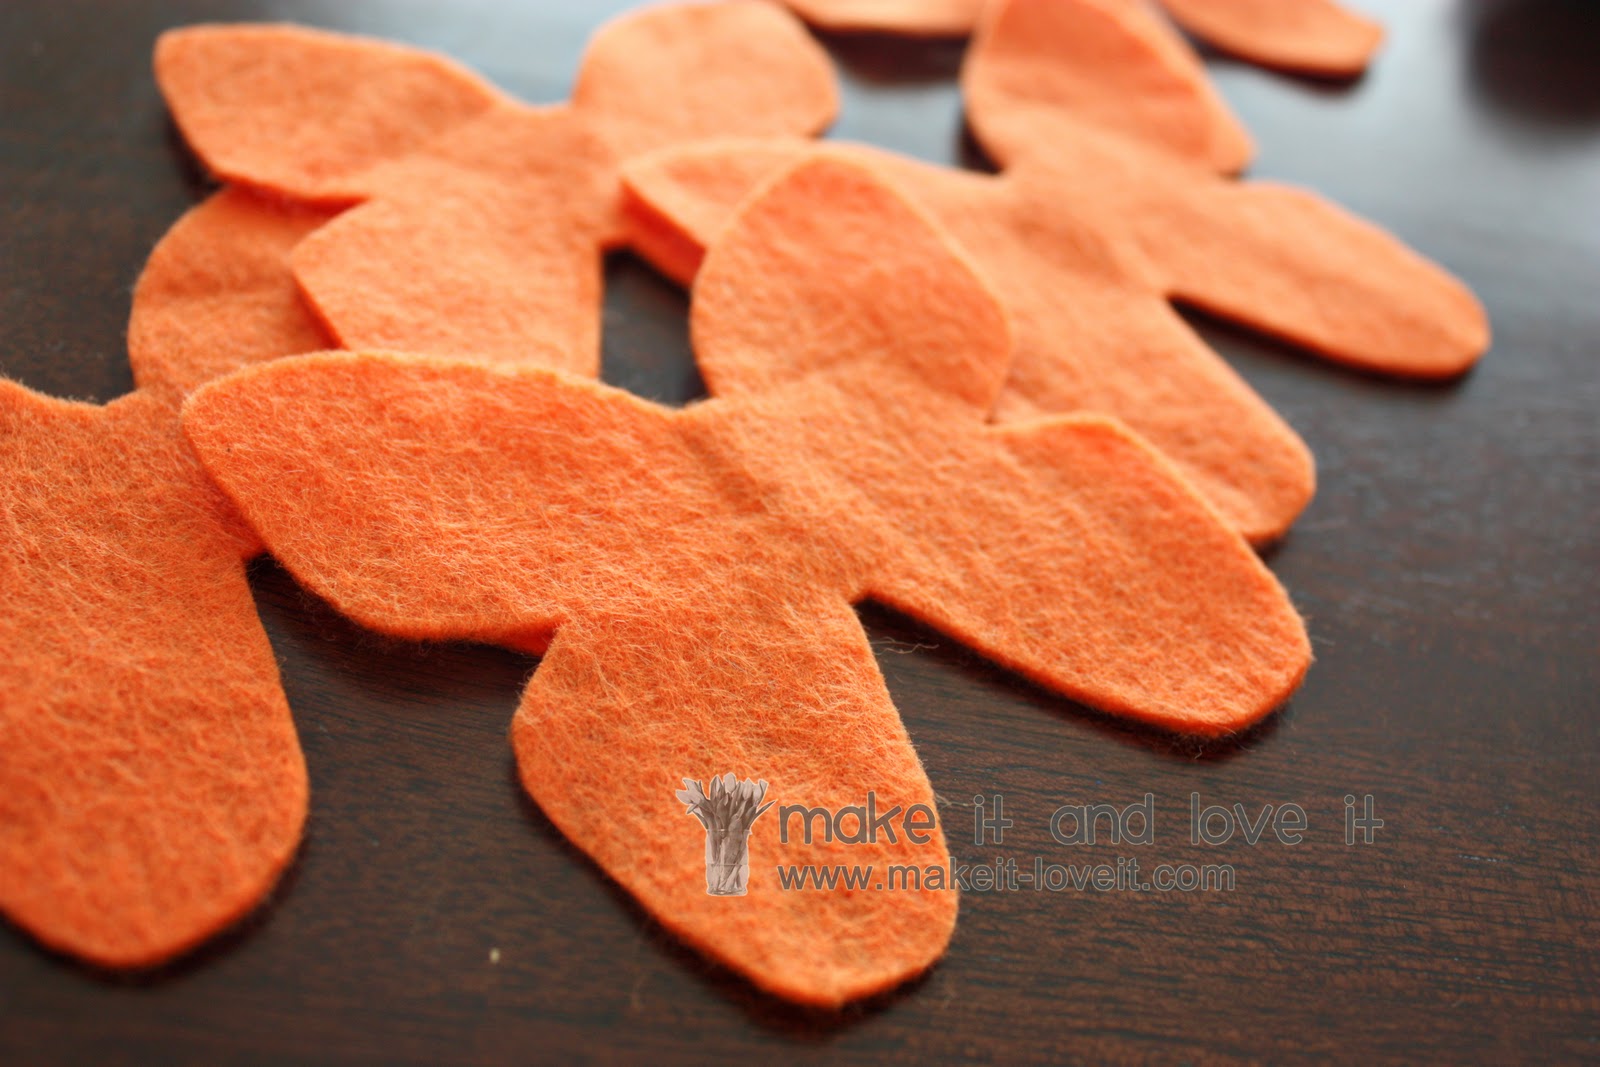
And then I cut out 10 butterflies…
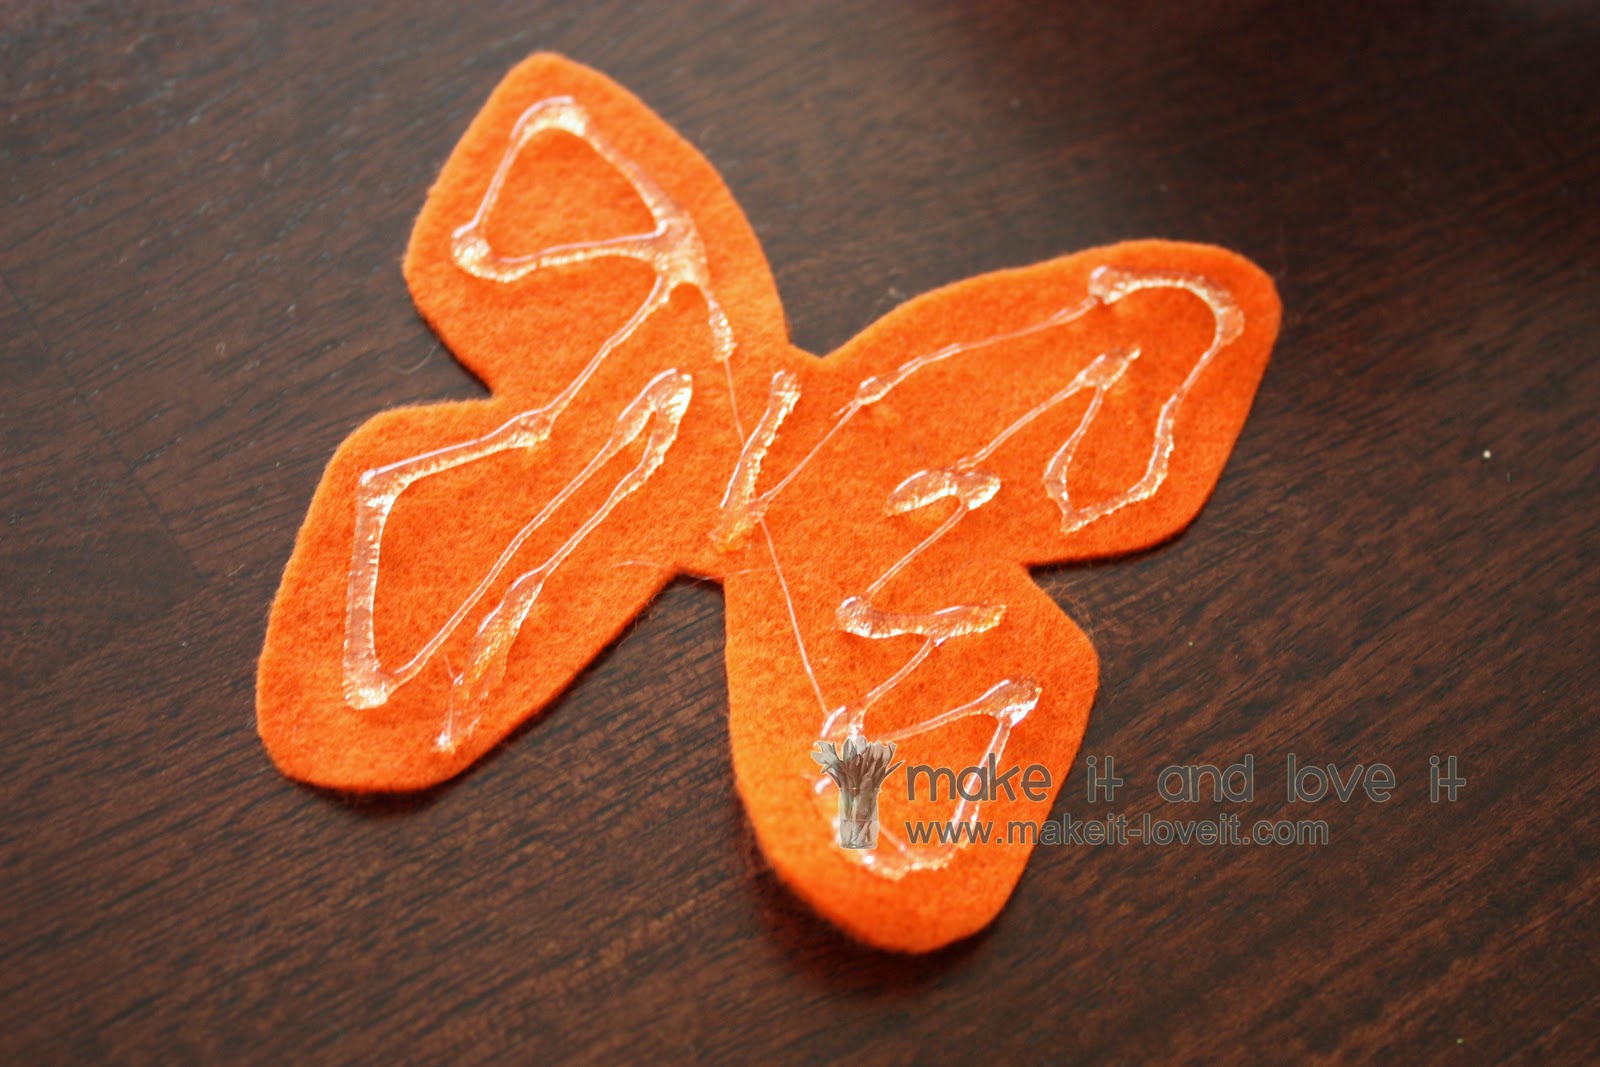
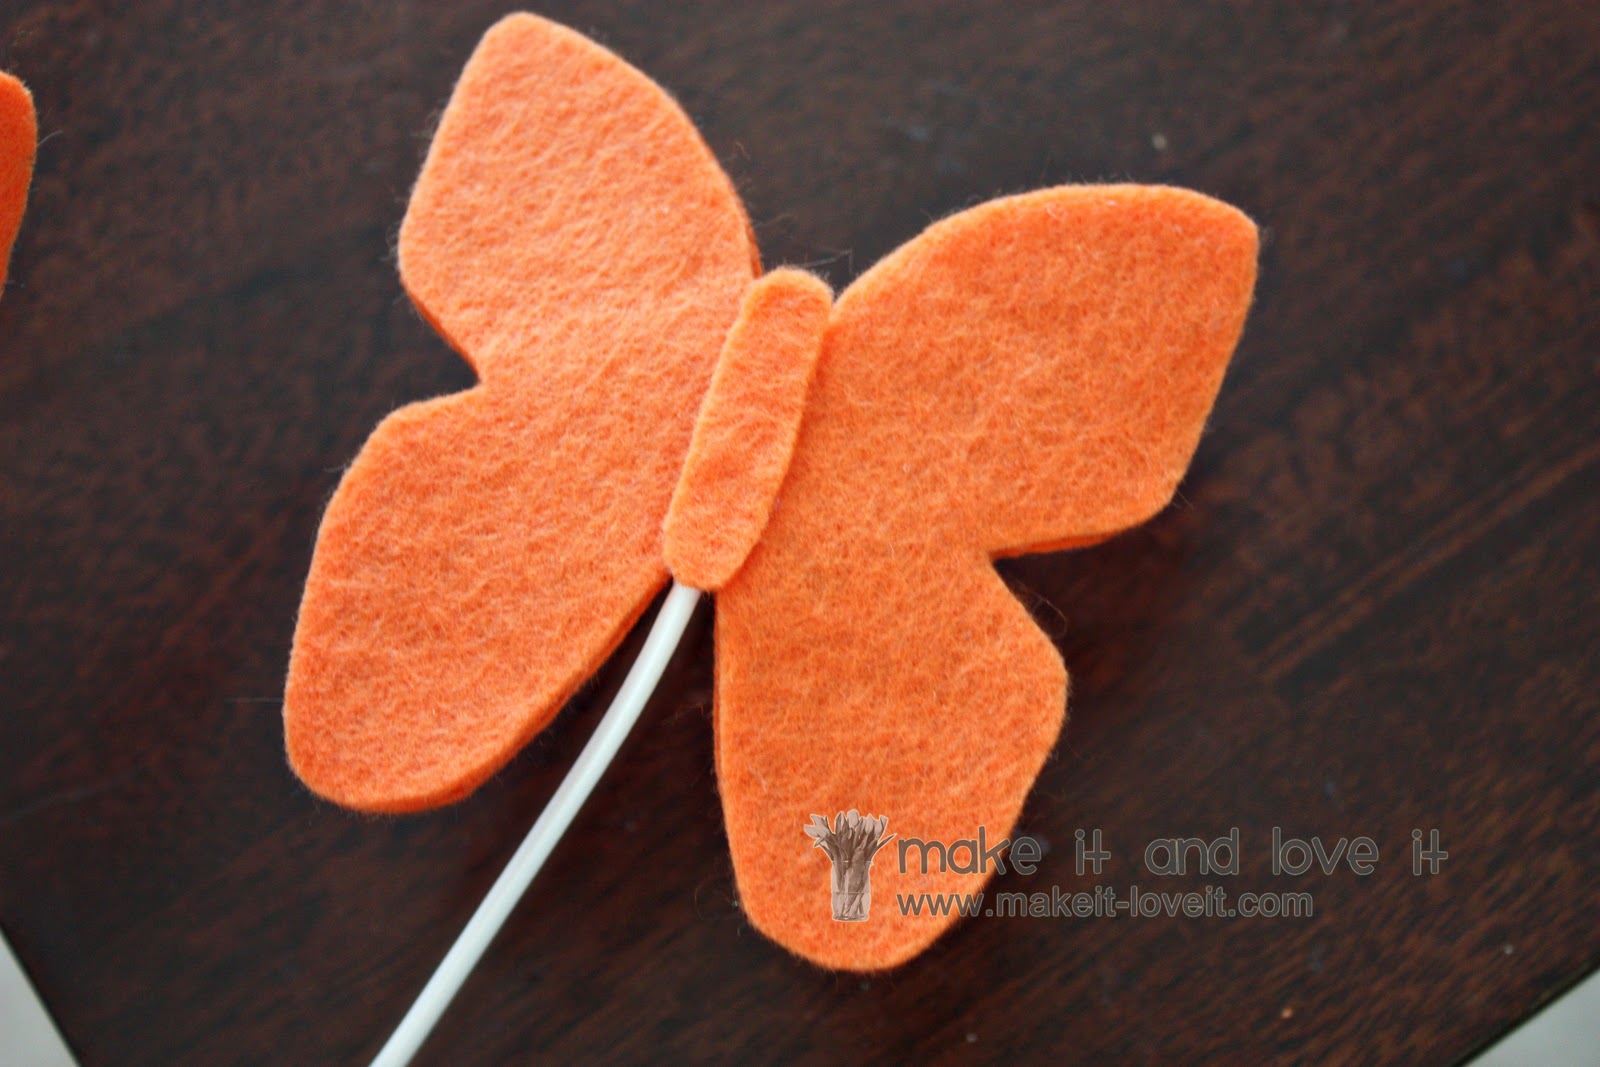
On one side of one of the butterflies, I placed a good amount of hot glue……
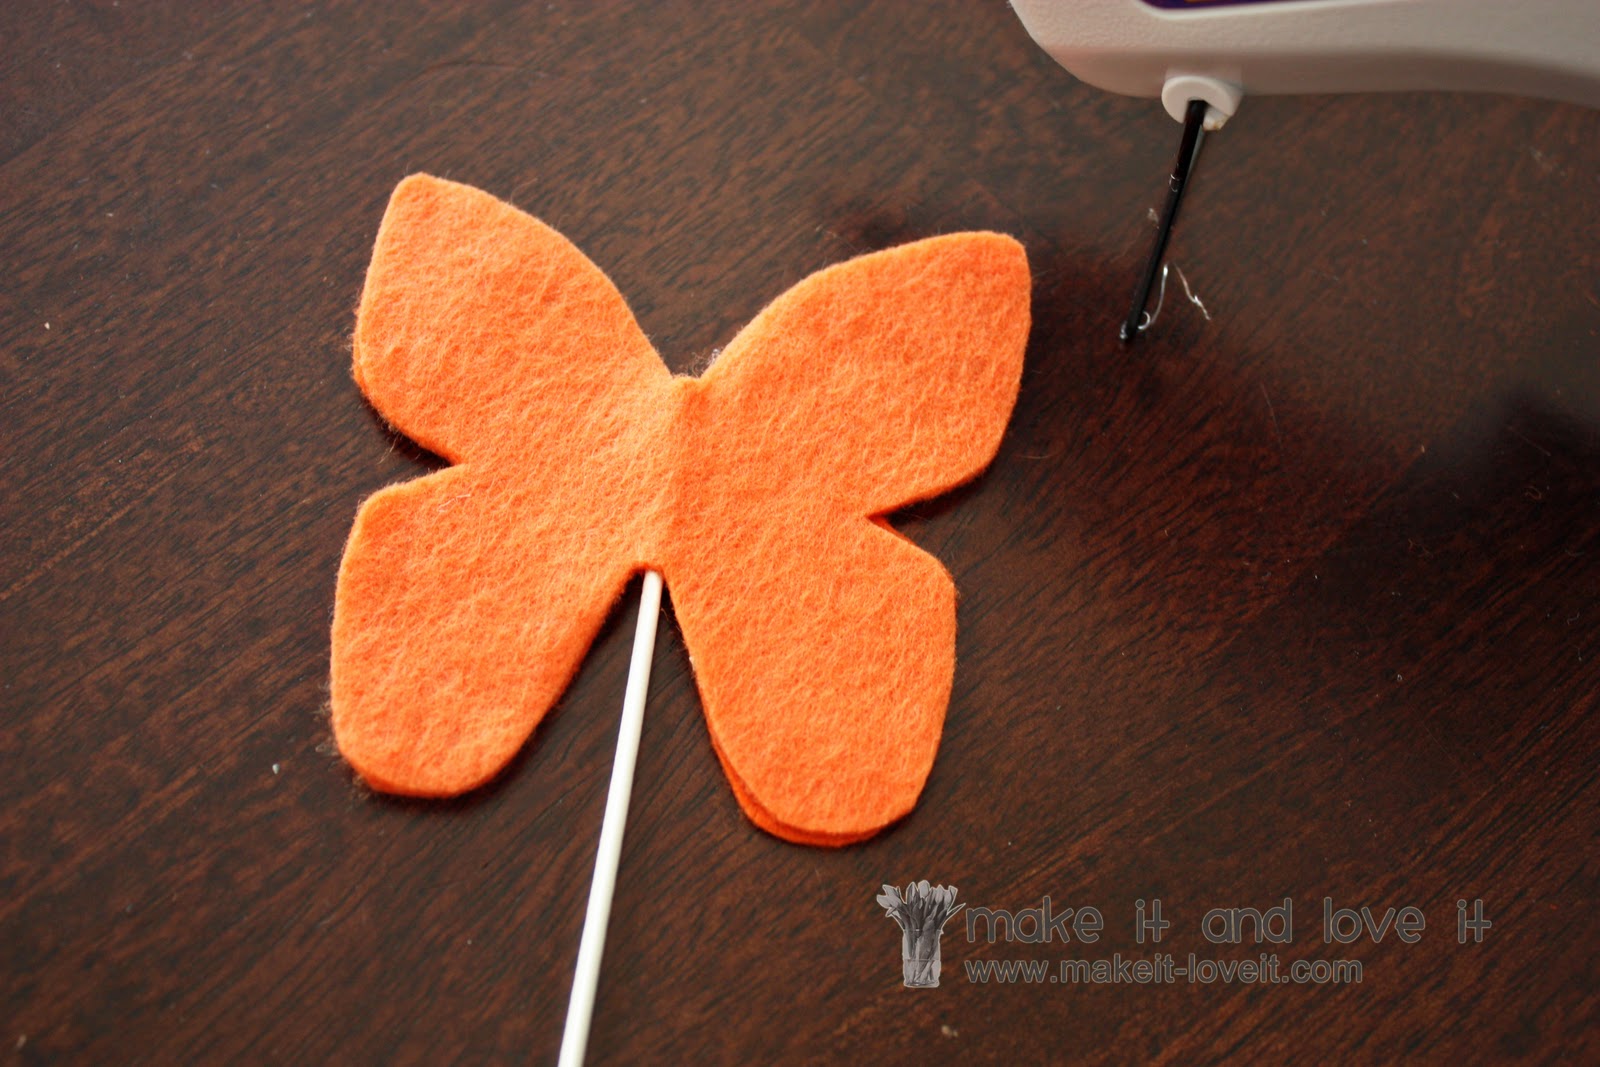
Then I placed the end of one of the hangers down the center of the butterfly and then placed another butterfly on top…….sandwiching the wire in between the two butterflies.
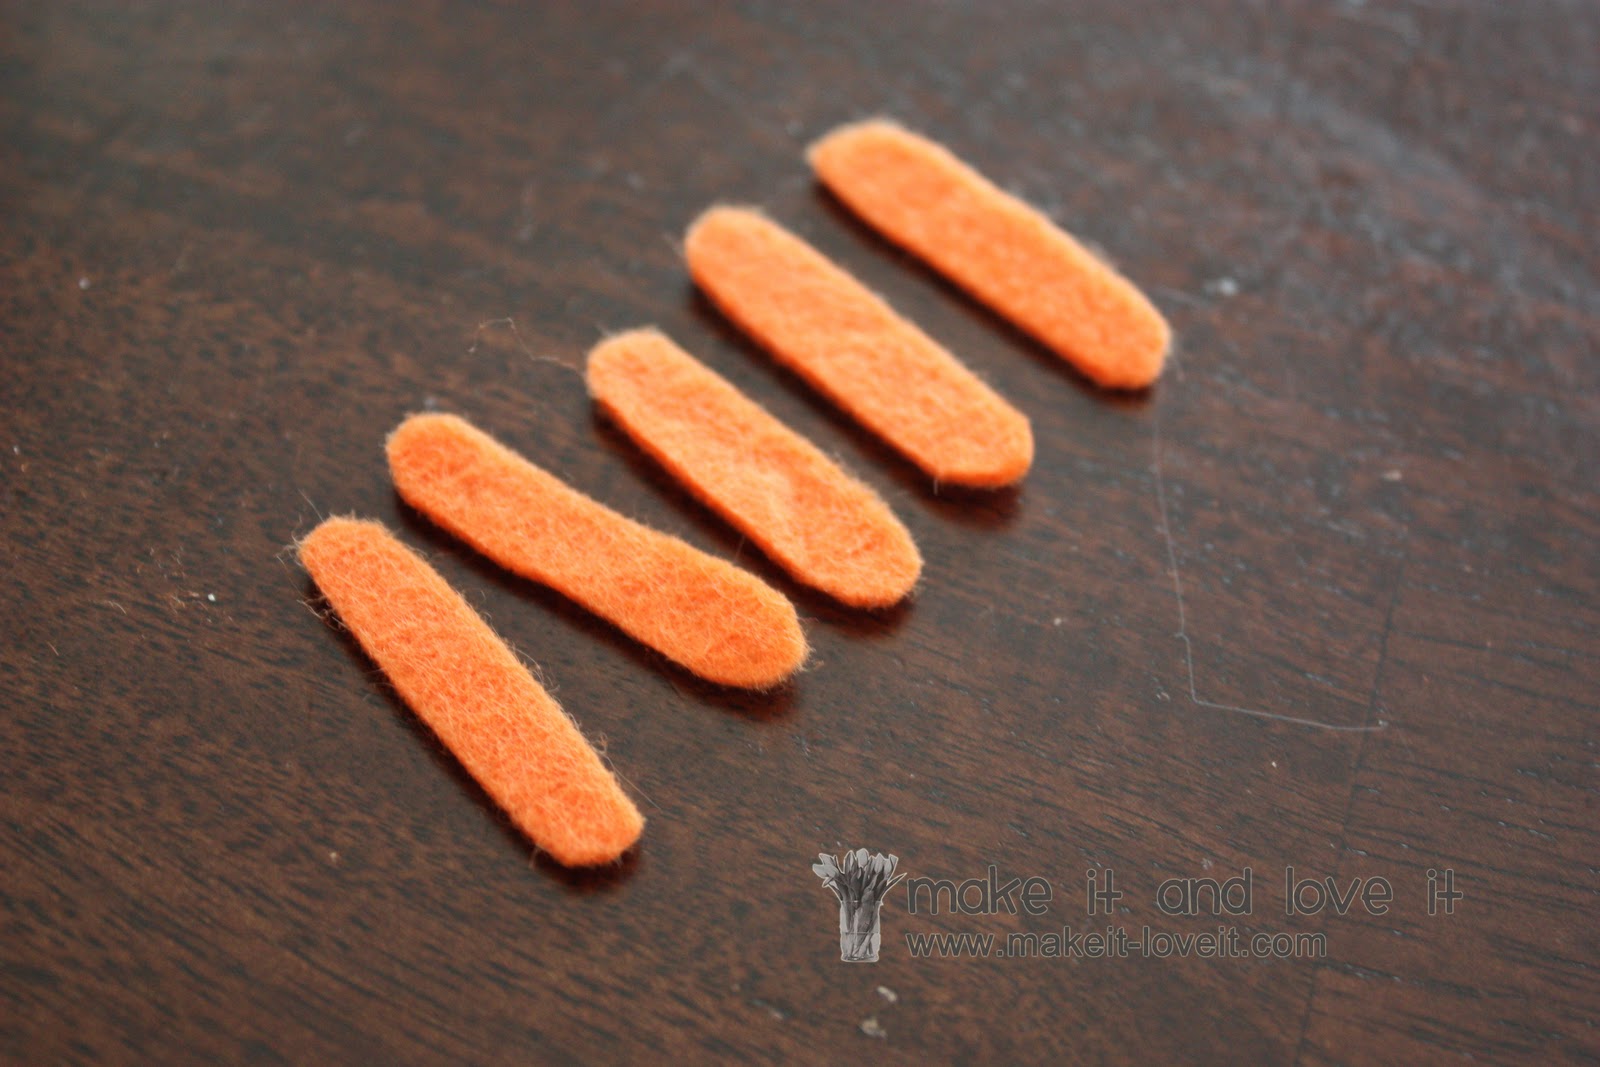
Then I cut out little butterfly bodies….
And glued them to each of the 5 butterflies.
Then I stuck a bit of hot glue down into one of the holes in the wood and slid the wire down into the hole, securing the wire in place.
Lastly, I bent the wires around a bit…….giving some of the butterflies some flight.
And then I hung the simple little butterfly decoration right above my little girl’s bed.
Done.
Be creative.
Think of whatever shapes or theme you could stick in some wood……and create a 3D wall display.

Hi, I’m Ashley—the DIY-enthusiast behind this crazy blog!


