Home » DIY Tutorials » DIY Sewing » Sewing: Clothing » Accessories » Repurposing: Neck Tie into Bow Tie
Repurposing: Neck Tie into Bow Tie
May 7, 2010 - By Ashley Johnston 72 Comments
Looking for the Mini Me Baby Gear giveaway? Scroll down or click
here?
. . . . . . . . . . . . . . . . . . . . . . . . .
My husband wanted a new bow tie.
And there weren’t any at the store.
At least not at the department stores we went to at the mall.
So we improvised. And turned a neck tie into a bow tie.
With a simple velcro closure, using the skinny end of the tie.
Perfect for my husband who just wanted a simple little bow tie.
And the real reason?
My husband is in PA school (physician assistant) and some of the guys in his program all wanted bow ties to wear with their white coats every Friday, while at the hospital. Maybe a regular tie is just no fun anymore? I have no clue.
I guess it’s one of those “don’t-ask-why” guy things. Don’t mess with that.
(And Mr., you better shave that sweet face or you’re going to get busted at school. Ha!)
Would you like to make a bow tie of your own?
Or even alter it for your little boy?
(That’s on the agenda for this weekend. A sweet little boy bow tie…….all made from one of my husband’s old ties. If you want to do one too, just alter all of the sizing lengths to fit your little guy.)
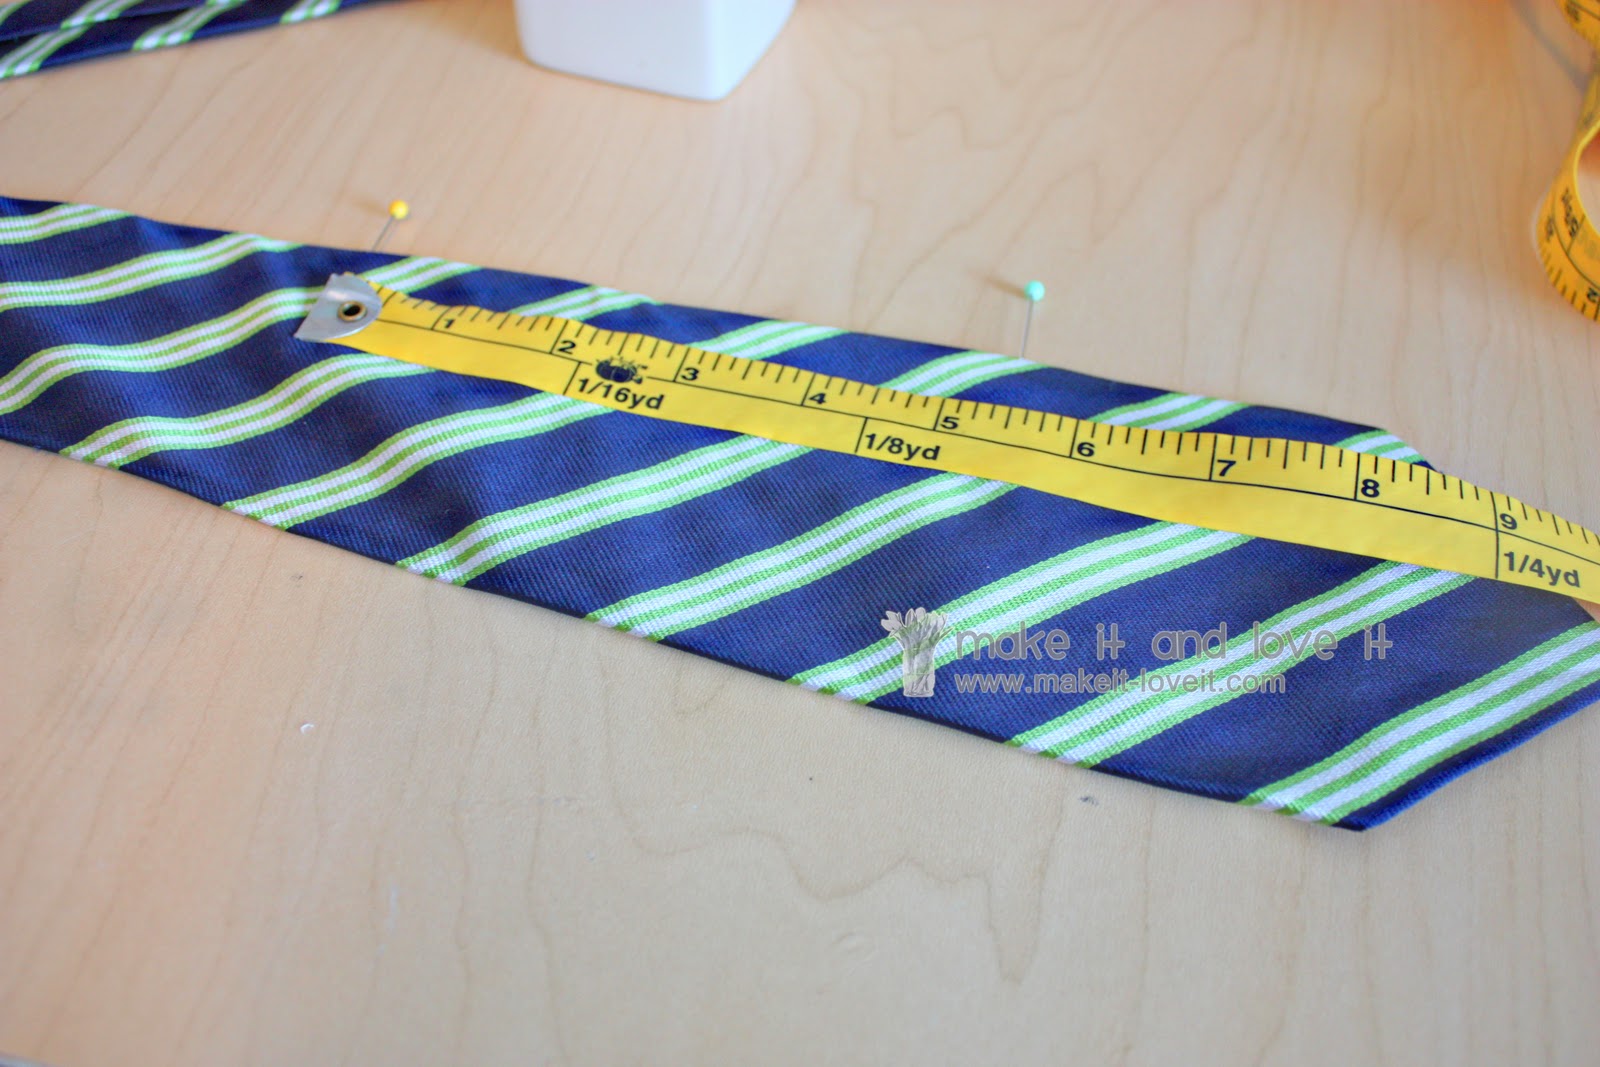
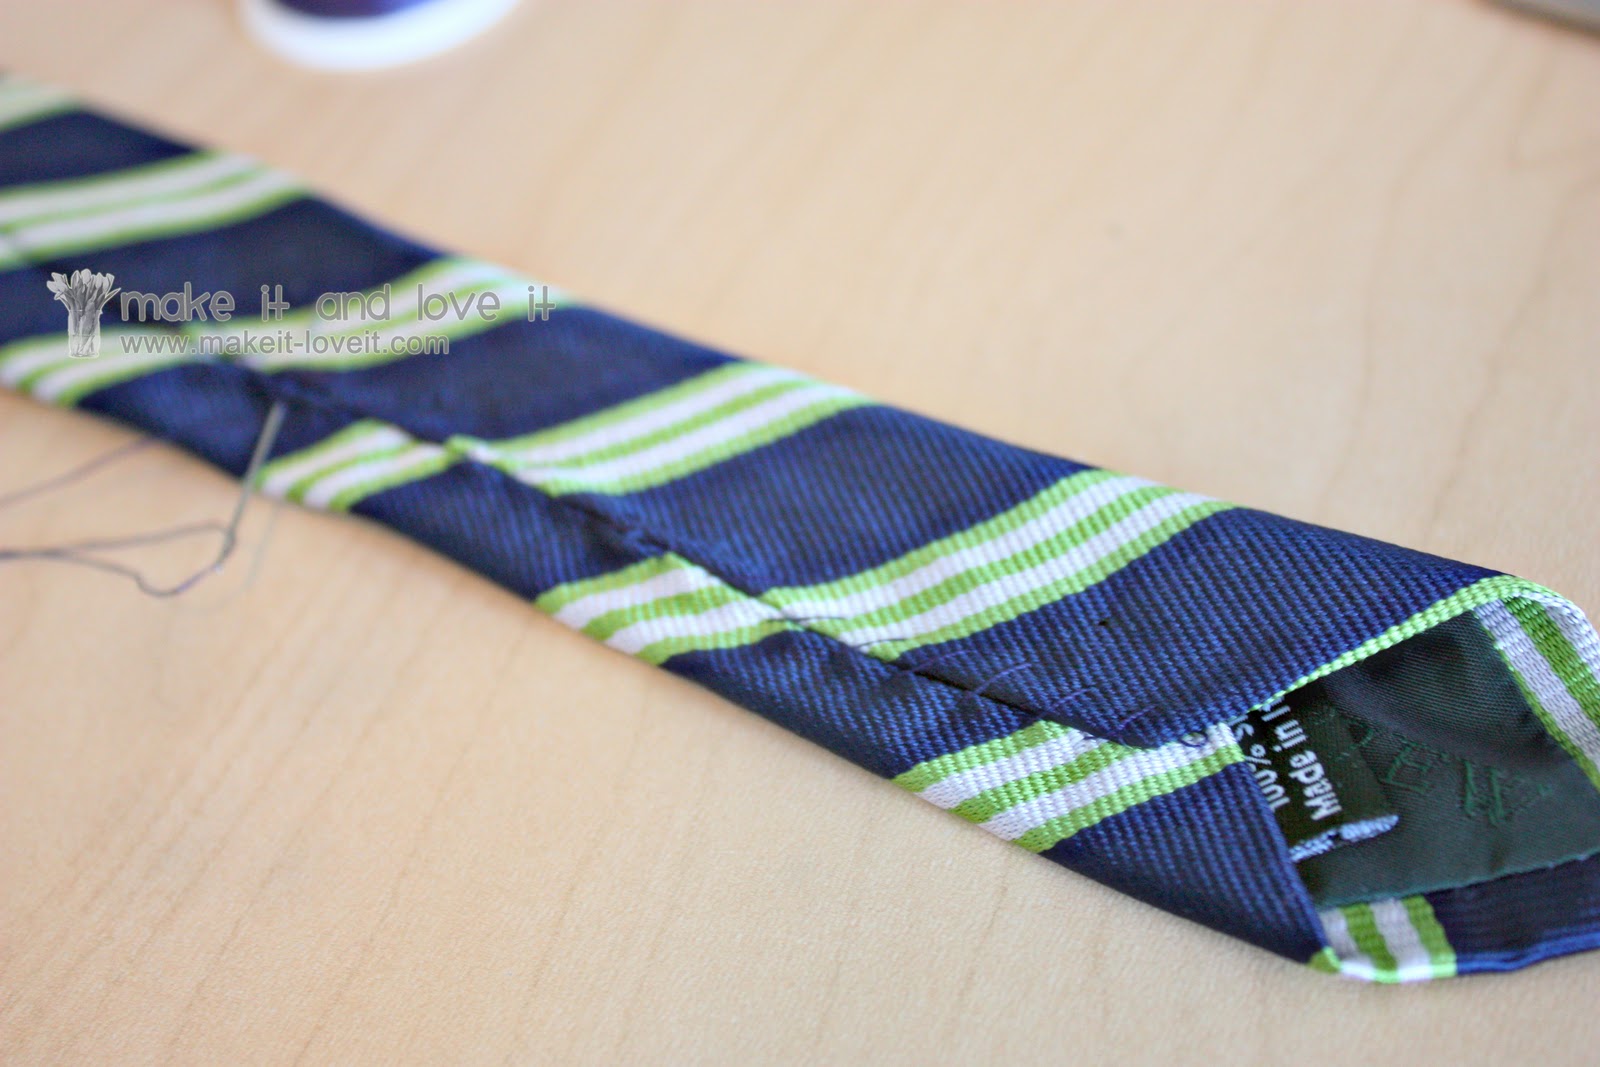
First, this works best with the wider ties…..not the narrow skinny ties. (But it doesn’t have to be a super wide polyester tie either.) I first measured a 5 1/2 inch wide section towards the end of the tie…….leaving enough room at the end to fold under and meet back at the middle of the bow tie. Place a pin at each edge of the 5 1/2 inches.
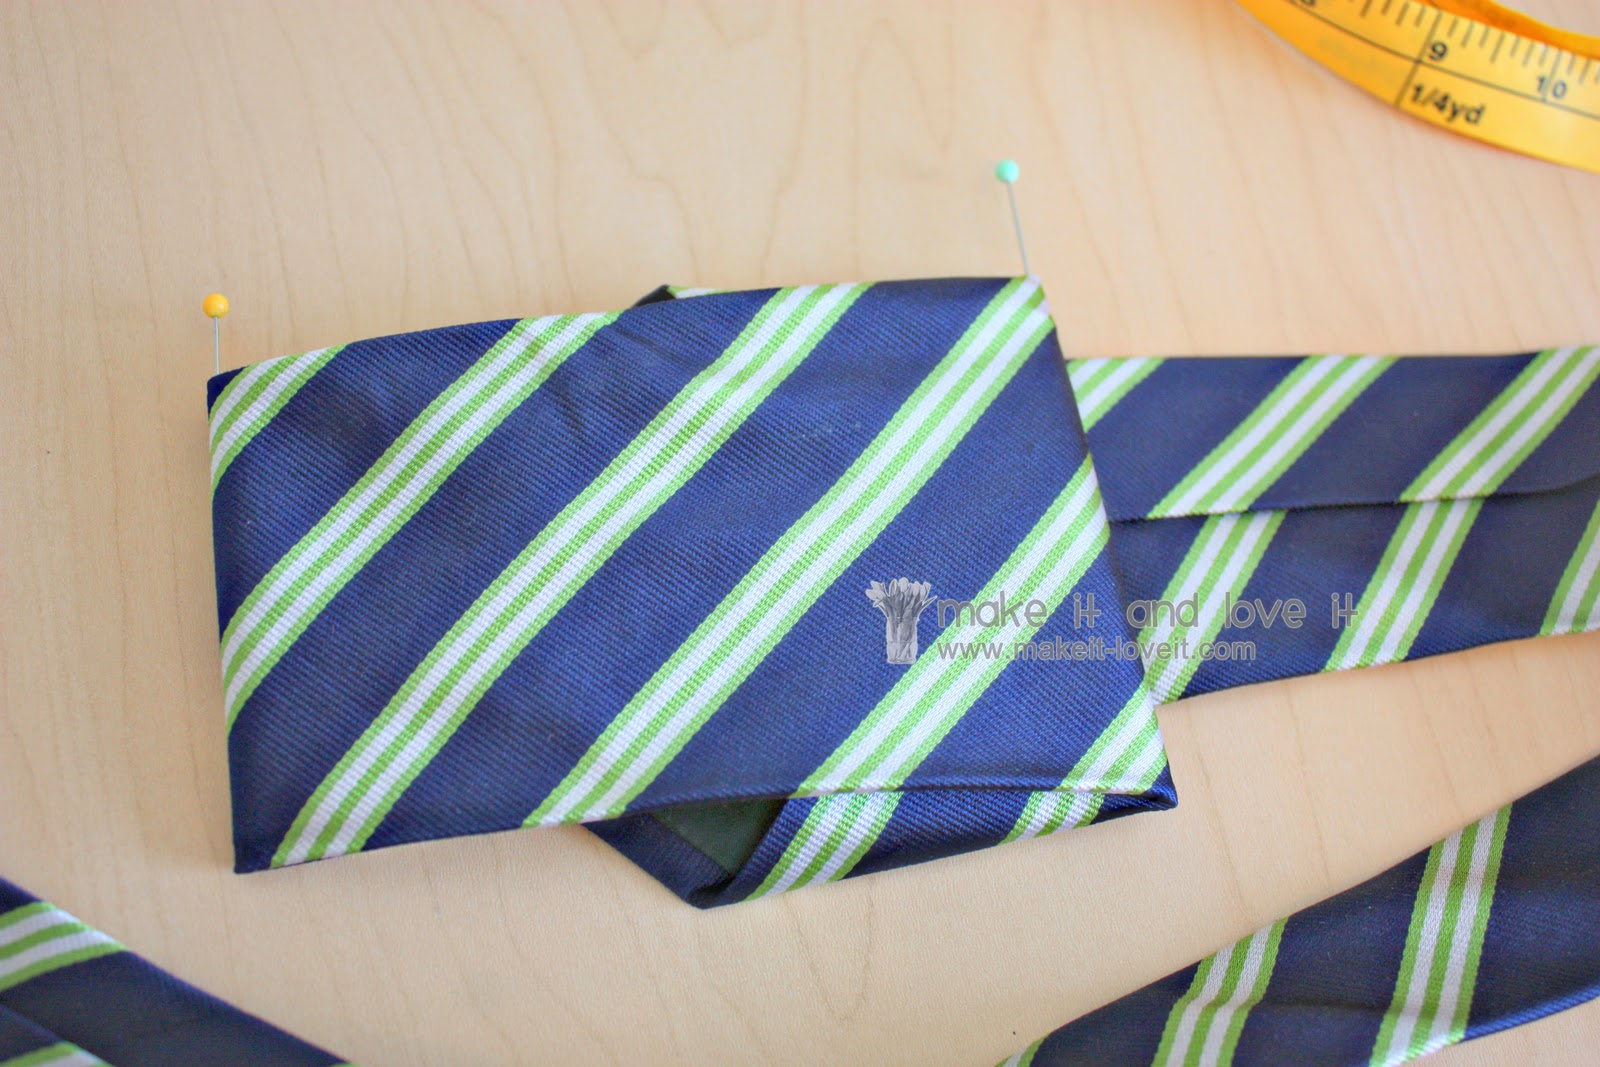
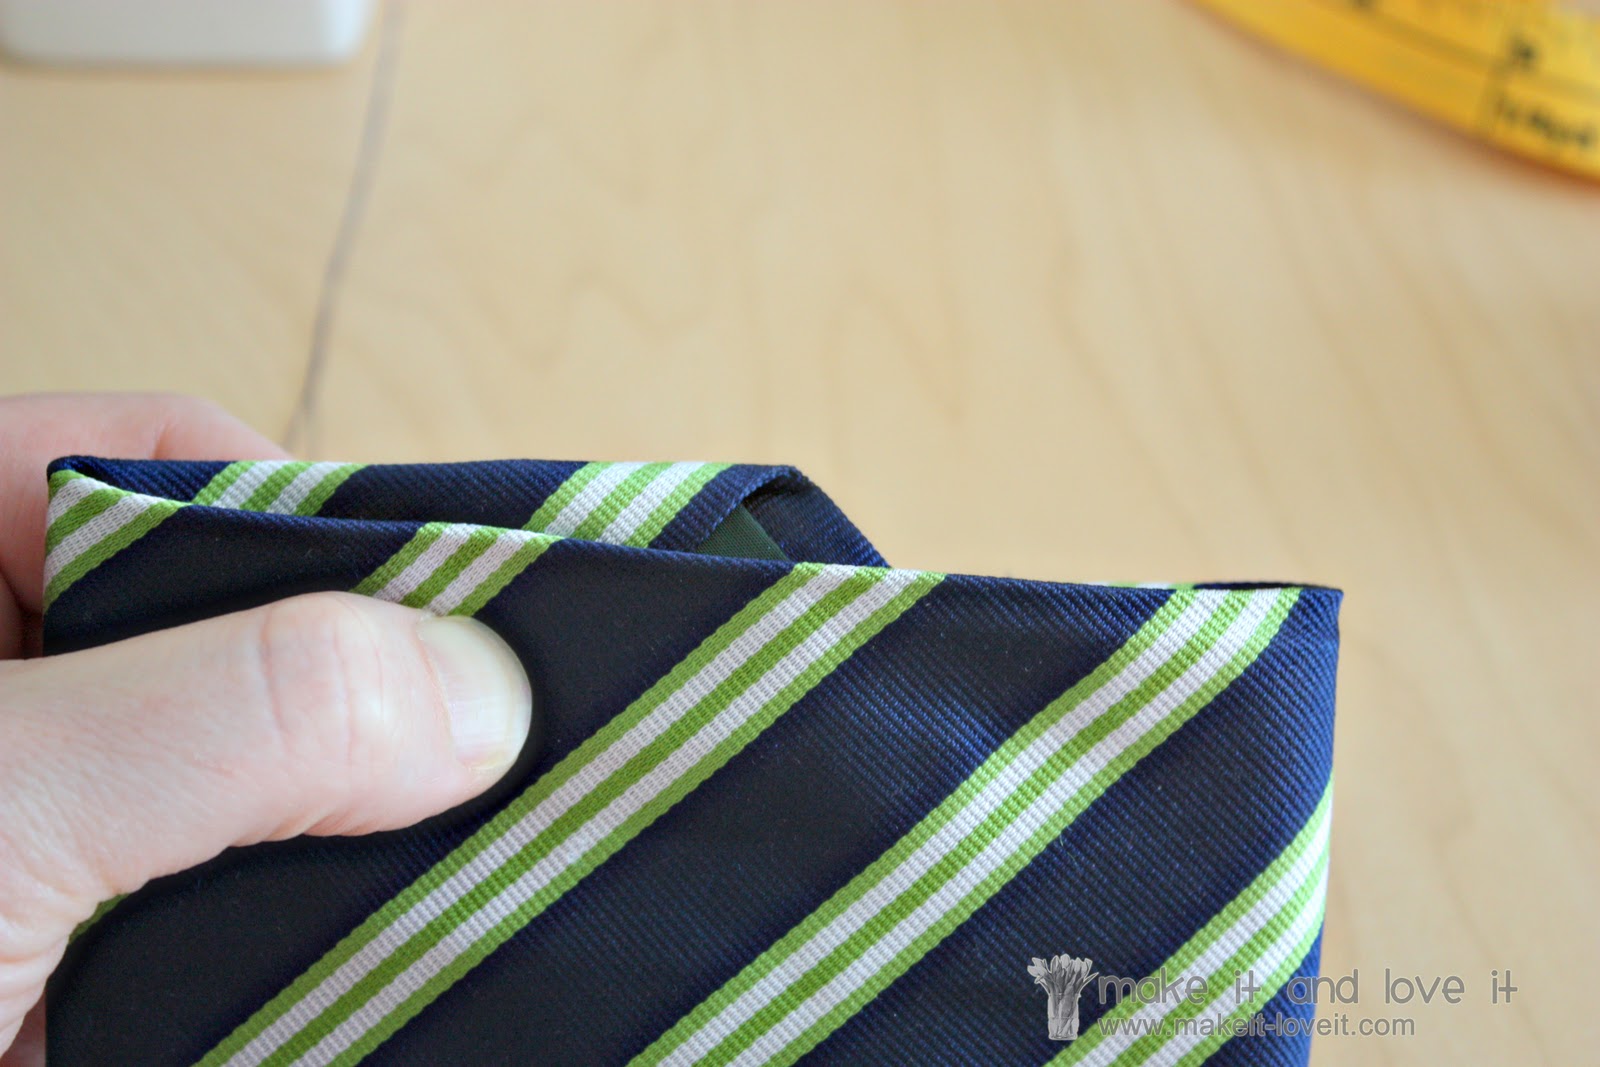
Then make folds where your pins are at and tuck the ends behind….
Turn it over, with the folds and pins still in place and cut off the excess length of the tie.
But make sure and leave enough so that the raw edge can be tucked under a 1/2 inch.
Then hand stitch the folded under section in place. (Need help with hand-stitching? Check out this tutorial
here.)
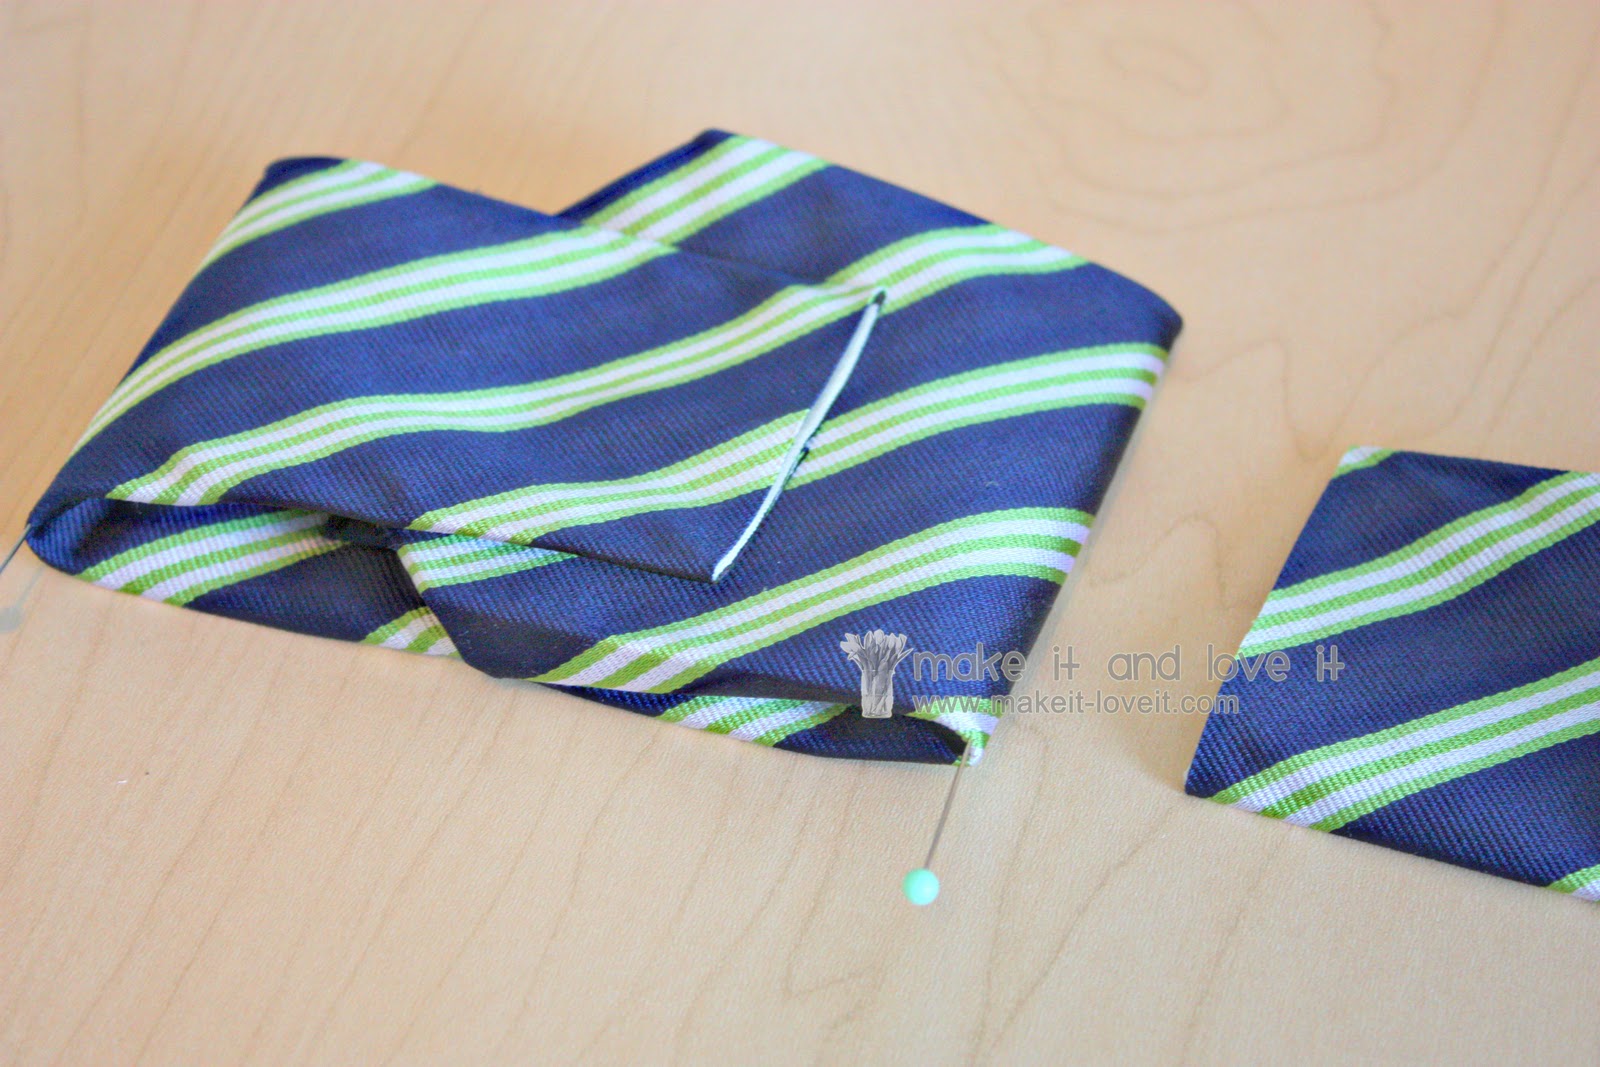
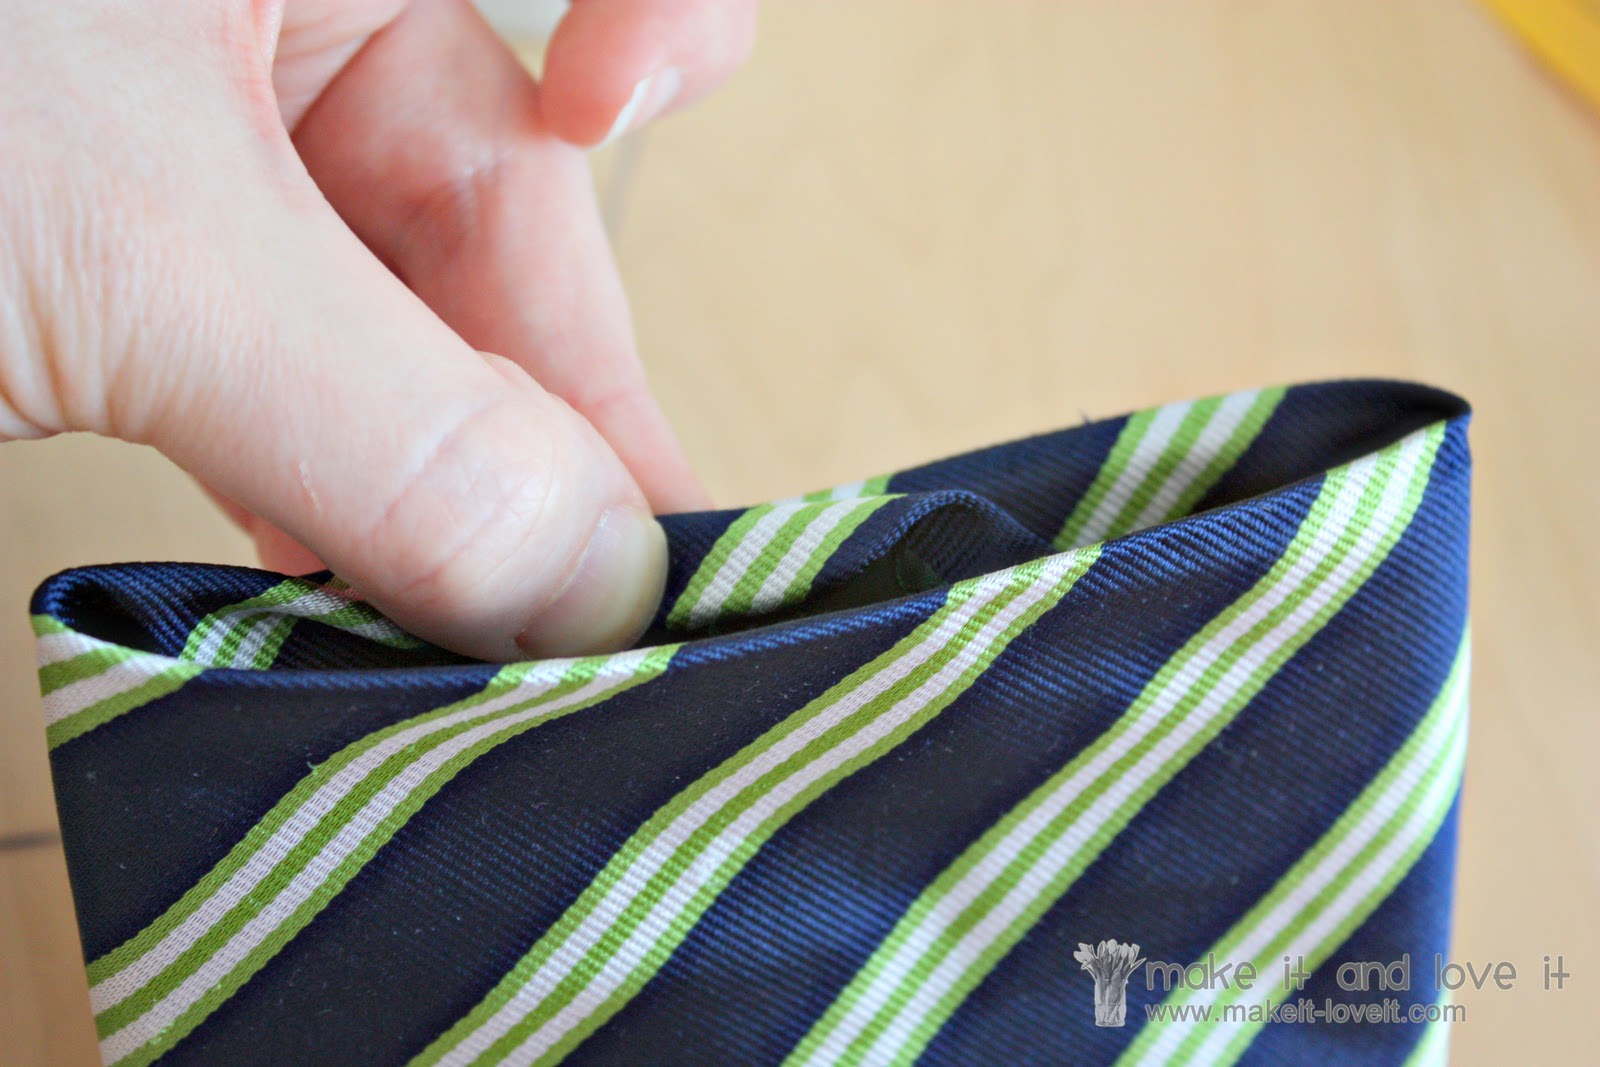
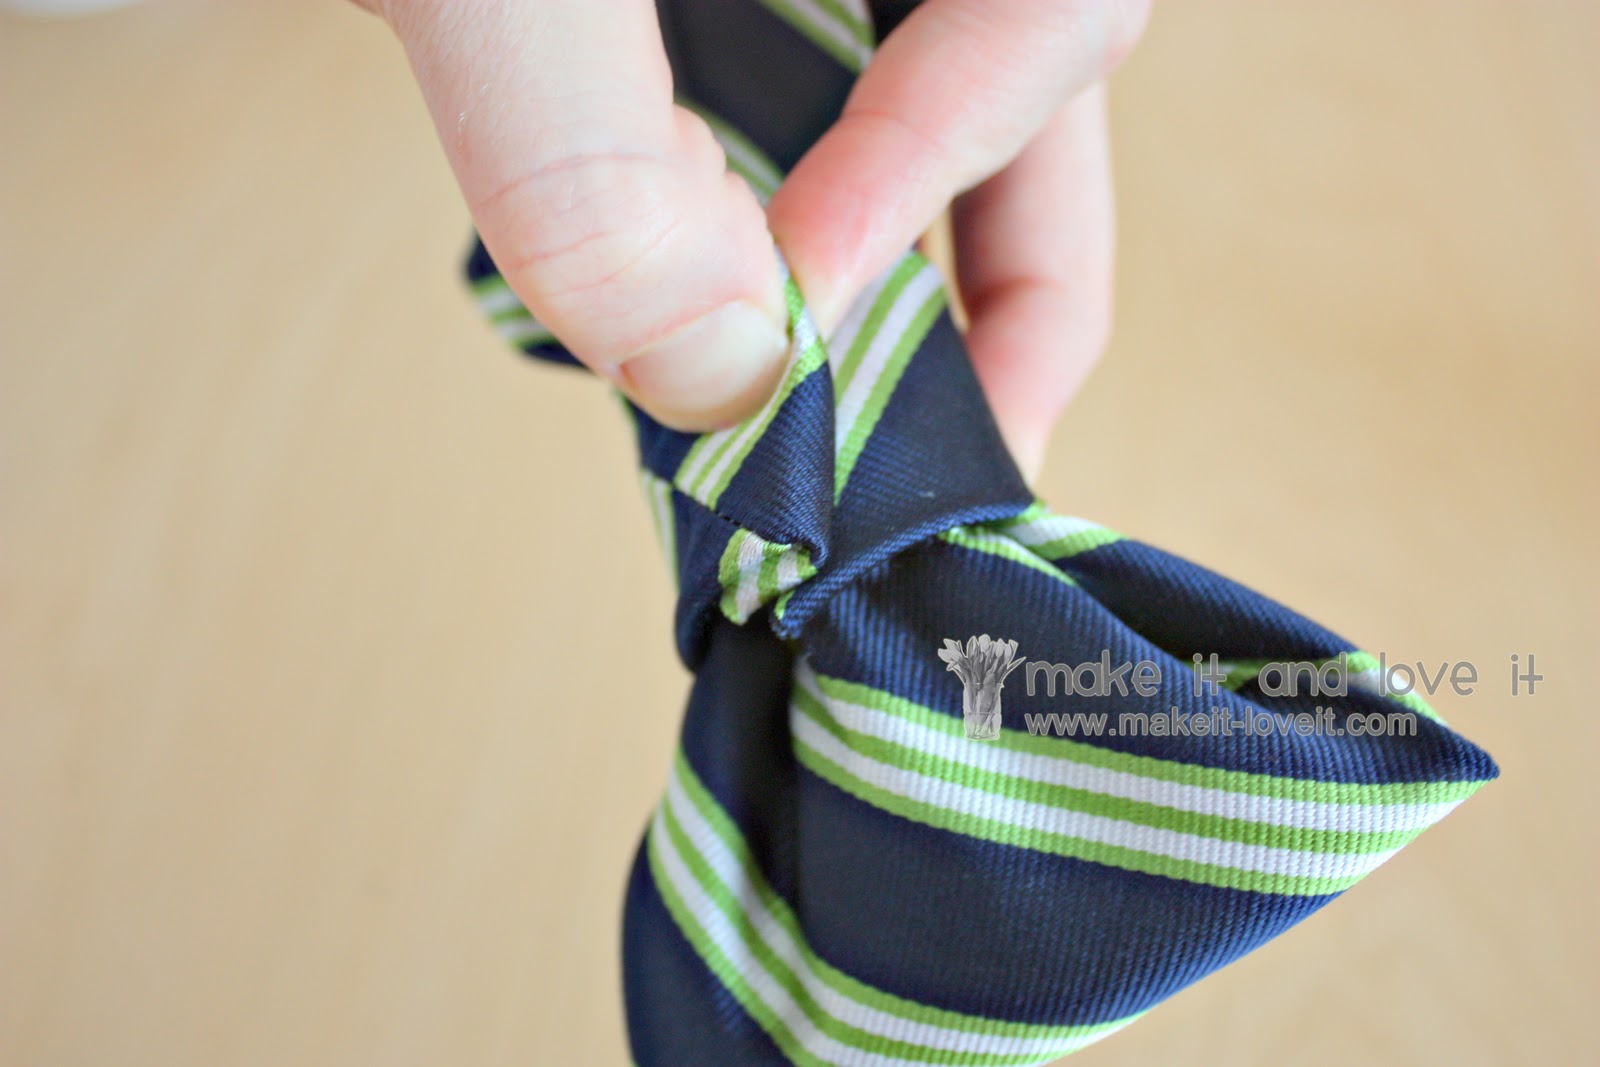
Then hold up your soon-to-be bow tie and see how there is extra fabric poking out from the angle of the original bow tie end?
Well, tuck that towards the inside, enough to line it up with the outer edges of the bow tie…….
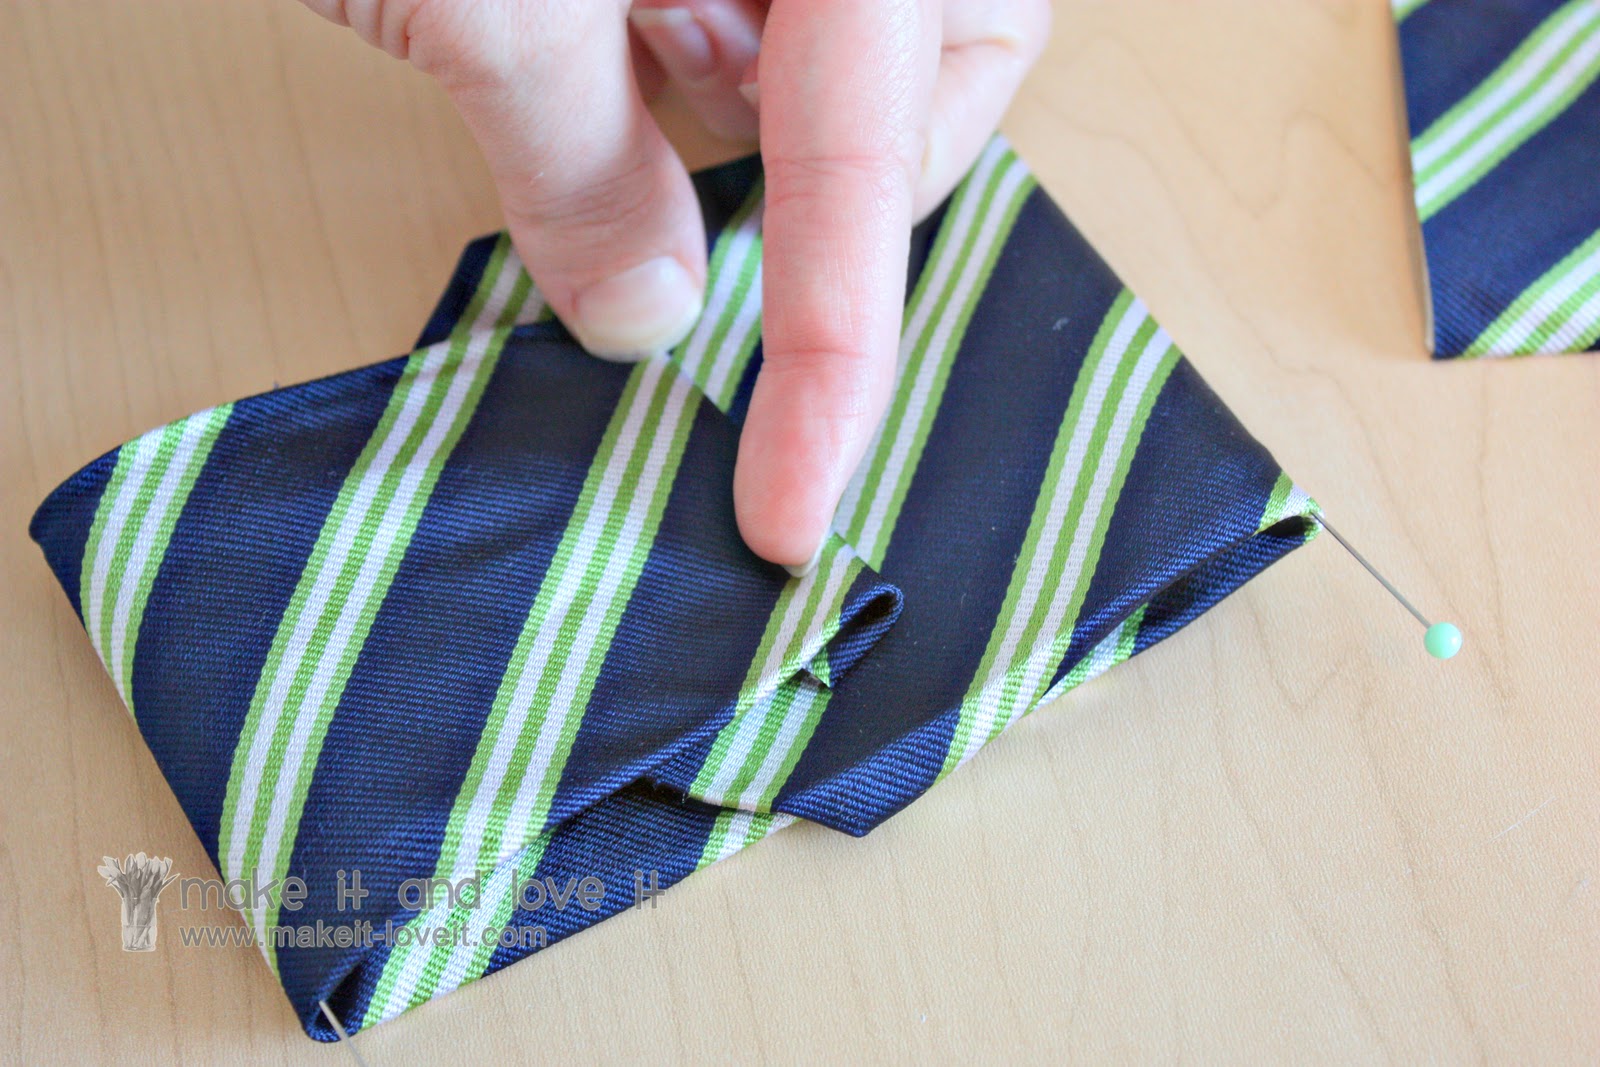
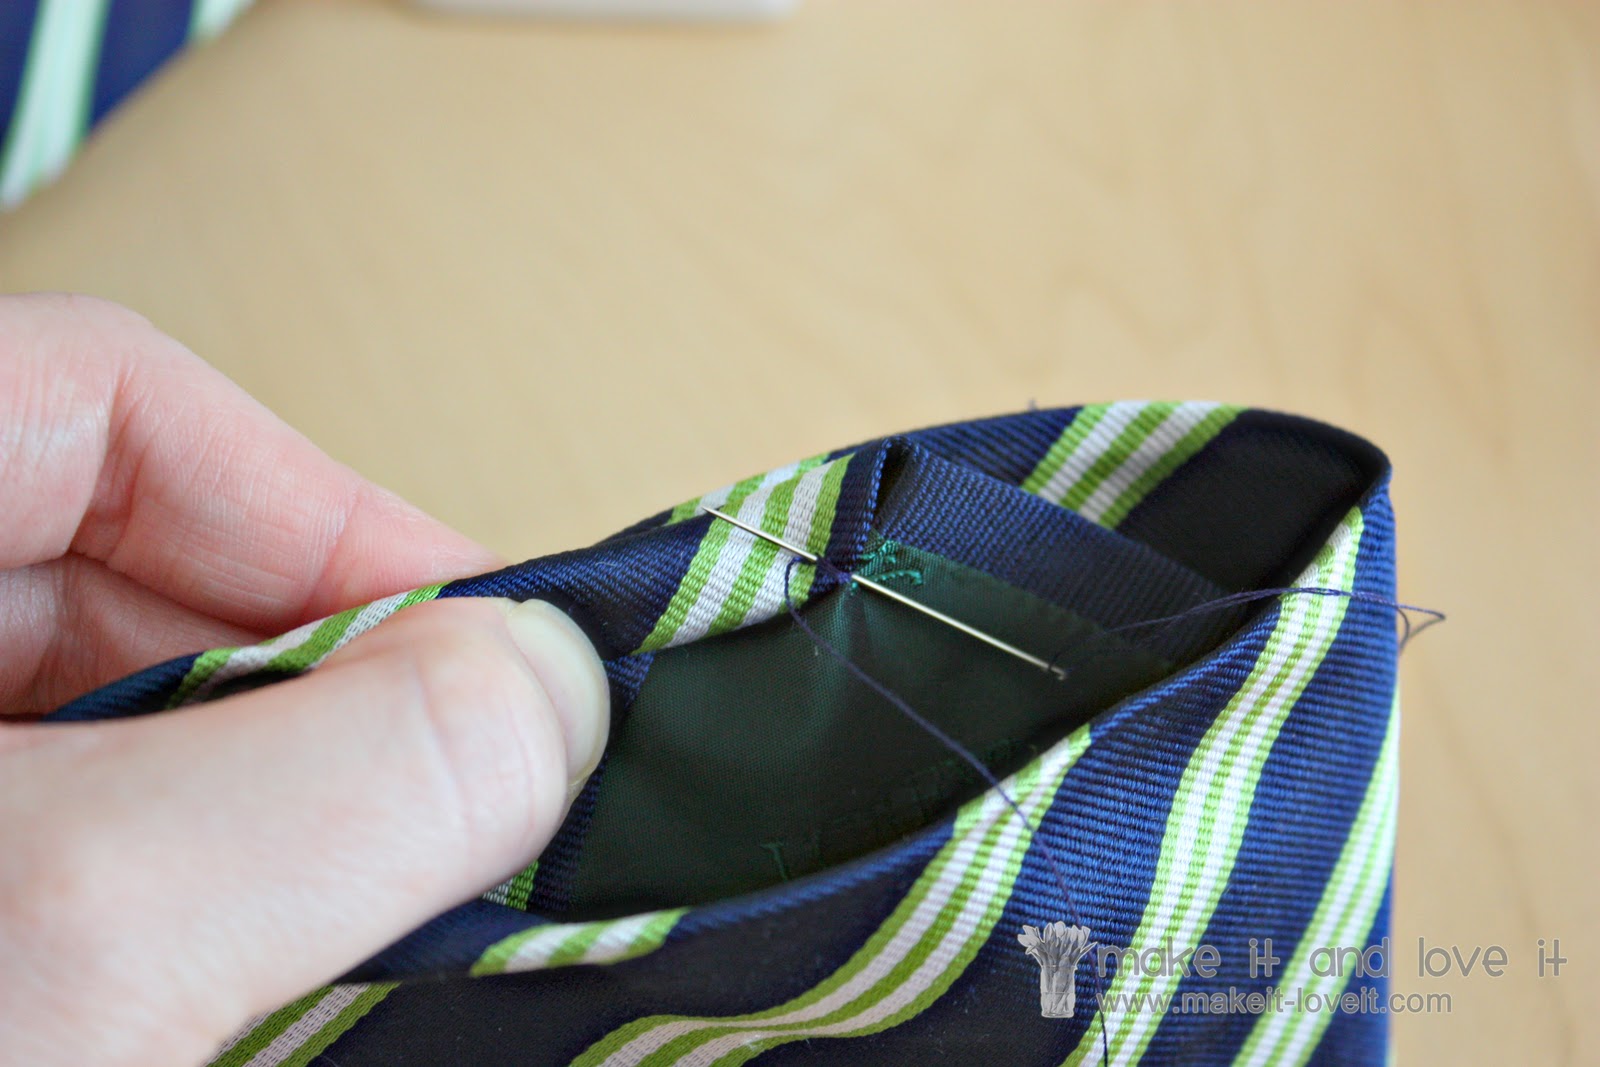
Then make a few hand-stitches to keep that tip tucked inside. Repeat with both sides.
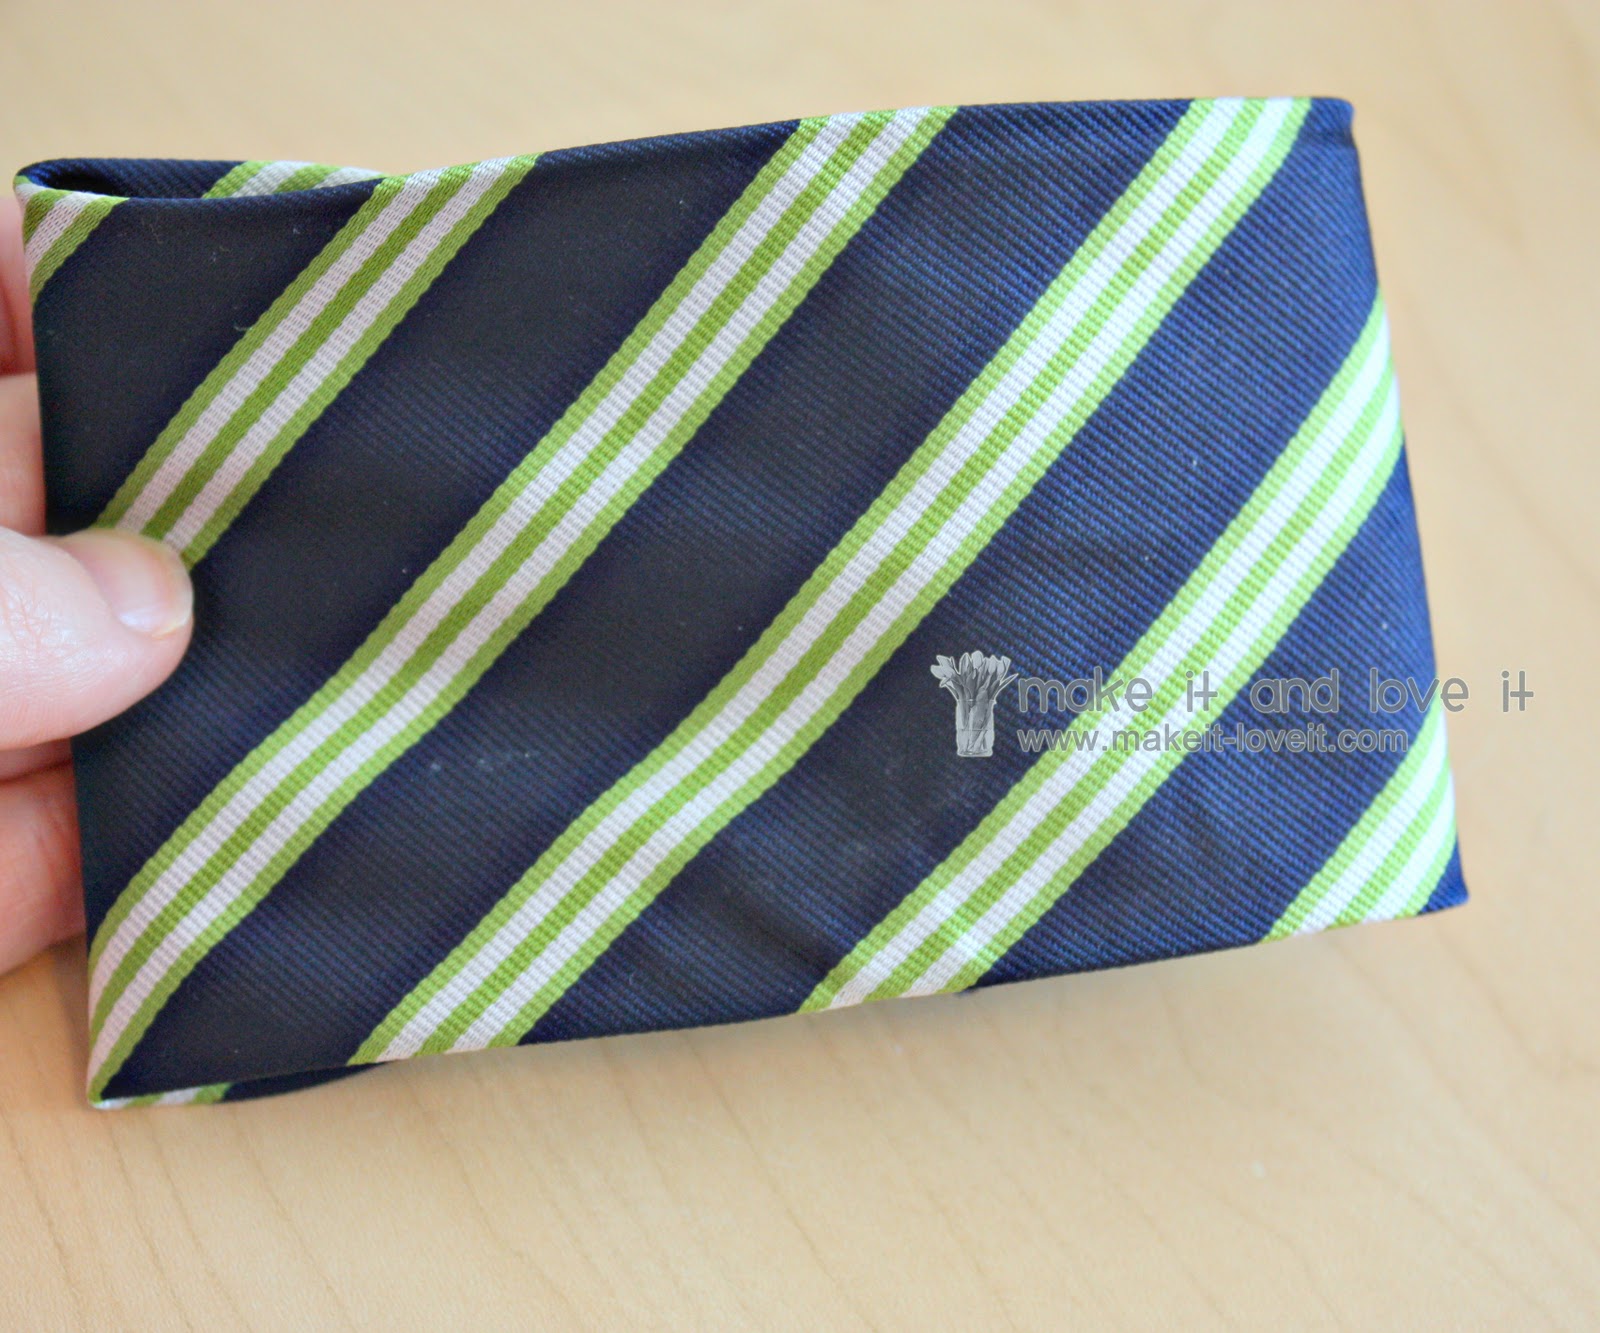
Now it’s nice and even….without any fabric poking out.
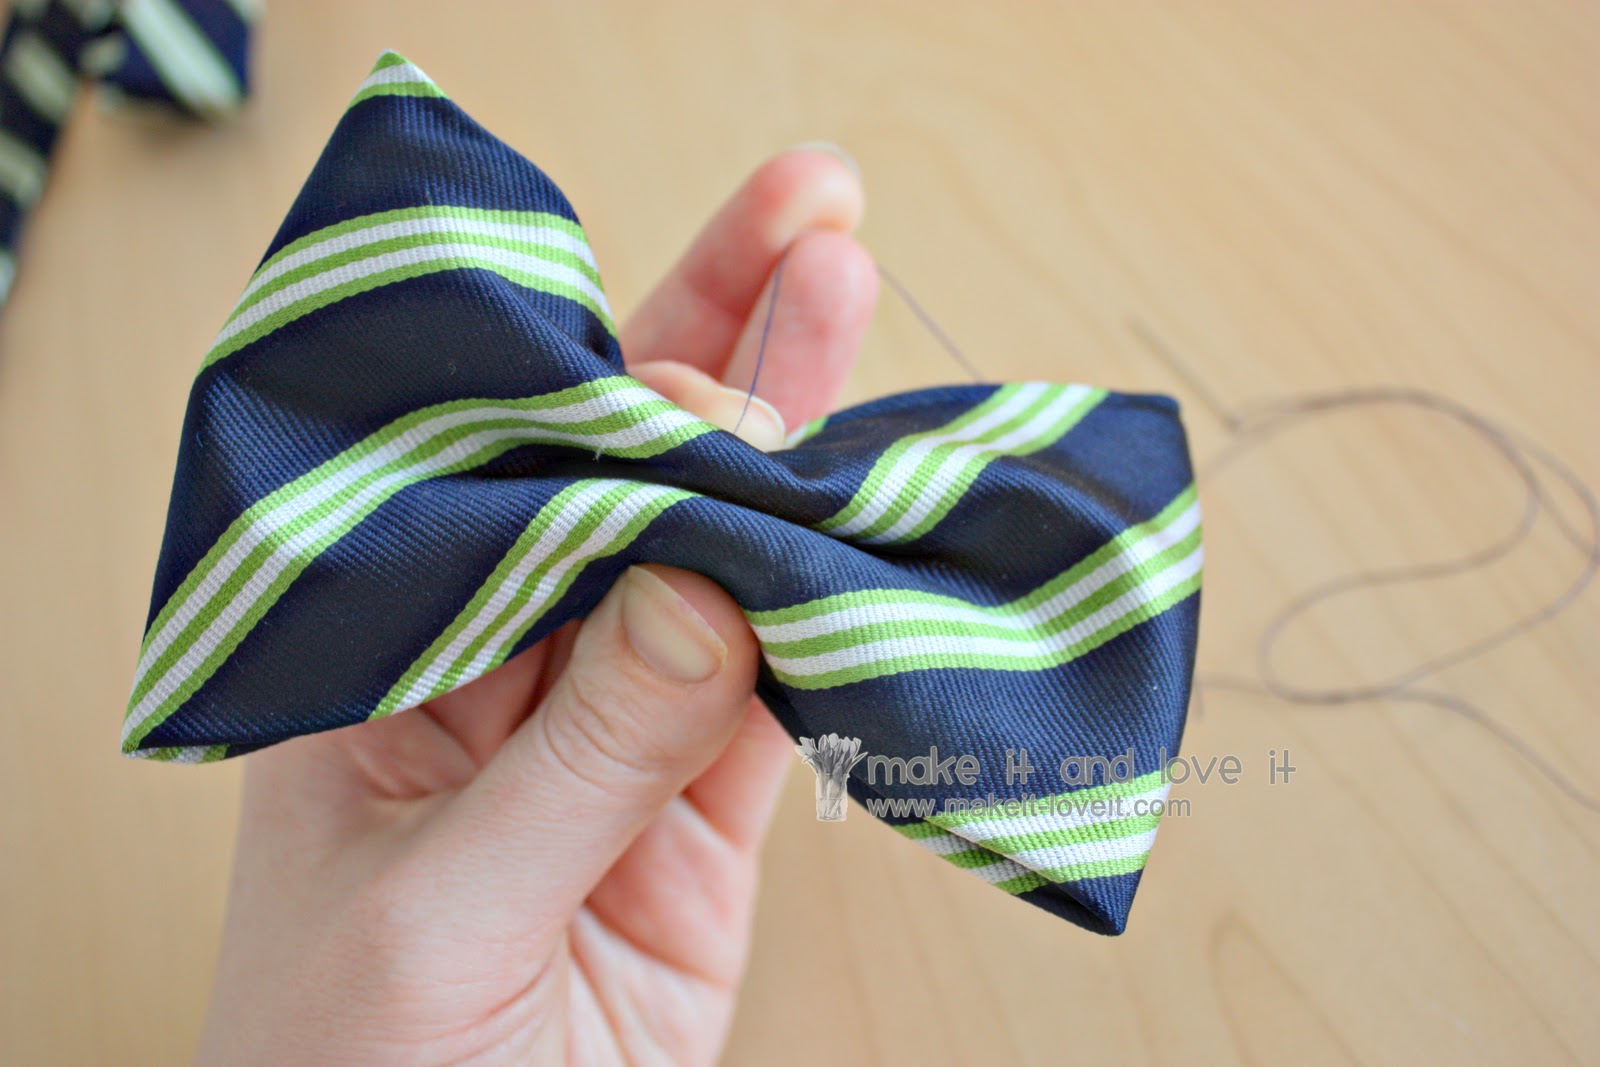
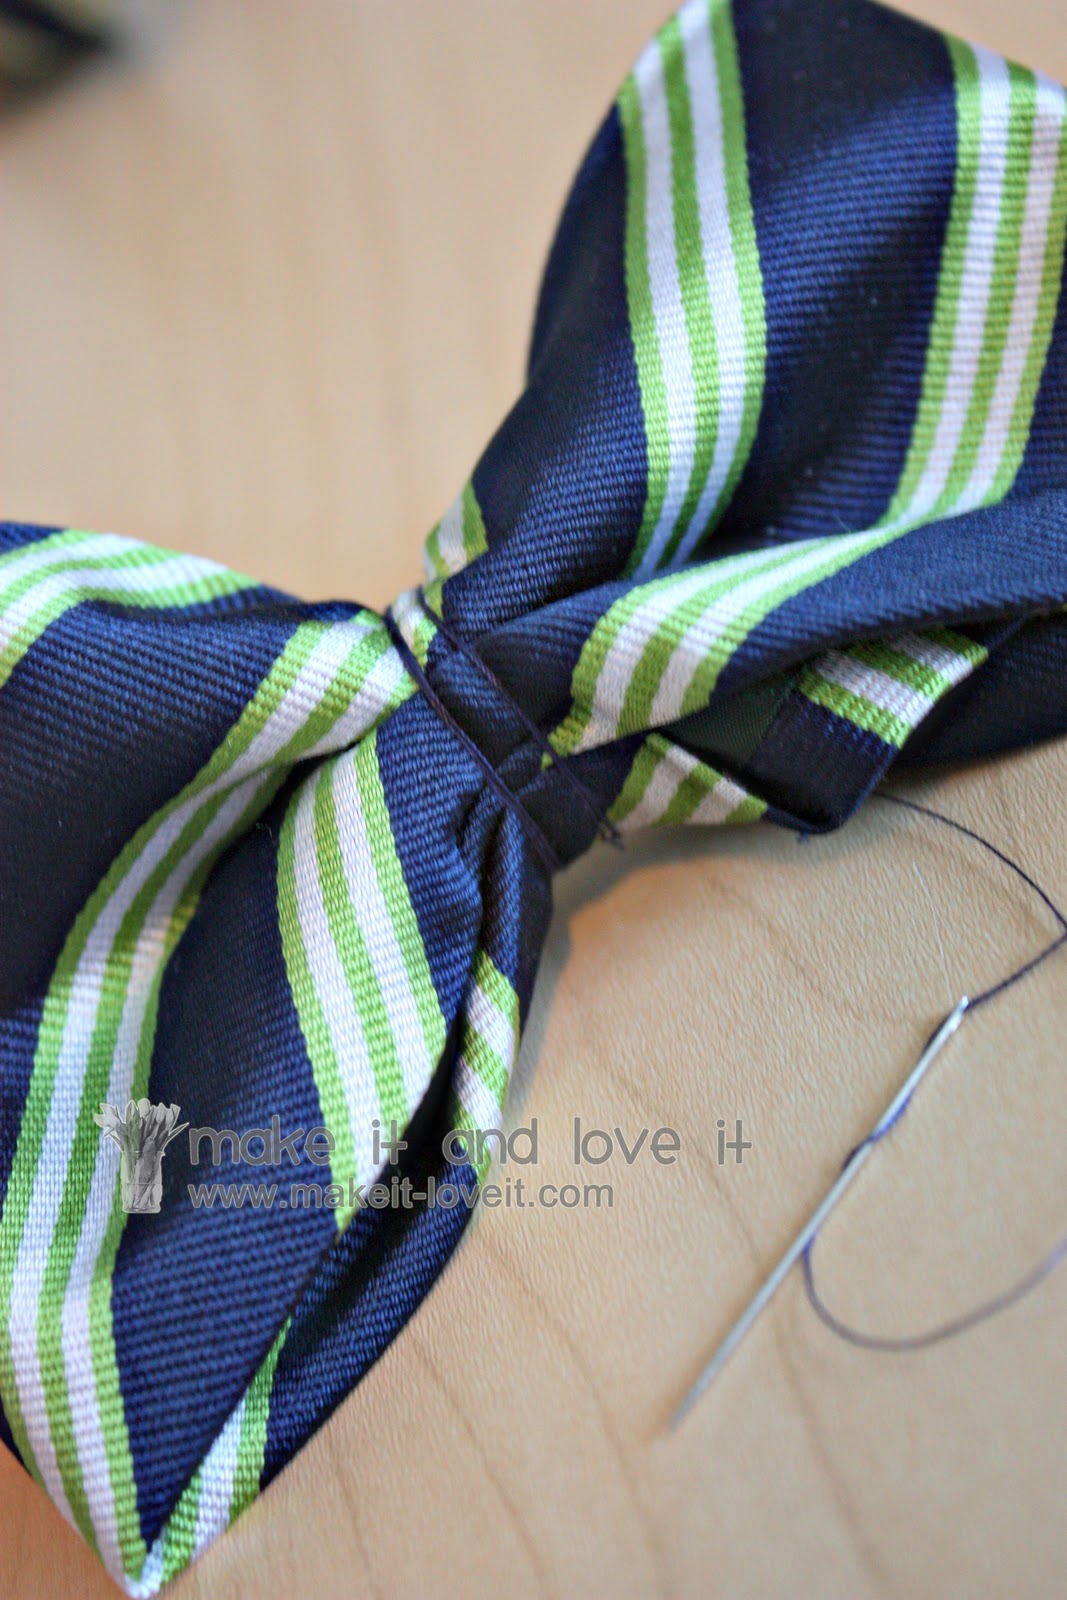
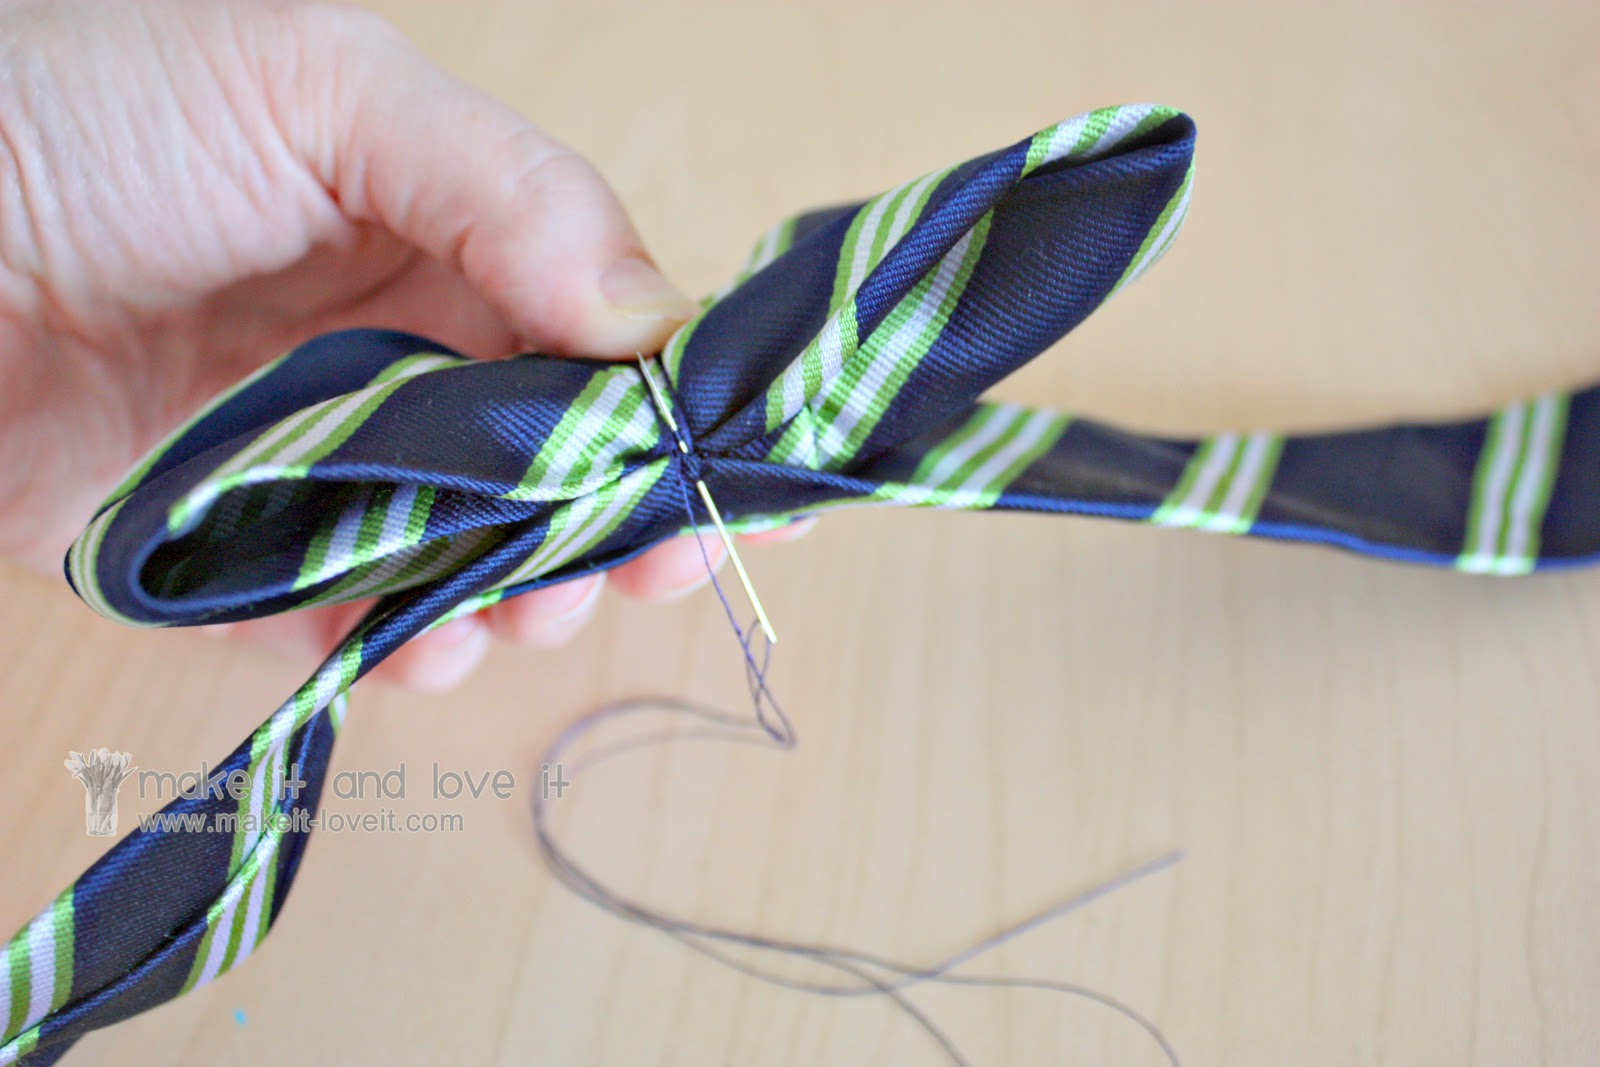
Then scrunch the center of the fabric with your fingers and slide your knotted thread through some of the fabric at the center…….
…….and wind the thread around the scrunched center several times. Pull it tight. Then knot it in place so the winding doesn’t come undone. (Need help with knots? Check out this tutorial
here.)
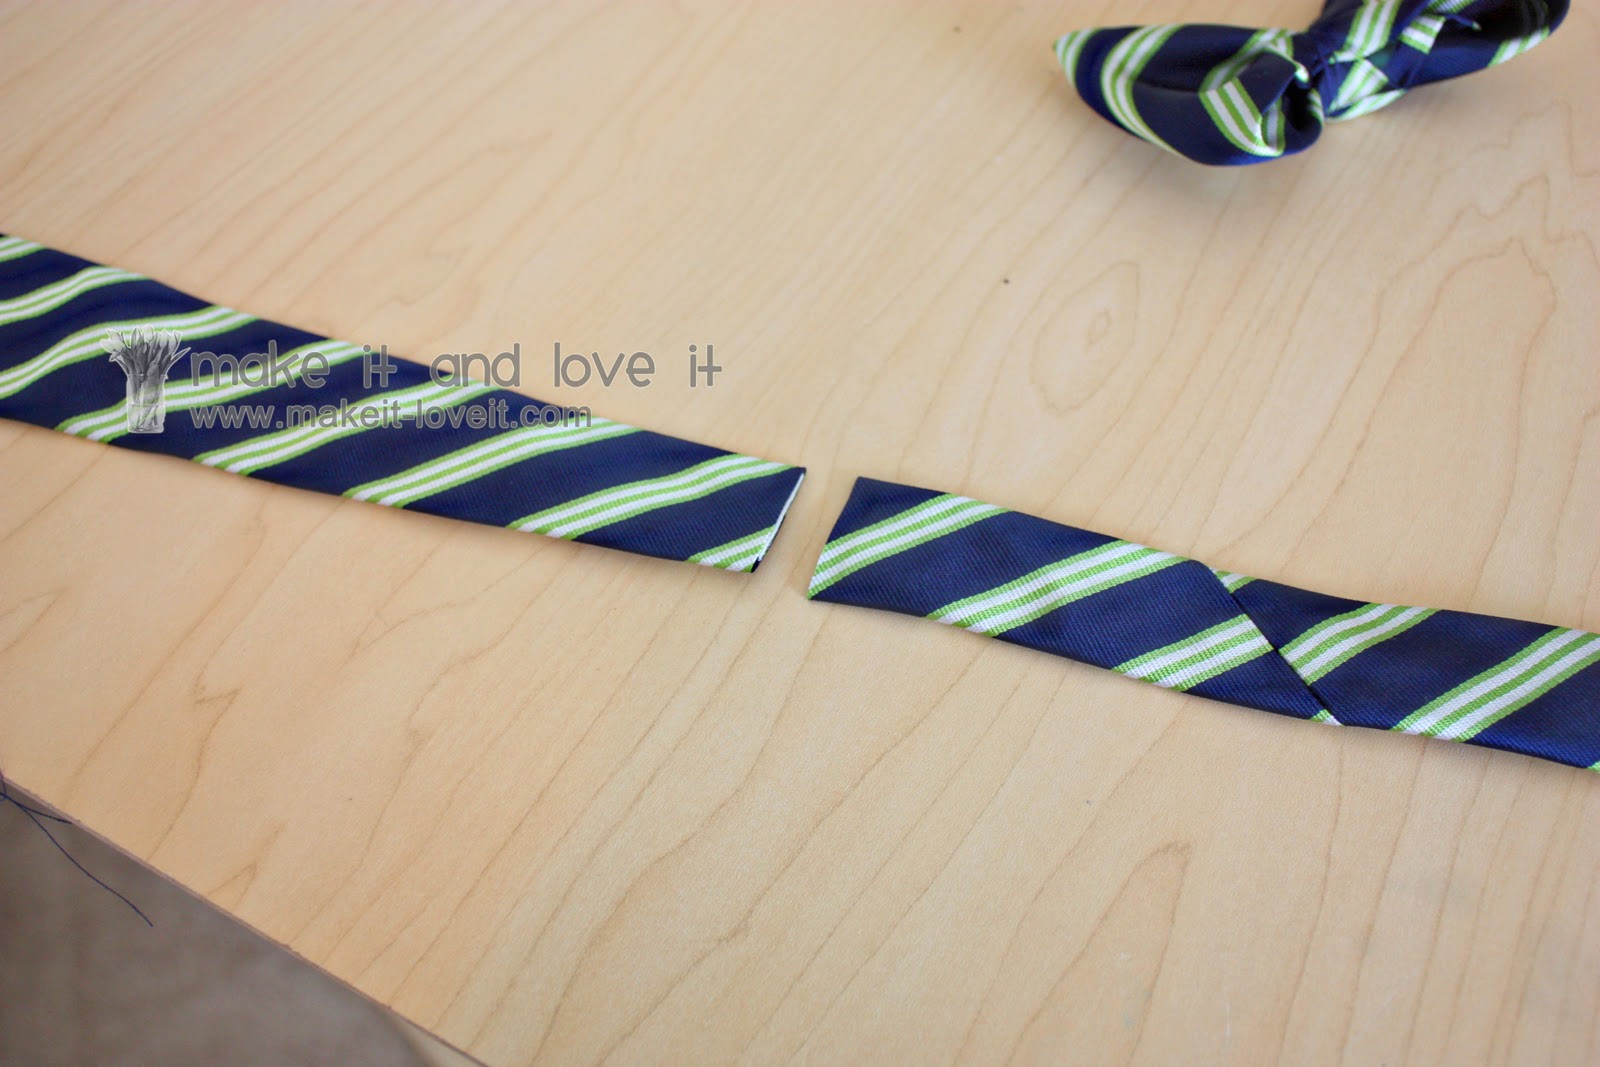
Now, grab the other scrap piece of the tie. Measuring from the pointy tip of the tie, cut your neck strap piece….making sure to have enough to overlap the two pieces while around their neck. (Mine was 25 inches…..but could have been a little less if I was using a shorter tie.)
And then cut off another piece from the scrap piece that you’ll need for the center of the bow-tie. I cut mine at 5 1/2 inches. (Don’t worry, that seam will end up on the back of the bow tie.)
Make sure it’s long enough to go around the bow tie, the neck strap, and then have enough to tuck under the raw edges of one end.
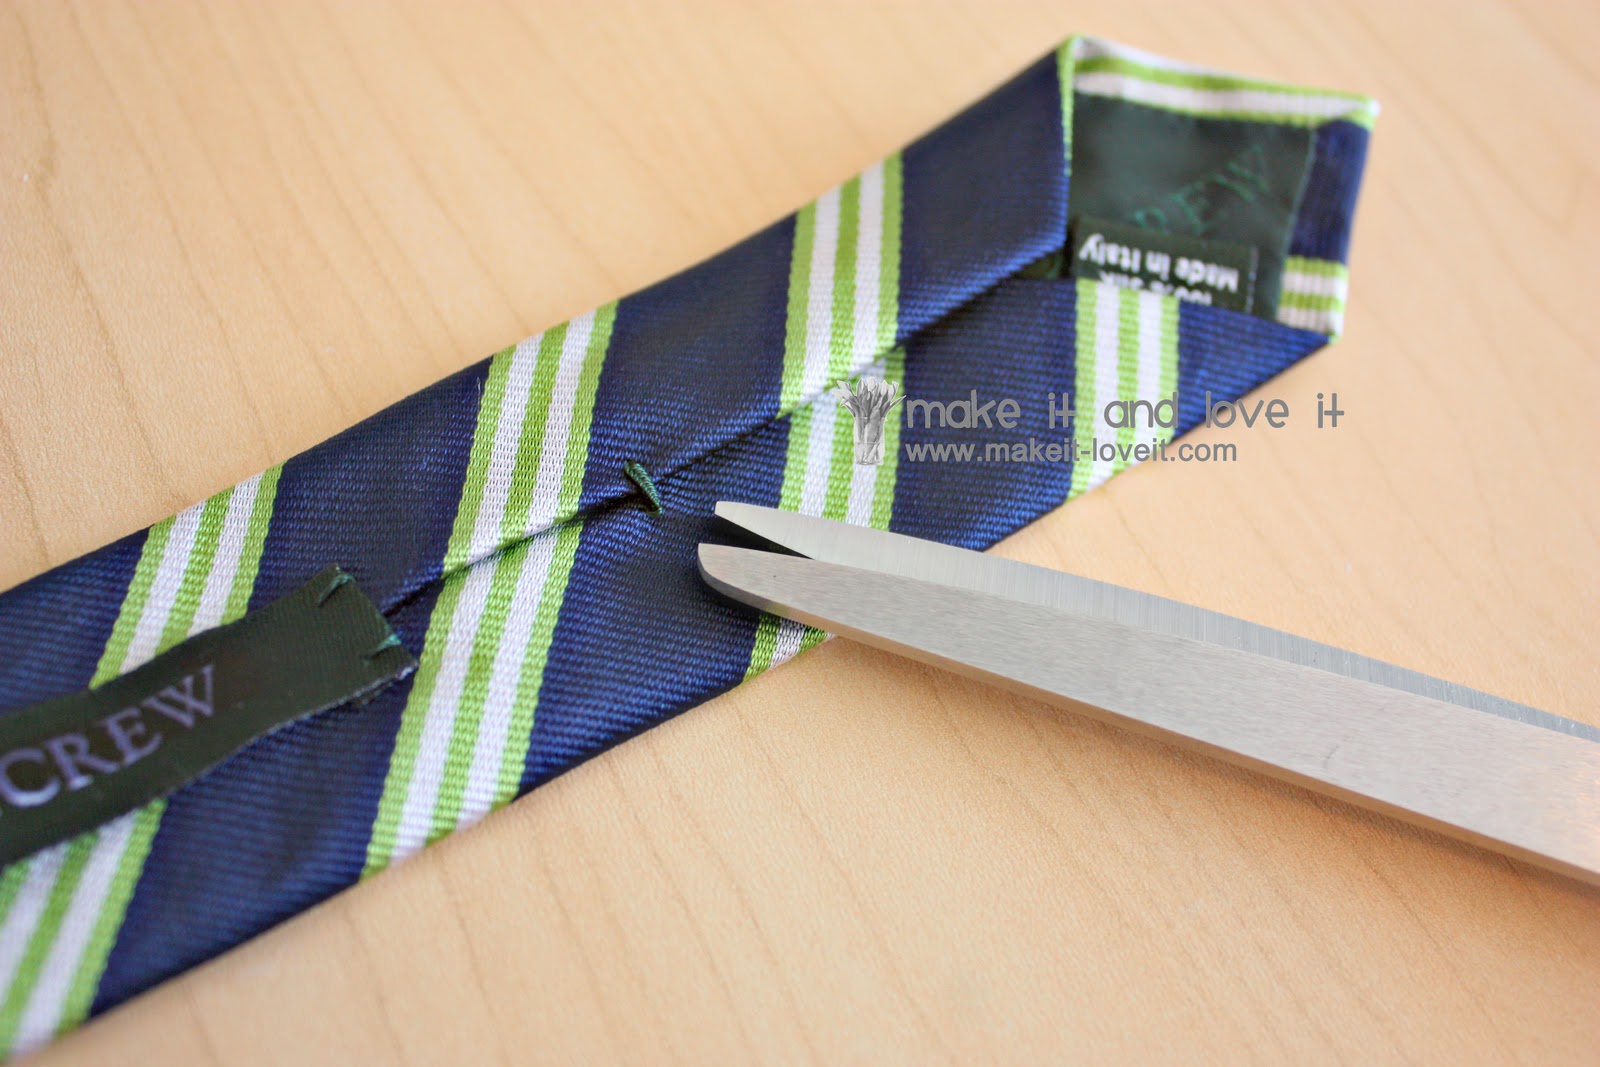
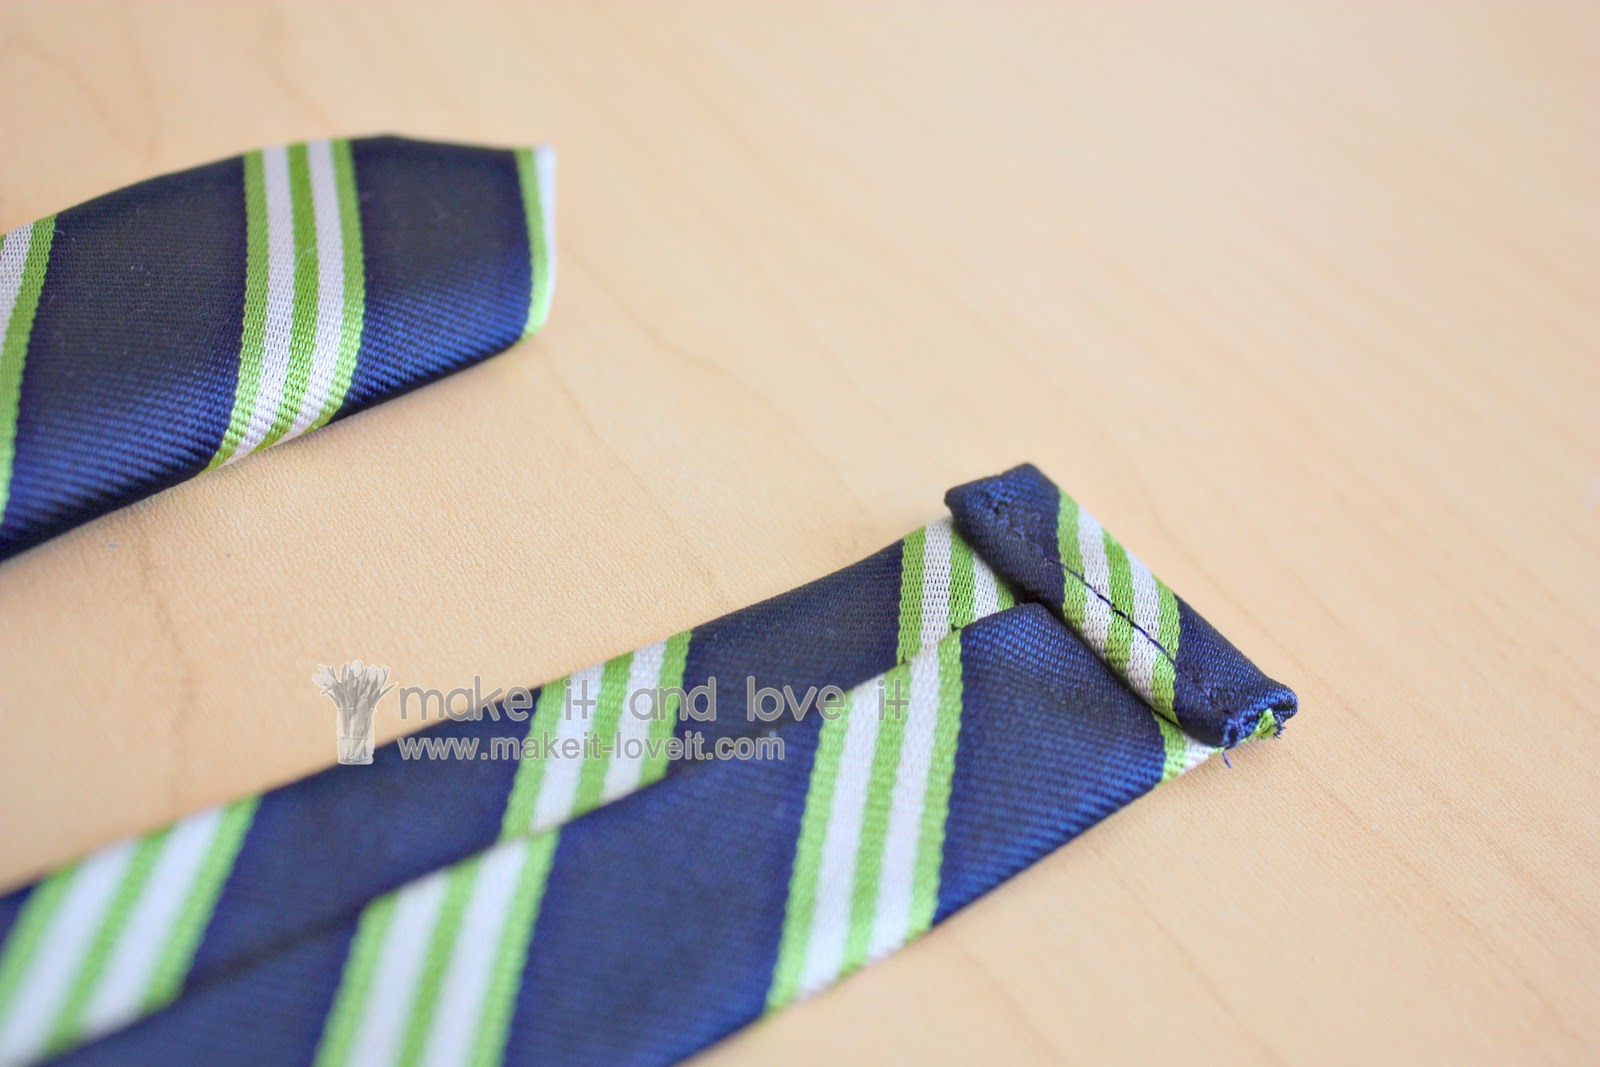
Now, back to the neck strap…….my pointy end flaired out a bit and would have peeked out of my husband’s collar, so I decided to open up the end and refold it to be as narrow as the rest of the neck strap piece. So cut that thread…
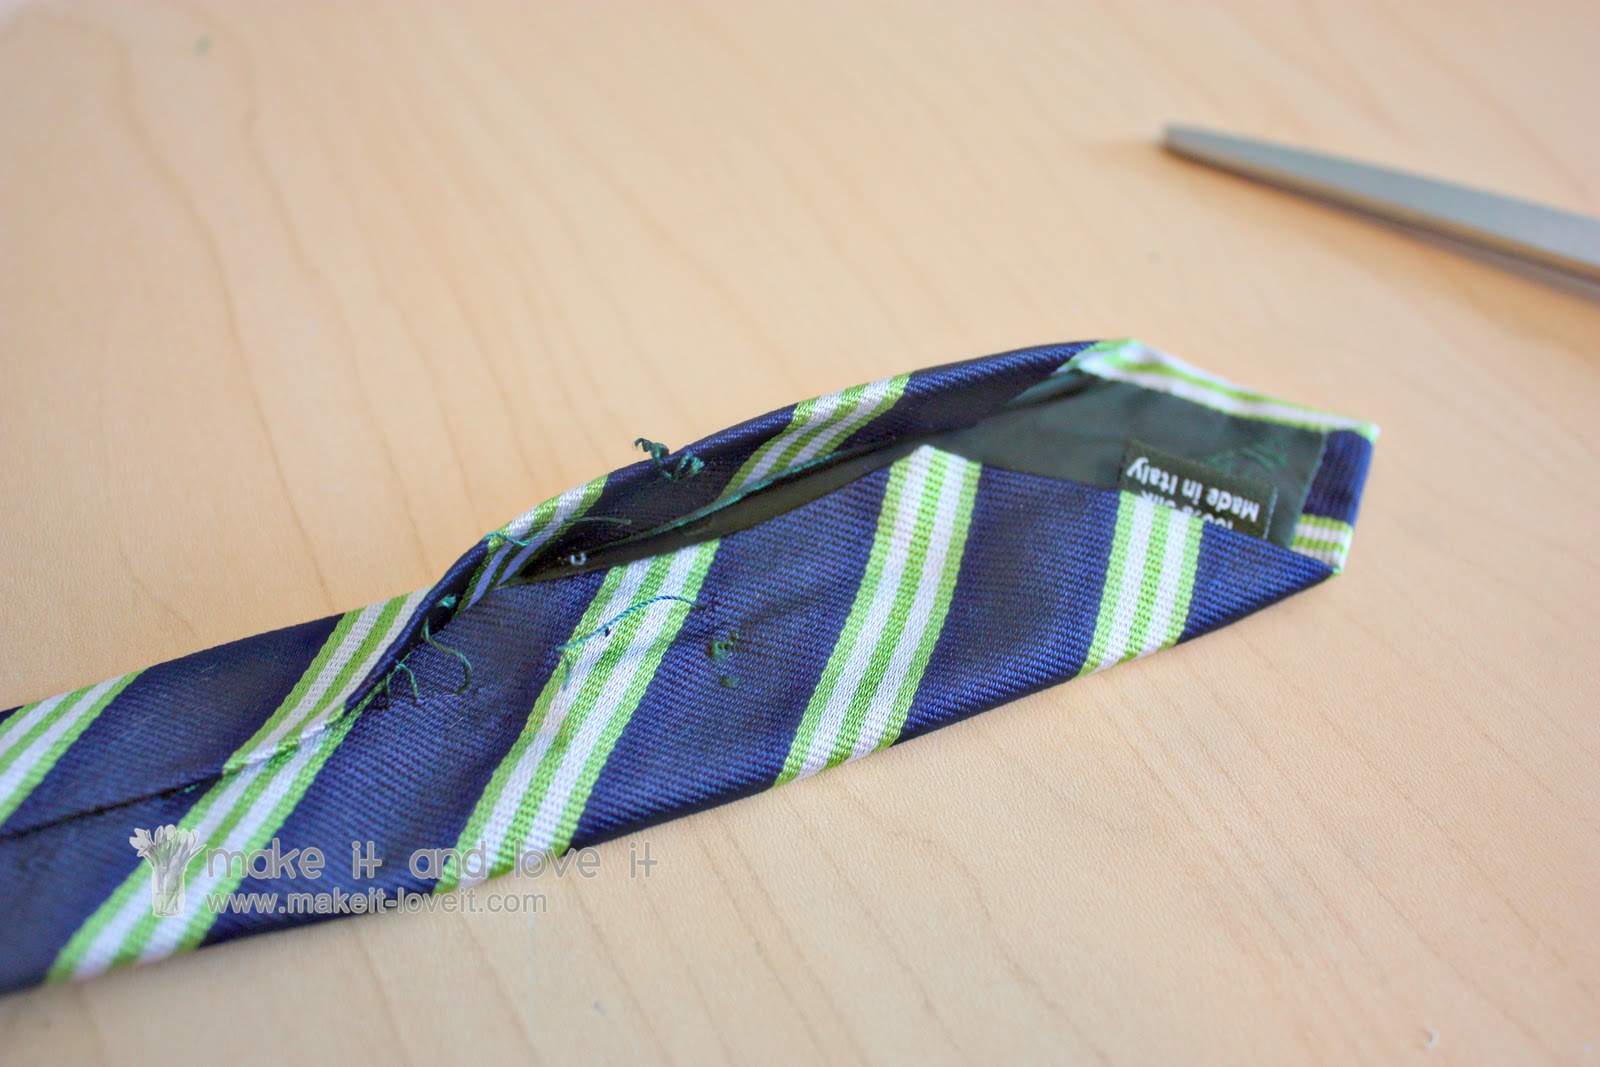
And un-stitch the end of the old tie a bit.
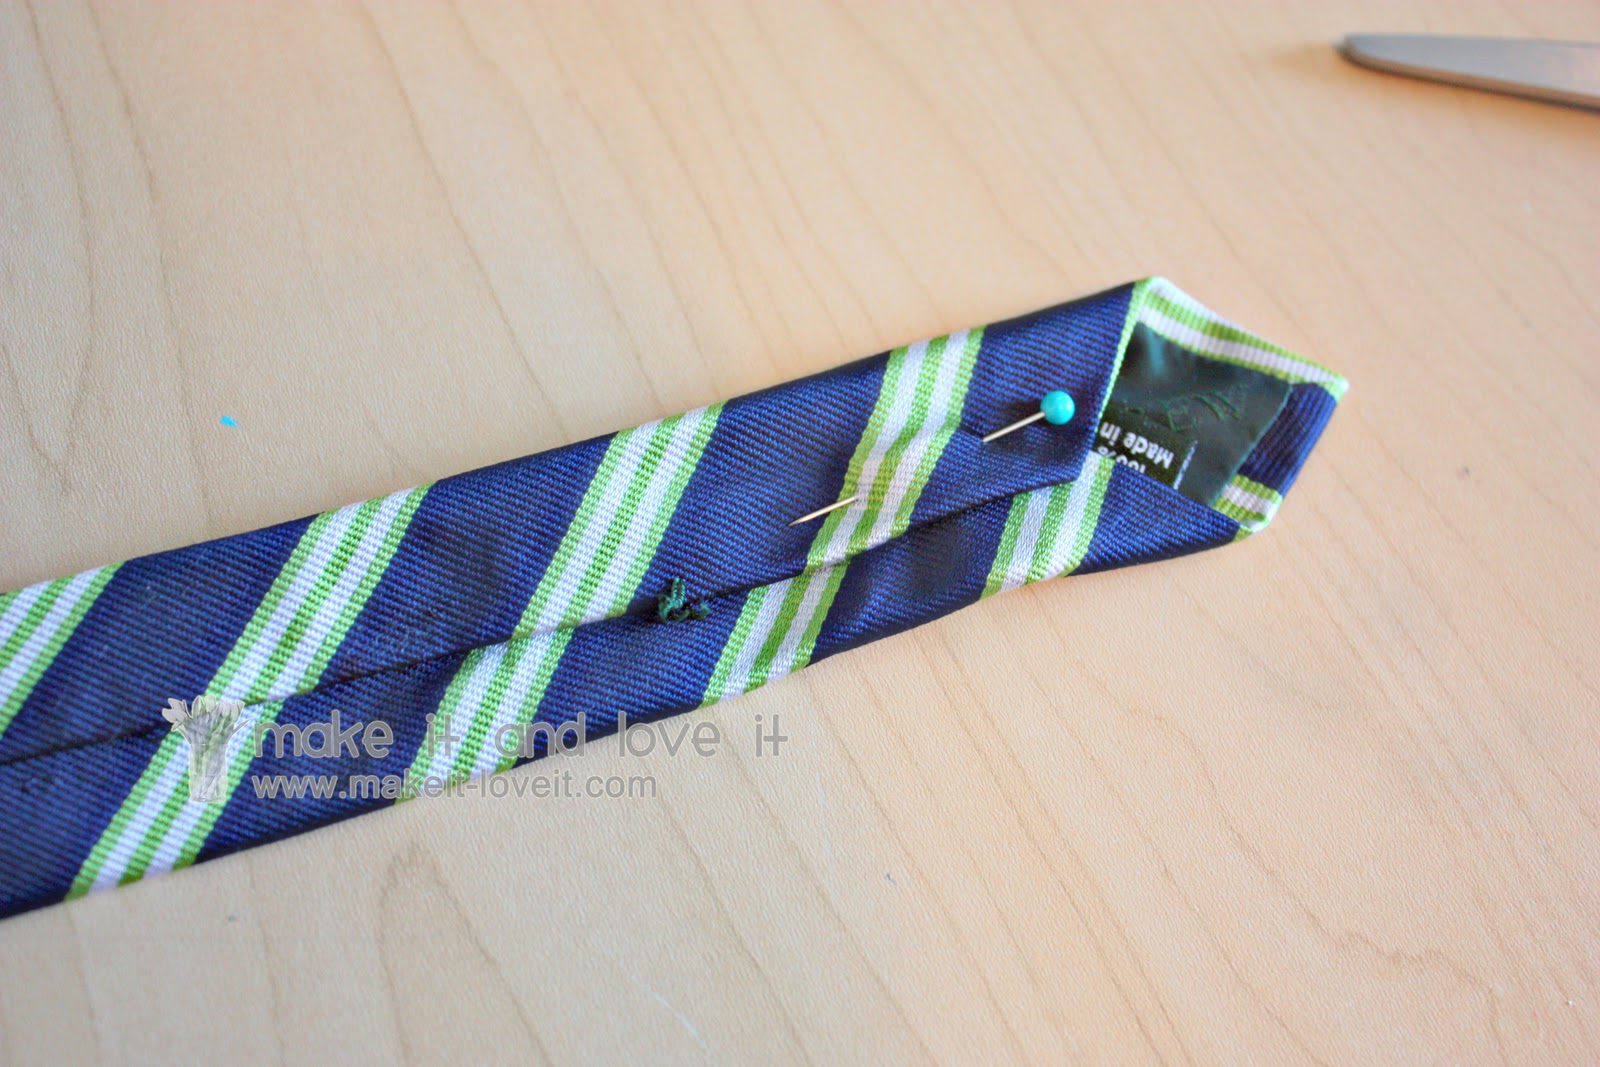
Then re-fold the end of this pointy end, then pin in place. (Iron flat if needed.)
Then hand-stitch in place.
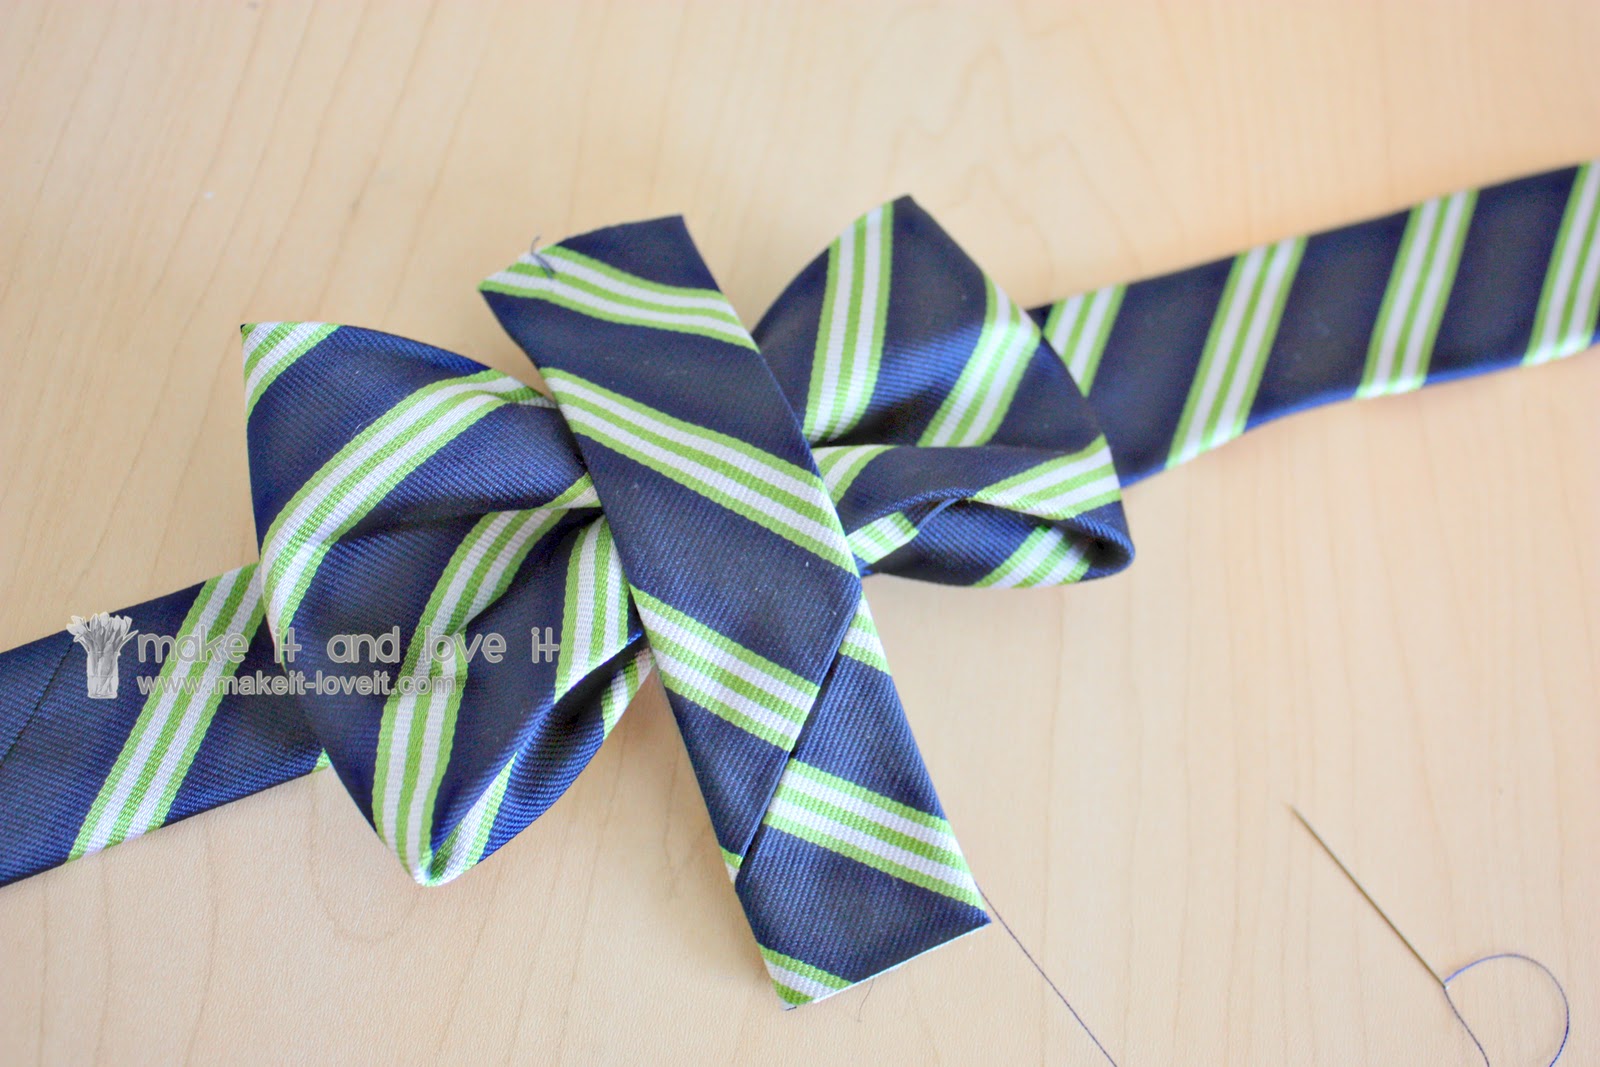
Now lay your bow tie at the center of the neck strap piece with the right sides of both pieces facing up. Then hand-stitch the neck strap to the bow tie at the sides…..right where the winded thread is at the center of the bow tie.
View from the back.
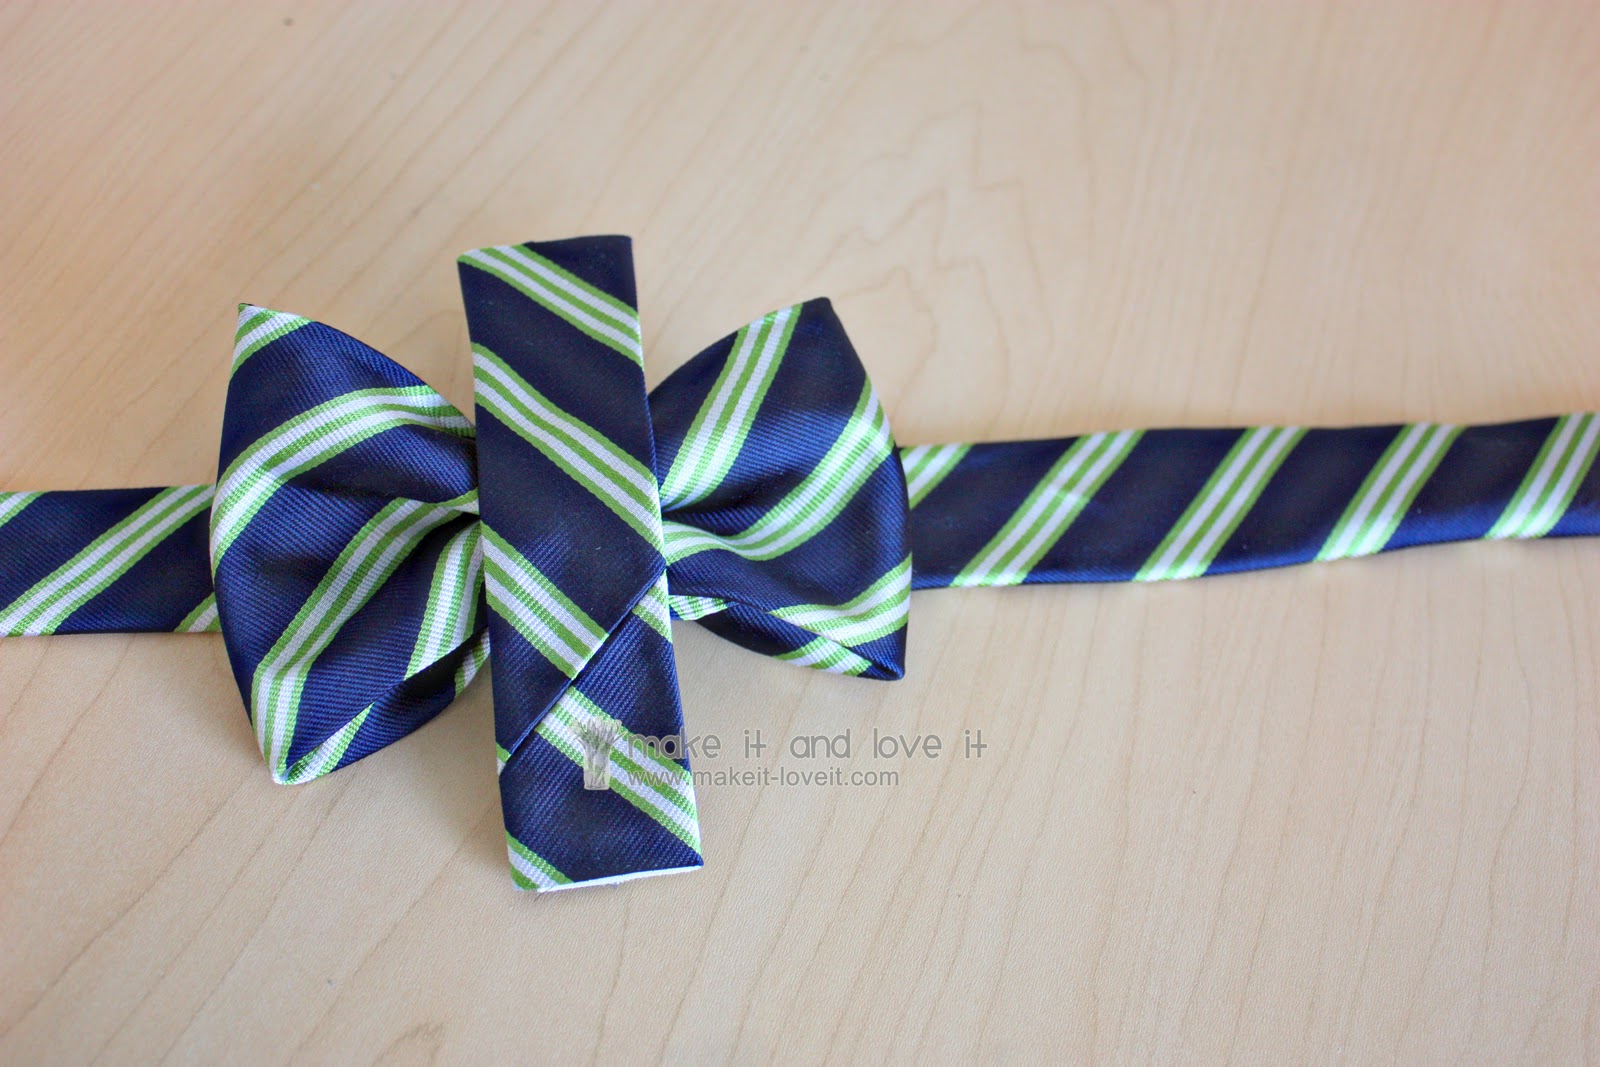
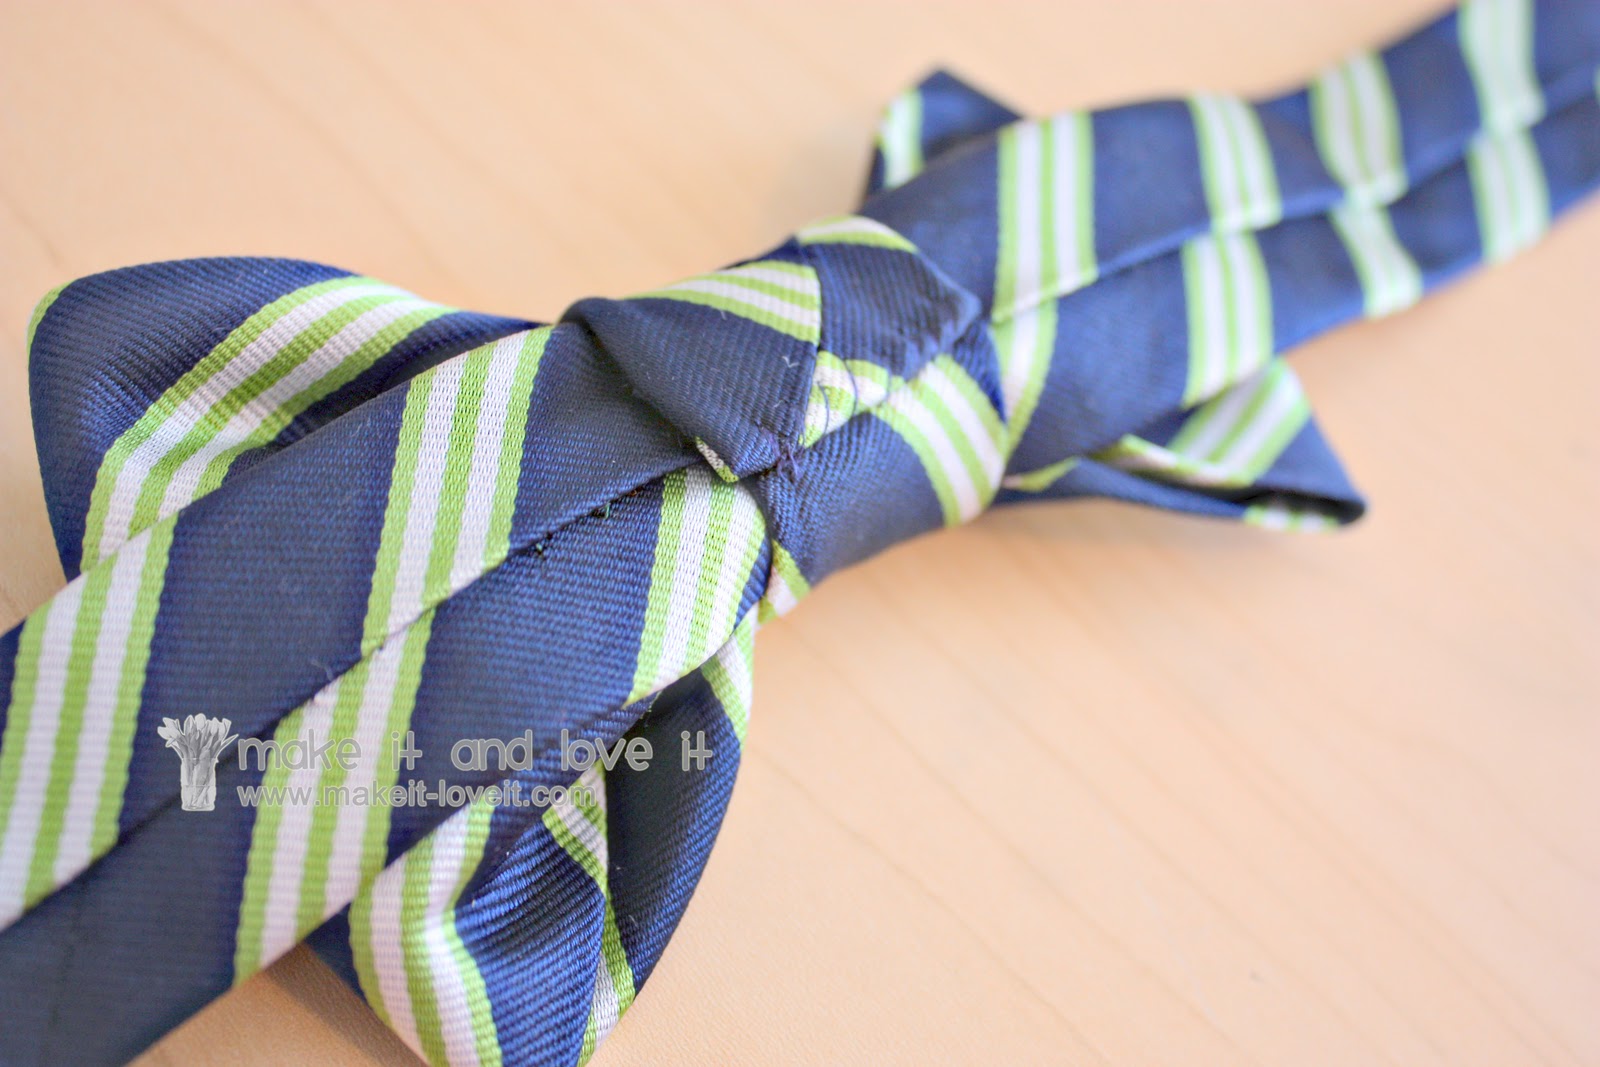
Then grab your 5 1/2 inch piece and center it on the bow tie.
Then flip it over and hand-stitch one end securely to the back of the neck strap piece.
Then pull the other end tight as you wrap it around the center of the bow tie and tuck under the raw end. (Depending on how thick your fabric is, you may have to cut a bit of the end off, so there isn’t so much folded under.) Hand-stitch the folded under section…..securing this center strip in place.
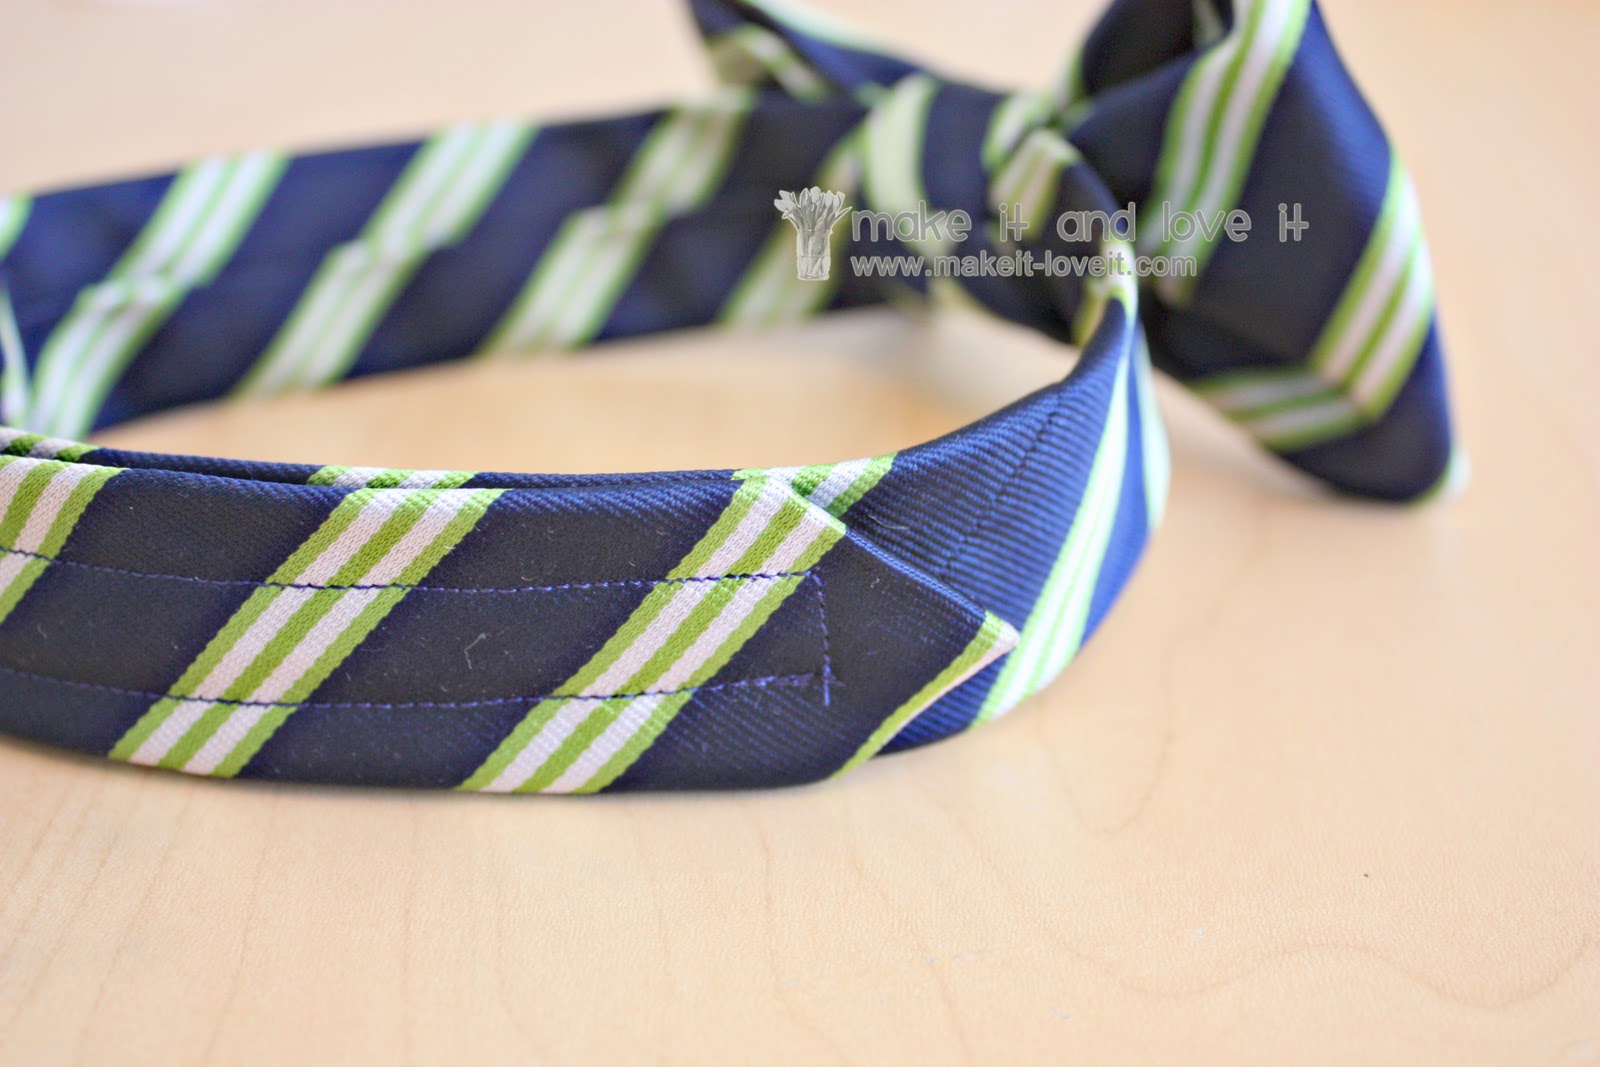
Once you flip over your bow tie, it should look like this. (If that center strip of fabric isn’t centered, cut the threads and re-do it.)
And here’s a view from the back. Make sure that your hand-stitched seam ends up at the center back of the bow tie. This keeps everything hidden.
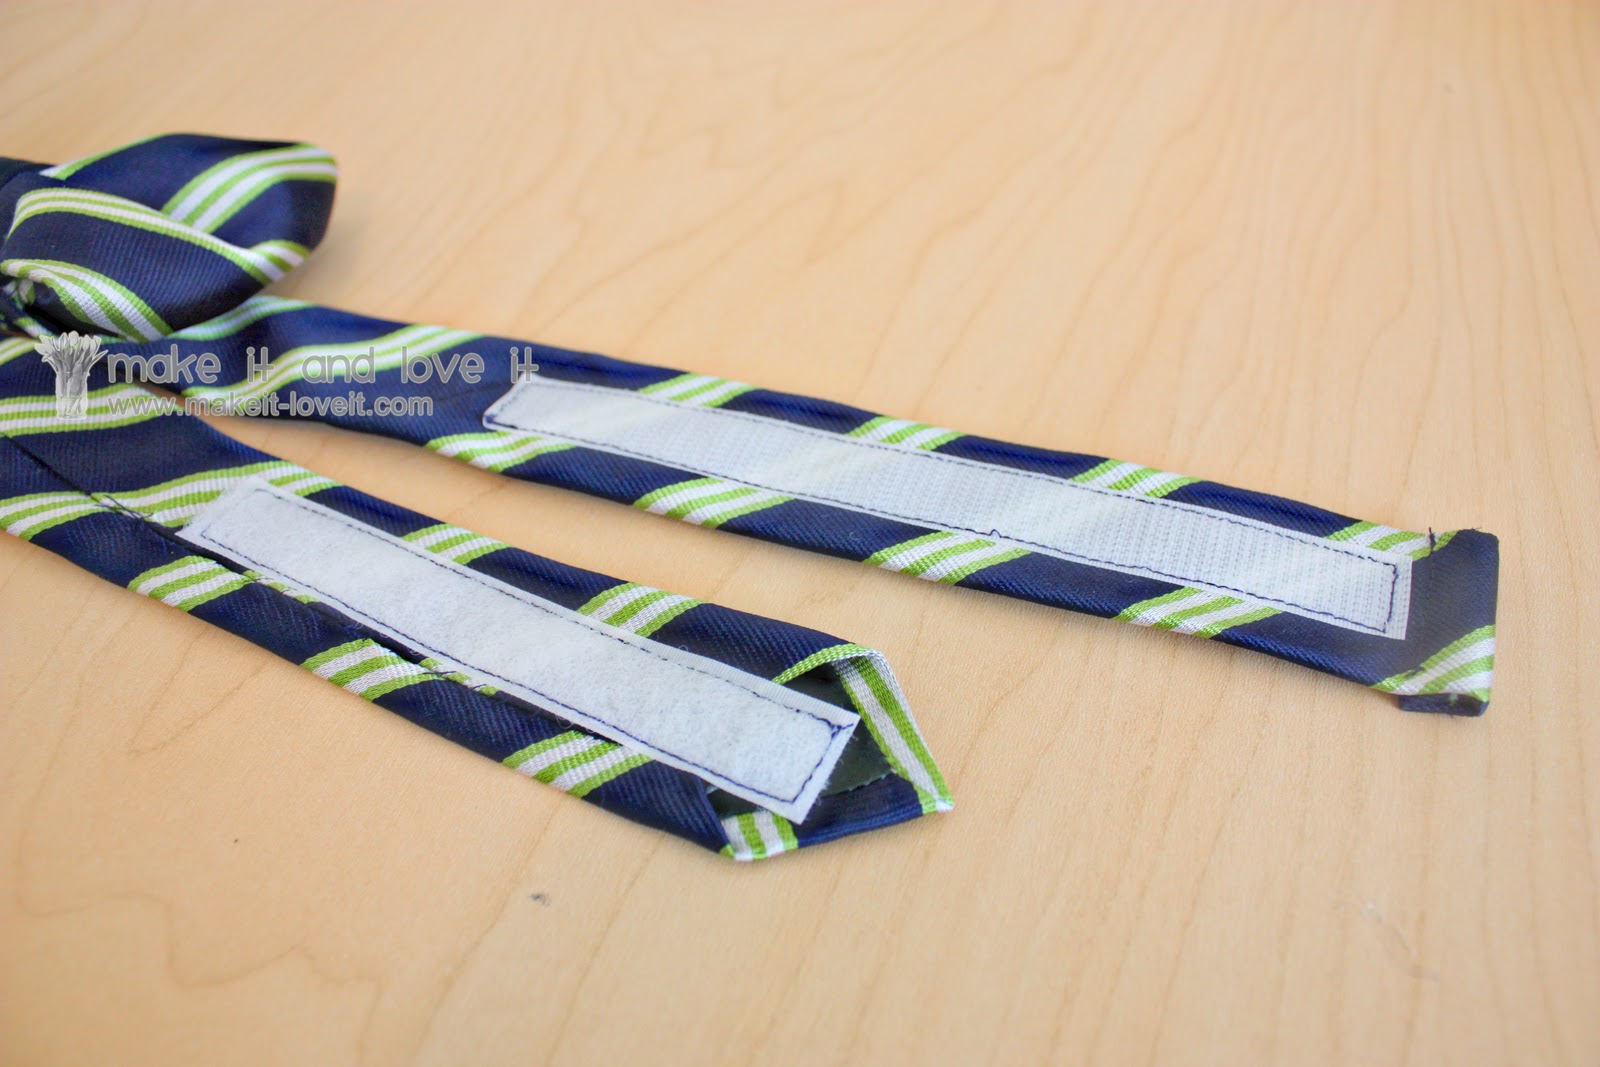
Next, you see that one end of your neck strap is the pointy finished end, but the other end is raw. Tuck under the raw end a 1/4 inch, then another 1/4 inch, then sew in place.
Then attach some velcro to the back of the pointy end and to the front of the other end…….
…………so that you can wrap one end around the other, and secure it shut with the velcro.
Nice and simple.
Nice and low budget.
Hmmmm…..what else can I make for my husband?