Have you been working on sprucing up a room? I have. Our little nursery is always a work in progress. I have added things here and there and it’s becoming more and more cozy. And here’s the latest addition.
A Light Switch Cover. This will only take minutes to do and really adds a great little detail to the room.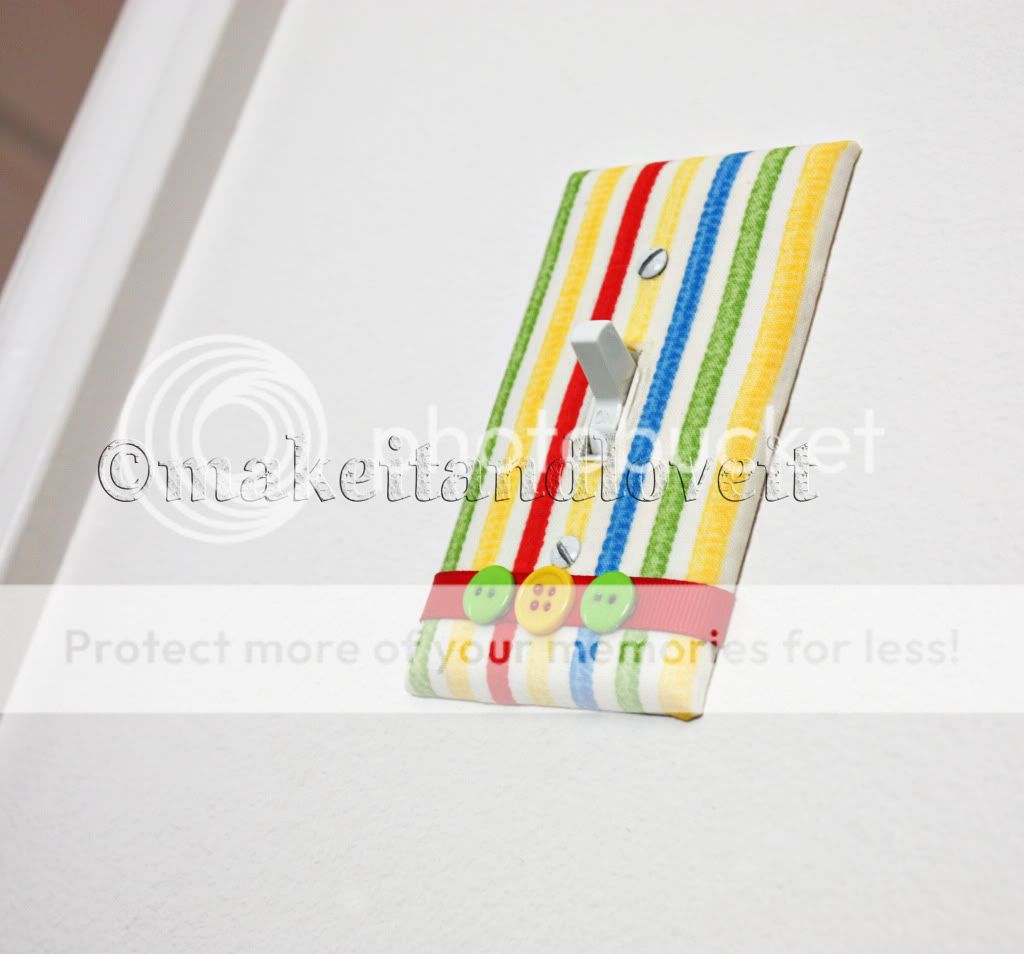
Buy a new cover or remove the one that’s on your light switch right now. Cut out a coordinating piece of material that’s just big enough to be able to wrap the extra fabric around the back. Slit a hole where the light switch would go and make additional slits, angling out towards each corner of the opening. Apply a coat of Mod Podge to the front of the cover. Lay the fabric over the top, making sure to center the hole over the light switch opening.
Pull the fabric tight and fold the edges around to the back. Apply another layer of Mod Podge and let dry completely.
Then add ribbon/buttons/embellishments to the front with hot glue.
Re-attach to the wall and……wow!

Hi, I’m Ashley—the DIY-enthusiast behind this crazy blog!


